Posibles Causas y Soluciones / Troubleshooting
Problema / Problem Causas / Causes Soluciones / Solutions
La rejilla está bloqueada. /
The grid is blocked.
Limpie la rejilla y el casquillo (Pág. 3, paso 10 “Mantenimiento”).
/ Clean the grid and bushing (Page 3, step 10 “Maintenance”).
Se regresan los olores.
/ Odors return.
No se colocó el casquillo. /
The bushing is not placed.
El desalojo de agua es lento
o nulo. / Water eviction is
slow or null.
No hay agua en la coladera para hacer el sello hidráulico. /
There is no water to make the hydraulic seal.
Es muy importante seguir las siguientes instrucciones para conservar los
acabados de los productos HELVEX, con brillo y en perfecto estado:
1. Utilice únicamente agua y un paño limpio.
2. No utilice fibras, polvos, abrasivos, ni productos químicos.
3. No utilice objetos punzo-cortantes para limpiar los acabados.
4. Se recomienda realizar la limpieza de su producto diariamente.
Visite nuestras páginas www.helvex.com.mx para México y www.helvex.com
para el mercado Internacional
Recomendaciones de Limpieza / Cleaning Recommendations
In Guadalajara:
Contact:
Enter our free
training courses.
In Monterrey:
En la Ciudad de México:
In Mexico City:
En Monterrey: En Guadalajara:
(52) 55 53 33 94 00
Ext. 5806, 5805 y 5804
33 36 19 01 13
Comunícate:
Participa en nuestros
cursos gratuitos
de capacitación.
81 83 33 57 67
81 83 33 61 78
HELVEX, S. A. DE C. V. Calzada Coltongo # 293, Col. Industrial Vallejo, Alcaldía Azcapotzalco, C. P. 02300, Ciudad de México.
Coloque el casquillo. /
Place the bushing.
It is very important to follow the instructions below to preserve HELVEX products
finishings, shiny and in perfect conditions:
1. Use only water and a clean cloth.
2. Do not use fibers, powders, abrasives, or chemicals.
3. Do not use sharp objects to clean the finishings.
4. It is recommended to clean your device daily
Visit our websites www.helvex.com.mx for México and www.helvex.com
for the international market
Vierta agua en la coladera para hacer el sello hidráulico. /
Pour water in the floor drain to make the hydraulic seal.
Para el modelo 28 seleccione una de las dos salidas de la coladera para direccionar el sentido de la descarga hacia el registro sanitario y el sentido
de la entrada a la coladera. Es necesario cerrar una salida para conectarse en la opuesta. / For the model 28 select one of the two outlets of the
floor drain to direct the direction of the discharge towards the sanitary sewer and the toward inlet of the floor drain. It is necessary to close an outlet
to connect on the opposite one.
Recomendación de Instalación para el modelo 28 / Installation Recommendation for 28 Model
NOTA: La coladera está diseñada para que se use una sola salida y se clausure la otra. Nunca debe cerrar la entrada de la coladera y utilizar las salidas como entrada y salida
por que ocasionará un mal funcionamiento y perderá la garantía del producto.
NOTE: The floor drain is designed to use a single outlet and close the other. Never close the admission of the floor drain and use the outlet as admission and outlet because it
will cause a malfunction and lose the warranty of the product.
9
10
tornillo
screw
casquillo
bushing
rejilla
round grid
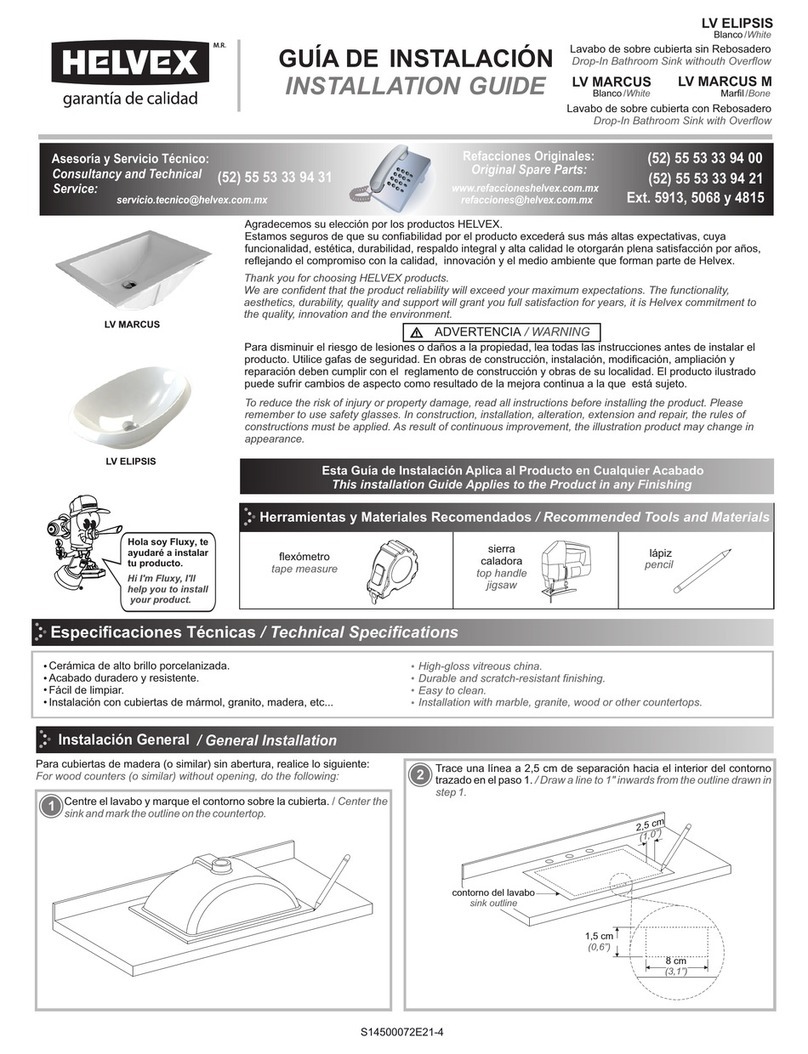
Desenrosque los tornillos para remover la rejilla de la coladera. Retire el casquillo y limpie el interior de la coladera. Ensamble nuevamente. / Unscrew the screws to
remove the round grid. Remove the bushing and clean inside of floor drain. Assemble again.
Mantenimiento / Maintenance
tapón roscable de PVC
(no incluido)
PVC threaded plug
(not included)
2" - 11 ½ NPSM
tubo de PVC
(no incluido)
PVC pipe
(not included)
conector roscado (no incluido)
threaded connector (not included)
2" - 11 ½ NPSM
conector roscado (no incluido)
threaded connector (not included)
1 ½” - 11 ½ NPSM
tubo de PVC (no incluida)
PVC pipe (not included)
2” - 11 ½ NPSM
1 ½” - 11 ½ NPSM
2” - 11 ½ NPSM
