manuals.online logo
Brands
  1. Home
  2. •
  3. Brands
  4. •
  5. Henny Penny
  6. •
  7. Commercial Food Equipment
  8. •
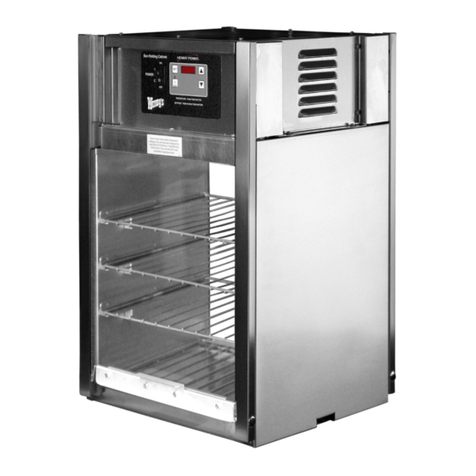
  9. Henny Penny HHC-98 Series User manual

Henny Penny HHC-98 Series User manual

FM07-007G
OPERATOR'S
MANUAL
HHC-980
HHC-983
HHuummiiddiiffiieedd HHoollddiinngg
CCaabbiinneettss
MMooddeell HHHHCC--9988XX
Contents
i
Table of Contents
Safety......................................................................................................................... iii
Chapter 1 Introduction.....................................................................................................1
1.1 Humidified Holding Cabinet.....................................................................................1
1.2 Features................................................................................................................1
1.3 Proper Care...........................................................................................................1
1.4 Assistance.............................................................................................................2
Chapter 2 Installation ......................................................................................................3
2.1 Introduction ...........................................................................................................3
2.2 Unpacking .............................................................................................................3
2.3 Selecting The Fryer Location ..................................................................................3
2.4 Electrical Requirements..........................................................................................4
2.5 Water Requirements ..............................................................................................4
2.6 Water Supply Connection .......................................................................................5
2.7 Cabinet Dimensions & Weights ...............................................................................7
2.8 Mounting HHC-983 On Stand..................................................................................8
Chapter 3 Operation...................................................................................................... 11
3.1 Introduction ......................................................................................................... 11
3.2 Operating Controls & Indicators............................................................................. 11
3.3 Start-Up ..............................................................................................................12
3.4 Operation With Product ........................................................................................12
3.5 Cleaning Procedures............................................................................................13
3.5.1 Daily Cleaning ...............................................................................................13
3.5.2 Weekly Deliming ............................................................................................14
Chapter 4 Programming ................................................................................................19
4.1 Introduction .........................................................................................................19
4.2 Hidden Buttons ....................................................................................................19
4.3 Clock Set.............................................................................................................19
4.4 Special Program Mode .........................................................................................20
Chapter 5 Troubleshooting ............................................................................................25
5.1 Introduction .........................................................................................................25
5.2 Troubleshooting ...................................................................................................25
5.3 Error Code...........................................................................................................26

Contents
ii
Preface
iii
SSaaffeettyy
The Henny Penny open fryer has many safety features incorporated. However, the
only way to ensure a safe operation is to fully understand the proper installation,
operation, and maintenance procedures. The instructions in this manual have been
prepared to aid you in learning the proper procedures. Where information is of
particular importance or is safety related, the words DANGER, WARNING, CAUTION,
or NOTICE are used. Their usage is described as follows:
DDAANNGGEERR!! indicates hazardous situation
which, if not avoided, will result in death or
serious injury.
WWAARRNNIINNGG!! indicates hazardous situation
which, if not avoided, could result in death or
serious injury.
CCAAUUTTIIOONN!! indicates hazardous situation
which, if not avoided, could result in moder-
ate or minor injury.
NOTICE: NOTICE
is used for information considered
important regarding property damage.
NOTE: NOTE: is used to highlight especially impor-
tant information.
SHOCK HAZARD SYMBOLS
HOT SURFACE SYMBOLS
Preface
iv
Introduction
1
CChhaapptteerr 11 IInnttrroodduuccttiioonn
11..11 HHuummiiddiiffiieedd HHoollddiinngg CCaabbiinneett
The Henny Penny humidified holding cabinets are designed to keep foods moist,
while maintaining proper temperature. The units are electronically controlled for easy
use and for consistent operation.
WWAASSTTEE EELLEECCTTRRIICCAALL AANNDD EELLEECCTTRROONNIICC EEQQUUIIPPMMEENNTT ((WWEEEEEE)) As of August
16, 2005, the Waste Electrical and Electronic Equipment directive went into effect for
the European Union. Our products have been evaluated to the WEEE directive. We
have also reviewed our products to determine if they comply with the Restriction of
Hazardous Substances directive (RoHS) and have redesigned our products as
needed in order to comply. To continue compliance with these directives, this unit
must not be disposed as unsorted municipal waste. For proper disposal, please
contact your nearest Henny Penny distributor.
11..22 FFeeaattuurreess
•Electronically controlled humidity and temperature.
•Double-panel glass, lift-off doors.
•Stainless steel construction.
•Easily maintained.
•Lift-out tray racks.
•Full perimeter magnetic door seals.
•Easy access to electrical controls.
•Automatic water-fill.
11..33 PPrrooppeerr CCaarree
As in any unit of food service equipment, the Henny Penny humidified holding cabinet
does require care and maintenance. Requirements for the maintenance and cleaning
are contained in this manual and must become a regular part of the operation of the
unit at all times.
Introduction
2
11..44 AAssssiissttaannccee
Should you require outside assistance, call your local independent distributor in your
area, call Henny Penny at 1-800-417-8405 toll free or 1-937-456-8405, or go to Henny
Penny online at www.hennypenny.com.
Installation
3
CChhaapptteerr 22 IInnssttaallllaattiioonn
22..11 IInnttrroodduuccttiioonn
This section provides the installation instructions for the Henny Penny models HHC-
980 and HHC-983.
NOTICE:
Installation of this unit should be performed only by a qualified service
technician.
SSHHOOCCKK HHAAZZAARRDD DDoo nnoott ppuunnccttuurree tthhee
uunniitt wwiitthh aannyy oobbjjeeccttss ssuucchh aass ddrriillllss oorr
ssccrreewwss aass ccoommppoonneenntt ddaammaaggee oorr eelleeccttrrii--
ccaall sshhoocckk ccoouulldd rreessuulltt..
22..22 UUnnppaacckkiinngg
The Henny Penny humidified holding cabinet has been tested, inspected, and expertly
packed to ensure arrival at its destination in the best possible condition.
NOTICE:
Any shipping damage should be noted in the presence of the delivery agent
and signed prior to his or her departure.
To remove the Henny Penny cabinet from carton:
11)) Cut and remove banding straps.
22)) Lift carton off the unit.
33)) Lift the unit off the cardboard padding and skid.
HHEEAAVVYY OOBBJJEECCTT TTaakkee ccaarree wwhheenn
mmoovviinngg tthhee ffrryyeerr ttoo pprreevveenntt ppeerrssoonnaall
iinnjjuurryy.. FFuullll ssiizzee ccaabbiinneettss wweeiigghh aabboouutt
330000 llbbss ((113366 kkgg))..
44)) Open doors are remove packing from behind racks and the water pan in the
bottom of the unit.
55)) Peel off any protective covering from the exterior of the cabinet.
66)) The cabinet is now ready for location and use.
22..33 SSeelleeccttiinngg TThhee FFrryyeerr LLooccaattiioonn
Place the humidified holding cabinet in an area that allows the doors to be opened
without inference of loading and unloading product. Also, keep the unit level for proper
operation.
NOTE: No minimum clearances are required for the rear and sides of the cabinet.
Installation
4
22..44 EElleeccttrriiccaall RReeqquuiirreemmeennttss
•TToo aavvooiidd eelleeccttrriiccaall sshhoocckk,, tthhee ccaabbiinneett
mmuusstt bbee aaddeeqquuaatteellyy aanndd ssaaffeellyy
ggrroouunnddeedd ((eeaarrtthheedd)) aaccccoorrddiinngg ttoo llooccaall
eelleeccttrriiccaall ccooddeess,, aanndd tthhiiss aapppplliiaannccee
mmuusstt bbee eeqquuiippppeedd wwiitthh aann eexxtteerrnnaall
cciirrccuuiitt bbrreeaakkeerr wwhhiicchh wwiillll ddiissccoonnnneecctt
aallll uunnggrroouunnddeedd ((uunneeaarrtthheedd))
ccoonndduuccttoorrss.. TThhee mmaaiinn ppoowweerr sswwiittcchh
oonn tthhiiss aapppplliiaannccee ddooeess nnoott ddiissccoonnnneecctt
aallll lliinnee ccoonndduuccttoorrss..
•FFoorr EEqquuiippmmeenntt WWiitthh CCEE MMaarrkk OOnnllyy::
TToo pprreevveenntt eelleeccttrriiccaall sshhoocckk hhaazzaarrdd,,
tthhiiss aapppplliiaannccee mmuusstt bbee bboonnddeedd ttoo
ootthheerr aapppplliiaanncceess wwiitthh aann eeqquuiippootteennttiiaall
bboonnddiinngg ccoonndduuccttoorr.. TThhiiss aapppplliiaannccee iiss
eeqquuiippppeedd wwiitthh aann eeqquuiippootteennttiiaall lluugg ffoorr
tthhiiss ppuurrppoossee.. TThhee eeqquuiippootteennttiiaall lluugg iiss
mmaarrkkeedd wwiitthh tthhee ffoolllloowwiinngg ssyymmbbooll::
If the electrical supply to the unit is a cord and plug, then the electrical receptacle, for
the plug, must be easily accessible. Refer to Table 2-1
Electrical Ratings
, page 4.
TTaabbllee 22--11 EElleeccttrriiccaall RRaattiinnggss
Model Volts Phase Amps Watts
HHC-980 208 1 13.8 2880
240 1 12.0 2876
220-240-CE 1 11.6 2792
HHC-983 120 1 17.3 2080
220-240-CE 1 8.3 1992
22..55 WWaatteerr RReeqquuiirreemmeennttss
Element Acceptable Compound Level
Fe (Iron) < .1 mg/l
Cl (Chlorine) < .1 mg/l
Cl2 (Chlorides and Salts) < 150 mg/l
Installation
5
Water Property Particle Level
PH 7–8
Silica < 15 ppm
Hardness < 3 grains
Alkalinity < 20 ppm
Dissolved Solids < 60 ppm
Un-dissolved Solids < 5 microns
22..66 WWaatteerr SSuuppppllyy CCoonnnneeccttiioonn
The automatic water-fill system requires a 1/4 inch, 100 psi maximum, water
connection. A water conditioner or filter, and a shut-off valve in the supply line is
recommended. See the following procedure when making the water supply
connection:
11)) Flush incoming water line.
22)) Using a pipe joint compound on the threads, screw the brass elbow into the
fitting on the left side of the cabinet. Using a 1 inch wrench, secure the fitting nut
while tightening the elbow. See Figure 2-1
Tightening Fitting Nut
, page 5.
Figure 2-1 Tightening Fitting Nut
33)) Connect 1/4 inch tubing to the female quick-disconnect fitting, supplied with the
cabinet. See Figure 2-2
Female Quick-Disconnect
, page 6.
Installation
6
Figure 2-2 Female Quick-Disconnect
44)) Attach female quick-disconnect to the male quick-disconnect on the elbow.
NOTE: This unit as manufactured requires the installation of an appropriate back-
siphoning device (as per National Plumbing Code ASA-A40:8-1955) to be connected
to the water inlet line. This device to be connected in accordance with basic plumbing
code of the Building Officials and Code Administrators International, Inc. (BOCA), and
the Food Service Sanitation Manual of the Food and Drug Administration (FDA).
Installation
7
22..77 CCaabbiinneett DDiimmeennssiioonnss && WWeeiigghhttss
Figure 2-3 HHC-980 Dimensions
Installation
8
Figure 2-4 HHC-983 Dimensions
TTaabbllee 22--22 HHHHCC--9988XX DDiimmeennssiioonn && WWeeiigghhtt
Model Height Width Depth Shipping
Weight
HHC-980 72-3/4 in (1835
mm)
24-3/4 in (628
mm)
31-3/4 (806
mm)
367 lbs (167 kg)
HHC-983 38 in (965 mm) 24-3/4 in (628
mm)
31-3/4 (806
mm)
220 lbs (100 kg)
NOTE: Two HHC-983 stands are available. One gives the total height of 59 inches
(1499 mm), and a taller version, gives the total height of 68 inches (1727 mm).
22..88 MMoouunnttiinngg HHHHCC--998833 OOnn SSttaanndd
11)) Unpack the humidified holding cabinet stand (HHS) and stand upright. See
Figure 2-5
Mounting Plates
, page 9.
Installation
9
Figure 2-5 Mounting Plates
22)) Remove doors from HHC-983 to allow easier lifting.
33)) Lift HHC-983 onto posts of the HHS, making sure the locking casters are
towards the front of the unit.
44)) Align the holes in the mounting plates with the holes in the HHC-983. NOTE:
The posts of the HHS can be moved, with some effort, to help align the holes in
the mounting plates with the holes in the HHC-983.
55)) Using the bolts and lock-washers provided with the HHS, screw the bolts up
under the mounting plates and into the bottom of the HHC-983. Tighten with 7/
16 inch wrench or socket. See Figure 2-6
HHS Bolts Secured
, page 9.
Figure 2-6 HHS Bolts Secured
66)) Replace the doors onto HHC-983 and unit is ready for use. See Figure 2-7
Mounted HHC-983
, page 10.
Installation
10
Figure 2-7 Mounted HHC-983
Operation
11
CChhaapptteerr 33 OOppeerraattiioonn
33..11 IInnttrroodduuccttiioonn
This section provides operating procedures for the humidified holding cabinet. Read
Chapter 1
Introduction
, page 1,Chapter 2
Installation
, page 3, and Chapter 3
Operation
, page 11 before operating the unit.
33..22 OOppeerraattiinngg CCoonnttrroollss && IInnddiiccaattoorrss
The operating controls and indicators are shown in Figure 3-1
Operating Controls &
Indicators
, page 11, and described in Table 3-1
Operating Controls & Indicators
, page
11.
Figure 3-1 Operating Controls & Indicators
TTaabbllee 33--11 OOppeerraattiinngg CCoonnttrroollss && IInnddiiccaattoorrss
Item
No.
Description Function
1 Power Switch A rocker switch that sends electrical current to the operat-
ing components and lights when turned on.
2 Temperature LED Lights when the control calls for heat, and the unit should
start heating. It goes out once the temperature inside the
cabinet reaches the programmed temperature setting.
3 Temperature Button Press the temperature button to set the cabinet
temperature.
4 Digital Display Shows the cabinet temperature, humidity settings, and the
selections in the Program Mode. The temperature of the
cabinet is shown by pressing the info button. If the temper-
ature exceeds 300°F (149°C), the display reads “E-5”,
“TOO HOT”.
5 Humidity LED Lights when the control calls for humidity. It goes out once
the humidity inside the cabinet reaches the programmed
humidity setting.
Operation
12
Item
No.
Description Function
6 Humidity Button Press the humidity button to set the relative humidity in-
side the cabinet, and to choose between the proofing and
holding modes, when the unit is turned on.
7 Info Button Press the info button to display the current cabinet humid-
ity and temperature as well as the time and date. Also, in
the program mode, press to step back to the previous
parameter.
8 Down Button Used to adjust the value of the currently displayed setting
in the program mode.
9 Up Button
10 Program Button Used to access the Program Modes. Also, once in the
Program Mode, it is used to advance to the next
parameter.
33..33 SSttaarrtt--UUpp
NOTE: Before using the humidified holding cabinet, thoroughly clean the unit as
described in 3.5
Cleaning Procedures
, page 13.
11)) Plug unit into electrical receptacle, or turn on wall circuit breaker. With the power
switch turned to off, the display shows “POWER OFF”.
SSHHOOCCKK HHAAZZAARRDDEEvveenn tthhoouugghh ppoowweerr
sswwiittcchh iiss ooffff,, iitt ddooeess nnoott ddiissccoonnnneecctt aallll
eelleeccttrriiccaall ssuupppplliieess ttoo tthhee ccoonnttrroollss.. TToo
aavvooiidd eelleeccttrriiccaall sshhoocckk oorr pprrooppeerrttyy
ddaammaaggee,, mmoovvee tthhee ppoowweerr sswwiittcchh ttoo ooffff
aanndd ddiissccoonnnneecctt mmaaiinn cciirrccuuiitt bbrreeaakkeerr,,
oorr uunnpplluugg ccoorrdd aatt wwaallll rreecceeppttaaccllee..
22)) Connect or turn on water supply.
33)) Turn the power switch to on, and the display shows “HHC-983” or “HHC-980”.
44)) Press the temperature button to set the desired cabinet temperature. While the
LED is flashing, press the up or down button until desired temperature shows in
the display. Preset at 165°F (74°C).
55)) Press the humidity button to set the desired cabinet humidity (OFF or 10-90%).
While the LED is flashing, press the up or down button until the desired
temperature shows in the display. Preset at 50%.
66)) Allow the unit to preheat for about an hour prior to placing product in the cabinet.
This allows the interior conditions to stabilize.
33..44 OOppeerraattiioonn WWiitthh PPrroodduucctt
11)) The LEDs above temperature and humidity button go out when the desired
temperature and humidity are reached inside the cabinet.
Operation
13
NOTE: The minimum holding temperature for potentially hazardous product is 150°F
(66°C). Also, the cabinet product loading capacity for the full size units is 375 lbs (170
kg), and the loading capacity for the half-sized unit is 125 lbs (57 kg).
22)) Place product into cabinet.
NOTE:
• If the float switch in the water pan senses low, or no water after 5 minutes, “WATER
PAN NOT FILLING, CHECK WATER SUPPLY” shows in the display.
• Open the doors only as necessary to load and unload product. This helps to keep
the interior conditions constant and saves energy.
33..55 CClleeaanniinngg PPrroocceedduurreess
33..55..11 DDaaiillyy CClleeaanniinngg
Aluminum sheet pans slowly wear as they slide in and out of stainless steel holding
rails to access product. As the pan slides against the rail, it can leave behind small
traces of aluminum dust or small aluminum shavings. It is important that daily cleaning
is performed to prevent aluminum dust/shavings from getting into the products being
held in the unit.
11)) Turn all controls off and disconnect electrical supply.
BBUURRNN RRIISSKKTToo aavvooiidd bbuurrnnss,, aallllooww tthhee
uunniitt ttoo ccooooll bbeeffoorree cclleeaanniinngg..
22)) Open doors and remove all pans and racks from unit, and take them to a sink to
thoroughly clean. See Figure 3-2
Removing Racks
, page 13.
Figure 3-2 Removing Racks
33)) Discard all warped or bent pans.
Operation
14
FFaaiilluurree ttoo ddiissccaarrdd wwaarrppeedd aanndd//oorr bbeenntt
ppaannss mmaayy rreessuulltt iinn mmeettaall sshhaavviinnggss//
dduusstt ccoonnttaammiinnaattiioonn ffoooodd pprroodduuccttss..
44)) Wipe interior and exterior of cabinet with damp cloth, soap, and water.
NOTICE:
• Do not use abrasive cleaners, or cleansers/sanitizers containing chlorine, bromine,
iodine, or ammonia chemicals. These abrasives and chemicals deteriorate the
stainless steel and shorten the life of the cabinet.
• Do not use a water jet (pressure sprayer) to clean the unit, or component failure
could result.
55)) Wipe the control panel with a damp cloth. Do not splash water around controls.
66)) Reinstall racks, and leave a door partially open overnight to allow interior
cabinet to thoroughly dry.
33..55..22 WWeeeekkllyy DDeelliimmiinngg
Different levels of minerals exist in water based on location. Hard water contains
minerals like calcium and magnesium which leaves limescale on the surface of the
water pan. Ensure water meets the water requirements section of this manual. To
better understand your water quality, contact the local water agency for a water quality
report. Clean and delime the water pan regularly to maintain performance of the
holding cabinet. Failure to maintain water quality and the water pan may lead to
mineral deposit build up and the following issues:
• The pan may overheat.
• Decreased humidity output may affect product quality holding times.
• Cracks may appear in the water pan.
Do not use steel wool, other abrasive
cleaners, or cleaners containing chlorine,
bromine, iodine, or ammonia chemicals as
these will deteriorate the stainless steel and
shorten the product life. Steel wool and abra-
sive cleaners can make micro scratches in
the pan where minerals may build up and
damage the pan.
BBUURRNN RRIISSKK TToo aavvooiidd bbuurrnnss ffrroomm sstteeaamm,,
hhoott wwaatteerr,, oorr cchheemmiiccaallss,, uussee aapppprroovveedd
ssaaffeettyy eeqquuiippmmeenntt iinncclluuddiinngg,, aapprroonn,, ffaaccee
sshhiieelldd aanndd gglloovveess bbeeffoorree cclleeaanniinngg..
To clean lime scale, use a non-boiler grade delimer with sequestrants, which
deactivate minerals in water. Deactivated minerals cannot react to form scum, film, or
lime scale. Use the recommended products and procedures to clean the holding
cabinet.

Other manuals for HHC-98 Series

1

This manual suits for next models

2

Other Henny Penny Commercial Food Equipment manuals

Henny Penny Evolution Elite 14X User manual

Henny Penny

Henny Penny Evolution Elite 14X User manual

Henny Penny HC-4 User manual

Henny Penny

Henny Penny HC-4 User manual

Henny Penny KFC Velocity Open Series User manual

Henny Penny

Henny Penny KFC Velocity Open Series User manual

Henny Penny EVOLUTION ELITE EEG-142 User manual

Henny Penny

Henny Penny EVOLUTION ELITE EEG-142 User manual

Henny Penny McDonald's OV Electric 200 Series User manual

Henny Penny

Henny Penny McDonald's OV Electric 200 Series User manual

Henny Penny LOV3 User manual

Henny Penny

Henny Penny LOV3 User manual

Henny Penny LOV LVE-102 User manual

Henny Penny

Henny Penny LOV LVE-102 User manual

Henny Penny FlexFusion FPG-221 Operating and maintenance instructions

Henny Penny

Henny Penny FlexFusion FPG-221 Operating and maintenance instructions

Henny Penny LVG-202 User manual

Henny Penny

Henny Penny LVG-202 User manual

Henny Penny FlexFusion FM08-454-G User manual

Henny Penny

Henny Penny FlexFusion FM08-454-G User manual

Henny Penny FlexFusion ELECTRIC SPACESSAVER Operating instructions

Henny Penny

Henny Penny FlexFusion ELECTRIC SPACESSAVER Operating instructions

Henny Penny ClassicCombi User manual

Henny Penny

Henny Penny ClassicCombi User manual

Henny Penny Evolution Elite Gas 14X User manual

Henny Penny

Henny Penny Evolution Elite Gas 14X User manual

Henny Penny LOV3 User manual

Henny Penny

Henny Penny LOV3 User manual

Henny Penny McDonald's LOV MVE 07X User manual

Henny Penny

Henny Penny McDonald's LOV MVE 07X User manual

Henny Penny ODS-450 User manual

Henny Penny

Henny Penny ODS-450 User manual

Henny Penny CW-216 User manual

Henny Penny

Henny Penny CW-216 User manual

Henny Penny 590 User manual

Henny Penny

Henny Penny 590 User manual

Henny Penny HEC-103 User manual

Henny Penny

Henny Penny HEC-103 User manual

Henny Penny FlexFusion ELECTRIC SPACESAVER PLUS TEAM User manual

Henny Penny

Henny Penny FlexFusion ELECTRIC SPACESAVER PLUS TEAM User manual

Henny Penny HHC-901 User manual

Henny Penny

Henny Penny HHC-901 User manual

Henny Penny HC-5 User manual

Henny Penny

Henny Penny HC-5 User manual

Henny Penny LVE-102 User manual

Henny Penny

Henny Penny LVE-102 User manual

Henny Penny FlexFusion FPG-615 User manual

Henny Penny

Henny Penny FlexFusion FPG-615 User manual

Popular Commercial Food Equipment manuals by other brands

Groen HY-3E Operator's and service manual

Groen

Groen HY-3E Operator's and service manual

Nostalgia SCM550COKE Instructions and recipes

Nostalgia

Nostalgia SCM550COKE Instructions and recipes

KBS NGWT 3-55/SN Installation, operation and maintenance instructions

KBS

KBS NGWT 3-55/SN Installation, operation and maintenance instructions

Skymsen LAR-15LMB instruction manual

Skymsen

Skymsen LAR-15LMB instruction manual

Hollymatic R2200 manual

Hollymatic

Hollymatic R2200 manual

SKIPIO SRT Series user manual

SKIPIO

SKIPIO SRT Series user manual

Omcan PACOJET 4 quick start guide

Omcan

Omcan PACOJET 4 quick start guide

KoolMore KM-ICD-26SD user manual

KoolMore

KoolMore KM-ICD-26SD user manual

saro ES 903 PZ operating instructions

saro

saro ES 903 PZ operating instructions

Robot Coupe CL 55 e quick start guide

Robot Coupe

Robot Coupe CL 55 e quick start guide

saro ES 903 S/S Top operating instructions

saro

saro ES 903 S/S Top operating instructions

JAC Rollform Translation of original user instructions

JAC

JAC Rollform Translation of original user instructions

etol blu'box 26 eco plus hot Original user manual

etol

etol blu'box 26 eco plus hot Original user manual

First Choice ALTO SHAAM 500-S manual

First Choice

First Choice ALTO SHAAM 500-S manual

Proluxe FAST-FIRE'D BLAZE PIZZA DOUGHPRO DP1300BZ Operation manual

Proluxe

Proluxe FAST-FIRE'D BLAZE PIZZA DOUGHPRO DP1300BZ Operation manual

Procusini Procusini 5.0 Installation and user manual

Procusini

Procusini Procusini 5.0 Installation and user manual

Kerbl FarmClipper Instructions for use

Kerbl

Kerbl FarmClipper Instructions for use

Nordcap KK 480-2 manual

Nordcap

Nordcap KK 480-2 manual

manuals.online logo
manuals.online logoBrands
  • About & Mission
  • Contact us
  • Privacy Policy
  • Terms and Conditions

Copyright 2025 Manuals.Online. All Rights Reserved.