manuals.online logo
Brands
  1. Home
  2. •
  3. Brands
  4. •
  5. Herman Miller
  6. •
  7. Indoor Furnishing
  8. •
  9. Herman Miller Aeron User manual

Herman Miller Aeron User manual

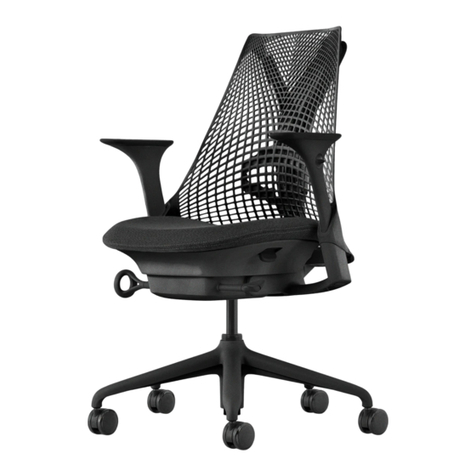
HermanMiller Aeron®Chair
Assembly Instructions
1Part no. 1bh0l0 rev A.
Step 2
Attach the parts
Remove the base, cylinder and back/seat assembly from box. Place the cylinder in the base
and back/seat assembly onto the cylinder.
Sit in the chair rmly several times to lock the components together.
Congratulations!
Your new Aeron chair is ready to enjoy in any workspace.
Step 1
HermanMiller
Aeron®
Chairs
Y
How to assemble
your chair
Parts Included
Base Cylinder
For more information about our products and services or to see a list of dealers, please visit us at
hermanmiller.com or call (800) 851 1196.
© 2016 Herman Miller, Inc., Zeeland, Michigan Printed in U.S.A. Part No. 1bh0l0 - A.
® Yand Aeron are among the registered trademarks of Herman Miller, Inc.
© 2016 Herman Miller, Inc. Zeeland, Michigan. Printed in the U.S.A on recycled paper.
® Y, Herman Miller and Aeron are among the registered trademarks of Herman Miller, Inc.
Notice:
Some of the parts have been wrapped to protect them during shipping. Remove the plastic
wrap before assembling the chair.
Back/Seat Assembly
Návod - jak sestavit Vaši židli
Poznámka:
Některé části byly zabaleny, aby byly chráněny během přepravy. Před montáží židle
tyto obaly odstraňte.
Obsah balení
Základna
Píst
Opěrák/Sedadlo sestavené
Krok 1
Krok 2
Sestavte všechny části
Vyjměte základnu,
píst a sestavené
sedadlo s opěrákem
z krabice. Vsuňte píst
do otvoru základny
a sedadlo nasuňte
na píst.
Opakovaněse posaďte na židli, aby se komponenty uzamkly do sebe.
Gratulujeme!
VášnovýAeron
je připraven
k používání.
HermanMiller Aeron®Chair Adjustment Guide1
Seating that
performs for you.
HermanMiller
Aeron®Chair
To raise:
To lower:
At the proper height, your feet should rest flat on the floor.
Seat Height: Paddle-shaped lever on right side
To swing arms in or out:
While seated, grasp front end of
posture. Swing chair arms inward for support while using keyboard. Swing
arm out to support use of computer mouse.
Arm Angle: Front of each armpad
To raise or lower arm:
Grasp base of arm support and raise
or lower to desired height. Lower lever
to lock.
For maximum comfort, your arms should make contact with the armpad
without any lift at your shoulders.
Arm Height: Lever on base of arm support
To increase tension:
While seated, turn knob forward
(toward + sign).
To decrease tension:
While seated, turn knob backward
(toward – sign).
Set the tilt tension to control the resistance you feel when leaning back.
Tilt Tension: Long stem on right side with knob
HermanMiller Aeron®Chair Adjustment Guide2
To move armpads forward and back:
Grasp front end of the armpad and slide
forward or back.
Arm Depth: Front of each armpad
To engage:
While seated, turn knob forward until
for you.
To disengage:
While seated, turn knob backward.
Set PostureFit SL with tilt limiter engaged in forward position to achieve the
your back in the pocket of the chair back. Then adjust PostureFit SL so that it
comfortably supports the natural alignment of your spine and provides lower
back comfort.
PostureFit SL™ Adjustment:
To change height:
Using equal pressure on each end of
the lumbar support, raise or lower it
to desired position within adjustment
track.
Adjust pad height so that it comfortably supports the natural curve of
your spine.
Lumbar Height: Adjustable strap on back of chair
To position chair forward:
Lean back and rotate knob forward.
To resume horizontal position:
While seated, lean back and rotate
lever back all the way.
Engage forward tilt to support the thighs’ declined posture when performing
intensive tasks such as keyboarding.
Forward Tilt:
To limit tilt range:
Rotate knob forward to limit recline to
preferred position.
To release tilt limiter:
Rotate knob all the way back.
Engage the tilt limiter when you want to sit in an upright or partially
reclined position.
Tilt Limiter:
To change height:
While holding base with one
hand, grasp and turn footrest
counterclockwise.
Raise or lower to desired height
using both hands.
Turn footrest clockwise to fully
tighten into lock position.
Your feet should sit comfortably on the footrest with knees at or just below
hip height. When you adjust the seat height, the footrest moves so you don’t
have to worry about readjusting.
Footrest Height: Circular support below seat
Only available on some models.
AERON - 8 jednoduchých kroků
1. krok ##
Výška sedáku !- plochá páčka na pravé straně
!!!
2 3
Seat Height
Paddle-shaped lever on right side
To raise: While lifting your weight off chair,
pull lever up.
To lower: While seated, pull lever up.
Adjust to fit height of worksurface or
keyboard, if possible. Feet should rest flat
on floor or footrest. Avoid dangling legs,
which puts pressure on and restricts blood
flow in the back of thighs.
Kinemat® Tilt Tension
Long stem on right side with knob
To increase tension: While seated, turn knob
forward (clockwise, toward + sign).
To decrease tension: While seated, turn knob
backward (anti-clockwise, toward - sign).
Depending on desired tilt resistance, a
number of turns may be required.
Increased tilt tension provides more stability
and back support while reclining. Too much
resistance makes the chair feel stiff.
Depending on weight and preference,
different people will require different
levels of tilt resistance.
-+
ENGLISH 3-7
FRANÇAIS 8-12
DEUTSCH 13-17
ESPAÑOL 18-22
ITALIANO 23-28
NEDERLANDS 29-33
Contents
ENGLISH
Zvýšení sedáku!- nadlehčete se a zvedněte páčku směrem nahoru
Snížení sedáku!- zůstaňte sedět a zvedněte páčku směrem nahoru.
!!! Chodidla by měla spočívat zcela na podlaze.
2. krok
Nastavení tuhosti!- otočnýregulátor na pravé straně
!!!
2 3
Seat Height
Paddle-shaped lever on right side
To raise: While lifting your weight off chair,
pull lever up.
To lower: While seated, pull lever up.
Adjust to fit height of worksurface or
keyboard, if possible. Feet should rest flat
on floor or footrest. Avoid dangling legs,
which puts pressure on and restricts blood
flow in the back of thighs.
Kinemat® Tilt Tension
Long stem on right side with knob
To increase tension: While seated, turn knob
forward (clockwise, toward + sign).
To decrease tension: While seated, turn knob
backward (anti-clockwise, toward - sign).
Depending on desired tilt resistance, a
number of turns may be required.
Increased tilt tension provides more stability
and back support while reclining. Too much
resistance makes the chair feel stiff.
Depending on weight and preference,
different people will require different
levels of tilt resistance.
-+
ENGLISH 3-7
FRANÇAIS 8-12
DEUTSCH 13-17
ESPAÑOL 18-22
ITALIANO 23-28
NEDERLANDS 29-33
Contents
ENGLISH
Zvýšení tuhosti!- vseděotáčejte regulátor směrem dopředu
!!! (po směru hodinových ručiček, ve směru +)
Snížení tuhosti!- vseděotáčejte regulátor směrem dozadu
!!! (proti směru hodinových ručiček, ve směru -)
!!! Počet otáček je přímo úměrnýpožadovanému odporu při náklonu.
&&& Zvýšenýodpor poskytuje vyšší stupeňstability a opory zad při
&&& záklonu. Při přílišvelkém odporu je však židle tuhá. Nastavení závisí
&&& na hmotnosti uživatele a požadovaném stupni odporu.
Návod k použití !Aeron® Chairs
3. krok
Výška područek#- kolečka na konstrukci područek
!!!
4 5
Arm Height
Lever on base of arm support
To raise or lower arm: While seated, lift
lever to unlock. Grasp base of arm support
and raise or lower to desired height. Lower
lever to lock.
Adjust height of each chair arm so your arms
are supported. This helps take weight off your
shoulders.
Arm Angle
End of each arm
To swing arms in or out: While seated, grasp
end of chair arm and move it left or right.
Adjusting arm angle can help support
different types of work and shifts in posture.
Swing chair arms inward for support while
keyboarding. Swing arm out to support use
of computer mouse.
Forward Tilt
Front lever on left side
To position chair forward: Lean back and pull
lever all the way up. Lean forward.
To resume horizontal position: While seated,
push lever all the way down. Lean back.
Normally, forward tilt position is used
with increased chair height. This relaxes
the bend of your waist, knees, and ankles.
To support back, set tilt limiter after
assuming forward position.
Tilt Limiter
Rear lever on left side
To limit tilt range: Recline as far as you like.
Move lever up to define limit of recline. You
can still move forward. Readjust as necessary.
To release tilt limiter: Lean forward, press
lever down.
If you want to sit in an upright position,
set the tilt limiter when the seat is in a
horizontal or forward position.
Zvýšení / snížení
pravé područky!- vseděodklopte páčku směrem nahoru, aby došlo k uvolnění
!!! područky
!!!- zvyšte nebo snižte područku v rozmezí stopy na rámu opěráku
!!!- zaklopte páčku směrem dolů
Zvýšení / snížení
levé područky!- vseděodklopte páčku směrem dolů, aby došlo k uvolnění područky
!!!- zvyšte nebo snižte područku v rozmezí stopy na rámu opěráku
!!!- zaklopte páčku směrem dolů
!!! Ruce by měly spočívat na područkách, aby nebyla jejich vahou
&&& zatěžována ramena.
4. krok
Úhel područek#- konce područek
!!!
4 5
Arm Height
Lever on base of arm support
To raise or lower arm: While seated, lift
lever to unlock. Grasp base of arm support
and raise or lower to desired height. Lower
lever to lock.
Adjust height of each chair arm so your arms
are supported. This helps take weight off your
shoulders.
Arm Angle
End of each arm
To swing arms in or out: While seated, grasp
end of chair arm and move it left or right.
Adjusting arm angle can help support
different types of work and shifts in posture.
Swing chair arms inward for support while
keyboarding. Swing arm out to support use
of computer mouse.
Forward Tilt
Front lever on left side
To position chair forward: Lean back and pull
lever all the way up. Lean forward.
To resume horizontal position: While seated,
push lever all the way down. Lean back.
Normally, forward tilt position is used
with increased chair height. This relaxes
the bend of your waist, knees, and ankles.
To support back, set tilt limiter after
assuming forward position.
Tilt Limiter
Rear lever on left side
To limit tilt range: Recline as far as you like.
Move lever up to define limit of recline. You
can still move forward. Readjust as necessary.
To release tilt limiter: Lean forward, press
lever down.
If you want to sit in an upright position,
set the tilt limiter when the seat is in a
horizontal or forward position.
Vytočení područek
dovnitř/ ven!! - vseděuchopte konec područky a vytočte ji vpravo nebo vlevo
!!!
!!! Nastavení úhlu područek umožňuje lepší podporu podle typu
&&& vykonávané práce. Područky mohou být nastaveny samostatně
&&& nezávisle na sobě. Při práci s klávesnicí doporučujeme područky
&&& přiklopit k tělu, při práci s myší naopak od těla.
Návod k použití !Aeron® Chairs
5. krok
Hloubka a výška bederní opěrky#- polštářová opěrka na vnější straněopěráku
!
6 7
-+
PostureFit® Adjustment
Knob on right side of chair
To engage: While seated, turn knob forward
(clockwise) until it stops. Then turn knob
backward (counterclockwise) until you find
the support that feels right for you.
To disengage: While seated, turn knob
backward (counterclockwise).
Note: Set PostureFit with tilt limiter engaged
in forward position to achieve the best fit for
you.
Before making this adjustment you should be
seated as far back in the chair as possible.
Then adjust PostureFit so that it comfortably
supports the natural alignment of your spine
and provides lower back comfort.
Fine-Tune™ Footring Height
Long stem on left side with knob
To raise: While seated, lift your feet off the
footring, turn knob forward.
To lower: While seated, lift your feet off the
footring, turn knob backward.
Adjust footring height so your feet rest flat
on the footring, with your body comfortably
supported by breathable Pellicle® suspension.
A void dangling legs, which puts pressure on
the back of thighs and restricts blood flow.
For more information about our
products and services, please visit us
at www.HermanMiller.com
Lumbar Depth
Thick pad on back of chair
To adjust depth: Lift lumbar support pad
out of its track in back of chair. Flip it over;
replace. One side of support pad is thicker
than the other side.
Switch between thick and thin sides to
determine desired amount of support.
Lumbar Height
Thick pad on back of chair
To adjust height: While seated, reach behind
chair with both hands to grasp lumbar
support pad. Raise or lower to desired
position within adjustment track.
Typically, placement is just above your
belt line.
!! !
6 7
-+
PostureFit® Adjustment
Knob on right side of chair
To engage: While seated, turn knob forward
(clockwise) until it stops. Then turn knob
backward (counterclockwise) until you find
the support that feels right for you.
To disengage: While seated, turn knob
backward (counterclockwise).
Note: Set PostureFit with tilt limiter engaged
in forward position to achieve the best fit for
you.
Before making this adjustment you should be
seated as far back in the chair as possible.
Then adjust PostureFit so that it comfortably
supports the natural alignment of your spine
and provides lower back comfort.
Fine-Tune™ Footring Height
Long stem on left side with knob
To raise: While seated, lift your feet off the
footring, turn knob forward.
To lower: While seated, lift your feet off the
footring, turn knob backward.
Adjust footring height so your feet rest flat
on the footring, with your body comfortably
supported by breathable Pellicle® suspension.
A void dangling legs, which puts pressure on
the back of thighs and restricts blood flow.
For more information about our
products and services, please visit us
at www.HermanMiller.com
Lumbar Depth
Thick pad on back of chair
To adjust depth: Lift lumbar support pad
out of its track in back of chair. Flip it over;
replace. One side of support pad is thicker
than the other side.
Switch between thick and thin sides to
determine desired amount of support.
Lumbar Height
Thick pad on back of chair
To adjust height: While seated, reach behind
chair with both hands to grasp lumbar
support pad. Raise or lower to desired
position within adjustment track.
Typically, placement is just above your
belt line.
Nastavení hloubky
bederní opěrky!- opěrka má dvěhloubky - 19 nebo 31 mm
!!!- při změněhloubky vysuňte opěrku z opěráku směrem nahoru, otočte
!!! ji a zasuňte zpět
Nastavení výšky
bederní opěrky!- vseděsáhněte oběma rukama dozadu a uchopte bederní opěrku
!!!- posuňte opěrku směrem nahoru / dolůtak, aby Vás podepírala
!!! v křížové oblasti
!!!
!!! Vyzkoušejte oběpolohy opěrky, abyste zjistili, zda Vám lépe
&&& vyhovuje její silnější či slabší strana. Většinou je správnou polohou
&&& místo těsněnad páskem kalhot.
6. krok
Opora PostureFit (PF)!- křížová opora na vnější straněopěráku
!!!
6 7
-+
PostureFit® Adjustment
Knob on right side of chair
To engage: While seated, turn knob forward
(clockwise) until it stops. Then turn knob
backward (counterclockwise) until you find
the support that feels right for you.
To disengage: While seated, turn knob
backward (counterclockwise).
Note: Set PostureFit with tilt limiter engaged
in forward position to achieve the best fit for
you.
Before making this adjustment you should be
seated as far back in the chair as possible.
Then adjust PostureFit so that it comfortably
supports the natural alignment of your spine
and provides lower back comfort.
Fine-Tune™ Footring Height
Long stem on left side with knob
To raise: While seated, lift your feet off the
footring, turn knob forward.
To lower: While seated, lift your feet off the
footring, turn knob backward.
Adjust footring height so your feet rest flat
on the footring, with your body comfortably
supported by breathable Pellicle® suspension.
A void dangling legs, which puts pressure on
the back of thighs and restricts blood flow.
For more information about our
products and services, please visit us
at www.HermanMiller.com
Lumbar Depth
Thick pad on back of chair
To adjust depth: Lift lumbar support pad
out of its track in back of chair. Flip it over;
replace. One side of support pad is thicker
than the other side.
Switch between thick and thin sides to
determine desired amount of support.
Lumbar Height
Thick pad on back of chair
To adjust height: While seated, reach behind
chair with both hands to grasp lumbar
support pad. Raise or lower to desired
position within adjustment track.
Typically, placement is just above your
belt line.
Zvýšení opory!- vseděotáčejte regulátor směrem dopředu (ve směru hodinových
!!! ručiček)
Uvolnění opory!- vseděotáčejte regulátor směrem dozadu (proti směru hodinových
!!! ručiček)
Upozornění&& PF nastavte ve fixní poloze.
&&& Pokud máte židli pouze s omezovačem záklonu, nastavte PF ve
&&&
Návod k použití !Aeron® Chairs
&&& vzpřímené poloze.
&&&
&&& Pokud máte ždli s dopředným náklonem, nastavte PF v předkloněné
&&& poloze.
&&& Před nastavením se posaďte co nejblíže opěráku.
&&& Nastavte PF tak, aby podporoval co nejvíce přirozené zakřivení Vaší
&&& páteře a poskytoval oporu v pánevní oblasti.
7. krok
Dopřednýnáklon!- přední páčka na levé straně
!!!
4 5
Arm Height
Lever on base of arm support
To raise or lower arm: While seated, lift
lever to unlock. Grasp base of arm support
and raise or lower to desired height. Lower
lever to lock.
Adjust height of each chair arm so your arms
are supported. This helps take weight off your
shoulders.
Arm Angle
End of each arm
To swing arms in or out: While seated, grasp
end of chair arm and move it left or right.
Adjusting arm angle can help support
different types of work and shifts in posture.
Swing chair arms inward for support while
keyboarding. Swing arm out to support use
of computer mouse.
Forward Tilt
Front lever on left side
To position chair forward: Lean back and pull
lever all the way up. Lean forward.
To resume horizontal position: While seated,
push lever all the way down. Lean back.
Normally, forward tilt position is used
with increased chair height. This relaxes
the bend of your waist, knees, and ankles.
To support back, set tilt limiter after
assuming forward position.
Tilt Limiter
Rear lever on left side
To limit tilt range: Recline as far as you like.
Move lever up to define limit of recline. You
can still move forward. Readjust as necessary.
To release tilt limiter: Lean forward, press
lever down.
If you want to sit in an upright position,
set the tilt limiter when the seat is in a
horizontal or forward position.
Zapnutí dopředného
náklonu!! - zakloňte se a posuňte páčku tahem směrem nahoru. Předkloňte se.
Horizontální pozice
vypnutí dopředného
náklonu!! - vseděposuňte páčku tahem směrem dolů. Zakloňte se.
!!&Dopřednýnáklon je vhodné nastavit především při zvýšení židle -
&&& poloha zmírní tlak na pas, kolena a klouby připráci u stolu.
&&& Pro vyšší oporu zad omezte záklon omezovačem.
8. krok
Omezovačzáklonu - zadní páčka na levé straně
!!!
4 5
Arm Height
Lever on base of arm support
To raise or lower arm: While seated, lift
lever to unlock. Grasp base of arm support
and raise or lower to desired height. Lower
lever to lock.
Adjust height of each chair arm so your arms
are supported. This helps take weight off your
shoulders.
Arm Angle
End of each arm
To swing arms in or out: While seated, grasp
end of chair arm and move it left or right.
Adjusting arm angle can help support
different types of work and shifts in posture.
Swing chair arms inward for support while
keyboarding. Swing arm out to support use
of computer mouse.
Forward Tilt
Front lever on left side
To position chair forward: Lean back and pull
lever all the way up. Lean forward.
To resume horizontal position: While seated,
push lever all the way down. Lean back.
Normally, forward tilt position is used
with increased chair height. This relaxes
the bend of your waist, knees, and ankles.
To support back, set tilt limiter after
assuming forward position.
Tilt Limiter
Rear lever on left side
To limit tilt range: Recline as far as you like.
Move lever up to define limit of recline. You
can still move forward. Readjust as necessary.
To release tilt limiter: Lean forward, press
lever down.
If you want to sit in an upright position,
set the tilt limiter when the seat is in a
horizontal or forward position.
Omezení záklonu!- zakloňte se do polohy, která má být nejzazším záklonem
!!!- posuňte páčku směrem nahoru - páčka se zastaví v požadovaném
!!! místěnastavení omezovače
Návod k použití !Aeron® Chairs
Uvolnění omezovače
záklonu!! - předkloňte se a posuňte páčku tahem směrem dolů
!!!- pokud chcete sedět v rovné poloze, omezte záklon omezovačem ve
!!! vzpřímené či předkloněné poloze
UPOZORNĚNÍ - ne každá židle Aeron je vybavena všemi uvedenými stavitelnými
mechanismy, záleží na konkrétním modelu.
©2007 Herman Miller, Inc., Zeeland, Michigan Printed in U.S.A. Part No. 170042-G
®L, Aeron, Kinemat, Pellicle, and Posturefit are among the registered trademarks of Herman Miller, Inc.
™ Fine-Tune is among the trademarks of Herman Miller, Inc.
User information: Installers do not remove
Instructions on this card show all possible adjustments. Not all Aeron chairs are equipped with all adjustments.
Informations utilisateurs:
Note aux installateurs: Ne les enlevez pas
Cette notice d´utilisation explique tous les ajustements possibles. Tous les siéges Aeron ne sont pas équipés de
ces ajustements.
Gebrauchsanleitungen:
an alle Installateure: Bitte nicht entfernen
Alle Verstellmöglichkeiten sind in dieser Gebrauchsanweisung abgebildet. Bitte beachten Sie, daß nicht alle
Aeron Stühle mit allen Verstellmöglichkeiten ausgerüstet sind.
Información para el usuario: Instalador, no quite esta
etiqueta
Las instrucciones en esta tarjeta muestran todas las posibles regulaciones. No todas las sillas Aeron estan
equipadas con todas estas regulaciones.
Informazioni per l’utente: A chi installa la sedia – Si
prega di non rimuovere
Le istruzioni contenute nella presente scheda illustrano tutte le regolazioni possibili. Le regolazioni effettive
variano a seconda del modello della sedia.
Notitie voor installateurs: Gelieve niet te verwijderen
De bijgevoegde gebruiksaanwijzingen betreffen alle mogelijke instellingen. Niet alle Aeron stoelen zijn
standaard voorzien van elke insteloptie.
Návod k použití !Aeron® Chairs
Other manuals for Aeron

8

Other Herman Miller Indoor Furnishing manuals

Herman Miller Envelop User manual

Herman Miller

Herman Miller Envelop User manual

Herman Miller Noguchi Rudder Coffee Table User manual

Herman Miller

Herman Miller Noguchi Rudder Coffee Table User manual

Herman Miller Locale T-Desk User manual

Herman Miller

Herman Miller Locale T-Desk User manual

Herman Miller Nelson X-Leg Table User manual

Herman Miller

Herman Miller Nelson X-Leg Table User manual

Herman Miller Setu Maintenance manual

Herman Miller

Herman Miller Setu Maintenance manual

Herman Miller Canvas Vista Installation instructions

Herman Miller

Herman Miller Canvas Vista Installation instructions

Herman Miller Eames User manual

Herman Miller

Herman Miller Eames User manual

Herman Miller Vantum Installation instructions

Herman Miller

Herman Miller Vantum Installation instructions

Herman Miller Mirra Guide

Herman Miller

Herman Miller Mirra Guide

Herman Miller Verus Task Chair Installation instructions

Herman Miller

Herman Miller Verus Task Chair Installation instructions

Herman Miller Celle User manual

Herman Miller

Herman Miller Celle User manual

Herman Miller Canvas Office Landscape Installation instructions

Herman Miller

Herman Miller Canvas Office Landscape Installation instructions

Herman Miller Canvas Channel StructuralFoot Installation instructions

Herman Miller

Herman Miller Canvas Channel StructuralFoot Installation instructions

Herman Miller Verus Task Chair Installation instructions

Herman Miller

Herman Miller Verus Task Chair Installation instructions

Herman Miller Cosm Guide

Herman Miller

Herman Miller Cosm Guide

Herman Miller Intent Furniture Tackboard Installation instructions

Herman Miller

Herman Miller Intent Furniture Tackboard Installation instructions

Herman Miller Aeron User manual

Herman Miller

Herman Miller Aeron User manual

Herman Miller Canvas Office Landscape Installation instructions

Herman Miller

Herman Miller Canvas Office Landscape Installation instructions

Herman Miller Nevi User manual

Herman Miller

Herman Miller Nevi User manual

Herman Miller Canvas Office Landscape FT420 User manual

Herman Miller

Herman Miller Canvas Office Landscape FT420 User manual

Herman Miller Aeron User manual

Herman Miller

Herman Miller Aeron User manual

Herman Miller Setu Table User manual

Herman Miller

Herman Miller Setu Table User manual

Herman Miller Mirra 2 User manual

Herman Miller

Herman Miller Mirra 2 User manual

Herman Miller Nevi Height Adjustment Table User manual

Herman Miller

Herman Miller Nevi Height Adjustment Table User manual

Popular Indoor Furnishing manuals by other brands

comfortel Mova owner's manual

comfortel

comfortel Mova owner's manual

WB Mfg TORO Assembly instructions

WB Mfg

WB Mfg TORO Assembly instructions

Pts Sango 7237BK581A5Q82 Assembly instructions

Pts

Pts Sango 7237BK581A5Q82 Assembly instructions

Cooper Lighting PORTFOLIO 834 Specification sheet

Cooper Lighting

Cooper Lighting PORTFOLIO 834 Specification sheet

Allseating DOVE Disassembly instructions

Allseating

Allseating DOVE Disassembly instructions

Tutti Bambini Modena Assembly instructions

Tutti Bambini

Tutti Bambini Modena Assembly instructions

modway Lippa Coffee Table manual

modway

modway Lippa Coffee Table manual

Habitat Rudolf manual

Habitat

Habitat Rudolf manual

CARRARO 881 manual

CARRARO

CARRARO 881 manual

Furniture of America FOA7916CK Assembly instructions

Furniture of America

Furniture of America FOA7916CK Assembly instructions

Alias TEAK TABLE 485 manual

Alias

Alias TEAK TABLE 485 manual

Sauder Costa 421934 manual

Sauder

Sauder Costa 421934 manual

Micasa INDUS 407559800000 manual

Micasa

Micasa INDUS 407559800000 manual

LG OUTDOOR GCO14 manual

LG OUTDOOR

LG OUTDOOR GCO14 manual

Flexa Cabin bed 1478538 Assembly instructions

Flexa

Flexa Cabin bed 1478538 Assembly instructions

Costway HW63771-12-22 user manual

Costway

Costway HW63771-12-22 user manual

SIG E-Pro Fieldbox Assembly manual

SIG

SIG E-Pro Fieldbox Assembly manual

Spectrum Esports Evolution 22860 Assembly instructions

Spectrum

Spectrum Esports Evolution 22860 Assembly instructions

manuals.online logo
manuals.online logoBrands
  • About & Mission
  • Contact us
  • Privacy Policy
  • Terms and Conditions

Copyright 2025 Manuals.Online. All Rights Reserved.