manuals.online logo
Brands
  1. Home
  2. •
  3. Brands
  4. •
  5. HiB
  6. •
  7. Indoor Furnishing
  8. •
  9. HiB austin 9101900 Manual

HiB austin 9101900 Manual

This manual suits for next models

1

Other HiB Indoor Furnishing manuals

HiB Maxi 73106100 User manual

HiB

HiB Maxi 73106100 User manual

HiB Proton User manual

HiB

HiB Proton User manual

HiB Austin User manual

HiB

HiB Austin User manual

HiB Minnesota User manual

HiB

HiB Minnesota User manual

HiB Novum N19FSCLMBL User manual

HiB

HiB Novum N19FSCLMBL User manual

HiB Vanquish 50 User manual

HiB

HiB Vanquish 50 User manual

HiB Novum N18DU60MWH User manual

HiB

HiB Novum N18DU60MWH User manual

HiB Jupiter 43600 User manual

HiB

HiB Jupiter 43600 User manual

HiB Laser User manual

HiB

HiB Laser User manual

HiB 21700 Manual

HiB

HiB 21700 Manual

HiB novum User manual

HiB

HiB novum User manual

HiB Eris Slim 50 User manual

HiB

HiB Eris Slim 50 User manual

HiB NOVUM N18BS60MWH User manual

HiB

HiB NOVUM N18BS60MWH User manual

HiB Groove 50 User manual

HiB

HiB Groove 50 User manual

HiB Vapor 50 User manual

HiB

HiB Vapor 50 User manual

HiB 78721000 Install guide

HiB

HiB 78721000 Install guide

HiB Mars 43500 User manual

HiB

HiB Mars 43500 User manual

HiB Groove 50 User manual

HiB

HiB Groove 50 User manual

HiB novum Prima User manual

HiB

HiB novum Prima User manual

HiB Atrium 50 User manual

HiB

HiB Atrium 50 User manual

HiB novum NF02S3DRT30 Series User manual

HiB

HiB novum NF02S3DRT30 Series User manual

HiB Paragon 50 Operator's manual

HiB

HiB Paragon 50 Operator's manual

HiB Vanquish 50 User manual

HiB

HiB Vanquish 50 User manual

HiB Trim Curve 40 User manual

HiB

HiB Trim Curve 40 User manual

Popular Indoor Furnishing manuals by other brands

Homelegance California 1662PEK-1CK Assembly instruction

Homelegance

Homelegance California 1662PEK-1CK Assembly instruction

Osmond Ergonomics FLO instructions

Osmond Ergonomics

Osmond Ergonomics FLO instructions

OVE ELOISE 42 installation manual

OVE

OVE ELOISE 42 installation manual

overstock MF286255 Assembly instructions

overstock

overstock MF286255 Assembly instructions

Sonoma 160-801 Assembly instructions

Sonoma

Sonoma 160-801 Assembly instructions

BOLERO Wicker Side Chair CF158 Care Instructions

BOLERO

BOLERO Wicker Side Chair CF158 Care Instructions

Coaster 4799N Assembly instructions

Coaster

Coaster 4799N Assembly instructions

Stor-It-All WS39MP Assembly/installation instructions

Stor-It-All

Stor-It-All WS39MP Assembly/installation instructions

Lexicon 194840161868 Assembly instruction

Lexicon

Lexicon 194840161868 Assembly instruction

Next AMELIA NEW 462947 Assembly instructions

Next

Next AMELIA NEW 462947 Assembly instructions

impekk Manual II Assembly And Instructions

impekk

impekk Manual II Assembly And Instructions

Elements Ember Nightstand CEB700NSE Assembly instructions

Elements

Elements Ember Nightstand CEB700NSE Assembly instructions

JWA CARY 68429 Assembly instruction

JWA

JWA CARY 68429 Assembly instruction

VIPACK AMORI AMKB9014 Assembly instructions

VIPACK

VIPACK AMORI AMKB9014 Assembly instructions

Rowico SANNA Assembly instructions

Rowico

Rowico SANNA Assembly instructions

Southern Enterprises CK556000TX Assembly instructions

Southern Enterprises

Southern Enterprises CK556000TX Assembly instructions

hygena 314/5041 Assembly instructions

hygena

hygena 314/5041 Assembly instructions

VINNOVA Kinsley 536060S manual

VINNOVA

VINNOVA Kinsley 536060S manual

manuals.online logo
manuals.online logoBrands
  • About & Mission
  • Contact us
  • Privacy Policy
  • Terms and Conditions

Copyright 2025 Manuals.Online. All Rights Reserved.

Quality Bathroom Products
LED Back-Lit Cabinets - Fixing Instructions
Thank you for purchasing this HiB product. Please
read through these instructions carefully and refer
back to them during installation to ensure that your
product is fitted safely and that it retains its high
quality finish.
Please retain this leaflet for future reference.
Electrical Safety Information
HiB recommends that all electrical bathroom
products should only be fitted by a suitably qualified,
Part P registered electrician in accordance with
current IEE reguations.
Ensure mains power supply is switched off before
starting installation.
Before drilling, ensure there are no hidden cables
or pipes in the wall.
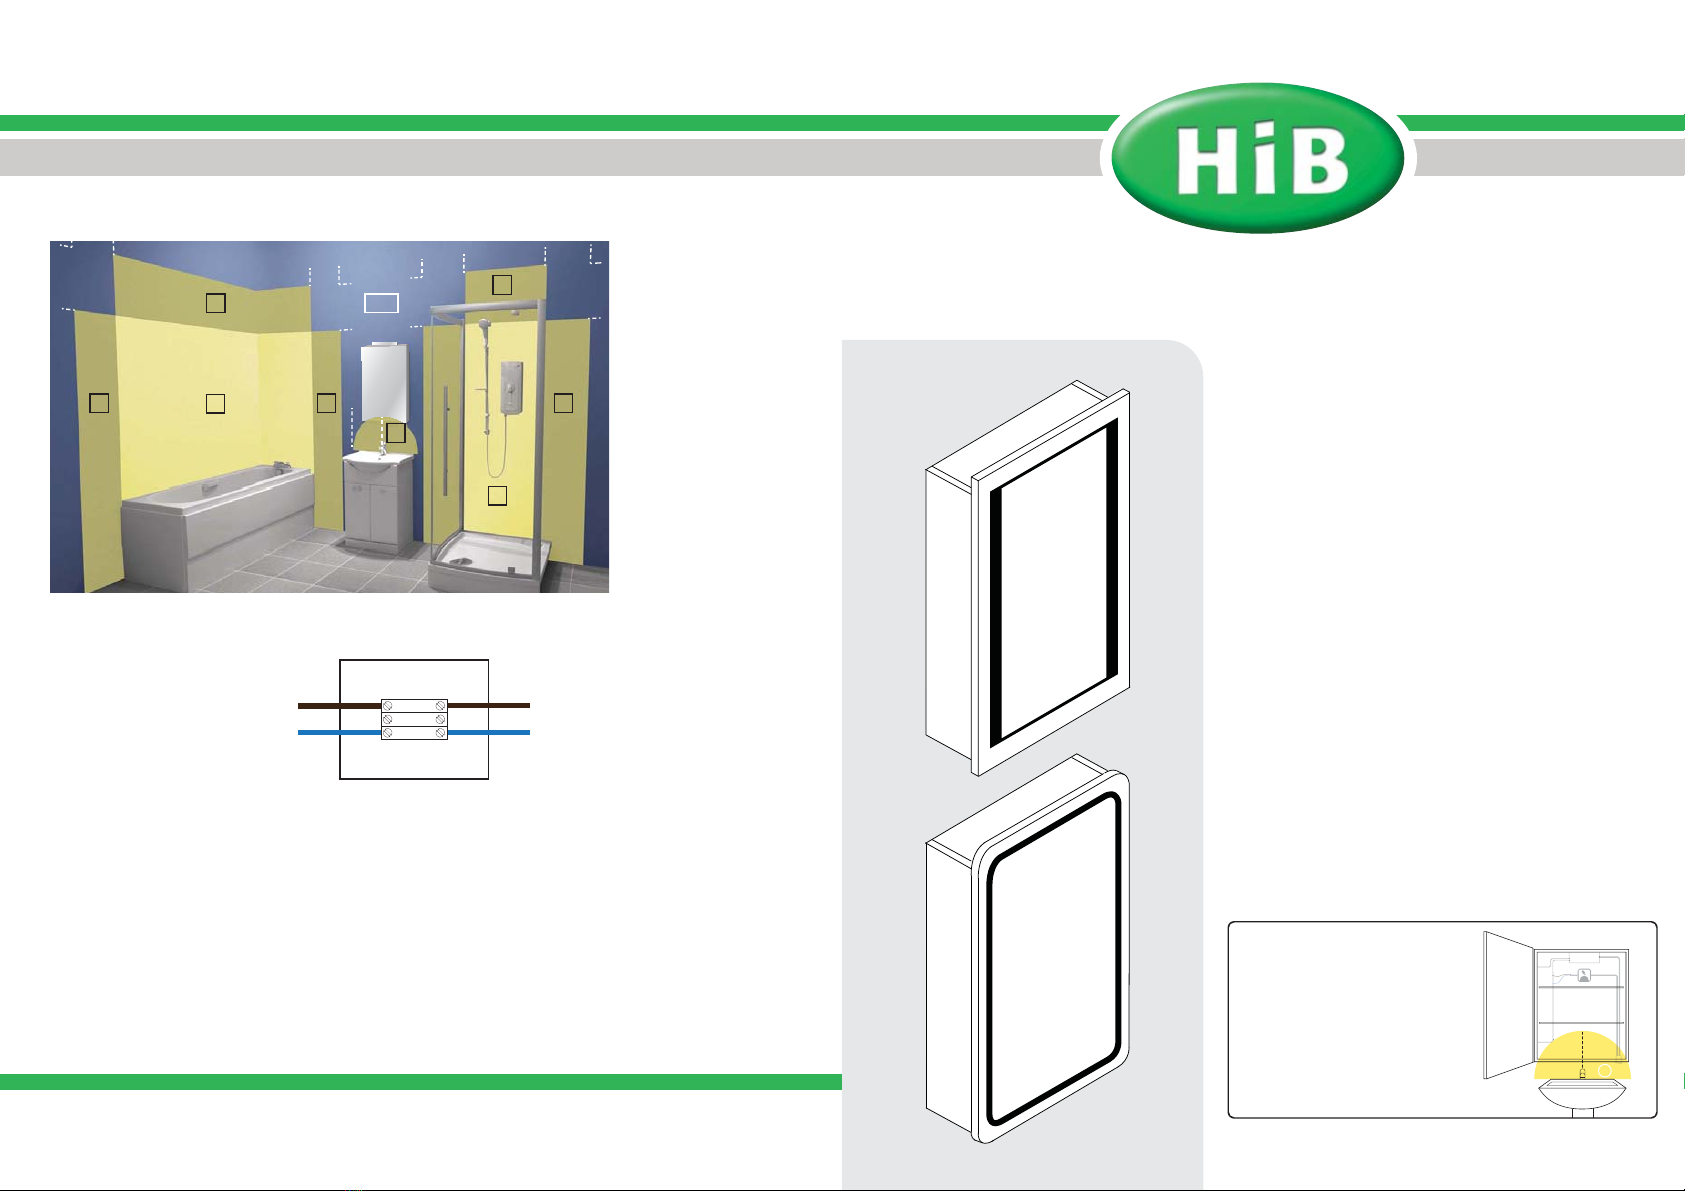
orlando Art no. 9102300 austin Art no. 9101900
©HiB Copyright: No part of this document may be reprinted or
duplicated without HiB consent. All sizes and measurements are
approximate, but we do try and make sure they are as accurate as
possible. In the interest of continuous product development, HiB
reserves the right to alter specifications as necessary. E & OE.
HiB Ltd, Castle House,
21-23 Station Road,
New Barnet, Herts,
EN5 1PH
t. 020 8441 0352
f. 020 8441 0219
e. [email protected]
w. www.hib.co.uk
zone
1
zone
2
zone
2
zone
2
zone
2
zone
2
outside
zone
60cm
60cm
60cm
60cm
75cm
75cm
75cm
75cm
60cm
radius
225cm
225cm
zone
1
zone
2
live
earth
neutral
MAINS SUPPLYLUMINAIRE
Wiring Diagram
Live supply can be Red or Brown
Neutral supply can be Blue or Black
Live supply is Brown
Neutral supply is Blue
Figure 1
Figure 2
Care Instructions
To preserve the high quality finish of your HiB product, please ensure you regard the
following care and cleaning recommendations:
-
-
-
-
wipe off all water spillages as soon as possible
mirrors and glass can be cleaned with a proprietary cleaner using a soft cloth, taking care not to get
excessive cleaner behind the mirror
all other surfaces should be cleaned with diluted detergent, i.e. washing up liquid, and a soft cloth
scourers and scouring agents should not be used, as these may cause damage to the surface of the
product
All installations must comply
with guidelines which are
based on a zonal concept.
The diagram to the left
illustrates this concept
and must be followed to
ensure the safe installation
of bathroom lighting. These
regulations apply to domestic
installations only. Installations
must be made in accordance
with the current IEE wiring
regulations and relevant
building regulations. HiB
recommends that all electrical
bathroom products should
only be fitted by a suitably
qualified, Part P registered
electrician. This product is
suitable for installation in
Outside Zones.
Attention:
When installing this cabinet,
please ensure that the
connection to the mains
electrics are outside of a
60cm radius of any water
source.
60 cm
radius
ZO N E
2
1) Position the cabinet in a suitable location,
(according to Figure 1 on the back page),
ensuring that the domestic electrical mains
supply is within reach of the electrical
connection point of the cabinet. Carefully
mark the position of the top of the cabinet
using a soft pencil.
2) Remove the cabinet from the wall and
using a spirit level, mark the position of the
two mounting points (as shown above).
3) Before drilling, ensure there are no
hidden cables or pipes behind the mounting
points. Drill the required holes in the marked
positions. If drilling through tile, use a
ceramic drill bit. Insert the wall plugs level
with the surface of the wall. If fitting to a tiled
surface, wall plugs should be inserted below
the tile surface to avoid cracking. NB. For
plasterboard walls, specialist fixings should
be purchased, available from any DIY or
hardware store.
4) Insert the hook screws into the wall plugs.
5) This cabinet is provided with an electrical
supply cable already fitted. This cable
should be connected to the household
electrical circuit, and connections should
be made in accordance with the latest IEE
regulations. This is a Class II product and
need not be connected to Earth. Ensure
the domestic electrical mains supply to
which the product is being connected is
turned off. Connect the domestic mains
supply according to Figure 2 on the back
page.
6) Hang the cabinet on the wall ensuring
that it is firmly located on both hook screws.
Adjust the bottom screw (1) to level the
cabinet. Fix the cabinet to the wall firmly by
tightening the front screw (2).
7) The hinge can be adjusted in order to
reposition the door correctly. See diagrams
A, B and C for further information.
fixing preparation wall mounting securing to wall
door adjustment
2
1
user
dened
height
A
B
C