manuals.online logo
Brands
  1. Home
  2. •
  3. Brands
  4. •
  5. HoldPeak
  6. •
  7. Multimeter
  8. •
  9. HoldPeak 760J Installation manual

HoldPeak 760J Installation manual

760J
3 1/2 DIGITAL AUTOMATIVE ENGING
ANALYZER MULTIMETER OPERATION
MANUAL
This instrument is a compact , rugged , battery operative,
handhold 3 1/2 digits automotive engine analyzer multimeter for
measuring RPM,DWELL ANGLE, DCV, ACV, OHMS, DIODE,
CONTINUITY, DCA TEMPERATURE .It is an ideal instrument for
all drivers.
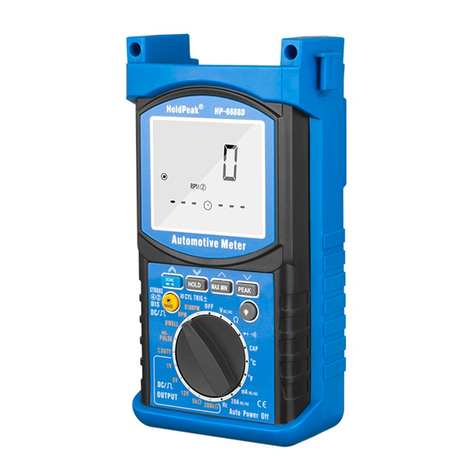
1. Panel Layout
1)LCD Display
2)POWER Switch:Boot Up / Shutdown
3)Function switch indicator lamp key: Pressing the button turns
the f unction switch indicator lamp on,pressing it again turns it off.
4)Data-hold Switch (HOLD):Pressing this button, the meter enters the
auto data hold mode and “HOLD” is displayed on the LCD.
5)Back Light Button Switch: Pressing the button turns the
backlight on,pressing it again turns it off.
6)Function switch indicator lamp
7)hFE Input Jack
8)Rotary Switch: use this switch to select functions and ranges
9) mechanical blocking system.
10)V Ω/T+ Input Jack、20A Input Jack、T- Input Jack 、COM
Input Jack
2. SPECIFICATIONS
2.1 GENERAL SPECIFICATIONS
Display : 3 1/2 digits LCD with a max . reading of 1999
Polarity : Automatic negative polarity indication..
Zero adjustment : Automatic.
Overrange indication : only the “1” display.
Lowbattery : The “ ” is display .
Safety standards : CE EMC/LVD.The meter is up to the
standards of IEC1010 Pollution Degree 2, Overvoltage
CategoryⅡor double insulation Ⅲ.
Operating environment : Temperature 32 to 104℉(0℃to 40℃),
humidity<85% RH.
Storage environment : Temperature –4 to 140℉(-20℃to
60℃),humidity<95% RH.
Power : Single, standard 9-volt battery, NEDA 1604IEC 6F 22.
Dimension : 190mm×88.5mm×27.5mm
Weight :Approx. 320g(including battery and holster).
2.2ELECTRICAL SPECIFICATIONS
Accuracy is ±(% of reading +number in last digit) at
23±5℃, <75% RH.
2.2.1 DC Voltage
Range Accuracy Resolution
200mV
±(0.5% of rdg + 8digits)
100μV
2V 1mV
20V 10mV
200V 100mV
1000V ±(1.5% of rdg + 8 digits) 1V
Impedance : 10MΩ
Overload protection: 1000V DC/AC RMS.
2.2.2 AC Voltage
Range Accuracy Resolution
200mV ±(2.0% of rdg + 10 digits) 100μV
2V
±(1.5% of rdg + 10 digits)
1mV
20V 10mV
200V 100mV
750V ±(2.5% of rdg + 10 digits) 1V
Impedance: 10MΩ
Frequency response:
200V: 40Hz------400Hz
750V: 40Hz------200Hz
Overload protection: 500V DC/AC RMS.
2.2.3 Resistance:
Range Accuracy
Resolutio
n
200Ω ±(1.2% of rdg +15 digits) 100mΩ
20kΩ ±(0.8% of rdg +8 digits) 10Ω
200kΩ 100Ω
20MΩ ±(2.5% of rdg + 15 digits) 10kΩ
200MΩ
±【5.0% of (rdg-10)+30 digits】
1 kΩ
Overload protection: 250VDC/AC RMS.
2.2.4 DC Current
Range Accuracy Resolutio
n
20A ±(2.0% of rdg + 10 digits) 10mA
Overload protection:20A/250V fuse 20A up to 10 seconds
1.2.5 Temperature (Using K type thermocouples probe)
Scale Accuracy
Resolution
(-20~1000)℃
±(3%of rdg +2 digits)<400℃
1℃
±(3.5%of rdg +5 digits)≥400℃
(-4~1800)℉
±(3%of rdg+2 digits)<750℉
℉
±(3.5%of rdg +5 digits)≥750℉
2.2.6 Diode test:
Range
Description Test condition
“
Display read
approx.
Forward voltage of
diode.
Test current : 1±0.6mA
Test voltage : Approx. 1.5V
Overload protection: 250V
DC/AC RMS
2.2.7 Continuity Test
Range Description Test condition
”
Audible indication: Less
than 80Ω Approx
Overload protection:
250V DC/AC RMS
2.2.8 Tachometer
500-10000RPM: ±(1.5%of rdg+8 digits)
Overload protection: 250V DC/AC RMS
2.2.9 Dwell : ±(1.5%of rdg+8 digits)
3 CYL 0 - 120.0°
4 CYL 0 - 90.0°
5CYL 0 - 72.0°
6CYL 0 - 60.0°
8CYL 0 - 45.0°
2.2.10 Transistor hFE Test
(1) Set the FUNCTION switch the “hFE” range.
(2) Determine whether the transistor is NPN or PNP and locate
the Emitter. Base and collector leads. Insert the leads into the
proper holes in the socket on the front panel.
(3) The display will read the approximated hFE value at the
test condition Base current 10uA, Vce 3V.
2.2.11 back light
Press button "LIGHT" backlight illume, Again press once
backlight breath go out.
2.2.12 Function switch indicator lamp: New style patent of
function direction light , easy use in dark place .
2.2.13 HOLD
Push the ”HOLD” button to lock display value, push it again to
exit.
3. OPERATION
Warning
1)When measuring voltage ensure that instrument is not
connected or switched to a current or resistance Range, or to the
diode check, Always ensure that the correct terminals are used
for the type of measurement to be made.
2)Use extreme care when measuring voltage above 50V,
especially from sources where high Energy is existed.
3)Avoid making connections to “live” circuits whenever possible.
4)When making current measurements ensure that the circuit
not “live” before opening it in order to connect the test leads.
5)Before making resistance measurements or diode test, ensure
that the circuit under test is De--energized.
6)Always ensure that the correct function and range is selected.
If in doubt about the correct range to use, start whit the highest
and work downwards.
7)Extreme care should be taken when using the instrument to
conjunction with a current Transformer connected to the
terminals if an open circuit occurs.
8)Ensure that the test leads and probes are in good condition
with no damage to the insulation.
9)Take care not to exceed the over-lode limits as given in the
specification.
10) FUSE FOR REPLACEMENT MUST BE OF THE
CORRECT TYPE AND RATING.
11) Before opening the case of the instrument to replace battery,
disconnect the test leads from any external circuit, set the
selector switch to “OFF” position.
3.1 DC Voltage measurement
1)Connect the black test lead to “COM” socket and red lead to
the “VΩ” socket.
2)Set the selector switch to desired “DCV”position and connect
the probes across the source or load under measurement.
3.2 AC Voltage measurement
1) Connect the black test lead to “COM” socket and red lead to
the “VΩ” socket.
2) Set the selector switch to desired “ACV”position and
connect the probes across the source or load under
measurement .
3.3 DC Current measurement
1) Connect the black test lead to “COM” socket and red lead to
the “20A” socket.
2) Set the selector switch to desired current range position.
3) Set the selector switch to desired “DCA”position and
connect the probes across the source or load under
measurement.
3.4 Resistance and continuity measurement
1) Connect the black test lead to “COM” socket and red lead to
the “VΩ” socket.
2) Set the selector switch to desired resistance range position
or “ ” position.
3) Connect the probes across circuit to be tested.
Caution: Ensure that the circuit to be tested is “dead”.
Max. input over-load: 250V RMS And<10sec.
3.5 Diode Test
1) Connect the black test lead to “COM” socket and red test
leads to the “VΩ” socket.
2) Set the selector switch to “ ” position .
3) Connect the black and red test probe to cathode (-) and
anode (+) ends of diode to be tested respectively.
3.6 Temperature measurement
Set the selector switch to the ‘TEMP ℃/℉’range and connect
the K type thermocouple’s black test lead to “TEMP-” socket and
red test lead to the “T+” socket.
A. The temperature function shows the random
number at ordinary times, must insert the thermocouple
in temperature test hole while examining temperature. In
order to guarantee the accuracy of the measurement,
need to close Light switch while measuring temperature.
B. This meter in closure WRNM-010 type contact
thermocouple limit temperature is 250 ℃(300 ℃
shortly ) ;
C. Please don't change the thermocouple at will ,
otherwise we can't guarantee to measure accuracy ;
D. Please don’t importing the voltage in the
temperature function.
3.7 RPM (TACH ) measurement
1). Connect the black test lead to “COM” socket and red test
leads to the “VΩ” socket.
2). Connect the red test probe to “BREAKER POINTS ” or
“ ”terminal of IGNITION CIOL ,and connect the black probe to
“GROUND ”or “ - ” terminal of battery .
3). Set the selector switch to the “TACH” position for 3cyl,4cyl ,
5cyl , 6cyl , 8cyl , according to the engine cylinders .For any
TACH signal with a given frequency , in convention
ignition system :RPM=120×freq÷cyl . in DIS ignition system :
RPM=120×freq÷2 .
4). Start the engine and read engine RPM .
3.8 DWELL ANGLE measurement
1). Connect the black test lead to “COM” socket and red test
lead to the “VΩ” socket .
2). Connect the red test probe to “BREAKER POINTS ” or
“ ”terminal of IGNITION CIOL ,and connect the black probe to
“GROUND ”or “-” terminal of battery .
3). Set the selector switch to the “DWELL” position for 3cyl,
4cyl , 5cyl , 6cyl , 8cyl , according to the engine cylinders .
4). Start engine the display will show the DWELL ANGLE of
points.
4. ACARE AND MAINTENANCE
4.1 CARING FOR YOUR MULTIMETER
Your digital multimeter is an example of superior design and
craftsmanship. The following Suggestions will help you care for
the milimeter so you can enjoy it for years.
1). Keep the multimeter dry. If it gets wet , wipe it dry immediately.
Liquids can contain minerals that Can corrode electronic circuits
2). Use and store the multimeter only in normal temperature
environments, Temperature extremes Can shorten the life of
electronic devices, damage the batteries, and distort or melt
plastic parts.
3). Handle the multimeter gently and carefully. Dropping it can
damage the circuit boards and case and can cause fthe
multimeter to work improperly although the holster can provide
enough protection.
4). Keep the multimeter away from dust and dirt, which can
cause premature wear of ports.
5). Wipe the multimeter with a damp cloth occasionally to keep it
looking new. Do not use harsh Chemicals, cleaning solvents, or
strong detergents to clean the multimeter.
6). Use only fresh batteries of the required size and type .always
remove old or weak batteries. They Can leak chemicals that
destroy electronic circuits.
4.2 MAINTENANCE
9-volt battery replacement
a) Ensure the instrument is not connected to any external
circuit. snap fastener “OFF” Position and remove the test leads
from the terminals.
b) Remove the screw on the bottom case and lift the battery
case. Remove the spent battery and Replace it with a battery of
the same type.
c) Please take out the battery when not using for a
long time.
Above picture and content just for your reference.
Please be subject to the actual products if anything
different or updated. Please pardon for not
informing in advance.

Other HoldPeak Multimeter manuals

HoldPeak HP-36C User manual

HoldPeak

HoldPeak HP-36C User manual

HoldPeak 770HD User manual

HoldPeak

HoldPeak 770HD User manual

HoldPeak 39B User manual

HoldPeak

HoldPeak 39B User manual

HoldPeak 770C User manual

HoldPeak

HoldPeak 770C User manual

HoldPeak 39K User manual

HoldPeak

HoldPeak 39K User manual

HoldPeak 770G User manual

HoldPeak

HoldPeak 770G User manual

HoldPeak HP-760E User manual

HoldPeak

HoldPeak HP-760E User manual

HoldPeak HP-90E User manual

HoldPeak

HoldPeak HP-90E User manual

HoldPeak HP-90F User manual

HoldPeak

HoldPeak HP-90F User manual

HoldPeak HP-770H User manual

HoldPeak

HoldPeak HP-770H User manual

HoldPeak 860N User manual

HoldPeak

HoldPeak 860N User manual

HoldPeak 90F User manual

HoldPeak

HoldPeak 90F User manual

HoldPeak 6208 User manual

HoldPeak

HoldPeak 6208 User manual

HoldPeak 6688D User manual

HoldPeak

HoldPeak 6688D User manual

HoldPeak 860D User manual

HoldPeak

HoldPeak 860D User manual

HoldPeak HP-770H User manual

HoldPeak

HoldPeak HP-770H User manual

HoldPeak 6205 User manual

HoldPeak

HoldPeak 6205 User manual

HoldPeak 760A Installation manual

HoldPeak

HoldPeak 760A Installation manual

HoldPeak HP-37A User manual

HoldPeak

HoldPeak HP-37A User manual

HoldPeak 770A User manual

HoldPeak

HoldPeak 770A User manual

HoldPeak 870CR User manual

HoldPeak

HoldPeak 870CR User manual

HoldPeak 870N User manual

HoldPeak

HoldPeak 870N User manual

HoldPeak 850E User manual

HoldPeak

HoldPeak 850E User manual

HoldPeak 6300 User manual

HoldPeak

HoldPeak 6300 User manual

Popular Multimeter manuals by other brands

VOLTA VC870 operating instructions

VOLTA

VOLTA VC870 operating instructions

Extech Instruments 410 user guide

Extech Instruments

Extech Instruments 410 user guide

Maxwell Digital Multimeters 25404 user manual

Maxwell Digital Multimeters

Maxwell Digital Multimeters 25404 user manual

wurth 0715 58 770 Translation of the original operating instructions

wurth

wurth 0715 58 770 Translation of the original operating instructions

Time Electronics 5075 Command guide

Time Electronics

Time Electronics 5075 Command guide

Amprobe CR50A user manual

Amprobe

Amprobe CR50A user manual

socomec DIRIS A20 operating instructions

socomec

socomec DIRIS A20 operating instructions

FIREDRAGON Victor 88E user manual

FIREDRAGON

FIREDRAGON Victor 88E user manual

APPA 36II instruction manual

APPA

APPA 36II instruction manual

Extech Instruments MultiTec MT310 user guide

Extech Instruments

Extech Instruments MultiTec MT310 user guide

Extech Instruments EX330 user guide

Extech Instruments

Extech Instruments EX330 user guide

Amprobe AM-140-A user manual

Amprobe

Amprobe AM-140-A user manual

Sealey MM20.V2 instructions

Sealey

Sealey MM20.V2 instructions

Thurlby 1905 operating manual

Thurlby

Thurlby 1905 operating manual

IDEAL INDUSTRIES 61-361 Technical manual

IDEAL INDUSTRIES

IDEAL INDUSTRIES 61-361 Technical manual

Unit UT120A operating manual

Unit

Unit UT120A operating manual

Major tech MT1005 manual

Major tech

Major tech MT1005 manual

FLIR Extech Instruments MN15 user guide

FLIR

FLIR Extech Instruments MN15 user guide

manuals.online logo
manuals.online logoBrands
  • About & Mission
  • Contact us
  • Privacy Policy
  • Terms and Conditions

Copyright 2025 Manuals.Online. All Rights Reserved.