manuals.online logo
Brands
  1. Home
  2. •
  3. Brands
  4. •
  5. Home Styles
  6. •
  7. Indoor Furnishing
  8. •
  9. Home Styles 5053-106 User manual

Home Styles 5053-106 User manual

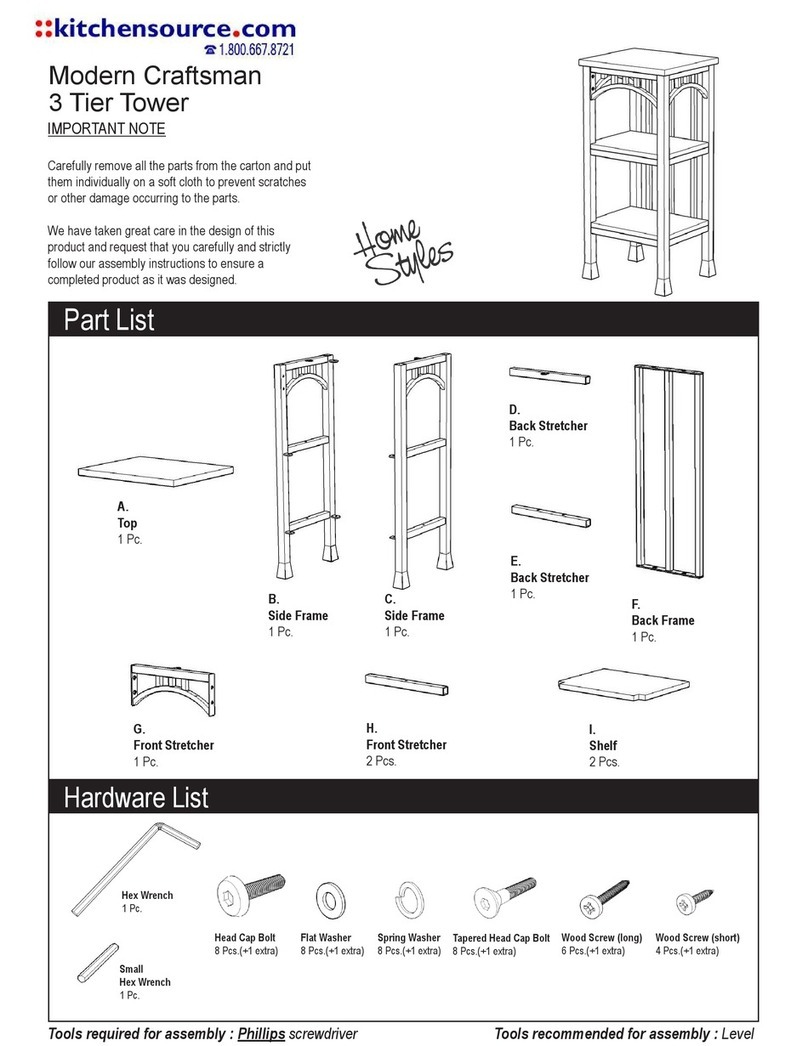
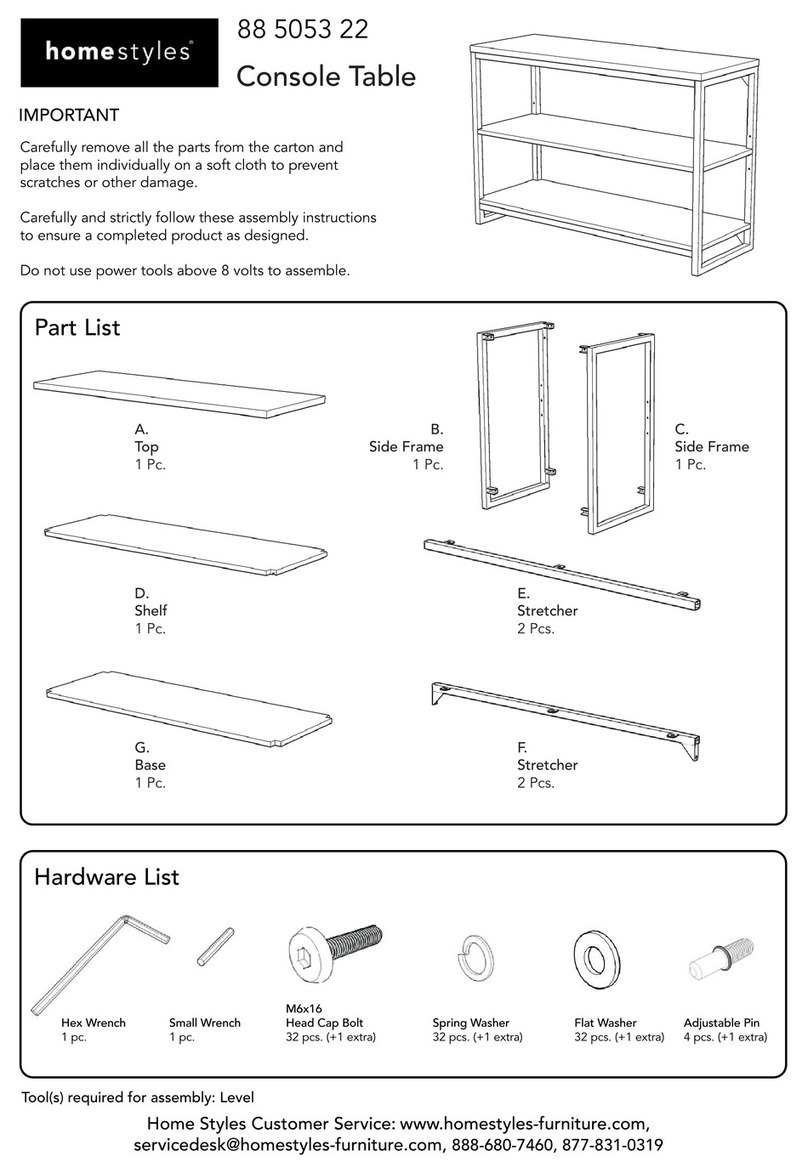
Part List
5053-106
Over the Commode Stand
IMPORTANT
Carefully remove all the parts from the carton and
place them individually on a soft cloth to prevent
scratches or other damage.
Carefully and strictly follow these assembly instructions
to ensure a completed product as designed.
Do not use power tools above 8 volts to assemble.
A.
Top
1 pc.
B.
Shelf
2 pcs.
C.
Shelf
1 pc.
D.
Side Frame
1 pc.
E.
Side Frame
1 pc.
F.
Side Frame
1 pc.
G.
Side Frame
1 pc.
H.
Front Rail
2 pcs.
I.
Back Rail
2 pcs.
Hardware List
Anchor
2 pcs. (+1 extra)
Bracket
2 pcs. (+1 extra)
Tool(s) required for assembly: Phillips screwdriver, Level, Pencil, Drill (8 volts or less), 3/8” Drill Bit
M3.5x40
Wall Screw
2 pcs. (+1 extra)
Hex Wrench
1 pc.
Small Hex Wrench
1 pc.
M6x16
Head Cap Bolt
32 pcs. (+1 extra)
Spring Washer
32 pcs. (+1 extra)
Flat Washer
24 pcs. (+1 extra)
Flat Washer (large)
8 pcs. (+1 extra)
Adjustable Pin
8 pcs. (+1 extra)
styles Customer Service: www.homestylesfurniture.com,home
[email protected], 888-680-7460
Assembly Instructions 2/6
IMPORTANT
Use a soft cloth between these parts and the floor.
Do not use power tools above 8 volts to assemble.
Do not tighten all the bolts until each part is properly assembled.
The unit must be level to work properly. Use the included adjustable levelers to level.
Keep Hex Wrench as the bolts may need to be tightened in the future.
STEP 1
Attach Side Frame (D) to Side Frame (F) with Flat Washer, Spring Washer
and Head Cap Bolt, tightening bolt only halfway.
(See Figure 1)
Attach Brackets to Back Rail (I) with Flat Washers, Spring Washers and
Head Cap Bolts.
(See Figure 2)
Attach Front Rails (H) and Back Rails (I) to unit with Flat Washers,
Spring Washers and Head Cap Bolts, tightening bolts only halfway.
Bracket
Flat Washer
Spring Washer
Head Cap Bolt
Figure 2
Figure 1
I
I
H
H
D
F
Assembly Instructions /36
Flat Washer
Spring Washer
Head Cap Bolt
STEP 2
Attach Side Frame (E) to Side Frame (G)
with Flat Washer, Spring Washer and
Head Cap Bolt, tightening bolt only halfway.
Attach unit to unit from Step 1 with Flat Washers, Spring Washers
and Head Cap Bolts, tightening bolts only halfway.
E
G
Assembly Instructions /46
STEP 3
Attach Top (A) and Shelf (C) to unit with Flat Washers (large), Spring Washers and Head Cap Bolts,
tightening bolts only halfway.
Tighten all bolts used in all steps.
Flat Washer (large)
Spring Washer
Head Cap Bolt
A
C
Adjustable Pin
STEP 4
Turn unit to its upright position.
Insert Adjustable Pins into unit at desired level. (See Figure 3)
Place Shelves (B) into position.
Level unit by adjusting the adjustable levelers on bottom of unit. (See Figure 4)
Note: Unit must be level to work properly.
Figure 3
Figure 4
Assembly Instructions /56
B
B
Assembly Instructions /66
IMPORTANT
To help reduce the risk of the unit tipping over, the Tipover Restraint must be installed following these instructions exactly.
STEP 5
Place unit at desired location.
Loosen slightly Head Cap Bolts attaching
Brackets to unit.
Slide Brackets to wall, then retighten
Head Cap Bolts.
Mark wall with pencil through holes in Brackets.
(See Figure 5)
Move unit.
Drill 3/8” holes in wall at marks, then insert
Anchors into the wall holes. (See Figure 6)
Move unit back into place.
Attach unit to wall with Wall Screws
through Brackets. (See Figure 7)
Figure 5
Figure 6 Figure 7
Wall Screw
Bracket
Anchor
3/8” wall hole
Head Cap Bolt
Bracket
Pencil
Anchor
3/8” wall hole
Bracket
Wall Screw
NEVER
use glass cleaners on
finished furniture. Ammonia
chemically attacks the finish.
allow liquids to remain on furniture.
Absorption causes parts to warp
and split and finishes to delaminate.
NEVER
CARE INSTRUCTIONS
Do not use rubber
based placemats.
PREVENT
DISCOLORING
Do not use commercial
waxes and polishes.
PREVENT
YELLOWING
Do not place hot
objects on surface.
PREVENT
FINISH DAMAGE
Do not write
directly on surface.
PREVENT
MARKING
Do not use power tools
above 8 volts to assemble.
PREVENT
CRACKING
Do not place
in direct sunlight.
PREVENT
FADING
with a soft cloth moistened
in lukewarm soap and water.
Buff with a dry clean cloth.
CLEAN
homestyles will provide replacements free of charge for missing or damaged parts within 1 year of purchase.
Digital images of the defective parts may be required. If the product was not purchased from an authorized retailer,
homestyles is under no obligation to provide replacement parts. Parts are not available for fully assembled items nor
are parts available for sale. Replacements for missing or damaged parts may be requested via contact info below.
styles Customer Service: www.homestylesfurniture.com,home
[email protected], 888-680-7460

Other Home Styles Indoor Furnishing manuals

Home Styles 20 05520 0761 User manual

Home Styles

Home Styles 20 05520 0761 User manual

Home Styles 5580-80 User manual

Home Styles

Home Styles 5580-80 User manual

Home Styles 6802-10 User manual

Home Styles

Home Styles 6802-10 User manual

Home Styles 50 942 User manual

Home Styles

Home Styles 50 942 User manual

Home Styles 88 5601 20 User manual

Home Styles

Home Styles 88 5601 20 User manual

Home Styles 20 05002 0992 User manual

Home Styles

Home Styles 20 05002 0992 User manual

Home Styles 88 5082 942 User manual

Home Styles

Home Styles 88 5082 942 User manual

Home Styles 20 05507 0503 User manual

Home Styles

Home Styles 20 05507 0503 User manual

Home Styles Buffet 88 5134 64 User manual

Home Styles

Home Styles Buffet 88 5134 64 User manual

Home Styles 20 08000 0751 User manual

Home Styles

Home Styles 20 08000 0751 User manual

Home Styles 88 5123 89C User manual

Home Styles

Home Styles 88 5123 89C User manual

Home Styles 5648 49 User manual

Home Styles

Home Styles 5648 49 User manual

Home Styles 88 5412 943 User manual

Home Styles

Home Styles 88 5412 943 User manual

Home Styles The Lafayette 88 5537 991 User manual

Home Styles

Home Styles The Lafayette 88 5537 991 User manual

Home Styles 88 5702 31 User manual

Home Styles

Home Styles 88 5702 31 User manual

Home Styles 88 5559 80 User manual

Home Styles

Home Styles 88 5559 80 User manual

Home Styles French Countryside Dining Table User manual

Home Styles

Home Styles French Countryside Dining Table User manual

Home Styles Brooklyn Desk 1001-16 User manual

Home Styles

Home Styles Brooklyn Desk 1001-16 User manual

Home Styles 20 05506 0031 User manual

Home Styles

Home Styles 20 05506 0031 User manual

Home Styles 88 5538 952 User manual

Home Styles

Home Styles 88 5538 952 User manual

Home Styles Bimini Jim 88 5565 32 User manual

Home Styles

Home Styles Bimini Jim 88 5565 32 User manual

Home Styles Storage Island 20 05530 0942 User manual

Home Styles

Home Styles Storage Island 20 05530 0942 User manual

Home Styles 88 5171 80 User manual

Home Styles

Home Styles 88 5171 80 User manual

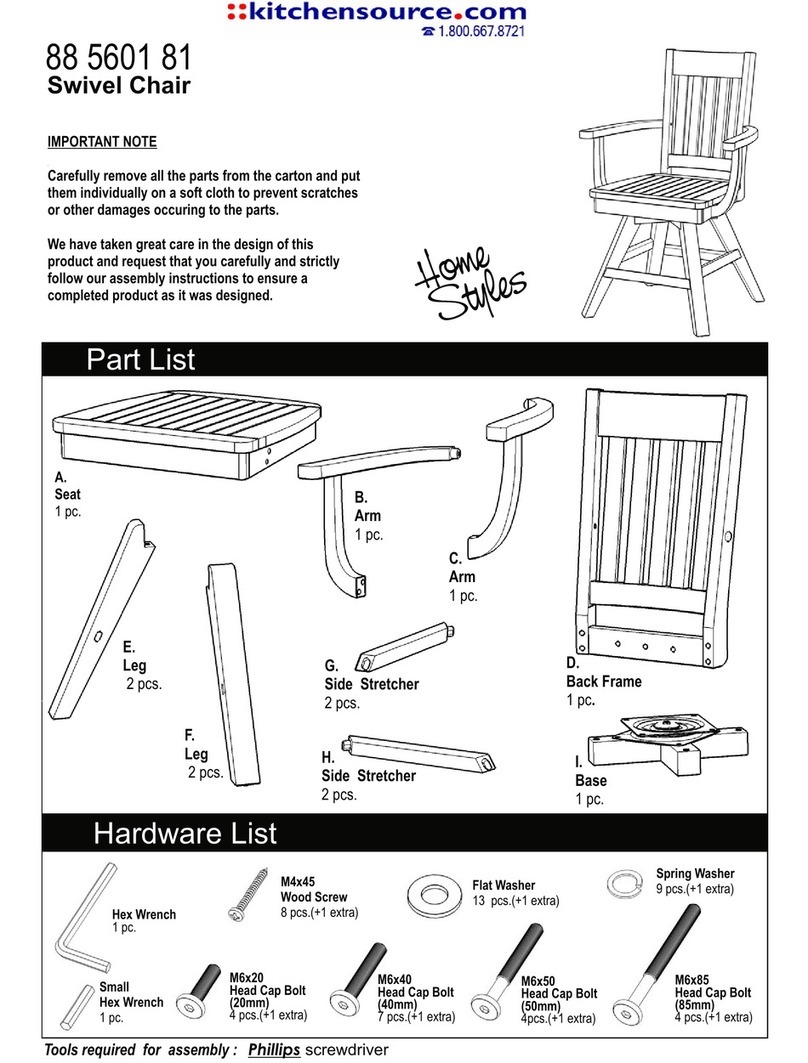
Home Styles Swivel Chair User manual

Home Styles

Home Styles Swivel Chair User manual

Popular Indoor Furnishing manuals by other brands

OSP Designs INDIO IND432 Assembly instructions

OSP Designs

OSP Designs INDIO IND432 Assembly instructions

Bosi Lisse Assembly and installation manual

Bosi

Bosi Lisse Assembly and installation manual

ROOMS TO GO 7450-140 Assembly instructions

ROOMS TO GO

ROOMS TO GO 7450-140 Assembly instructions

RiverRidge Sort & Store 4-Bin Organizer Assembly instructions

RiverRidge

RiverRidge Sort & Store 4-Bin Organizer Assembly instructions

BLACK RED WHITE STYLIUS NKOM 1d1sn Assembly manual

BLACK RED WHITE

BLACK RED WHITE STYLIUS NKOM 1d1sn Assembly manual

John Lewis Mixit instructions

John Lewis

John Lewis Mixit instructions

Multistore Ultra-ST Assembly instructions

Multistore

Multistore Ultra-ST Assembly instructions

U-Line S-21114 quick start guide

U-Line

U-Line S-21114 quick start guide

Tradecraft Specialties SWXWNG-2 instruction manual

Tradecraft Specialties

Tradecraft Specialties SWXWNG-2 instruction manual

Bonaldo Art Dining Table manual

Bonaldo

Bonaldo Art Dining Table manual

BRC Mesa Standard Wall Mount Electric HA Table installation guide

BRC

BRC Mesa Standard Wall Mount Electric HA Table installation guide

Ameriwood HOME 7855340EBL manual

Ameriwood HOME

Ameriwood HOME 7855340EBL manual

Whittier Wood Products 70W Assembly instructions

Whittier Wood Products

Whittier Wood Products 70W Assembly instructions

Atlantic Furniture MISSION AH11214 Assembly instructions

Atlantic Furniture

Atlantic Furniture MISSION AH11214 Assembly instructions

Yaasa The Space Saver Desk Basic S Original operating instructions

Yaasa

Yaasa The Space Saver Desk Basic S Original operating instructions

The Land of Nod Everlasting Table Assembly instructions

The Land of Nod

The Land of Nod Everlasting Table Assembly instructions

Amart Furniture Locklyn 72733 Assembly instruction

Amart Furniture

Amart Furniture Locklyn 72733 Assembly instruction

Better Bathrooms BeBa-24919 user manual

Better Bathrooms

Better Bathrooms BeBa-24919 user manual

manuals.online logo
manuals.online logoBrands
  • About & Mission
  • Contact us
  • Privacy Policy
  • Terms and Conditions

Copyright 2025 Manuals.Online. All Rights Reserved.