manuals.online logo
Brands
  1. Home
  2. •
  3. Brands
  4. •
  5. Hornady
  6. •
  7. Safe
  8. •
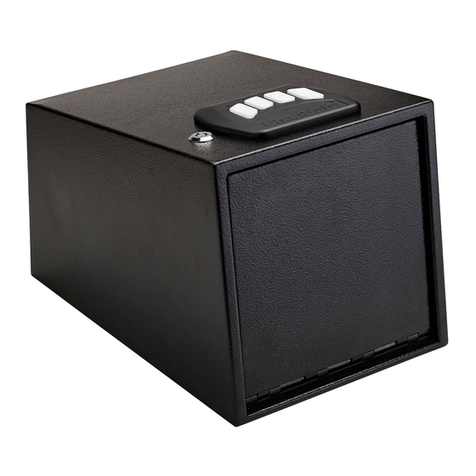
  9. Hornady SnapSafe GlideVault 75404 User manual

Hornady SnapSafe GlideVault 75404 User manual

Narrowest Diameter
of Ferrule
Pin
Spring Plate
Owner’s Manual
GlideVault™
Item No. 75404
Customer Service: PO Box 1848, Grand Island, NE 68802-1848
1-877-214-4470 | Email: info@snapsafe.com
21SNAP0036 | 10/2021
Ext. Dimensions: 15.9" x 12.2" x 4.4"
Int. Dimensions: 13.5" x 9.5" x 3.14"
LOW BATTERY WARNING
If the batteries become weak, the keypad will remain red during operation.
Replace batteries immediately to ensure proper operation of the safe.
SECURITY CABLE INSTALLATION
To maintain the security of the safe, either use the included security cable or
bolt the safe to a secure structure.
USING THE SECURITY CABLE
Wrap the security cable around a secure object and place the ferrule end
through the loop in the cable. With the drawer open, snap the narrowest
diameter of the ferrule into the back of the safe by gently pushing the ferrule
end against the spring plate and sliding the ferrule down. As the drawer
closes, it presses against the spring plate and locks the ferrule in place.
To remove the security cable, open the safe and press the pin above the
ferrule while lifting the ferrule.
BOLTING DOWNTHE SAFE
Remove the drawer by gently pulling it out while pressing the plastic tab on
the left side up, and the tab on the right side down.
Mark and pre-drill holes before installing the appropriate fasteners for your
application.
To reinstall the drawer, carefully align the slides on each side and push the
drawer in.The tabs should click into place.
Weight: 26 Lbs
Power: 4 AAA batteries (not included)
Plastic Tab on
Side of Drawer
Override Keys
The safe is pre-programmed with
default code 1-2-3-4-ENTER.You
must change this code before
storing valuables to ensure the
security of the product.
POWER
1. Open the safe with the barrel override
key. Lock found on back of safe.
2. Remove battery cover inside the
drawer.
3. Insert four AAA batteries and replace
the battery cover.
4. Do not close the door before testing
digital lock.
MICRO-USB BACKUP PORT
The GlideVault includes a micro-USB
port on the front of the drawer. If the
batteries become too weak to open
the safe, use either the mechanical key
override on the back of the safe, or plug
in a battery backup into the front
micro-USB port.To access the micro-
USB port, pry up on the bottom center
of the SnapSafe plastic cover.
After plugging in the battery backup the
safe should power on and open with
the programmed combination code.
Replace all batteries immediately to
ensure proper function.
PROGRAMMING/RESET
COMBINATION CODE
1. Open the safe with either the barrel
override key or default code.
2. Press and hold the yellow program
button inside the drawer for about 3
seconds until the safe beeps.
3. Enter the new 4 to 6 digits code
then press and release the program
button.The safe should beep three
times.
4. Re-enter the same new 4 to 6 digit code then press and release the
program button.The safe should beep three times.
Note: If a mismatched code is entered during programming, the keypad
will blink red and beep three times. Return to step 2 to enter a new code.
5. With the safe open, enter the new code followed by ENTER to confirm the
safe is working properly.The motor should cycle after each correct entry.
Note: Become comfortable with the operation of your safe before storing
anything of value inside.
OPEN SAFE BY COMBINATION CODE
Note: To save batteries, the keypad lights turn off after approximately 10
seconds of inactivity.To enter a code, the keypad must first be turned on by
pressing any of the buttons in the center of the front panel.
• With the keypad on, enter the programmed code followed by ENTER.
• When a correct code is entered, the keypad will beep and blink
blue one time.
• When an incorrect code is entered, the keypad will beep and blink red
two times. After five incorrect entries, the safe will beep and lock out
for 3 minutes.
• The safe drawer should open a few inches automatically under
spring tension.
• If five incorrect codes are entered, the safe will beep and the keypad will
deactivate for 5 minutes.The safe can only be opened with the manual key
during this time.
Note: If the safe does not open automatically, make sure the drawer front
is not blocked by an object (i.e. carpet, bedding, clothes, etc.) and check
to make sure the internal contents are not interfering with the top inside
of the safe.
TO CLOSE THE SAFE
• Push the center of the drawer until you hear the locking lugs engage and
the drawer locks into place.
Note: The drawer is placed under spring tension, so the last few inches
can be a little more difficult to close. Press firmly on the drawer front, but
excessive force should not be used as it may damage the drawer slides or
spring mechanism.
KEYPAD TONES ON/OFF
Press and hold the “1” button for three seconds to toggle sound ON
and OFF.
Note: Toggling the sound off will turn the keypad, program, and alarm
beeps off.Toggling the sound on will turn the keypad, program, and
alarm beeps on.
Program
Button
Plastic
Cover
Micro-USB
Port
Battery
Backup


Other Hornady Safe manuals

Hornady SnapSafe 75430 User manual

Hornady

Hornady SnapSafe 75430 User manual

Hornady SnapSafe 75402 User manual

Hornady

Hornady SnapSafe 75402 User manual

Hornady SnapSafe 75401 User manual

Hornady

Hornady SnapSafe 75401 User manual

Hornady SnapSafe 75530 User manual

Hornady

Hornady SnapSafe 75530 User manual

Hornady SnapSafe 75413 User manual

Hornady

Hornady SnapSafe 75413 User manual

Hornady RAPID 2600KP User manual

Hornady

Hornady RAPID 2600KP User manual

Hornady 98210 User manual

Hornady

Hornady 98210 User manual

Hornady 95430 User manual

Hornady

Hornady 95430 User manual

Hornady SnapSafe Super Titan XL User manual

Hornady

Hornady SnapSafe Super Titan XL User manual

Hornady SnapSafe 75413 User manual

Hornady

Hornady SnapSafe 75413 User manual

Hornady SnapSafe Trunk Safe II User manual

Hornady

Hornady SnapSafe Trunk Safe II User manual

Hornady RAPiD SAFE READY VAULT User manual

Hornady

Hornady RAPiD SAFE READY VAULT User manual

Hornady SnapSafe 75410 User manual

Hornady

Hornady SnapSafe 75410 User manual

Popular Safe manuals by other brands

Haba SACA DIGITAL manual

Haba

Haba SACA DIGITAL manual

Phoenix KS0030E Series operating instructions

Phoenix

Phoenix KS0030E Series operating instructions

Honeywell 2911 user guide

Honeywell

Honeywell 2911 user guide

lifelong LLHSL03 user manual

lifelong

lifelong LLHSL03 user manual

Indel B SAFE 10 E PLUS SMART Instructions for use

Indel B

Indel B SAFE 10 E PLUS SMART Instructions for use

hentech SFFP01 Instruction

hentech

hentech SFFP01 Instruction

Burg Wächter Pure-Safe E FP manual

Burg Wächter

Burg Wächter Pure-Safe E FP manual

Genie Hand TDS Series operating instructions

Genie Hand

Genie Hand TDS Series operating instructions

Royal Sovereign RS-SAFE20 owner's manual

Royal Sovereign

Royal Sovereign RS-SAFE20 owner's manual

SPORTS AFIELD INSTINCT Series instruction manual

SPORTS AFIELD

SPORTS AFIELD INSTINCT Series instruction manual

Honeywell 5113 manual

Honeywell

Honeywell 5113 manual

PROAIM CT-SLBD-01 Assembly manual

PROAIM

PROAIM CT-SLBD-01 Assembly manual

Stack-On QAS-1512 instructions

Stack-On

Stack-On QAS-1512 instructions

Stack-On GCB-1522 instructions

Stack-On

Stack-On GCB-1522 instructions

De Raat Technomax Trony GTR/4P instructions

De Raat

De Raat Technomax Trony GTR/4P instructions

Tellermate LiveSafe user guide

Tellermate

Tellermate LiveSafe user guide

SnapSafe Super Titan XL owner's manual

SnapSafe

SnapSafe Super Titan XL owner's manual

Phoenix GS8010K Instructions & Guarantee Registration

Phoenix

Phoenix GS8010K Instructions & Guarantee Registration

manuals.online logo
manuals.online logoBrands
  • About & Mission
  • Contact us
  • Privacy Policy
  • Terms and Conditions

Copyright 2025 Manuals.Online. All Rights Reserved.