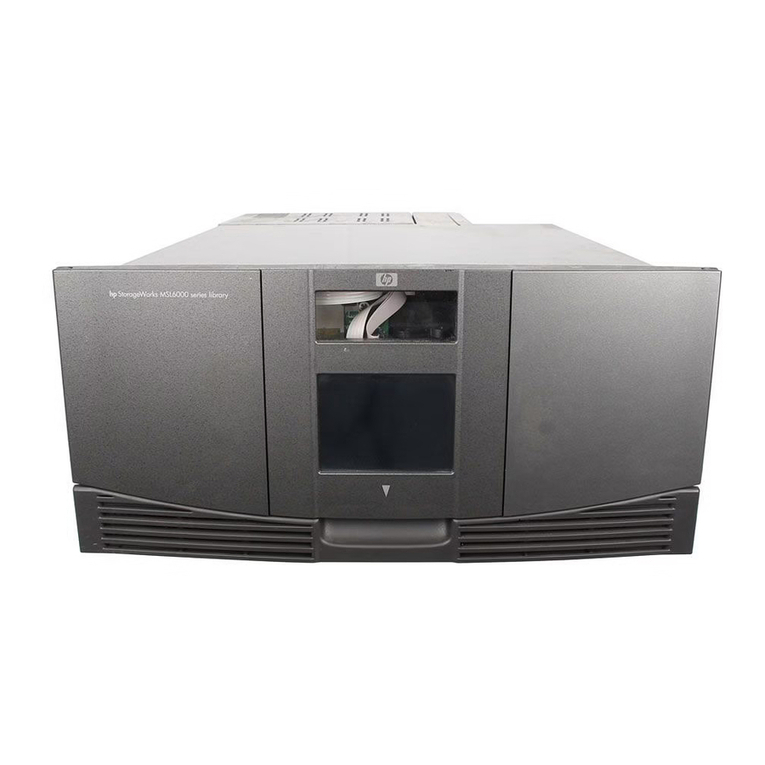
HP E Series User manual

*AD560-96002*
HP StorageWorks
Enterprise Modular Library E-Series
user guide
Part number: AD560–96002
First edition: May 2005

Legal and notice information
© Copyright 2005 Hewlett-Packard Development Company, L.P.
Hewlett-Packard Company makes no warranty of any kind with regard to this material, including, but not limited to, the implied warranties of
merchantability and fitness for a particular purpose. Hewlett-Packard shall not be liable for errors contained herein or for incidental or consequential
damages in connection with the furnishing, performance, or use of this material.
This document contains proprietary information, which is protected by copyright. No part of this document may be photocopied, reproduced, or
translated into another language without the prior written consent of Hewlett-Packard. The information is provided “as is” without warranty of any
kind and is subject to change without notice. The only warranties for HP products and services are set forth in the express warranty statements
accompanying such products and services. Nothing herein should be construed as constituting an additional warranty. HP shall not be liable for
technical or editorial errors or omissions contained herein.
Microsoft, Windows, and Windows XP are U.S. registered trademarks of Microsoft Corporation.
Java is a trademark of Sun Microsystems, Inc.
UNIX is a registered trademark of The Open Group.
Printed in the US.
Enterprise Modular Library E-Series user guide
Regulatory model number LVLDC-0401

Enterprise Modular Library E-Series user guide 3
About this guide. . . . . . . . . . . . . . . . . . . . . . . . . . . . . . . . . . . . . . . . . . . . . 9
Intended audience . . . . . . . . . . . . . . . . . . . . . . . . . . . . . . . . . . . . . . . . . . . . . . . . . . . . . . . . . . . . . . . 9
Related documentation . . . . . . . . . . . . . . . . . . . . . . . . . . . . . . . . . . . . . . . . . . . . . . . . . . . . . . . . . . . . 9
Document conventions and symbols . . . . . . . . . . . . . . . . . . . . . . . . . . . . . . . . . . . . . . . . . . . . . . . . . . 10
Rack stability . . . . . . . . . . . . . . . . . . . . . . . . . . . . . . . . . . . . . . . . . . . . . . . . . . . . . . . . . . . . . . . . . . 11
Taking ESD precautions. . . . . . . . . . . . . . . . . . . . . . . . . . . . . . . . . . . . . . . . . . . . . . . . . . . . . . . . . . . 11
HP technical support . . . . . . . . . . . . . . . . . . . . . . . . . . . . . . . . . . . . . . . . . . . . . . . . . . . . . . . . . . . . . 12
HP-authorized reseller. . . . . . . . . . . . . . . . . . . . . . . . . . . . . . . . . . . . . . . . . . . . . . . . . . . . . . . . . . 12
Helpful web sites . . . . . . . . . . . . . . . . . . . . . . . . . . . . . . . . . . . . . . . . . . . . . . . . . . . . . . . . . . . . . 12
1 Library overview . . . . . . . . . . . . . . . . . . . . . . . . . . . . . . . . . . . . . . . . . . 13
Physical description . . . . . . . . . . . . . . . . . . . . . . . . . . . . . . . . . . . . . . . . . . . . . . . . . . . . . . . . . . . . . 13
Base module . . . . . . . . . . . . . . . . . . . . . . . . . . . . . . . . . . . . . . . . . . . . . . . . . . . . . . . . . . . . . . . . 17
Expansion modules . . . . . . . . . . . . . . . . . . . . . . . . . . . . . . . . . . . . . . . . . . . . . . . . . . . . . . . . . . . 21
Tape drive expansion module. . . . . . . . . . . . . . . . . . . . . . . . . . . . . . . . . . . . . . . . . . . . . . . . . . 21
Card cage expansion module . . . . . . . . . . . . . . . . . . . . . . . . . . . . . . . . . . . . . . . . . . . . . . . . . 22
Functional description . . . . . . . . . . . . . . . . . . . . . . . . . . . . . . . . . . . . . . . . . . . . . . . . . . . . . . . . . . . . 23
Controller cards. . . . . . . . . . . . . . . . . . . . . . . . . . . . . . . . . . . . . . . . . . . . . . . . . . . . . . . . . . . . . . 24
HP StorageWorks Interface Manager card. . . . . . . . . . . . . . . . . . . . . . . . . . . . . . . . . . . . . . . . . 24
HP StorageWorks e2400-FC 2G interface controller . . . . . . . . . . . . . . . . . . . . . . . . . . . . . . . . . . 24
Library robotics controller. . . . . . . . . . . . . . . . . . . . . . . . . . . . . . . . . . . . . . . . . . . . . . . . . . . . . 24
Load ports and magazines . . . . . . . . . . . . . . . . . . . . . . . . . . . . . . . . . . . . . . . . . . . . . . . . . . . . . . 24
Tape drives. . . . . . . . . . . . . . . . . . . . . . . . . . . . . . . . . . . . . . . . . . . . . . . . . . . . . . . . . . . . . . . . . 25
Operator control panel. . . . . . . . . . . . . . . . . . . . . . . . . . . . . . . . . . . . . . . . . . . . . . . . . . . . . . . . . 25
LTO slots. . . . . . . . . . . . . . . . . . . . . . . . . . . . . . . . . . . . . . . . . . . . . . . . . . . . . . . . . . . . . . . . . . . 26
HP StorageWorks Command View TL. . . . . . . . . . . . . . . . . . . . . . . . . . . . . . . . . . . . . . . . . . . . . . . 29
HP StorageWorks Library and Tape Tools. . . . . . . . . . . . . . . . . . . . . . . . . . . . . . . . . . . . . . . . . . . . 29
2 Installing the Library . . . . . . . . . . . . . . . . . . . . . . . . . . . . . . . . . . . . . . . 31
Selecting an installation location. . . . . . . . . . . . . . . . . . . . . . . . . . . . . . . . . . . . . . . . . . . . . . . . . . . . . 31
Floor space. . . . . . . . . . . . . . . . . . . . . . . . . . . . . . . . . . . . . . . . . . . . . . . . . . . . . . . . . . . . . . . . . 31
Power requirements . . . . . . . . . . . . . . . . . . . . . . . . . . . . . . . . . . . . . . . . . . . . . . . . . . . . . . . . . . . 32
Grounding requirements . . . . . . . . . . . . . . . . . . . . . . . . . . . . . . . . . . . . . . . . . . . . . . . . . . . . . . . . 32
Receiving and unpacking. . . . . . . . . . . . . . . . . . . . . . . . . . . . . . . . . . . . . . . . . . . . . . . . . . . . . . . . . . 33
Tools needed for unpacking . . . . . . . . . . . . . . . . . . . . . . . . . . . . . . . . . . . . . . . . . . . . . . . . . . . . . 33
Receiving the library . . . . . . . . . . . . . . . . . . . . . . . . . . . . . . . . . . . . . . . . . . . . . . . . . . . . . . . . . . 33
Unpacking the library. . . . . . . . . . . . . . . . . . . . . . . . . . . . . . . . . . . . . . . . . . . . . . . . . . . . . . . . . . 33
Positioning the library. . . . . . . . . . . . . . . . . . . . . . . . . . . . . . . . . . . . . . . . . . . . . . . . . . . . . . . . . . 39
Storing the packaging materials . . . . . . . . . . . . . . . . . . . . . . . . . . . . . . . . . . . . . . . . . . . . . . . . . . 39
Component installation . . . . . . . . . . . . . . . . . . . . . . . . . . . . . . . . . . . . . . . . . . . . . . . . . . . . . . . . . . . 39
Installing tape drives . . . . . . . . . . . . . . . . . . . . . . . . . . . . . . . . . . . . . . . . . . . . . . . . . . . . . . . . . . 40
Installing the HP StorageWorks e2400-FC 2G interface controllers . . . . . . . . . . . . . . . . . . . . . . . . . . 41
Cabling the library . . . . . . . . . . . . . . . . . . . . . . . . . . . . . . . . . . . . . . . . . . . . . . . . . . . . . . . . . . . . . . 43
Cabling the HP StorageWorks e2400-FC 2G interface controllers . . . . . . . . . . . . . . . . . . . . . . . . . . . 43
Cabling the Interface Manager card . . . . . . . . . . . . . . . . . . . . . . . . . . . . . . . . . . . . . . . . . . . . . . . 44
Connecting the power cables . . . . . . . . . . . . . . . . . . . . . . . . . . . . . . . . . . . . . . . . . . . . . . . . . . . . 44
Installation checklist . . . . . . . . . . . . . . . . . . . . . . . . . . . . . . . . . . . . . . . . . . . . . . . . . . . . . . . . . . . 45
Install HP StorageWorks Command View TL. . . . . . . . . . . . . . . . . . . . . . . . . . . . . . . . . . . . . . . . . . . . . 45
Install HP StorageWorks Library and Tape Tools. . . . . . . . . . . . . . . . . . . . . . . . . . . . . . . . . . . . . . . . . . 45
Contents

4Contents
3 Preparation for use . . . . . . . . . . . . . . . . . . . . . . . . . . . . . . . . . . . . . . . . 47
Preparing tape cartridges . . . . . . . . . . . . . . . . . . . . . . . . . . . . . . . . . . . . . . . . . . . . . . . . . . . . . . . . . 47
Labeling tape cartridges . . . . . . . . . . . . . . . . . . . . . . . . . . . . . . . . . . . . . . . . . . . . . . . . . . . . . . . . 47
Ultrium bar code labels. . . . . . . . . . . . . . . . . . . . . . . . . . . . . . . . . . . . . . . . . . . . . . . . . . . . 48
Media label identifiers . . . . . . . . . . . . . . . . . . . . . . . . . . . . . . . . . . . . . . . . . . . . . . . . . . . . 48
Setting the write-protect switch. . . . . . . . . . . . . . . . . . . . . . . . . . . . . . . . . . . . . . . . . . . . . . . . . . . . 49
Inserting tape cartridges into permanent slots. . . . . . . . . . . . . . . . . . . . . . . . . . . . . . . . . . . . . . . . . . . . 49
Removing the robot shipping restraints . . . . . . . . . . . . . . . . . . . . . . . . . . . . . . . . . . . . . . . . . . . . . . . . 50
Setting the IP address for the HP StorageWorks Interface Manager card . . . . . . . . . . . . . . . . . . . . . . . . . 50
EML configuration through the OCP . . . . . . . . . . . . . . . . . . . . . . . . . . . . . . . . . . . . . . . . . . . . . . . . . . 51
4 Library operation. . . . . . . . . . . . . . . . . . . . . . . . . . . . . . . . . . . . . . . . . . 53
Powering on the library. . . . . . . . . . . . . . . . . . . . . . . . . . . . . . . . . . . . . . . . . . . . . . . . . . . . . . . . . . . 53
Initialization. . . . . . . . . . . . . . . . . . . . . . . . . . . . . . . . . . . . . . . . . . . . . . . . . . . . . . . . . . . . . . . . . . . 53
Front door interlock. . . . . . . . . . . . . . . . . . . . . . . . . . . . . . . . . . . . . . . . . . . . . . . . . . . . . . . . . . . . . . 54
Inserting tape cartridges into the load port. . . . . . . . . . . . . . . . . . . . . . . . . . . . . . . . . . . . . . . . . . . . . . 54
Using the OCP . . . . . . . . . . . . . . . . . . . . . . . . . . . . . . . . . . . . . . . . . . . . . . . . . . . . . . . . . . . . . . . . . 55
OCP icons . . . . . . . . . . . . . . . . . . . . . . . . . . . . . . . . . . . . . . . . . . . . . . . . . . . . . . . . . . . . . . . . . 55
Home screen. . . . . . . . . . . . . . . . . . . . . . . . . . . . . . . . . . . . . . . . . . . . . . . . . . . . . . . . . . . . . . . . 56
OCP tabs and status bar . . . . . . . . . . . . . . . . . . . . . . . . . . . . . . . . . . . . . . . . . . . . . . . . . . . . . . . 56
Timeouts. . . . . . . . . . . . . . . . . . . . . . . . . . . . . . . . . . . . . . . . . . . . . . . . . . . . . . . . . . . . . . . . . . . 57
OCP functions . . . . . . . . . . . . . . . . . . . . . . . . . . . . . . . . . . . . . . . . . . . . . . . . . . . . . . . . . . . . . . . 58
Status screen. . . . . . . . . . . . . . . . . . . . . . . . . . . . . . . . . . . . . . . . . . . . . . . . . . . . . . . . . . . . . . . . 59
Configuration screen . . . . . . . . . . . . . . . . . . . . . . . . . . . . . . . . . . . . . . . . . . . . . . . . . . . . . . . . . . 61
Operations screen . . . . . . . . . . . . . . . . . . . . . . . . . . . . . . . . . . . . . . . . . . . . . . . . . . . . . . . . . . . . 62
Support screen . . . . . . . . . . . . . . . . . . . . . . . . . . . . . . . . . . . . . . . . . . . . . . . . . . . . . . . . . . . . . . 64
Performing an inventory . . . . . . . . . . . . . . . . . . . . . . . . . . . . . . . . . . . . . . . . . . . . . . . . . . . . . . . . . . 64
Controls and indicators . . . . . . . . . . . . . . . . . . . . . . . . . . . . . . . . . . . . . . . . . . . . . . . . . . . . . . . . . . . 65
HP StorageWorks e2400-FC 2G Interface Controller card . . . . . . . . . . . . . . . . . . . . . . . . . . . . . . . . 65
HP StorageWorks Interface Manager card . . . . . . . . . . . . . . . . . . . . . . . . . . . . . . . . . . . . . . . . . . . 66
Library robotics controller . . . . . . . . . . . . . . . . . . . . . . . . . . . . . . . . . . . . . . . . . . . . . . . . . . . . . . . 67
HP StorageWorks Ultrium tape drive . . . . . . . . . . . . . . . . . . . . . . . . . . . . . . . . . . . . . . . . . . . . . . . 68
Library main power switch . . . . . . . . . . . . . . . . . . . . . . . . . . . . . . . . . . . . . . . . . . . . . . . . . . . . . . 69
Base module (or tape drive expansion module) power supply . . . . . . . . . . . . . . . . . . . . . . . . . . . . . . 70
Card cage expansion module power supply . . . . . . . . . . . . . . . . . . . . . . . . . . . . . . . . . . . . . . . . . . 71
Power distribution unit . . . . . . . . . . . . . . . . . . . . . . . . . . . . . . . . . . . . . . . . . . . . . . . . . . . . . . . . . 72
Powering off the library. . . . . . . . . . . . . . . . . . . . . . . . . . . . . . . . . . . . . . . . . . . . . . . . . . . . . . . . . . . 72
5 Maintenance . . . . . . . . . . . . . . . . . . . . . . . . . . . . . . . . . . . . . . . . . . . . 73
Diagnostic support tools . . . . . . . . . . . . . . . . . . . . . . . . . . . . . . . . . . . . . . . . . . . . . . . . . . . . . . . . . . 73
HP StorageWorks Command View TL. . . . . . . . . . . . . . . . . . . . . . . . . . . . . . . . . . . . . . . . . . . . . . . 73
HP StorageWorks Library and Tape Tools. . . . . . . . . . . . . . . . . . . . . . . . . . . . . . . . . . . . . . . . . . . . 73
Troubleshooting . . . . . . . . . . . . . . . . . . . . . . . . . . . . . . . . . . . . . . . . . . . . . . . . . . . . . . . . . . . . . . . . 74
Startup problems . . . . . . . . . . . . . . . . . . . . . . . . . . . . . . . . . . . . . . . . . . . . . . . . . . . . . . . . . . . . . 75
OCP problems . . . . . . . . . . . . . . . . . . . . . . . . . . . . . . . . . . . . . . . . . . . . . . . . . . . . . . . . . . . . . . 77
Robotics problems . . . . . . . . . . . . . . . . . . . . . . . . . . . . . . . . . . . . . . . . . . . . . . . . . . . . . . . . . . . . 78
Operating problems. . . . . . . . . . . . . . . . . . . . . . . . . . . . . . . . . . . . . . . . . . . . . . . . . . . . . . . . . . . 79
Tape drive problems . . . . . . . . . . . . . . . . . . . . . . . . . . . . . . . . . . . . . . . . . . . . . . . . . . . . . . . . . . 80
Interface Manager card problems . . . . . . . . . . . . . . . . . . . . . . . . . . . . . . . . . . . . . . . . . . . . . . . . . 81
Fibre Channel interface controller problems . . . . . . . . . . . . . . . . . . . . . . . . . . . . . . . . . . . . . . . . . . 82
LED indicators . . . . . . . . . . . . . . . . . . . . . . . . . . . . . . . . . . . . . . . . . . . . . . . . . . . . . . . . . . . . 82
Basic troubleshooting . . . . . . . . . . . . . . . . . . . . . . . . . . . . . . . . . . . . . . . . . . . . . . . . . . . . . . . 83
Verifying FC port connection . . . . . . . . . . . . . . . . . . . . . . . . . . . . . . . . . . . . . . . . . . . . . . . . 83
Verifying the interface controller configuration. . . . . . . . . . . . . . . . . . . . . . . . . . . . . . . . . . . . 83
Verifying devices . . . . . . . . . . . . . . . . . . . . . . . . . . . . . . . . . . . . . . . . . . . . . . . . . . . . . . . . 83
Verifying the host configuration . . . . . . . . . . . . . . . . . . . . . . . . . . . . . . . . . . . . . . . . . . . . . . 83
Verifying HBA device driver information . . . . . . . . . . . . . . . . . . . . . . . . . . . . . . . . . . . . . . . . 84
Verifying serial port configuration . . . . . . . . . . . . . . . . . . . . . . . . . . . . . . . . . . . . . . . . . . . . 84

Enterprise Modular Library E-Series user guide 5
Removal and replacement . . . . . . . . . . . . . . . . . . . . . . . . . . . . . . . . . . . . . . . . . . . . . . . . . . . . . . . . . 85
Library robotics controller . . . . . . . . . . . . . . . . . . . . . . . . . . . . . . . . . . . . . . . . . . . . . . . . . . . . . . . 85
Required tools . . . . . . . . . . . . . . . . . . . . . . . . . . . . . . . . . . . . . . . . . . . . . . . . . . . . . . . . . . . . 85
Replacing the library robotics controller. . . . . . . . . . . . . . . . . . . . . . . . . . . . . . . . . . . . . . . . . . . 85
HP StorageWorks Interface Manager card . . . . . . . . . . . . . . . . . . . . . . . . . . . . . . . . . . . . . . . . . . . 86
Required tools . . . . . . . . . . . . . . . . . . . . . . . . . . . . . . . . . . . . . . . . . . . . . . . . . . . . . . . . . . . . 86
Replacing the Interface Manager card. . . . . . . . . . . . . . . . . . . . . . . . . . . . . . . . . . . . . . . . . . . . 86
HP StorageWorks e2400-FC 2G interface controller . . . . . . . . . . . . . . . . . . . . . . . . . . . . . . . . . . . . 88
Required tools . . . . . . . . . . . . . . . . . . . . . . . . . . . . . . . . . . . . . . . . . . . . . . . . . . . . . . . . . . . . 88
Replacing an HP StorageWorks e2400-FC 2G interface controller . . . . . . . . . . . . . . . . . . . . . . . . 88
Base module (or tape drive expansion unit module) power supply . . . . . . . . . . . . . . . . . . . . . . . . . . . 89
Required tools . . . . . . . . . . . . . . . . . . . . . . . . . . . . . . . . . . . . . . . . . . . . . . . . . . . . . . . . . . . . 89
Replacing a power supply . . . . . . . . . . . . . . . . . . . . . . . . . . . . . . . . . . . . . . . . . . . . . . . . . . . . 89
Card cage expansion module power supply . . . . . . . . . . . . . . . . . . . . . . . . . . . . . . . . . . . . . . . . . 91
Required tools . . . . . . . . . . . . . . . . . . . . . . . . . . . . . . . . . . . . . . . . . . . . . . . . . . . . . . . . . . . . 91
Replacing a card cage expansion module power supply . . . . . . . . . . . . . . . . . . . . . . . . . . . . . . . 91
HP StorageWorks Ultrium tape drive . . . . . . . . . . . . . . . . . . . . . . . . . . . . . . . . . . . . . . . . . . . . . . . 92
Required tools . . . . . . . . . . . . . . . . . . . . . . . . . . . . . . . . . . . . . . . . . . . . . . . . . . . . . . . . . . . . 92
Replacing a tape drive module . . . . . . . . . . . . . . . . . . . . . . . . . . . . . . . . . . . . . . . . . . . . . . . . . 92
Periodic and routine maintenance. . . . . . . . . . . . . . . . . . . . . . . . . . . . . . . . . . . . . . . . . . . . . . . . . . . . 94
Maintaining tape cartridges . . . . . . . . . . . . . . . . . . . . . . . . . . . . . . . . . . . . . . . . . . . . . . . . . . . . . 94
Cleaning Ultrium tape drives . . . . . . . . . . . . . . . . . . . . . . . . . . . . . . . . . . . . . . . . . . . . . . . . . . . . . 95
6 Moving the library . . . . . . . . . . . . . . . . . . . . . . . . . . . . . . . . . . . . . . . . 97
Checking the new installation site . . . . . . . . . . . . . . . . . . . . . . . . . . . . . . . . . . . . . . . . . . . . . . . . . . . . 97
Preparing the library for a short move . . . . . . . . . . . . . . . . . . . . . . . . . . . . . . . . . . . . . . . . . . . . . . . . . 97
Preparing the library for long-distance relocation . . . . . . . . . . . . . . . . . . . . . . . . . . . . . . . . . . . . . . . . . 98
Repacking the library . . . . . . . . . . . . . . . . . . . . . . . . . . . . . . . . . . . . . . . . . . . . . . . . . . . . . . . . . . . . 98
Preparing the library for operation . . . . . . . . . . . . . . . . . . . . . . . . . . . . . . . . . . . . . . . . . . . . . . . . . . . 99
A Specifications and characteristics . . . . . . . . . . . . . . . . . . . . . . . . . . . . . 101
B Regulatory compliance notices . . . . . . . . . . . . . . . . . . . . . . . . . . . . . . . 105
Regulatory compliance identification numbers . . . . . . . . . . . . . . . . . . . . . . . . . . . . . . . . . . . . . . . . . . 105
Battery statements . . . . . . . . . . . . . . . . . . . . . . . . . . . . . . . . . . . . . . . . . . . . . . . . . . . . . . . . . . . . . . 105
Dutch battery statement. . . . . . . . . . . . . . . . . . . . . . . . . . . . . . . . . . . . . . . . . . . . . . . . . . . . . . . . 106
French battery statement . . . . . . . . . . . . . . . . . . . . . . . . . . . . . . . . . . . . . . . . . . . . . . . . . . . . . . . 106
German battery statement. . . . . . . . . . . . . . . . . . . . . . . . . . . . . . . . . . . . . . . . . . . . . . . . . . . . . . 107
Italian battery statement . . . . . . . . . . . . . . . . . . . . . . . . . . . . . . . . . . . . . . . . . . . . . . . . . . . . . . . 107
Japanese battery statement . . . . . . . . . . . . . . . . . . . . . . . . . . . . . . . . . . . . . . . . . . . . . . . . . . . . . 108
Spanish battery statement . . . . . . . . . . . . . . . . . . . . . . . . . . . . . . . . . . . . . . . . . . . . . . . . . . . . . . 108
Federal Communications Commission notice . . . . . . . . . . . . . . . . . . . . . . . . . . . . . . . . . . . . . . . . . . . 109
FCC rating label . . . . . . . . . . . . . . . . . . . . . . . . . . . . . . . . . . . . . . . . . . . . . . . . . . . . . . . . . . . . 109
Class A equipment . . . . . . . . . . . . . . . . . . . . . . . . . . . . . . . . . . . . . . . . . . . . . . . . . . . . . . . . 109
Class B equipment . . . . . . . . . . . . . . . . . . . . . . . . . . . . . . . . . . . . . . . . . . . . . . . . . . . . . . . . 109
Declaration of Conformity for products marked with the FCC logo, United States only.. . . . . . . . . . . . 110
Modification . . . . . . . . . . . . . . . . . . . . . . . . . . . . . . . . . . . . . . . . . . . . . . . . . . . . . . . . . . . . . . . 110
Cables . . . . . . . . . . . . . . . . . . . . . . . . . . . . . . . . . . . . . . . . . . . . . . . . . . . . . . . . . . . . . . . . . . . 110
Canadian notice (Avis Canadien). . . . . . . . . . . . . . . . . . . . . . . . . . . . . . . . . . . . . . . . . . . . . . . . . . . 110
Class A equipment. . . . . . . . . . . . . . . . . . . . . . . . . . . . . . . . . . . . . . . . . . . . . . . . . . . . . . . . . . . 110
Class B equipment . . . . . . . . . . . . . . . . . . . . . . . . . . . . . . . . . . . . . . . . . . . . . . . . . . . . . . . . . . . 110
European Union notice . . . . . . . . . . . . . . . . . . . . . . . . . . . . . . . . . . . . . . . . . . . . . . . . . . . . . . . . . . 111
Japanese notices . . . . . . . . . . . . . . . . . . . . . . . . . . . . . . . . . . . . . . . . . . . . . . . . . . . . . . . . . . . . . . 111
Japanese power cord statement. . . . . . . . . . . . . . . . . . . . . . . . . . . . . . . . . . . . . . . . . . . . . . . . . . 111
Korean notices . . . . . . . . . . . . . . . . . . . . . . . . . . . . . . . . . . . . . . . . . . . . . . . . . . . . . . . . . . . . . . . . 112
Class A equipment. . . . . . . . . . . . . . . . . . . . . . . . . . . . . . . . . . . . . . . . . . . . . . . . . . . . . . . . . . . 112
Class B equipment . . . . . . . . . . . . . . . . . . . . . . . . . . . . . . . . . . . . . . . . . . . . . . . . . . . . . . . . . . . 112
Taiwanese notices . . . . . . . . . . . . . . . . . . . . . . . . . . . . . . . . . . . . . . . . . . . . . . . . . . . . . . . . . . . . . 112

6Contents
BSMI Class A notice. . . . . . . . . . . . . . . . . . . . . . . . . . . . . . . . . . . . . . . . . . . . . . . . . . . . . . . . . . 112
Taiwan battery recycle statement . . . . . . . . . . . . . . . . . . . . . . . . . . . . . . . . . . . . . . . . . . . . . . . . . 113
Laser compliance . . . . . . . . . . . . . . . . . . . . . . . . . . . . . . . . . . . . . . . . . . . . . . . . . . . . . . . . . . . . . . 113
Dutch laser notice . . . . . . . . . . . . . . . . . . . . . . . . . . . . . . . . . . . . . . . . . . . . . . . . . . . . . . . . . . . 113
French laser notice. . . . . . . . . . . . . . . . . . . . . . . . . . . . . . . . . . . . . . . . . . . . . . . . . . . . . . . . . . . 114
German laser notice . . . . . . . . . . . . . . . . . . . . . . . . . . . . . . . . . . . . . . . . . . . . . . . . . . . . . . . . . 114
Italian laser notice . . . . . . . . . . . . . . . . . . . . . . . . . . . . . . . . . . . . . . . . . . . . . . . . . . . . . . . . . . . 114
Japanese laser notice. . . . . . . . . . . . . . . . . . . . . . . . . . . . . . . . . . . . . . . . . . . . . . . . . . . . . . . . . 115
Spanish laser notice. . . . . . . . . . . . . . . . . . . . . . . . . . . . . . . . . . . . . . . . . . . . . . . . . . . . . . . . . . 115
Recycling notices . . . . . . . . . . . . . . . . . . . . . . . . . . . . . . . . . . . . . . . . . . . . . . . . . . . . . . . . . . . . . . 116
Disposal of waste equipment by users in private household in the European Union . . . . . . . . . . . . . . 116
Czechoslovakian notice . . . . . . . . . . . . . . . . . . . . . . . . . . . . . . . . . . . . . . . . . . . . . . . . . . . . . . . 116
Danish notice . . . . . . . . . . . . . . . . . . . . . . . . . . . . . . . . . . . . . . . . . . . . . . . . . . . . . . . . . . . . . . 116
Dutch notice . . . . . . . . . . . . . . . . . . . . . . . . . . . . . . . . . . . . . . . . . . . . . . . . . . . . . . . . . . . . . . . 117
Estonian notice . . . . . . . . . . . . . . . . . . . . . . . . . . . . . . . . . . . . . . . . . . . . . . . . . . . . . . . . . . . . . 117
Finnish notice . . . . . . . . . . . . . . . . . . . . . . . . . . . . . . . . . . . . . . . . . . . . . . . . . . . . . . . . . . . . . . 117
French notice . . . . . . . . . . . . . . . . . . . . . . . . . . . . . . . . . . . . . . . . . . . . . . . . . . . . . . . . . . . . . . 118
German notice . . . . . . . . . . . . . . . . . . . . . . . . . . . . . . . . . . . . . . . . . . . . . . . . . . . . . . . . . . . . . 118
Greek notice . . . . . . . . . . . . . . . . . . . . . . . . . . . . . . . . . . . . . . . . . . . . . . . . . . . . . . . . . . . . . . . 118
Hungarian notice. . . . . . . . . . . . . . . . . . . . . . . . . . . . . . . . . . . . . . . . . . . . . . . . . . . . . . . . . . . . 119
Italian notice . . . . . . . . . . . . . . . . . . . . . . . . . . . . . . . . . . . . . . . . . . . . . . . . . . . . . . . . . . . . . . . 119
Latvian notice . . . . . . . . . . . . . . . . . . . . . . . . . . . . . . . . . . . . . . . . . . . . . . . . . . . . . . . . . . . . . . 119
Lithuanian notice . . . . . . . . . . . . . . . . . . . . . . . . . . . . . . . . . . . . . . . . . . . . . . . . . . . . . . . . . . . . 120
Polish notice . . . . . . . . . . . . . . . . . . . . . . . . . . . . . . . . . . . . . . . . . . . . . . . . . . . . . . . . . . . . . . . 120
Portuguese notice . . . . . . . . . . . . . . . . . . . . . . . . . . . . . . . . . . . . . . . . . . . . . . . . . . . . . . . . . . . 120
Slovakian notice . . . . . . . . . . . . . . . . . . . . . . . . . . . . . . . . . . . . . . . . . . . . . . . . . . . . . . . . . . . . 121
Slovenian notice . . . . . . . . . . . . . . . . . . . . . . . . . . . . . . . . . . . . . . . . . . . . . . . . . . . . . . . . . . . . 121
Spanish notice. . . . . . . . . . . . . . . . . . . . . . . . . . . . . . . . . . . . . . . . . . . . . . . . . . . . . . . . . . . . . . 121
Swedish notice . . . . . . . . . . . . . . . . . . . . . . . . . . . . . . . . . . . . . . . . . . . . . . . . . . . . . . . . . . . . . 122
C Ordering HP tape cartridges and bar code label packs . . . . . . . . . . . . . . 123
D Installing a redundant PDU . . . . . . . . . . . . . . . . . . . . . . . . . . . . . . . . . . 125
Leakage current . . . . . . . . . . . . . . . . . . . . . . . . . . . . . . . . . . . . . . . . . . . . . . . . . . . . . . . . . . . . . . . 125
Redundancy. . . . . . . . . . . . . . . . . . . . . . . . . . . . . . . . . . . . . . . . . . . . . . . . . . . . . . . . . . . . . . . . . . 125
Power rating . . . . . . . . . . . . . . . . . . . . . . . . . . . . . . . . . . . . . . . . . . . . . . . . . . . . . . . . . . . . . . . . . 126
Placement of redundant PDU components . . . . . . . . . . . . . . . . . . . . . . . . . . . . . . . . . . . . . . . . . . . . . 126
Installation of redundant PDU components . . . . . . . . . . . . . . . . . . . . . . . . . . . . . . . . . . . . . . . . . . . . . 127
Glossary . . . . . . . . . . . . . . . . . . . . . . . . . . . . . . . . . . . . . . . . . . . . . . . . 129
Index . . . . . . . . . . . . . . . . . . . . . . . . . . . . . . . . . . . . . . . . . . . . . . . . . . 133

Enterprise Modular Library E-Series user guide 7
Figures
1 Enterprise Modular Library E-Series, Model 103e . . . . . . . . . . . . . . . . . . . . . . . . . . . . . . . . . . . . . 14
2 Enterprise Modular Library E-Series, Model 245e . . . . . . . . . . . . . . . . . . . . . . . . . . . . . . . . . . . . . 15
3 Example of a fully expanded Enterprise Modular Library E-Series. . . . . . . . . . . . . . . . . . . . . . . . . . . 16
4 Robotic unit. . . . . . . . . . . . . . . . . . . . . . . . . . . . . . . . . . . . . . . . . . . . . . . . . . . . . . . . . . . . . . . . 17
5 Library load ports on 42U configuration . . . . . . . . . . . . . . . . . . . . . . . . . . . . . . . . . . . . . . . . . . . . 18
6 Base module card cage . . . . . . . . . . . . . . . . . . . . . . . . . . . . . . . . . . . . . . . . . . . . . . . . . . . . . . . 19
7 Library robotics controller . . . . . . . . . . . . . . . . . . . . . . . . . . . . . . . . . . . . . . . . . . . . . . . . . . . . . . 19
8 HP StorageWorks Interface Manager card . . . . . . . . . . . . . . . . . . . . . . . . . . . . . . . . . . . . . . . . . . 20
9 HP StorageWorks e2400-FC 2G interface controller . . . . . . . . . . . . . . . . . . . . . . . . . . . . . . . . . . . 20
10 Ultrium tape drive . . . . . . . . . . . . . . . . . . . . . . . . . . . . . . . . . . . . . . . . . . . . . . . . . . . . . . . . . . . 20
11 Tape drive expansion module . . . . . . . . . . . . . . . . . . . . . . . . . . . . . . . . . . . . . . . . . . . . . . . . . . . 21
12 Expansion card cage module . . . . . . . . . . . . . . . . . . . . . . . . . . . . . . . . . . . . . . . . . . . . . . . . . . . 22
13 EML network . . . . . . . . . . . . . . . . . . . . . . . . . . . . . . . . . . . . . . . . . . . . . . . . . . . . . . . . . . . . . . . 23
14 Base Module slot mapping . . . . . . . . . . . . . . . . . . . . . . . . . . . . . . . . . . . . . . . . . . . . . . . . . . . . . 27
15 Drive expansion module slot mapping . . . . . . . . . . . . . . . . . . . . . . . . . . . . . . . . . . . . . . . . . . . . . 28
16 Card cage expansion module slot mapping . . . . . . . . . . . . . . . . . . . . . . . . . . . . . . . . . . . . . . . . . 28
17 Minimum floor space requirements—unpacking site . . . . . . . . . . . . . . . . . . . . . . . . . . . . . . . . . . . . 34
18 Removing the bands. . . . . . . . . . . . . . . . . . . . . . . . . . . . . . . . . . . . . . . . . . . . . . . . . . . . . . . . . . 34
19 Removing the box top cover . . . . . . . . . . . . . . . . . . . . . . . . . . . . . . . . . . . . . . . . . . . . . . . . . . . . 35
20 Removing the box retaining clips . . . . . . . . . . . . . . . . . . . . . . . . . . . . . . . . . . . . . . . . . . . . . . . . . 35
21 Removing the cardboard sides . . . . . . . . . . . . . . . . . . . . . . . . . . . . . . . . . . . . . . . . . . . . . . . . . . 36
22 Removing the corner posts . . . . . . . . . . . . . . . . . . . . . . . . . . . . . . . . . . . . . . . . . . . . . . . . . . . . . 36
23 Removing plastic bag over rack. . . . . . . . . . . . . . . . . . . . . . . . . . . . . . . . . . . . . . . . . . . . . . . . . . 37
24 Unbolt rack hold-down brackets. . . . . . . . . . . . . . . . . . . . . . . . . . . . . . . . . . . . . . . . . . . . . . . . . . 37
25 Attaching the ramp assembly . . . . . . . . . . . . . . . . . . . . . . . . . . . . . . . . . . . . . . . . . . . . . . . . . . . 38
26 Rolling the rack down the ramp . . . . . . . . . . . . . . . . . . . . . . . . . . . . . . . . . . . . . . . . . . . . . . . . . . 38
27 Remove drive cover plates . . . . . . . . . . . . . . . . . . . . . . . . . . . . . . . . . . . . . . . . . . . . . . . . . . . . . 40
28 Tighten the mounting bracket captive screw . . . . . . . . . . . . . . . . . . . . . . . . . . . . . . . . . . . . . . . . . 41
29 Interface controller locations . . . . . . . . . . . . . . . . . . . . . . . . . . . . . . . . . . . . . . . . . . . . . . . . . . . . 42
30 Tape drive FC connector. . . . . . . . . . . . . . . . . . . . . . . . . . . . . . . . . . . . . . . . . . . . . . . . . . . . . . . 43
31 Tape drive FC connections . . . . . . . . . . . . . . . . . . . . . . . . . . . . . . . . . . . . . . . . . . . . . . . . . . . . . 43
32 Attaching an Ultrium bar code label. . . . . . . . . . . . . . . . . . . . . . . . . . . . . . . . . . . . . . . . . . . . . . . 48
33 Proper HP Ultrium LTO2 or LTO3 bar code label placement . . . . . . . . . . . . . . . . . . . . . . . . . . . . . . 48
34 Write-protecting HP Ultrium tape cartridges. . . . . . . . . . . . . . . . . . . . . . . . . . . . . . . . . . . . . . . . . . 49
35 Robot shipping restraints. . . . . . . . . . . . . . . . . . . . . . . . . . . . . . . . . . . . . . . . . . . . . . . . . . . . . . . 50
36 Inserting a magazine into the load port . . . . . . . . . . . . . . . . . . . . . . . . . . . . . . . . . . . . . . . . . . . . 54
37 Home screen. . . . . . . . . . . . . . . . . . . . . . . . . . . . . . . . . . . . . . . . . . . . . . . . . . . . . . . . . . . . . . . 56
38 OCP navigation. . . . . . . . . . . . . . . . . . . . . . . . . . . . . . . . . . . . . . . . . . . . . . . . . . . . . . . . . . . . . 56
39 OCP functions . . . . . . . . . . . . . . . . . . . . . . . . . . . . . . . . . . . . . . . . . . . . . . . . . . . . . . . . . . . . . . 58
40 OCP Status screen . . . . . . . . . . . . . . . . . . . . . . . . . . . . . . . . . . . . . . . . . . . . . . . . . . . . . . . . . . . 59
41 OCP Configuration screen . . . . . . . . . . . . . . . . . . . . . . . . . . . . . . . . . . . . . . . . . . . . . . . . . . . . . 61
42 OCP Operations screen . . . . . . . . . . . . . . . . . . . . . . . . . . . . . . . . . . . . . . . . . . . . . . . . . . . . . . . 62
43 OCP Support screen. . . . . . . . . . . . . . . . . . . . . . . . . . . . . . . . . . . . . . . . . . . . . . . . . . . . . . . . . . 64
44 e2400-FC 2G interface controller indicators . . . . . . . . . . . . . . . . . . . . . . . . . . . . . . . . . . . . . . . . . 65
45 Interface Manager card reset and indicators . . . . . . . . . . . . . . . . . . . . . . . . . . . . . . . . . . . . . . . . . 66
46 Library robotics controller indicators. . . . . . . . . . . . . . . . . . . . . . . . . . . . . . . . . . . . . . . . . . . . . . . 67
47 HP Ultrium tape drive indicator . . . . . . . . . . . . . . . . . . . . . . . . . . . . . . . . . . . . . . . . . . . . . . . . . . 68
48 Library main power switch control . . . . . . . . . . . . . . . . . . . . . . . . . . . . . . . . . . . . . . . . . . . . . . . . 69
49 Autoranging power supply indicator . . . . . . . . . . . . . . . . . . . . . . . . . . . . . . . . . . . . . . . . . . . . . . 70
50 Card cage expansion module power supply indicators. . . . . . . . . . . . . . . . . . . . . . . . . . . . . . . . . . 71
51 Power distribution unit controls and indicator . . . . . . . . . . . . . . . . . . . . . . . . . . . . . . . . . . . . . . . . 72
52 Removing the memory module from the Interface Manager card . . . . . . . . . . . . . . . . . . . . . . . . . . . 87
53 Screws securing power supply to base module . . . . . . . . . . . . . . . . . . . . . . . . . . . . . . . . . . . . . . . 90
54 Removing the power supply bracket . . . . . . . . . . . . . . . . . . . . . . . . . . . . . . . . . . . . . . . . . . . . . . . 90
55 Connecting the FC cable into the new drive . . . . . . . . . . . . . . . . . . . . . . . . . . . . . . . . . . . . . . . . . 93
56 Repacking the library . . . . . . . . . . . . . . . . . . . . . . . . . . . . . . . . . . . . . . . . . . . . . . . . . . . . . . . . . 98
57 Redundant PDU and power strip placement. . . . . . . . . . . . . . . . . . . . . . . . . . . . . . . . . . . . . . . . . 127

8Contents
Tables
1 Document conventions . . . . . . . . . . . . . . . . . . . . . . . . . . . . . . . . . . . . . . . . . . . . . . . . . . . . . . . . . 10
2 Ultrium compatibility . . . . . . . . . . . . . . . . . . . . . . . . . . . . . . . . . . . . . . . . . . . . . . . . . . . . . . . . . . 25
3 OCP icons . . . . . . . . . . . . . . . . . . . . . . . . . . . . . . . . . . . . . . . . . . . . . . . . . . . . . . . . . . . . . . . . . 55
4 Status screen functions . . . . . . . . . . . . . . . . . . . . . . . . . . . . . . . . . . . . . . . . . . . . . . . . . . . . . . . . . 59
5 Configuration screen functions . . . . . . . . . . . . . . . . . . . . . . . . . . . . . . . . . . . . . . . . . . . . . . . . . . . 61
6 Operations screen functions . . . . . . . . . . . . . . . . . . . . . . . . . . . . . . . . . . . . . . . . . . . . . . . . . . . . . 62
7 Support screen functions. . . . . . . . . . . . . . . . . . . . . . . . . . . . . . . . . . . . . . . . . . . . . . . . . . . . . . . . 64
8 e2400-FC 2G interface controller indicators . . . . . . . . . . . . . . . . . . . . . . . . . . . . . . . . . . . . . . . . . .65
9 Interface Manager card reset and indicators. . . . . . . . . . . . . . . . . . . . . . . . . . . . . . . . . . . . . . . . . .66
10 Library robotics controller indicators. . . . . . . . . . . . . . . . . . . . . . . . . . . . . . . . . . . . . . . . . . . . . . . . 67
11 HP Ultrium tape drive indicator . . . . . . . . . . . . . . . . . . . . . . . . . . . . . . . . . . . . . . . . . . . . . . . . . . . 68
12 Library main power switch control . . . . . . . . . . . . . . . . . . . . . . . . . . . . . . . . . . . . . . . . . . . . . . . . . 69
13 Autoranging power supply indicator . . . . . . . . . . . . . . . . . . . . . . . . . . . . . . . . . . . . . . . . . . . . . . . 70
14 Card cage expansion module power supply indicators . . . . . . . . . . . . . . . . . . . . . . . . . . . . . . . . . . 71
15 Power distribution unit controls and indicator . . . . . . . . . . . . . . . . . . . . . . . . . . . . . . . . . . . . . . . . . 72
16 Fault isolation to a specific area . . . . . . . . . . . . . . . . . . . . . . . . . . . . . . . . . . . . . . . . . . . . . . . . . . 74
17 Startup problems . . . . . . . . . . . . . . . . . . . . . . . . . . . . . . . . . . . . . . . . . . . . . . . . . . . . . . . . . . . . . 75
18 OCP problems . . . . . . . . . . . . . . . . . . . . . . . . . . . . . . . . . . . . . . . . . . . . . . . . . . . . . . . . . . . . . . 77
19 Robotics problems . . . . . . . . . . . . . . . . . . . . . . . . . . . . . . . . . . . . . . . . . . . . . . . . . . . . . . . . . . . . 78
20 Problems during library operation . . . . . . . . . . . . . . . . . . . . . . . . . . . . . . . . . . . . . . . . . . . . . . . . . 79
21 Tape drive problems . . . . . . . . . . . . . . . . . . . . . . . . . . . . . . . . . . . . . . . . . . . . . . . . . . . . . . . . . . 80
22 Common Interface Manager issues . . . . . . . . . . . . . . . . . . . . . . . . . . . . . . . . . . . . . . . . . . . . . . . . 81
23 Terminal configuration settings . . . . . . . . . . . . . . . . . . . . . . . . . . . . . . . . . . . . . . . . . . . . . . . . . . . 84
24 EML configurations . . . . . . . . . . . . . . . . . . . . . . . . . . . . . . . . . . . . . . . . . . . . . . . . . . . . . . . . . . 101
25 Library component specifications . . . . . . . . . . . . . . . . . . . . . . . . . . . . . . . . . . . . . . . . . . . . . . . . . 102
26 Library environmental specifications. . . . . . . . . . . . . . . . . . . . . . . . . . . . . . . . . . . . . . . . . . . . . . . 104
27 Acoustics . . . . . . . . . . . . . . . . . . . . . . . . . . . . . . . . . . . . . . . . . . . . . . . . . . . . . . . . . . . . . . . . . 104
28 HP StorageWorks Ultrium tape drive comparisons . . . . . . . . . . . . . . . . . . . . . . . . . . . . . . . . . . . . . 104
29 HP media and bar code labels . . . . . . . . . . . . . . . . . . . . . . . . . . . . . . . . . . . . . . . . . . . . . . . . . . 124

Enterprise Modular Library E-Series user guide 9
About this guide
This guide provides information about:
•Installing the HP StorageWorks Enterprise Modular Library (EML) E-Series.
•Preparing the EML for use.
•Operating the EML.
•Troubleshooting the EML.
•Removing and replacing components.
•Relocating the EML.
Intended audience
This guide is intended for system administrators, system engineers, and operators who need physical and
functional knowledge of the EML E-Series Library.
Related documentation
In addition to this guide, please see these other documents for this product:
•HP StorageWorks Enterprise Modular Library E-Series getting started poster
•
HP StorageWorks Interface Manager and Command View TL user guide
•
HP StorageWorks Library and Tape Tools (L&TT) user guide
These and other HP documents can be found on the HP web site: http://www.docs.hp.com.

10 About this guide
Document conventions and symbols
WARNING! Indicates that failure to follow directions could result in bodily harm or death.
CAUTION: Indicates that failure to follow directions could result in damage to equipment or data.
IMPORTANT: Provides clarifying information or specific instructions.
NOTE: Provides additional information.
TIP: Provides helpful hints and shortcuts.
Table 1 Document conventions
Convention Element
Medium blue text: Figure 1 Cross-reference links and e-mail addresses
Medium blue, underlined text
(http://www.hp.com)Web site addresses
Bold font •Key names
•Text typed into a graphical user interface (GUI) element, such as
into a box
•GUI elements that are clicked or selected, such as menu and list
items, buttons, and check boxes
Italics font Text emphasis
Monospace font •File and directory names
•System output
•Code
•Text typed at the command-line
Monospace, italic font •Code variables
•Command-line variables
Monospace, bold font Emphasis of file and directory names, system output, code, and text
typed at the command-line
!

Enterprise Modular Library E-Series user guide 11
Rack stability
WARNING! To reduce the risk of personal injury or damage to equipment:
•Extend leveling jacks to the floor.
•Ensure that the full weight of the rack rests on the leveling jacks.
For information on implementing these safety features, see the HP10000 Series Rack reference guide.
Information on HP rack products can be obtained at http://www.hp.com/products/racks.
Taking ESD precautions
Components within the library contain static-sensitive parts. To prevent damage to these parts while
performing installation, maintenance, or replacement procedures, observe the following electostatic
discharge (ESD) precautions:
•Always use Ethernet cables that come with your product.
•Use an antistatic wrist strap when touching internal rack components. To use the wrist strap properly,
place the band around your wrist and attach the clip to the rack frame. Keep the strap on until you
are ready to close the rack doors.
•Keep static-sensitive parts in their shipping containers until ready for installation.
•Do not place static-sensitive parts on any metal surface. If you need to put down a static-sensitive part,
place it inside its protective shipping bag or on a grounded antistatic mat.
•Avoid direct contact with static-sensitive parts. Avoid touching connectors and discrete components.
•Close rack doors when not working on the rack.
•Be careful when installing the rack or handling components in dry climates or environments where
cold weather heating is used. Environments such as these with lower relative humidity have greater
potential to produce static electricity.
NOTE: In environments with high potential for static electricity, take additional precautions, such as the use
of an antistatic smock or a grounded antistatic mat.

12 About this guide
HP technical support
Telephone numbers for worldwide technical support are listed on the HP web site:
http://www.hp.com/support/. Collect the following information before calling:
•Technical support registration number (if applicable)
•Product serial numbers
•Product model names and numbers
•System configuration
•Applicable error messages
•Operating system type and revision level
•Detailed, specific questions
For continuous quality improvement, calls may be recorded or monitored.
HP strongly recommends that customers sign up online using the Subscriber's choice web site at
http://www.hp.com/go/e-updates.
•Subscribing to this service provides you with e-mail updates on the latest product enhancements,
newest versions of drivers, and firmware documentation updates as well as instant access to
numerous other product resources.
•After signing up, you can quickly locate your products by selecting Business support and then Storage
under Product Category.
HP-authorized reseller
For the name of your nearest HP-authorized reseller:
•In the United States, call 1-800-345-1518.
•Elsewhere, visit http://www.hp.com and click Contact HP to find locations and telephone numbers.
Helpful web sites
For additional product information, see the following web sites:
•http://www.hp.com
•http://www.hp.com/go/storage
•http://www.hp.com/support/
•http://www.docs.hp.com
•http://www.hp.com/support/cvtl
•http://www.hp.com/products/racks

Enterprise Modular Library E-Series user guide 13
1Libraryoverview
The HP StorageWorks Enterprise Modular Library (EML) E-Series is a self-contained, fully automated tape
cartridge storage and retrieval system. The EML is a part of the Extended Tape Library Architecture
(ETLA), using HP controller-based manageability interfaces communicating over a SAN to provide
reliability, security, network awareness, and diagnostic features to tape libraries.
This chapter covers the following EML topics:
•Physical description, page 13
•Functional description, page 23
Physical description
The EML arrives fully contained in a 42U rack on a shock pallet. The rack contains one power distribution
unit (PDU) mounted on the side, and two extension bars (power strips) containing10-amp outlets mounted
to the rear rails. The front and rear doors are perforated to allow sufficient air circulation, with the split
rear doors allowing full access to library modules, without blocking rack aisles.
The EML is orderable in three HP rack configurations:
•Model 103e (see Figure 1)—A 12U design consisting of a base module that contains a robot, an
operator control panel (OCP), load port, card cage (with a preinstalled library robotics controller and
Interface Manager card), and mounting space for up to four tape drives. A total of 103 Linear
Tape-Open (LTO) slots (98 permanent and 5 configurable) are available. Tape drives and Fibre
Channel (FC) interface controllers are ordered separately.
•Model 103e bundle with drives and media—The same as the model described above, with four HP
Ultrium 460 tape drives, FC interface controller, media, cables, and cleaning cartridge included. The
tape drives and interface controller come preinstalled in the rack.
•Model 245e (see Figure 2)—A 24U design consisting of the components in the Model 103e
configuration, plus an 8U drive expansion module with load port, and a 4U card cage expansion
module. A total of 245 LTO slots (230 permanent and 15 configurable) are provided with eight tape
drives allowed. Tape drives and FC interface controllers are ordered separately.
In addition, HP provides kits that enable you to expand the library configuration to 42U (with 2U at the
top of the rack reserved for customer use). An additional power distribution unit (PDU) and redundant
power supplies can be added to the EML to provide failsafe power features (see ”Installing a redundant
PDU” on page 125 for guidelines). A fully-configured rack can provide a maximum of 442 LTO slots (407
permanent and 35 configurable) with as many as 16 tape drives (see Figure 3). All configurations, with
their slot and tape drive capacities, are listed in Table 24 in Appendix A.
Components described in the following sections comprise an orderable EML or can be installed in an EML
for additional capacity.

14 Library overview
Figure 1 Enterprise Modular Library E-Series, Model 103e
1Base module
2Robotics unit (internal)
3Viewing window
4Operator control panel
5Load port (5-cartridge capacity)
6Redundant power supply module
(optional)
7Primary power supply module
8Customer reserved space (2U)
9Library main power switch
10 Library fans
11 Base module card cage
12 Tape drives
13 Cable management features
14 Extension bars (power strips)
15 Power distribution unit
10447
13
2
3
4
5
12
12
12
12
6
7
89
10
11
13
14
15
6

Enterprise Modular Library E-Series user guide 15
Figure 2 Enterprise Modular Library E-Series, Model 245e
1See Model 103e figure
2Tape drive expansion module
3Card cage expansion module
4Viewing window
5Load port (10-cartridge capacity)
6Primary power supply module
7Redundant power supply module (optional)
8Tape drives
9Cable management features
10 Card cage module fans
11 Redundant card cage power supplies
10448
3
1
2
3
4
4
4
5
8
8
8
8
9
10
11
6
7
4

16 Library overview
Figure 3 Example of a fully expanded Enterprise Modular Library E-Series
10449
3

Enterprise Modular Library E-Series user guide 17
Base module
The 12U base module (see Figure 1) resides below the 2U space at the top of the rack reserved for
customer use. The module contains a total of 103 LTO slots. Nine of these slots can be configured as
reserved, and five slots are configurable within a load port through the use of a removable magazine. The
number of usable permanent slots depends on whether it is the lowest module vertically placed in the
library. The library floor is always attached to the lowest library module. If the library floor is attached to
the base module, the last two rows (containing 16 slots) are blocked and cannot be used.
The robotics unit (see Figure 4) is located at the top of the base module. When fully retracted (or parked),
the robot is fully contained within a 2U space. For safety reasons, the robot is parked before the front
door can be opened.
Within the robotics unit, a lift table assembly contains a motor, pulleys, and cables to move the table up
and down to a desired level in the library. The picker assembly moves front and back, and side-to-side
along the table. A bar code scanner, attached to the bottom of the hand assembly, scans targets on rack
components for alignment, as well as bar code labels on tape cartridges, if they are present. The picker
has fingers that remove and insert cartridges among storage slots, tape drives, or load ports.
Figure 4 Robotic unit
1Lift flex cable
2Lift drive assembly
3Picker assembly
4Lift suspension cable (4x)
5Table
10456
2
3
5
1
4

18 Library overview
The base module has two windows on the front for viewing the robotic motion inside the library. A load
port door is located to the right front (see Figure 5) where a 5-cartridge magazine can be loaded with
tape cartridges for insertion into or removal from the library. The load port can also be used for
additional tape storage. An operator control panel (OCP) is located at the bottom front of the module.
Figure 5 Library load ports on 42U configuration
The base module contains an autoranging power supply (a redundant power supply is optional), card
cage, cable management feature, and space for mounting up to four LTO-technology tape drives on the
back.
The card cage in the base module (see Figure 6) provides four cPCI slots for the following:
•Library robotics controller (see Figure 7)—A single slot, 6U-wide cPCI board having Ethernet ports
and an RS-232 port. One Ethernet port connects this controller to the Interface Manager card.
•HP StorageWorks Interface Manager card (see Figure 8)—A single slot, 4U-wide cPCI board having
six Ethernet ports. This board contains 128 MB of dynamic random access memory (DRAM) plus a
256 MB CompactFlash card, both in their own sockets. A 2U-wide adapter panel next to the 4U-wide
Interface Manager card allows it to fit in the lowest 6U-wide card cage slot.
•HP StorageWorks e2400-FC 2G interface controller (see Figure 9)—A single slot, 6U-wide cPCI
board, having two 2-Gbps FC ports for connecting to the SAN, along with four 2-Gbps FC ports to
connect up to four HP Ultrium tape drives.
•An empty card slot reserved for future use.
The cable management feature is a spool, mounted near the tape drives, that allows LAN and FC cables
to be dressed and routed away from hot plug or hot swap components.
Ultrium 460 tape drives (see Figure 10) come installed in one orderable 103e library model option
bundled with tape media. Ultrium 460 or 960 tape drives are ordered separately with the other 103e
and 245e EML model options.
10434

Enterprise Modular Library E-Series user guide 19
B
Figure 6 Base module card cage
Figure 7 Library robotics controller
1Base module card cage
2Interface Manager card
3HP StorageWorks e2400-FC 2G interface
controller
4Library robotics controller
5Adapter panel
1Private Ethernet port (not used)
2Eject OK LED
3Public Ethernet port (connection to Interface
Manager card)
4Fault LED
5Reserved port (not used)
6Standby LED
7CLI port (RS-232—not used)
8Active LED
10459
1 43
2 5
<Reverify text> 10420
1 2 3 4 56 7 8
FAULT STANDBY ACTIVE

20 Library overview
Figure 8 HP StorageWorks Interface Manager card
Figure 9 HP StorageWorks e2400-FC 2G interface controller
Figure 10 Ultrium tape drive
1Cascade Ethernet port (connection to library
robotics controller)
2Private Ethernet ports to e2400-FC 2G
interface controllers
3Network Ethernet port (to LAN)
4Serial port
5Auxiliary RJ-11 serial
connector (not used)
6Board status LEDs
7Green link speed LED
8Green light activity LED
1Tape drive FC port 3
2Tape drive FC port 2
3Tape drive FC port 1
4Tape drive FC port 0
5FC port 1 (connection to host or switch)
6FC port 0 (connection to host or switch)
7Ethernet port (connection to Interface
Manager card)
8Serial port
9Power indicator
1Fibre Channel connector 2Mounting bracket with captive screw
10421
1 2 345 6
78
10422
1 2 3 4 56789
10415
1 2
This manual suits for next models
1
Table of contents
Other HP Control Unit manuals

HP
HP HP E1361A User manual

HP
HP 572018-B21 User manual

HP
HP ProCurve MSM765zl Assembly instructions

HP
HP 75000 B Series User manual

HP
HP 98624A Quick start guide

HP
HP 10GbE Pass-Thru Module User manual

HP
HP Synergy 480 Gen10 User manual

HP
HP ProCurve Wireless 170wl User manual

HP
HP Synergy 480 Gen9 User manual

HP
HP E1407A User manual