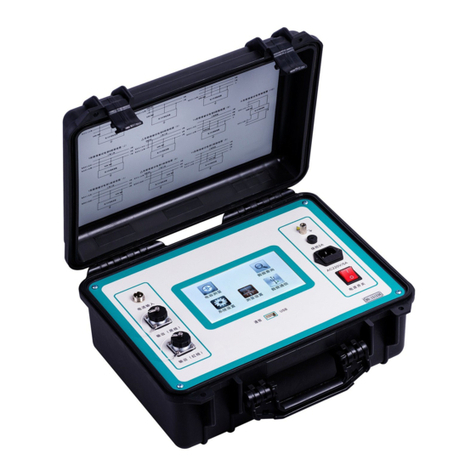
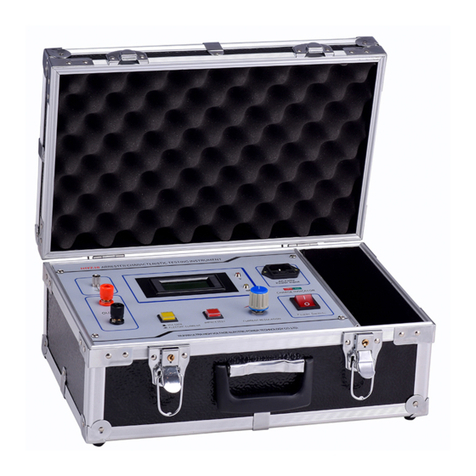
HVTest HTYSZ-H User manual

1
Dear Client
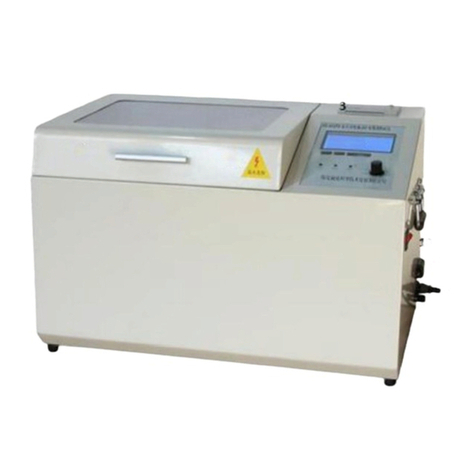
Thank you for Purchasing our HTYSZ-H Automatic Acid
Value Tester. Please read the manual in detail prior to first use,
which will help you use the equipment skillfully.
Our aim is to improve and perfect the
company's products continually, so there may be
slight differences between your purchase equipment
and its instruction manual. You can find the changes
in the appendix. Sorry for the inconvenience. If you have further
questions, welcome to contact with our service department.
The input/output terminals and the test column
may bring voltage, when you plug/draw the test wire or
power outlet, they will cause electric spark. PLEASE
CAUTION RISK OF ELECTRICAL SHOCK!
Company Address:
T4,No. 41, High-tech 2 Road,East Lake High-tech Development Zone,
Wuhan
Sales Hotline: 86-27- 87457960
After Service Hotline:86-27- 87459656
Fax: 86-27- 87803129
E-mail: [email protected]
Website: www.hvtest.cc

2
SERIOUS COMMITMENT
All products of our company carry one year limited warranty
from the date of shipment. If any such product proves defective
during this warranty period we will maintain it for free. Meanwhile
we implement lifetime service. Except otherwise agreed by
contract.
SAFETY REQUIREMENTS
Please read the following safety precautions carefully to avoid
body injury and prevent the product or other relevant subassembly
to damage. In order to avoid possible danger, this product can only
be used within the prescribed scope.
Only qualified technician can carry out maintenance or repair
work.
--To avoid fire and personal injury:
Use Proper Power Cord
Only use the power wire supplied by the product or meet the
specification of this produce.
Connect and Disconnect Correctly
When the test wire is connected to the live terminal, please do
not connect or disconnect the test wire.
Grounding
The product is grounded through the power wire; besides, the

3
ground pole of the shell must be grounded. To prevent electric
shock, the grounding conductor must be connected to the ground.
Make sure the product has been grounded correctly before
connecting with the input/output port.
Pay Attention to the Ratings of All Terminals
To prevent the fire hazard or electric shock, please be care of
all ratings and labels/marks of this product. Before connecting,
please read the instruction manual to acquire information about the
ratings.
Do Not Operate without Covers
Do not operate this product when covers or panels removed.
Use Proper Fuse
Only use the fuse with type and rating specified for the product.
Avoid Touching Bare Circuit and Charged Metal
Do not touch the bare connection points and parts of energized
equipment.
Do Not Operate with Suspicious Failures
If you encounter operating failure, do not continue. Please
contact with our maintenance staff.
Do Not Operate in Wet/Damp Conditions.
Do Not Operate in Explosive Atmospheres.
Ensure Product Surfaces Clean and Dry.

4
-Security Terms
Warning: indicates that death or severe personal injury may
result if proper precautions are not taken
Caution: indicates that property damage may result if proper
precautions are not taken.

5
Content
I. Overview................................................................................................. 6
II. Instrument features.............................................................................. 7
III. Technical specification........................................................................9
IV. Structure............................................................................................... 9
V. Menu and keys operation................................................................. 10
Instrument is divided into four displays:..............................................11
VI. Installation..........................................................................................19
VII. Test procedure................................................................................. 20
VIII. Cautions........................................................................................... 21
IX. Troubleshooting................................................................................ 22

6
I. Overview
In power system and industrial and mining enterprises have a
lot of oil filled electrical equipment, transformer oil, and the acid
value of turbine oil is a regular inspection items shall be measured.
Insulation oleic acid value automatic tester used in transformer oil,
turbine oleic acid determination instrument, adopt computer control,
automatic electrical, optical, mechanical and chemical integration
design, completely replaces manual operation, raised the working
efficiency, reduces the labor intensity of workers, minimize the
organic solvents and chemicals to the harm of human body. The
operation is simple, easy to use, strong anti-interference ability,
stable and reliable.
The acid value is the number of milligrams of potassium
hydroxide in 1 gram of oil in the acidic substances, with mgKOH / g
expressed; that it is one of the indicators of the weight of oil should
be strictly controlled. This tester according to GB / T264-83
standard developed and produce for acid value measurement,
analysis of transformer oil, turbine oil and anti-fuel oil samples. This
product through a combination of mechanical, optical and
electronic technology, use advanced microprocessors, capable of
automatically switching multi-sample, titration to determine the
titration end point, print the results and other functions, the system

7
is reliable, high degree of automation. It can be widely used in
electric power, chemical industry, environmental protection and
other fields.
II. Instrument features
The instrument uses powerful new generation processors and
peripheral circuits, high precision, high positioning accuracy, the
titration point is accurate and reliable, reproducible results.
1. Using 320 x240 graphic dot matrix liquid crystal display
screen, full screen, touch keys, friendly man-machine interface;
2. Using neutralization titration principle, use microcomputer to
control automatically add liquid at room temperature, and titration,
stirring, judge titration end point, LCD screen display and can print
test results.
3. Color sensor coordinate titration end point detection, the
judgment of end conditions is reliable.
4. No need to waste liquor cup.
5. Extract and neutralization liquid by a peristaltic pump control,
high measuring accuracy.
6. History inquiry, instruments and automatic memory function,
with the result of the experiment time automatic storage of record,
and is not lost the data after power off, can be stored for more than

8
10 years, for later queries to print.
7. Calendar clock, temperature compensation, as accurate,
record the date and time, determination in power to run more than
10 years;
8. With special reagent bottle holding extract and neutralization
liquid, reagent in use process not exposed to air, avoid the
influence of solvent evaporation and CO2 in the air; Users don't
have to hand contact with solvents, reducing the organic solvents
and chemicals to the harm of human body.
9. The equipment is simple operation, using large screen LCD
and Chinese menu options, users only need to choose the menu
function, according to the relevant data of the screen prompts, the
instrument can automatically complete the determination of acid
value.
10. The tester still can choose according to need only one
sample or continuous measurement of 2-6 samples.
11. Convenient communication with the computer with RS232
interface
12. Micro printer, thermal makes printing more beautiful and
more quickly, with offline print function.

9
III. Technical specification
1. Power supply voltage: AC220V±20%,50Hz±10%
2. Acid value determination range: 0.0001 ~ 0.50000mgKOH/g
3. Minimum resolution: 0.0001 mgKOH/g
4. Measurement accuracy: acid value between 0.001 ~ 0.1000
mgKOH/g,
Allowable error range: 0.02mgkoh /g
The acid value is between 0.1000 ~ 0.5000 mgKOH/g,
Allowable error range: 0.05mgkoh /g
5. External dimensions: 420×270×260 (mm)
6. Ambient temperature: 5 C ~ 40 C
7. Relative humidity: <85% RH
8. Weight: about 9Kg
IV. Structure
Instrument structure as bellow:

10
NOTE: The turntable can be placed six oil cups, one
experiment can be done up to 6 oil sample.
The instrument is divided into three parts, control box,
mechanical transmission parts, and test area. Test area places the
oil cup turntable, drip detecting devices, automatic determination
the acid value. The control box collects and processes all kinds of
information, sends the actuator operation command, while the
control box contains the LCD and touch screen, to form a good
man-machine communication interface. A mechanical transmission
part is inside, through a peristaltic pump and a mechanical
transmission part to control cup liquid and rotation control and so
on.
V. Menu and keys operation
Instrument used big LCD, with a full-screen touch buttons,

11
button function is clearly defined, users learn to use the instrument
becomes simple.
Instrument is divided into four displays:
boot;
parameter settings;
history;
sample test;
1. Boot screen:
Connect instrument power cord; turn on the power switch, the
screen center cross cursor image appears, as shown in the figure
below:
At this time, you can carry out touch screen calibration, the
method is as follows: fingers touch the cross cursor, then into
the touch screen calibration screen, as shown in the figure
below:

12
At this point, according to the prompts on the screen five basis
points in turn (that is, the four corners and center) for calibration.
Note: equipment has been calibrated before delivery, no
special circumstances, no need the calibration! Remember!
If without touching the cross cursor after boot 2 seconds,
automatically enter the welcome screen, as shown in the figure
below:
There are three functions in the current display:

13
"Set.", enter the clock and the parameters settings;
"Data:" into the historical test data;
"Test”: enter the sample test.
2. The parameter Setting
Under the boot screen, press the "set." key, the LCD screen
display as shown in the figure below:
Under current display screen with your finger touch to modify
parameters are selected, checked, according to "▲", "▼" button to
adjust the current parameter values, press "save" to save
parameters, press "exit" button to return to the boot screen.
The meaning of each parameter stated below:
Date, time, instrument of the system clock.
Print mode: indicates whether the samples after the
determination of all automatic printing, "automatic" auto - print,
"manual" said not automatic printing.

14
3. History data
Under the boot screen, press the "Data" button, can display
the history of experimental records, as shown in the figure below:
pgup: the former historical record, the record number plus 1,
long press the key, the page forward quickly.
pgdn: show next history record, record number minus 1, long
press the key, fast flip backward, minimum record number is 1.
Print: print the current history records, the printing content
including: 1 # sample to 6 # of the sample determination results, the
inspection date and time.
Del.: delete the current record.
Exit:quit history screen, return to boot screen.
4. RUN
Used for test the selected samples oil acid value, in the boot
screen, press "test" button, as shown in the figure below:

15
About one and a half minutes into the testing interface
automatically, as shown in the figure below:
(1) Neutralization concentration: the concentration of
neutralizing liquid (national standard concentration between 0.02 to
0.05 moL/L), if the concentration different with its shown, according
to the concentration of the neutral solution with the increase and
decrease the number of changes, the instrument automatically
save the data.

16
(2) blank test: the interface is as follows
Used for measuring the acid value of the extract. If changed
the extract liquid, blank experiment must do first before sample test.
Method is as follows: Put one empty cup into test cup position,
place one stir, and then select the test cup, for example " 1 cup",
select " sample weight" corresponds to the test cup and with "▲",
"▼" button adjust it to "0.000", then the sample weight shows
"blank", as shown in the figure. After press "start" button, the
machine will automatically blank test operation. (Note: to observe
the neutralization liquid titration speed about every drop 1 second)
and then take out the cup of blank test.
(3)Cur.Hue: is value of the color sensor, instrument automatic
detect and display.
(4)End Hue: basis of titration end point, is refers to the color
sensor value at the end of test, that is to say, when the current

17
value is greater than or equal to the end color value, test finished,
changing method according to the numbers below the color to
increase and decrease value, instrument automatically save.
"Print": print the current measurement record.
"▲”: modify the selected sample weight, increase.
"▼" modify the selected sample weight, decrease.
"RUN": start the selected samples acid value test.
"Exit": exit.
Press the "RUN", instrument cleaning, press the "SKIP",
instruments automatically return to the main interface, press "RUN"
again during the cleaning process can stop, cleaning about 1 and
1/2 minutes automatically enter the main interface.
Note: if you quit and not to continue the test, please
cleaning or you can press "SKIP" to exit.
Sample test: used to test the acid value of oil sample. After

18
open the cover, put the cup with oil at setting position, and place
one stir into it. And then select the corresponding cup position, as
follows: in "test cup " column, touch the screen to select, as shown
in the figure below:
After selected test cup, then input the corresponding sample
weight, the method is as follows: in "Mass" column, with your
fingers touch the data, to select, then press the "▲", "▼" button to
adjust parameters, as shown in the figure below:

19
After all input, press the "RUN" to test, and "Test result" column
indicates the process, display information such as position...,
extraction... , neutralization…, test cancel, test end, etc.
For several oil cups, according to 1 cup, 2 cups,... 6 cup
sequence, automatic test, until all finished.
VI. Installation
1. After opening, the instrument is placed on a solid laboratory
bench.
2. Take a beaker into hydroxide against 80ml water, fully
dissolved, and then injected into the wash bottle.
3. Extraction liquid into the extraction liquid bottle (liquid level
shall not be higher than 500 ml scribed line).
4. Open the back baffle and put the extraction liquid bottle and
the neutralizing liquid bottle into the fixed bottle opening on the

20
back of the instrument.
5. Switch on 220V power supply. Note: 220V power supply
should have good grounding wire!
VII. Test procedure
1. Turn on the power, instrument display the main menu.
2. Blank test: if change the extract liquid, blank experiment
must do first before sample test. Put one empty cup into position
1st, and place one stir. Adjust the sample weight is "blank", press
"start" button, the machine will automatically blank experiment
operation. (Note: to observe the neutralization liquid titration speed
about every drop 1 second) and then take out the blank experiment
cup, begin test.
3. Sample test:
(1) Press "set." key in the boot screen, enter the neutralization
liquid concentration.
(2) With finger touch to modify parameters are selected, press
"▲", "▼" button input neutralization liquid concentration.
(3) Press the "RUN" key in the boot screen, enter the sample
oil test.
(4) Sample weighing: sample with a syringe, insulating oil and
turbine oil is 8 ml, fire-resistant oil is 1 ml, take its net weight and
Table of contents
Other HVTest Test Equipment manuals

HVTest
HVTest HTJY-80S User manual

HVTest
HVTest HTFZ-HI User manual

HVTest
HVTest HTZZ-2A User manual

HVTest
HVTest HT2571B User manual

HVTest
HVTest ETCR2000 User manual

HVTest
HVTest HT-802 User manual

HVTest
HVTest HTYX-III User manual

HVTest
HVTest HTYZL-H User manual

HVTest
HVTest HT2671 User manual

HVTest
HVTest HTFZ-III User manual

HVTest
HVTest HT2533 User manual

HVTest
HVTest TAG-8000 User manual

HVTest
HVTest HTZZ-5A User manual

HVTest
HVTest HT2670 User manual

HVTest
HVTest HTJS-V User manual

HVTest
HVTest HTZZ-S10A User manual
HVTest
HVTest HTYB-3H User manual

HVTest
HVTest HTZZ-1A User manual

HVTest
HVTest HTJS-M User manual
HVTest
HVTest HT2672 User manual