manuals.online logo
Brands
  1. Home
  2. •
  3. Brands
  4. •
  5. Icom
  6. •
  7. Cables And Connectors
  8. •
  9. Icom opc-478uc User manual

Icom opc-478uc User manual

CAUTION: USE ONLY INDOORS! NEVER ex-
pose the cables to rain, snow or any liquids.
NEVER let metal, wire, or other objects touch any in-
ternal part of the connectors.
CAUTION: NEVER use a USB cable other than the
OPC-1637. DO NOT extend the USB cable. When
the cable longer than 1.5 m (4.9 ft) is used, a data
error may occur.
DO NOT use harsh solvents such as benzine or alco-
hol when cleaning, as they will damage the cables.
Ensure that your PC supports USB port operation by
confirming the Universal Serial Bus controller is in the
PC’s Device Manager.
Connect the cable to the PC’s USB port directly, or to
a self-powered USB hub.
Approximately 20 mA of current is required. Insuffi-
cient current capacity of the USB port can cause un-
stable cloning operation and a data error.
CAUTION:
You MUST install the USB driver BEFORE you
connect the cable to the PC. Otherwise you will
have to:
q disconnect the cable
w install the driver
e reconnect the cable
DCloning software compatibility
The connector of OPC-478UC, OPC-966U, and OPC-
1122U USB type cloning cables are basically the
same as the same numbered RS-232C type cables.
Therefore, you can use the USB type cables with most
of the Icom cloning software that require the RS-232C
type cables.
IMPORTANT: Some Icom cloning software can only
select ports 1 to 4. When several external devices,
such as a printer, scanner, or hard-disk drive are con-
nected to the USB port, the port number available for
the cloning software may be port 5 or higher. There-
fore, you must first change the external device to a
port number other than 1 to 4.
INSTRUCTIONS
CLONING CABLES
opc-478uc opc-966u
opc-1122u opc-1862
opc-2338 opc-2344
opc-2363
DATA CABLE
opc-2357
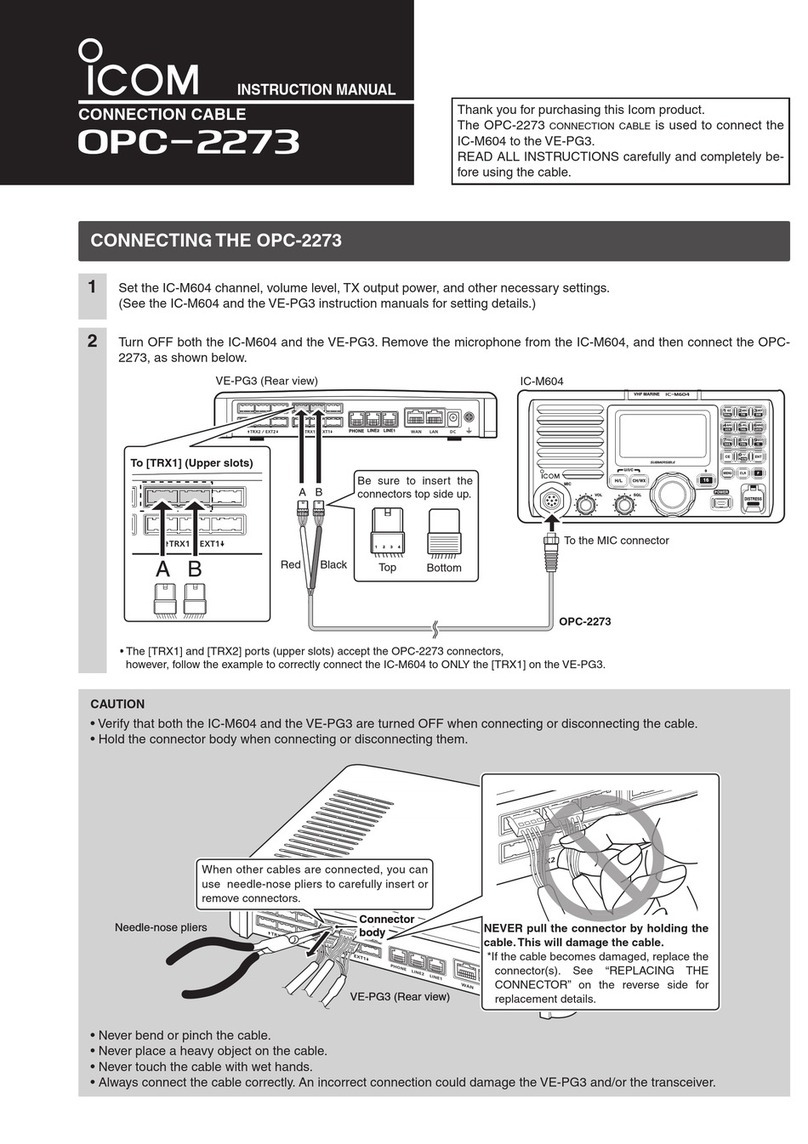
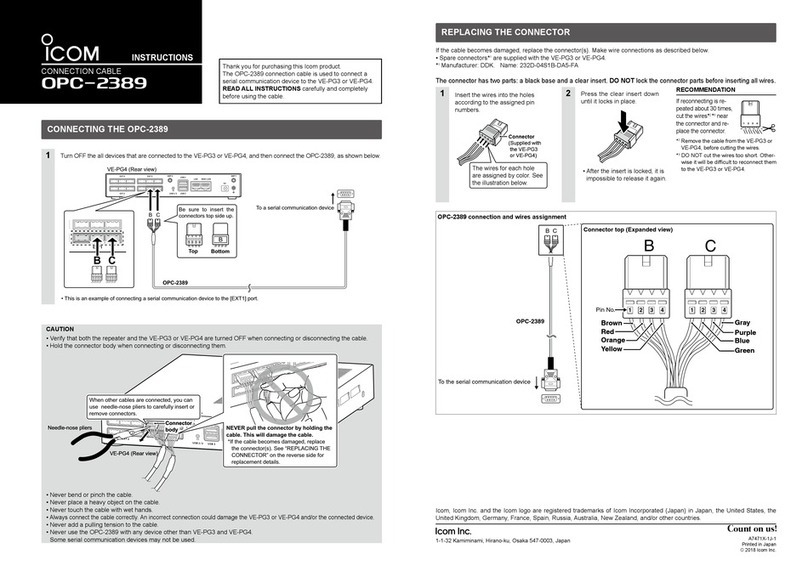
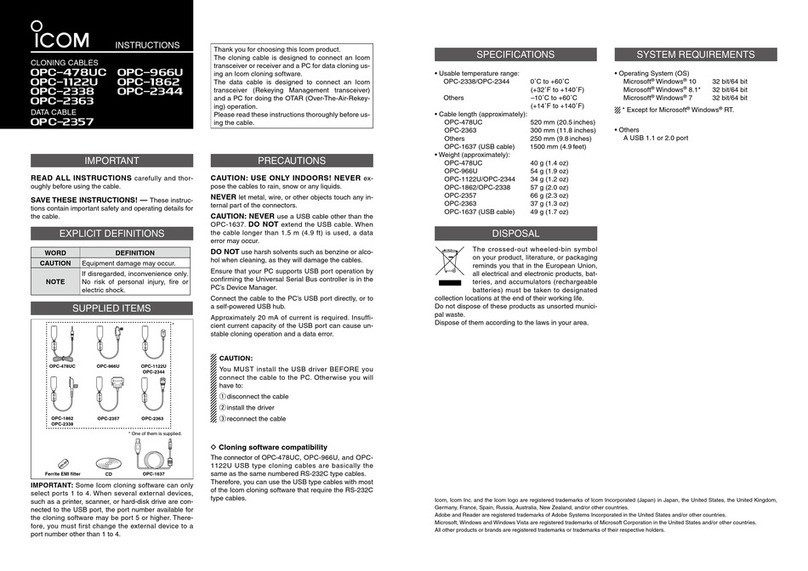
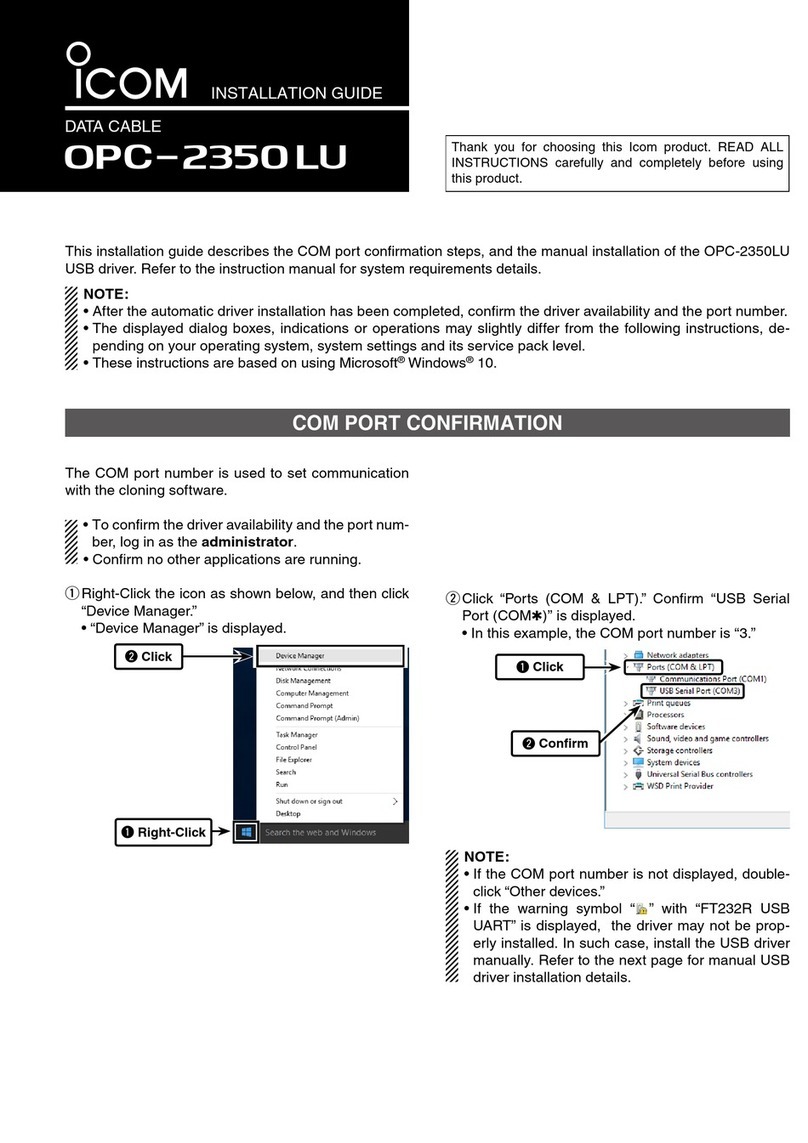
Thank you for choosing this Icom product.
The cloning cable is designed to connect an Icom
transceiver or receiver and a PC for data cloning us-
ing an Icom cloning software.
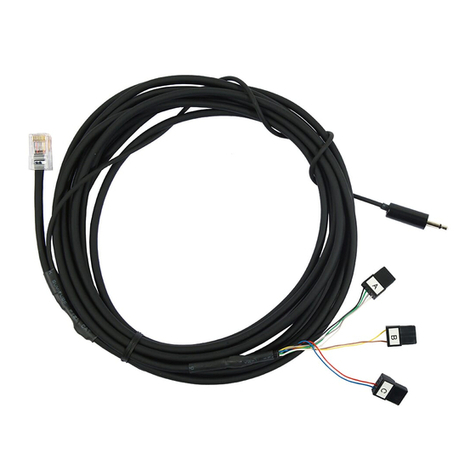
The data cable is designed to connect an Icom
transceiver (Rekeying Management transceiver)
and a PC for doing the OTAR (Over-The-Air-Rekey-
ing) operation.
Please read these instructions thoroughly before us-
ing the cable.
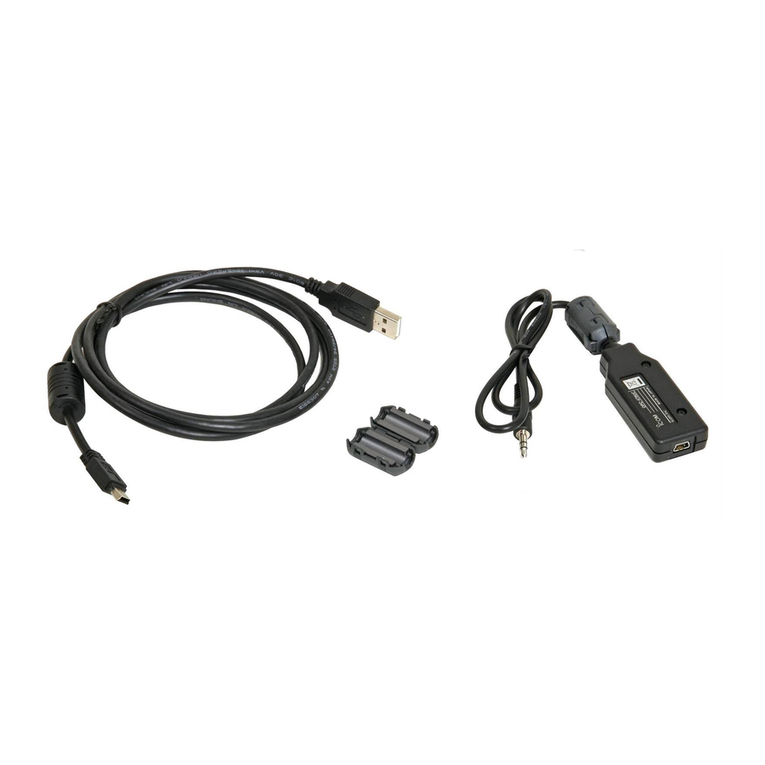
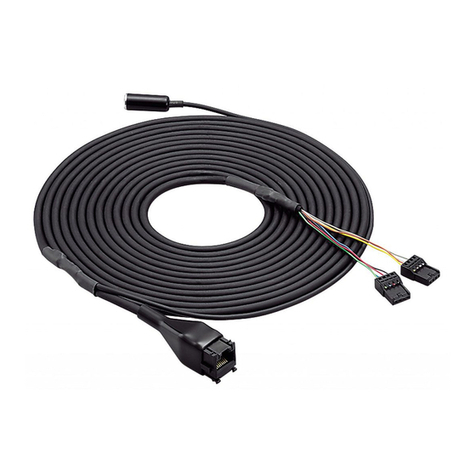
OPC-478UC
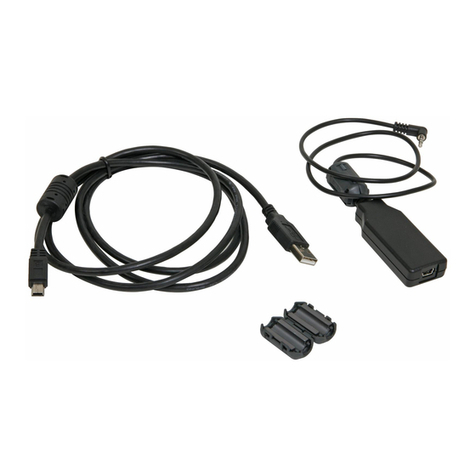
OPC-1637
OPC-1122U
OPC-2344
CD
OPC-966U
OPC-1862
OPC-2338
Ferrite EMI filter
OPC-2357
*
* One of them is supplied.
OPC-2363
IMPORTANT
EXPLICIT DEFINITIONS
PRECAUTIONS
SPECIFICATIONS
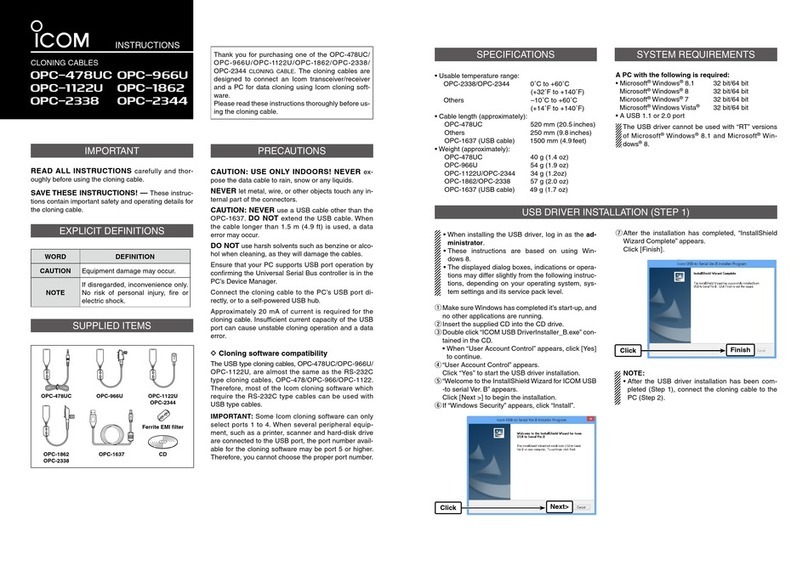
USB DRIVER INSTALLATION (STEP 1)
• When installing the USB driver, log in as the ad-
ministrator.
•
These instructions are based on using Windows 8.1.
• The displayed dialog boxes, indications or opera-
tions may differ slightly from the following instruc-
tions, depending on your operating system, its
service pack level, and/or system settings.
q Make sure Windows has completed it’s start-up, and
no other applications are running.
wInsert the supplied CD into the CD drive.
eDouble click “ICOM USB DriverInstaller_B.exe” con-
tained in the CD.
• When “User Account Control” appears, click [Yes]
to continue.
r“Welcome to the InstallShield Wizard for ICOM USB
-to serial Ver. B” appears.
Click [Next >] to begin the installation.
tIf “Windows Security” appears, click “Install”.
yAfter the installation has completed, “InstallShield
Wizard Complete” appears.
Click [Finish].
NOTE:
• After the USB driver installation has been com-
pleted (Step 1), connect the cable to the PC (Step
2 on the next section).
SUPPLIED ITEMS
SYSTEM REQUIREMENTS
WORD DEFINITION
CAUTION Equipment damage may occur.
NOTE
If disregarded, inconvenience only.
No risk of personal injury, fire or
electric shock.
READ ALL INSTRUCTIONS carefully and thor-
oughly before using the cable.
SAVE THESE INSTRUCTIONS! — These instruc-
tions contain important safety and operating details for
the cable.
• Usable temperature range:
OPC-2338/OPC-2344 0˚C to +60˚C
(+32˚F to +140˚F)
Others –10˚C to +60˚C
(+14˚F to +140˚F)
• Cable length (approximately):
OPC-478UC 520 mm (20.5 inches)
OPC-2363 300 mm (11.8 inches)
Others 250 mm (9.8 inches)
OPC-1637 (USB cable) 1500 mm (4.9 feet)
• Weight (approximately):
OPC-478UC 40 g (1.4 oz)
OPC-966U 54 g (1.9 oz)
OPC-1122U/OPC-2344 34 g (1.2 oz)
OPC-1862/OPC-2338 57 g (2.0 oz)
OPC-2357 66 g (2.3 oz)
OPC-2363 37 g (1.3 oz)
OPC-1637 (USB cable) 49 g (1.7 oz)
• Operating System (OS)
Microsoft®Windows®8.1* 32 bit/64 bit
Microsoft®Windows®7 32 bit/64 bit
Microsoft®Windows Vista®32 bit/64 bit
• Others
A USB 1.1 or 2.0 port
* Except for Microsoft®Windows®RT.
Click Next>
Click Finish
A-6815H-1EX-oPrinted in Japan
© 2009–2016 Icom Inc.
1-1-32 Kamiminami, Hirano-ku, Osaka 547-0003, Japan
COM PORT CONFIRMATION (STEP 3)
DISPOSAL
After the driver installation has completed, confirm the
driver availability and the port number.
The COM port number is used to set communications
with the cloning software.
q Select “Desktop” and click the folder icon at the bot-
tom of the screen.
• The “Libraries” window is displayed
wRight-Click [This PC], and then click [Properties], as
shown below.
• The “System” window appears.
eClick [Device Manager].
• “Device Manager” appears.
rClick the “” next to “Ports (COM&LPT).”
Confirm “Icom USB-to-Serial Comm Port (COM✱)”
is displayed.
• In this example, the COM port number is “3.”
• If the COM port number is not displayed, or sever-
al numbers are displayed at the same time like
“Icom USB-to-Serial Comm Port (COM✱)(COM✱),”
the driver may not be properly installed. In such
case, uninstall the USB driver and install it again.
• You can uninstall the program using the
“
Uninstall
a program
”
in the Windows Control Panel.
qRight-Click
wClick
CABLE CONNECTION (STEP 2)
After completing Step 1, connect the cloning cable or
data cable to the PC. The PC automatically starts the
USB-to-Serial Comm Port installation.
qConnect the cloning cable or data cable to the USB
cable, and then the USB cable to the PC’s USB port,
as illustrated below.
• Attach the Ferrite EMI filter to the USB cable and
the tip of the strain relief.
USB cable
to the USB port
Cloning cable
or
data cable
Strain relief
wThe status is displayed at the bottom of the desktop
screen.
Wait a moment until it disappears.
For your information: If the status is clicked, the
“Installing Icom USB-to-Serial Comm Port (COM✱)”
dialog is displayed.
• “✱” is the number of the COM port.
eWhen the status disappears, the installation is com-
pleted.
Reboot the PC.
Icom, Icom Inc. and the Icom logo are registered trademarks of Icom Incorporated (Japan) in Japan, the United States, the United Kingdom,
Germany, France, Spain, Russia, Australia, New Zealand, and/or other countries.
Adobe and Reader are registered trademarks of Adobe Systems Incorporated in the United States and/or other countries.
Microsoft, Windows and Windows Vista are registered trademarks of Microsoft Corporation in the United States and/or other countries.
All other products or brands are registered trademarks or trademarks of their respective holders.
The crossed-out wheeled-bin symbol on your product, literature, or packaging reminds you that in the
European Union, all electrical and electronic products, batteries, and accumulators (rechargeable bat-
teries) must be taken to designated collection locations at the end of their working life.
Do not dispose of these products as unsorted municipal waste.
Dispose of them according to the laws in your area.
Shows the status
Click
Click
qClick
wConfirm

This manual suits for next models

7

Other Icom Cables And Connectors manuals

Icom OPC-2350LU User manual

Icom

Icom OPC-2350LU User manual

Icom OPC-2218 LU User manual

Icom

Icom OPC-2218 LU User manual

Icom opc-478uc User manual

Icom

Icom opc-478uc User manual

Icom OPC-478UC User manual

Icom

Icom OPC-478UC User manual

Icom OPC-2276 User manual

Icom

Icom OPC-2276 User manual

Icom OPC- 2218LU User manual

Icom

Icom OPC- 2218LU User manual

Icom OPC-2218LU User manual

Icom

Icom OPC-2218LU User manual

Icom OPC-2350LU User manual

Icom

Icom OPC-2350LU User manual

Icom OPC-2273 User manual

Icom

Icom OPC-2273 User manual

Icom OPC-966U-1 User manual

Icom

Icom OPC-966U-1 User manual

Icom OPC-2274 User manual

Icom

Icom OPC-2274 User manual

Icom OPC-2275 User manual

Icom

Icom OPC-2275 User manual

Icom OPC-1122U User manual

Icom

Icom OPC-1122U User manual

Icom OPC-2328 User manual

Icom

Icom OPC-2328 User manual

Icom OPC-2389 User manual

Icom

Icom OPC-2389 User manual

Icom OPC-2350LU User manual

Icom

Icom OPC-2350LU User manual

Popular Cables And Connectors manuals by other brands

hager 4 RJ 45 User instructions

hager

hager 4 RJ 45 User instructions

Gefen DVI Splitter user manual

Gefen

Gefen DVI Splitter user manual

Agilent Technologies N6314A user guide

Agilent Technologies

Agilent Technologies N6314A user guide

OEZ CS-BD-B022 Instructions for use

OEZ

OEZ CS-BD-B022 Instructions for use

gofanco PRO-HDBaseT4P user guide

gofanco

gofanco PRO-HDBaseT4P user guide

ChargeArm CA01 user manual

ChargeArm

ChargeArm CA01 user manual

id-Technik K-Tower Series Assembly instructions

id-Technik

id-Technik K-Tower Series Assembly instructions

Staubli CombiTac MA213-03 Assembly instructions

Staubli

Staubli CombiTac MA213-03 Assembly instructions

VXI USB CORD user guide

VXI

VXI USB CORD user guide

Leviton rhino-hide LNR80 manual

Leviton

Leviton rhino-hide LNR80 manual

Cypress CDVI-8 Operation manuals

Cypress

Cypress CDVI-8 Operation manuals

Altinex RT300-121 user guide

Altinex

Altinex RT300-121 user guide

Pfeiffer Vacuum IMR 420 operating instructions

Pfeiffer Vacuum

Pfeiffer Vacuum IMR 420 operating instructions

Oehlbach HighWay Splitter User's manual & warranty information

Oehlbach

Oehlbach HighWay Splitter User's manual & warranty information

KOA CCTV K5702 user manual

KOA CCTV

KOA CCTV K5702 user manual

Labgear HD2-SP4 user guide

Labgear

Labgear HD2-SP4 user guide

Kidde Alarmline II Analogue installation instructions

Kidde

Kidde Alarmline II Analogue installation instructions

Rean RT*FC-B Assembly & instruction manual

Rean

Rean RT*FC-B Assembly & instruction manual

manuals.online logo
manuals.online logoBrands
  • About & Mission
  • Contact us
  • Privacy Policy
  • Terms and Conditions

Copyright 2025 Manuals.Online. All Rights Reserved.