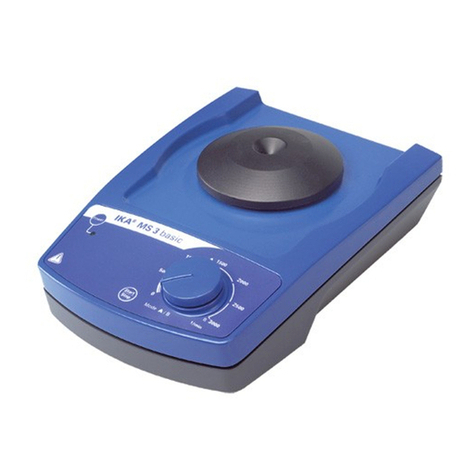
IKA MS 3 basic User manual

MS 3 basic
20000005495
MS 3 digital
B DE
O EN
M ’ FR
I ES
V NL
N IT
S SV
S DA
S NO
T FI
I PT
W PL
B CS
B HU
V SL
B SK
O ET
D LV
N LT
MS 3 basic/digital_082017
www.GlobalTestSupply.com
Find Quality Products Online at: sales@GlobalTestSupply.com

KONFORMITÄTSERKLÄRUNG DE
Wir erklären in alleiniger Verantwortung, dass dieses Produkt den
Bestimmungen der Richtlinien 2014/35/EU, 2006/42/EG, 2014/30/EU und
2011/65/EU entspricht und mit den folgenden Normen und normativen
Dokumenten übereinstimmt: EN 61010-1, -2-051, EN 61326-1, EN 60529
und EN ISO 12100.
DECLARATION OF CONFORMITY EN
We declare under our sole responsibility that this product corresponds to
the regulations 2014/35/EU, 2006/42/EC, 2014/30/EU and 2011/65/EU
and conforms with the standards or standardized documents EN 61010-1,
-2-051, EN 61326-1, EN 60529 and EN ISO 12100.
DÉCLARATION DE CONFORMITÉ FR
Nous déclarons sous notre propre responsabilité que ce produit est confor-
me aux réglementations 2014/35/UE, 2006/42/CE, 2014/30/UE et 2011/65/
UE et en conformité avec les normes ou documents normalisés suivant EN
61010-1, -2-051, EN 61326-1, EN 60529 et EN ISO 12100.
2
Pos.Bezeichnung Designation Désignation
MS 3 basic/digital
A Taste “Power” Button “Power” Bouton “Power”
B Standardaufsatz Standard attachment Support standard
C Drehknopf Dreh- Rotary knob of Bouton rotatif pour
zahleinstellung speed adjustment la réglage de la
vitesse de rotation
D Gerätefuss Base Pied
E
Taste “Start/Stop”
Button “Start/Stop” Bouton “Start/Stop”
MS 3 digital
F Tasten “Timer” Buttons “Timer” Boutons “Minuteur”
G Display Display Indication
A
B
DC
E
MS 3 basic
F
MS 3 digital
G
DC
B
A
E
www.GlobalTestSupply.com
Find Quality Products Online at: sales@GlobalTestSupply.com

Seite
Konformitätserklärung 2
Sicherheitshinweise 3
Auspacken 4
Bestimmungsgemäßer Gebrauch 4
Inbetriebnahme 5
Zubehör 7
Instandhaltung 8
Technische Daten 9
Gewährleistung 9
• Lesen Sie die Betriebsanleitung vor Inbetriebnahme vollständig
• und beachten Sie die Sicherheitshinweise.
• Bewahren Sie die Betriebsanleitung für Alle zugänglich auf.
• Beachten Sie, dass nur geschultes Personal mit dem Gerät
arbeitet.
• Beachten Sie die Sicherheitshinweise, Richtlinien,
• Arbeitsschutz-und Unfallverhütungsvorschriften.
• Spannungsangabe des Typenschildes muss mit Netzspannung
übereinstimmen.
• Das Gerät darf nur mit dem originalen Steckernetzteil betrieben werden.
• Tragen Sie Ihre persönliche Schutzausrüstung entsprechend
der Gefahrenklasse des zu bearbeitenden Mediums. Ansonsten
besteht eine Gefährdung durch:
- Spritzen von Flüssigkeiten
- Herausschleudern von Teilen
- Erfassen von Körperteilen, Haaren, Kleidungsstücken und
Schmuck
• Stellen Sie das Gerät frei auf einer ebenen, stabilen, sauberen,
rutschfesten, trockenen und feuerfesten Fläche auf.
• Die Gerätefüße müssen sauber und unbeschädigt sein.
• Stellen Sie vor Inbetriebnahme den Drehknopf (C) auf
Linksanschlag.
• Steigern Sie die Drehzahl langsam.
• Verringern Sie die Hand-Arm-Schwingungsbelastung (Richtlinie
2002/44/EG) bei Handbetrieb:
- Halten Sie den Probenbehälter möglichst senkrecht.
- Üben Sie nur soviel Druck aus wie für den Mischvorgang
erforderlich
.
-
Benutzen
Sie bei hohen Probenzahlen Aufsätze für mehrere Proben.
• Falls sich die Schüttelbewegung des Gerätes aufschaukelt
(Resonanz), reduzieren Sie die Drehzahl oder durchlaufen Sie
den kritischen Bereich schnellstmöglich. Reduzieren Sie die
Drehzahl, falls
- Medium infolge zu hoher Drehzahl aus dem Gefäß spritzt
- unruhiger Lauf auftritt
- das Gerät durch dynamische Kräfte zu wandern beginnt.
• Befestigen Sie Zubehörteile und aufgestellte Gefäße gut, da
sonst Schüttelgefäße beschädigt oder herausgeschleudert wer-
den können.
• Prüfen Sie vor jeder Verwendung Gerät und Zubehör auf
Beschädigungen. Verwenden Sie keine beschädigten Teile.
• Platzieren Sie ein einzelnes Schüttelgefäß mittig und mehrere
Schüttelgefäße gleichmäßig.
•
Spitze, scharfkantige Gefäße führen an den Aufsätzen zu Abrieb.
• Beachten Sie eine Gefährdung durch
- entzündliche Materialien
- Glasbruch infolge mechanischer Schüttelenergie.
• Bearbeiten Sie nur Medien, bei denen der Energieeintrag durch
das Bearbeiten unbedenklich ist. Dies gilt auch für andere
Energieeinträge, z.B. durch Lichteinstrahlung.
• Betreiben Sie das Gerät nicht in explosionsgefährdeten
Atmosphären, mit Gefahrstoffen und unter Wasser.
• Sicheres Arbeiten ist nur mit Zubehör, das im Kapitel „Zubehör“
beschrieben wird, gewährleistet.
• Montieren Sie das Zubehör nur bei gezogenem Netzstecker.
• Nach einer Unterbrechung der Stromzufuhr läuft das Gerät
nicht von selbst wieder an.
• Vermeiden Sie Stöße und Schläge auf Gerät oder Zubehör.
• Im Betrieb kann sich das Gerät erwärmen.
• Das Gerät darf nur von einer Fachkraft geöffnet werden.
3
Inhaltsverzeichnis
Sicherheitshinweise
DE
www.GlobalTestSupply.com
Find Quality Products Online at: sales@GlobalTestSupply.com
•Verwendung
4zum Mischen von Flüssigkeiten
- Touch-Betrieb für einzelne Gefäße
- Dauer-Betrieb für einzelne oder mehrere Gefäße
• Verwendungsgebiet
- Laboratorien - Schulen
- Apotheken - Universitäten
Das Gerät ist für den Gebrauch in allen Bereichen geeignet, außer
industriellen Bereichen.
Der Schutz für den Benutzer ist nicht mehr gewährleistet, wenn
das Gerät mit Zubehör betrieben wird, welches nicht vom
Hersteller geliefert oder empfohlen wird oder das Gerät in nicht
bestimmungsgemäßem Gebrauch entgegen der Herstellervor-
gabe betrieben wird.
• Auspacken
- Packen Sie das Gerät vorsichtig aus
- Nehmen Sie bei Beschädigungen sofort den Tatbestand auf
(Post, Bahn oder Spedition)
• Lieferumfang
MS 3 basic
- Schüttler MS 3 basic
- Netzteil
- Standardaufsatz MS 3.1
- Universalaufsatz MS 3.3
- Einhandeinsatz MS 1.21
- Betriebsanleitung
MS 3 digital
- Schüttler MS 3 digital
- Netzteil
- Standardaufsatz MS 3.1
- Universalaufsatz MS 3.3
- Einhandeinsatz MS 1.21
- Mikrotiteraufsatz MS 3.4
- Reagenzglaseinsatz MS 1.32
- Betriebsanleitung
Auspacken Bestimmungsgemäßer Gebrauch
www.GlobalTestSupply.com
Find Quality Products Online at: sales@GlobalTestSupply.com
Power
Power
0 0 0
Gerät
einschalten
Start
Stop
In Dauerbetrieb
wechseln
Modus A
Betriebsart "Dauerbetrieb"
Drehzahl bis 1300 rpm
Modus wechseln
A B
Modus A
Betriebsart "Touchbetrieb"
Drehzahl bis 3000 rpm
B A
1
4
Power
Gerät ausschalten und
wieder einschalten, siehe 1
Timer einstellen /
0 0 0
0 0 5
1 0 0 1 0 1
Sekundenmodus
Wechsel in
Minutenmodus
Countdown läuft:
Gerät ausschalten
Power
Gerät einschalten:
Taste "1" gedrückt halten und
zusätzlich Taste "Power" drücken
Power
1
0 0 5
Minutenmodus
Countdown läuft:
Einstellung
Drehzahl
2
3
Stellen Sie vor Inbetriebnahme
den Drehknopf auf Linksanschlag
Modus B
Betriebsarten "Touch" und "Dauerbetrieb"
Drehzahl bis 3000 rpm
0 0 0
Start
Stop
Start
Stop
1 0 0 1 0 1
Gerät ausschalten
Power
Gerät einschalten:
Taste "Start/Stop" gedrückt halten
und zusätzlich Taste "Power" drücken
(= Werkseinstellung)
Start
Stop
Nach Ablauf des Countdown
ertönt ein akustisches Signal
Nach Ablauf des Countdown
ertönt ein akustisches Signal
Nicht bei
MS 3 BASIC
Einstellung Timer
verändern Zuletzt eingestellter Wert wird angezeigt
(Werkseinstellung=000)
Wenn alle Bedingungen erfüllt sind,
ist das Gerät nach Einstecken des
Netzsteckers betriebsbereit
5
Inbetriebnahme
Einstellungen
Display
Aktion
www.GlobalTestSupply.com
Find Quality Products Online at: sales@GlobalTestSupply.com

Power
Power
0 0 0
Gerät
einschalten
Start
Stop
In Dauerbetrieb
wechseln
Modus A
Betriebsart "Dauerbetrieb"
Drehzahl bis 1300 rpm
Modus wechseln
A B
Modus A
Betriebsart "Touchbetrieb"
Drehzahl bis 3000 rpm
B A
1
4
Power
Gerät ausschalten und
wieder einschalten, siehe 1
Timer einstellen /
0 0 0
0 0 5
1 0 0 1 0 1
Sekundenmodus
Wechsel in
Minutenmodus
Countdown läuft:
Gerät ausschalten
Power
Gerät einschalten:
Taste "1" gedrückt halten und
zusätzlich Taste "Power" drücken
Power
1
0 0 5
Minutenmodus
Countdown läuft:
Einstellung
Drehzahl
2
3
Stellen Sie vor Inbetriebnahme
den Drehknopf auf Linksanschlag
Modus B
Betriebsarten "Touch" und "Dauerbetrieb"
Drehzahl bis 3000 rpm
0 0 0
Start
Stop
Start
Stop
1 0 0 1 0 1
Gerät ausschalten
Power
Gerät einschalten:
Taste "Start/Stop" gedrückt halten
und zusätzlich Taste "Power" drücken
(= Werkseinstellung)
Start
Stop
Nach Ablauf des Countdown
ertönt ein akustisches Signal
Nach Ablauf des Countdown
ertönt ein akustisches Signal
Nicht bei
MS 3 BASIC
Einstellung Timer
verändern Zuletzt eingestellter Wert wird angezeigt
(Werkseinstellung=000)
Wenn alle Bedingungen erfüllt sind,
ist das Gerät nach Einstecken des
Netzsteckers betriebsbereit
Einstellungen Display
Aktion
Betriebsmodi
Modus A
(mit Drehzahlbegrenzung)
Modus B
(ohne Drehzahlbegrenzung)
Touchbetrieb
(mit Standardaufsatz MS 3.1)
max. 3000 rpm max. 3000 rpm
Dauerbetrieb
(mit allen Aufsätzen)
max. 1300 rpm max. 3000 rpm
6
www.GlobalTestSupply.com
Find Quality Products Online at: sales@GlobalTestSupply.com
7
Verwendungsmöglichkeiten und zulässige Drehzahlbereiche der Aufsätze:
Bezeichnung Beschreibung Ident-
Nr.
Touch-
betrieb
Dauer-
betrieb
Drehzahl-
bereich (rpm)
Modus
MS 3.1
Standardaufsatz
Für Reagenzgläser und kleine Gefäße bis
ø 50 mm
3426300 x
-
-
-
x
x
0/200-3000
0/200-1300
0/200-3000
A und B
A
B
MS 3.3
Universalaufsatz Für verschiedene Schaumstoffeinsätze
3426600 - x 0/200-1300
0/200-3000 A
B
MS 3.4
Mikrotiteraufsatz
Für eine Mikrotiterplatte
3426400 - x 0/200-1300 A
MS 3.5
PCR-Plattenaufsatz
Für eine 96-well PCR-Platte
3428000 - x 0/200-1300 A
MS 3.51
PCR-Platteneinsatz
-Zum Einsetzen in den PCR-Plattenaufsatz
3428700 - x 0/200-1300 A
MS 1.21
Einhandeinsatz
Zum Einsetzen in den Universalaufsatz
L001540 - x 0/200-1300
0/200-3000 A
B
MS 1.30
Reagenzglaseinsatz
- Zum Einsetzen in den Universalaufsatz
- Für 24 Reagenzgläser ø7,8 mm
25005776
- x 0/200-1300 A
MS 1.31
Reagenzglaseinsatz
- Zum Einsetzen in den Universalaufsatz
- Für 14 Reagenzgläser ø10 mm
L001840 - x 0/200-1300 A
MS 1.32
Reagenzglaseinsatz
- Zum Einsetzen in den Universalaufsatz
- Für 6 Reagenzgläser ø12 mm
L001850 - x 0/200-1300 A
MS 1.33
Reagenzglaseinsatz
- Zum Einsetzen in den Universalaufsatz
- Für 4 Reagenzgläser ø16 mm
L001860 - x 0/200-1300 A
MS 1.34
Reagenzglaseinsatz
- Zum Einsetzen in den Universalaufsatz
-Zum Anbringen von beliebigen Bohrungen
L001830 - x 0/200-1300 A
Zubehör
www.GlobalTestSupply.com
Find Quality Products Online at: sales@GlobalTestSupply.com
Wechsel der Aufsätze
Verwendung der Einsätze
Reinigung
Das Gerät arbeitet wartungsfrei.
Ziehen Sie zum Reinigen den Netzstecker.
Verwenden Sie nur von IKA empfohlene Reinigungsmittel.
Verwenden Sie zum Reinigen von:
Farbstoffen Isopropanol
Baustoffen Tensidhaltiges Wasser, Isopropanol
Kosmetika Tensidhaltiges Wasser, Isopropanol
Nahrungsmitteln Tensidhaltiges Wasser
Brennstoffen Tensidhaltiges Wasser
- Beim Reinigen darf keine Feuchtigkeit in das Gerät dringen.
- Tragen Sie zum Reinigen des Gerätes Schutzhandschuhe.
- Falls andere als die empfohlenen Reinigungs- oder Dekonta-
minationsmethoden angewendet werden, fragen Sie bitte bei
IKA nach.
Ersatzteilbestellung
Bei Ersatzteilbestellungen geben Sie bitte Folgendes an:
- Gerätetyp
- Fabrikationsnummer des Gerätes, siehe Typenschild
- Positionsnummer und Bezeichnung des Ersatzteiles,
siehe Ersatzteilbild und -liste,
Reparaturfall
Bitte senden Sie nur Geräte zur Reparatur ein, die gerei-
nigt und frei von gesundheitsgefährdenden Stoffen sind.
Fordern Sie hierzu das Formular „Unbedenklichkeits-
bescheinigung“bei IKA an oder verwenden Sie den download
Ausdruck des Formulares auf der IKA
Senden Sie im Reparaturfall das Gerät in der Originalverpackung
zurück. Lagerverpackungen sind für den Rückversand nicht
ausreichend. Verwenden Sie zusätzlich eine geeignete
Transportverpackung.
8
Instandhaltung
1
2
3
1
2
3
1
2
1
"click"
1
!
Start
Stop
Power
Set
Time
!
Start
Stop
Power
Set
Time
!
Start
Stop
Power
Set
Time
!
Start
Stop
Power
Set
Time
Lorem ipsum
MS 3.1
MS 3.3
MS 3.4
www.GlobalTestSupply.com
Find Quality Products Online at: sales@GlobalTestSupply.com
9
Steckernetzteil
Input V 100 - 240
A 0,8
Hz 50-60
Output Vdc 24
24W.LPS
(Limited power source)
Schutzklasse 2 (
doppelt isoliert)
Schüttler
Betriebsspannung Vdc 24
mA 800
Leistungsaufnahme Normal-Betrieb W 20
Leistungsaufnahme Standby-Betrieb W 2
Motor-Leistungsabgabe W 8
Antrieb EC - Motor
Drehzahlbereich rpm 0/200 – 3000
stufenlos einstellbar
Drehzahleinstellung Drehknopf frontseitig
Drehzahlanzeige Skala 0 – 3000
Schüttelhub mm 4,5
Schüttelbewegung
horizontal, kreisförmig
Zulässige Einschaltdauer % 100
Timer Modus Sekunden 1 - 999 sec
Modus Minuten 1 - 999 min
Anzeige Timer digital
Zul. Umgebungstemperatur °C +5 bis +40
Zul. rel. Feuchte % 80
Schutzart nach DIN EN 60529 IP 21
Verschmutzungsgrad 2
Überspannungskategorie II
Geräteeinsatz über NN m max. 2000
Abmessung (B x T x H) mm 148 x 205 x 63
ohne Aufsatz
Gewicht ohne Beladung kg 2,9
Max. Beladung inkl. Aufsatz kg 0,5
Technische Änderungen vorbehalten!
E
ntsprechend den IKA-Verkaufs-und Lieferbedingungen beträgt
die Gewährleistungszeit 24 Monate. Im Gewährleistungsfall
wenden Sie sich bitte an Ihren Fachhändler, oder senden Sie das
Gerät unter Beifügung der Lieferrechnung und Nennung der
Reklamati-onsgründe direkt an unser Werk. Frachtkosten gehen
zu Ihren Lasten.
Die Gewährleistung erstreckt sich nicht auf Verschleißteile und
gilt nicht für Fehler, die auf unsachgemäße Handhabung und
unzureichende Pflege und Wartung, entgegen den Anweisungen
in dieser Betriebsanleitung, zurückzuführen sind.
Technische Daten
Gewährleistung
www.GlobalTestSupply.com
Find Quality Products Online at: sales@GlobalTestSupply.com

ttttttttttttttttttttttttttttttttttttttttttttttttttttttttttttttttttttttttttttttttttttttPage
Declaration of conformity 2
Safety instructions 10
Unpack sssssssssssssssssssssssssssssssssssssssssssssssss11
Correct use 11
Commissioning 12
Accessories 14
Maintenance 15
Technical data 16
Warrantydddddddddddddddddddddddddddddddddddddddd 16
•
Read the operating instructions in full before starting
up and follow the safety instructions.
• Keep the operating instructions in a place where they can be
accessed by everyone.
• Ensure that only trained staff work with the appliance.
• Follow the safety instructions, guidelines, occupational health
and safety and accident prevention regulations.
• The voltage stated on the nameplate must correspond to the
mains voltage.
• The device must only be operated with the original plug-in
power supply unit.
• Wear your personal protective equipment in accordance with
the hazard category of the medium to be processed. Otherwise
there is a risk of:
- splashing liquids
- projectile parts
- body parts, hair, clothing and jewellery getting caught.
• Set up the appliance in a spacious area on an even, stable,
clean, non-slip, dry and fireproof surface.
•
The feet of the appliance must be clean and undamaged.
• Position the knob (C) at the left stop before starting up.
Gradually increase the speed.
10
• Keep hand/arm vibration to a minimum (Directive 2002/44/EC)
when operated manually:
- Keep the sample container as vertical as possible.
-
Only
exert the minimum pressure necessary for the mixing
process
.
- Use attachments for multiple samples when there is a large
number of samples.
• If the shaking movement of the appliance increases (resonan-
ce), reduce the speed or pass through the critical phase as
quickly as possible.
• Reduce the speed if
- the medium splashes out of the vessel because the speed is
too high
- the appliance is not running smoothly
-
the appliance begins to move around because of dynamic forces.
• Firmly secure the accessories and vessels in place, otherwise
shaking vessels could be damaged or projected out.
• Check the appliance and accessories beforehand for damage
each time you use them. Do not use damaged components.
• Position one single shaking vessel in the centre and several
shaking vessels so that they are evenly spread out.
• Sharp edged vessels cause wear debris on the attachments.
• Beware of the risk of
- flammable materials
- glass breakage as a result of mechanical shaking power
• Only process media that will not react dangerously to the
extra energy produced through processing. This also applies
to any extra energy produced in other ways, e.g. through light
irradiation.
• Do not operate the appliance in explosive atmospheres, with
hazardous substances or under water.
• Safe operation is only guaranteed with the accessories descri-
bed in the ”Accessories” chapter.
• Always disconnect the plug before fitting accessories.
• The appliance does not start up again automatically following
a cut in the power supply.
• Protect the appliance and accessories from bumps and impacts.
• The appliance may heat up when in use.
• The appliance may only be opened by experts.
Contents
Safety instructions
EN
www.GlobalTestSupply.com
Find Quality Products Online at: sales@GlobalTestSupply.com

11
•Unpack
- Please unpack the device carefully
- In the case of any damage a fact report must be set
immediately (post, rail or forwarder)
•Delivery scope
MS 3 basic
- Shaker MS 3 basic
- Power supply
- Standard attachment MS 3.1
- Universal attachment MS 3.3
- One-hand insert MS 1.21
- Operating instructions
MS 3 digital
- Shaker MS 3 digital
- Power supply
- Standard attachment MS 3.1
- Universal attachment MS 3.3
- One-hand insert MS 1.21
- Microtiter attachment MS 3.4
- Test tube insert MS 1.32
- Operating instructions
•Use
4For mixing liquids
- Touch mode for single test tubes
- Continuous mode for single or several vessels
•Range of use
- Laboratories - Schools
- Pharmacies - Universities
This device is suitable for use in all areas except industrial areas.
The protection for the user is not ensured no more, if the equip-
ment with accessories is operated, which are supplied or are not
recommended not by the manufacturer or if the equipment in
not correct use is operated against the manufacturer default.
Unpack Correct use
www.GlobalTestSupply.com
Find Quality Products Online at: sales@GlobalTestSupply.com
Power
Power
0 0 0
Switching on
Start
Stop
Change to
continuous
operation
Mode A
Operating mode
"Continuous operation"
Speed upto 1300 rpm
Change mode
A B
Mode A
Operating mode
"Touch operation"
Speed upto 3000 rpm
B A
1
4
Power
Switch off the device and
switch on again, see 1
Setting timer /
0 0 0
0 0 5
1 0 0 1 0 1
Seconds mode
Change to
minutes mode
Countdown running:
Switch off the device
Power
Switching on the device:
Press and hold button "1" and
also press the "Power" button
Power
1
0 0 5
Minutes mode
Countdown running:
Speed
adjustment
2
3
Position the rotating knob at the
left stop before starting up
Mode B
Operation modes "Touch"
and "Continuous operation"
Speed upto 3000 rpm
0 0 0
Start
Stop
Start
Stop
1 0 0 1 0 1
Switch off the device
Power
Switching on the device:
Press and hold button "Start/Stop"
and also press the "Power" button
(= Factory setting)
Start
Stop
An audible signal will be given
when the countdown is
complete
An audible signal will be given
when the countdown is
complete
Not available on
MS 3 BASIC
Change
timer setting
The value previously set
will be displayed
(Factory setting=000)
If these conditions are met, the
unit is ready for service when the
mains plug has been plugged in
12
Commissioning
Setting Display
Action
www.GlobalTestSupply.com
Find Quality Products Online at: sales@GlobalTestSupply.com

Power
Power
0 0 0
Switching on
Start
Stop
Change to
continuous
operation
Mode A
Operating mode
"Continuous operation"
Speed upto 1300 rpm
Change mode
A B
Mode A
Operating mode
"Touch operation"
Speed upto 3000 rpm
B A
1
4
Power
Switch off the device and
switch on again, see 1
Setting timer /
0 0 0
0 0 5
1 0 0 1 0 1
Seconds mode
Change to
minutes mode
Countdown running:
Switch off the device
Power
Switching on the device:
Press and hold button "1" and
also press the "Power" button
Power
1
0 0 5
Minutes mode
Countdown running:
Speed
adjustment
2
3
Position the rotating knob at the
left stop before starting up
Mode B
Operation modes "Touch"
and "Continuous operation"
Speed upto 3000 rpm
0 0 0
Start
Stop
Start
Stop
1 0 0 1 0 1
Switch off the device
Power
Switching on the device:
Press and hold button "Start/Stop"
and also press the "Power" button
(= Factory setting)
Start
Stop
An audible signal will be given
when the countdown is
complete
An audible signal will be given
when the countdown is
complete
Not available on
MS 3 BASIC
Change
timer setting
The value previously set
will be displayed
(Factory setting=000)
If these conditions are met, the
unit is ready for service when the
mains plug has been plugged in
13
Setting Display
Action
Operating modes
Modus A
(with speed limiter) Modus B
(without speed limiter)
Touch mode
(with standard attachment
MS 3.1)
max. 3000
rpm
max. 3000 rpm
Continuous mode
(with all attachments)
max. 1300
rpm
max. 3000 rpm
www.GlobalTestSupply.com
Find Quality Products Online at: sales@GlobalTestSupply.com

Accessories
Possible uses and permitted speed ranges of attachments:
Designation
Description
Ident-
Nr.
Touch
mode
Continuous
mode
Speed
range (rpm)
Mode
MS 3.1
Standard attachment
For test tubes and small vessels upto
ø 50 mm
3426300 x
-
-
-
x
x
0/200-3000
0/200-1300
0/200-3000
A and B
A
B
MS 3.3
Universal attachment
For different rubber foam inserts
3426600 - x 0/200-1300
0/200-3000 A
B
MS 3.4
Microtiter attachment
For one microtiter plate
3426400 - x 0/200-1300 A
MS 3.5
PCR-Plate attachment
For one 96-well PCR-plate
3428000 - x 0/200-1300 A
MS 3.51
PCR-Plate insert
- F
or inserting into the PCR-Plate attachment
3428700 - x 0/200-1300 A
MS 1.21
One-hand insert
For inserting into the
universal
attachment
L001540 - x 0/200-1300
0/200-3000 A
B
MS 1.30
Test tube insert
- For inserting into the universal attachment
- For 24 tubes ø7,8 mm
25005776
- x 0/200-1300 A
MS 1.31
Test tube insert
- For inserting into the universal attachment
- For 14 test tubes ø 10 mm
L001840 - x 0/200-1300 A
MS 1.32
Test tube insert
- For inserting into the universal attachment
- For 6 test tubes ø 12 mm
L001850 - x 0/200-1300 A
MS 1.33
Test tube insert
- For inserting into the universal attachment
- For 4 test tubes ø 16 mm
L001860 - x 0/200-1300 A
MS 1.34
Test tube insert
- For inserting into the universal attachment
- You can make holes as you like
L001830 - x 0/200-1300 A
14
www.GlobalTestSupply.com
Find Quality Products Online at: sales@GlobalTestSupply.com

15
Changing attachments
Using inserts
Cleaning
The
appliance is maintenance-free.
For cleaning, disconnect the main plug!
Only use cleansing agents which have been recommended by
IKA. Use to remove:
Dyes isopropyl alcohol
Construction materials water containing tenside/ isopropyl alcohol
Cosmetics water containing tenside/ isopropyl alcohol
Foodstuffs water containing tenside
Fuels water containing tenside
- Do not allow moisture to get into the appliance when cleaning
- Wear protective gloves during cleaning the devices.
- Before using another than the recommended method for clean-
ing or decontamination, the user must ascertain with IKA that
this method does not destroy the instrument.
Spare parts order
When ordering spare parts, please give:
- Machine type
- Manufacturing number, see type plate
- Item and designation of the spare part, see spare parts dia-
gram and spare parts list, see
Repair
Please only send devices in for repair that have been
cleaned and are free of materials which might present
health hazards.
For this, use the “certificate of compliance” form which you
can obtain from IKA or can download a version for printing from
the IKA website
If your appliance requires repair, return it in its original packaging.
Storage packaging is not sufficient when sending the device -
also use appropriate transport packaging.
Maintenance
MS 3.1
MS 3.3
MS 3.4
www.GlobalTestSupply.com
Find Quality Products Online at: sales@GlobalTestSupply.com

Dimensions total W x D x H mm 148 x 205 x 63
without attachment
Weight without supported load kg 2,9
Max. supported load incl. attachment
kg 0,5
Subject to technical changes!
I
n accordance with IKA warranty conditions, the warranty period
is 24 months. For claims under the warranty please contact your
local dealer. You may also send the machine direct to our works,
enclosing the delivery invoice and giving reasons for the claim.
You will be liable for freight costs.
The warranty does not cover wearing parts, nor does it apply to
faults resulting from improper use or insufficient care and main-
tenance contrary to the instructions in this operating manual.
16
Power supply
Input V 100 - 240
A 0,8
Hz 50-60
Output Vdc 24
24W.LPS
(Limited power source)
Protection class
2 (double insulated)
Shaker
Operating voltage Vdc 24
mA 800
Power consumption, normal operation
W 20
Power consumption, standby operation
W 2
Motor-output power W 8
Drive EC - motor
Speed range rpm 0/200 – 3000
infinitely adjustable
Speed adjustment
rotating knob in front
of the appliance
Speed display scale 0 – 3000
Agitation stroke mm 4,5
Shaking motion horizontal, circular
Perm duration of operation % 100
Timer mode seconds 1 - 999 sec
mode minutes 1 - 999 min
Timer display digital
Perm ambient temperature °C +5 bis +40
Perm. relative humidity % 80
Protection type acc. to DIN EN 60529
IP 21
Contamination level 2
Overvoltage category II
Operation at a terrestrial altitude m max. 2000
Technical data
Warranty
www.GlobalTestSupply.com
Find Quality Products Online at: sales@GlobalTestSupply.com

17
Page
Déclaration de conformité 2
Consignes de sécurité 17
Déballage 18
Utilisation conforme 18
Mise en service 19
Accessories 21
Entretien 22
Caractéristiques techniques 23
Garantie 23
•
Lisez intégralement la notice d’utilisation avant la mise
en service et respectez les consignes de sécurité.
• Laissez la notice à portée de tous.
• Attention, seul le personnel formé est autorisé à utiliser l’appareil.
• Respectez les consignes de sécurité, les directives, ainsi que les
prescriptions pour la prévention des accidents du travail.
• L’indication de tension de la plaque d’identification doit cor
re-spondre avec la tension du réseau.
• L’appareil ne doit être utilisé qu’avec l’alimentateur d’origine.
• Portez votre équipement de protection personnel selon la
classe de danger du milieu à traiter. Sinon, vous vous exposez à
des danger:
- aspersion de liquides
- éjection de pièces
- happement de parties du corps, cheveux, habits et bijoux.
• Placez l’appareil en aire spacieuse sur une surface plane, stable,
propre, non glisssante, sèche et inflammable.
• Les pieds de l’appareil doivent être propres et en parfait état.
• Avant la mise en service, placez le bouton rotatif (C) en butée
gauche. Augmentez doucement le régime.
• Réduisez les vibrations soumises au système main-bras (directive
2002/44/CE) lors de l’utilisation manuelle:
- tenez le récipient contenant l’échantillon le plus verticalement
possible.
- exercez une pression semblable à celle nécessaire pour le pro
cessus de mélange, pas plus.
- utilisez des supports pour plusieurs échantillons lorsque leur
nombre est élevé.
•
Si le mouvement de secousse de l’appareil s’accroît (résonance), rédu-
isez le régime ou passez le plus rapidement possible la zone critique.
• Réduisez le régime si
- le milieu est aspergé hors du récipient à cause d’un régime
trop élevé
- le fonctionnement est irrégulier
-
l’appareil
commence à se déplacer en raison des forces dynamiques.
• Fixez les accessoires et les récipients, sous peine d’endommager
ou d’éjecter les récipients agitateurs.
• Avant toute utilisation, contrôlez l’état de l’appareil et des
accessoires. N’utilisez pas les pièces endommagées.
• Placez un récipient agitateur au centre et plusieurs récipients
agitateurs répartis de manière régulière.
• Les récipients coupants et pointus entraînent l’abrasion des
supports.
• Vous vous exposez à des dangers par
- les matériaux inflammables
-
les bris de verre causés par l’énergie mécanique des secousses.
• Ne traitez que des milieux pour lesquels l’apport d’énergie pen-
dant l’opération ne pose pas problème. Cela vaut aussi pour les
autres apports d’énergie, comme la radiation lumineuse par ex.
• N’utilisez pas l’appareil dans les atmosphères explosives, avec
des matières dangereuses et sous l’eau.
• La sécurité de l’appareil n’est assurée qu’avec les accessoires
décrits dans le chapitre “Accessoires”.
• Montez les accessoires uniquement lorsque l’appareil est
dé-branché.
• Après une coupure de l’alimentation électrique, l’appareil ne
redémarre pas seul.
• Evitez les coups sur l’appareil et les accessoires.
• En fonctionnement, l’appareil peut s’échauffer.
• Seules les personnes spécialisées sont autorisées à ouvrir l’appareil.
Sommaire
Consignes de sécurité
FR
www.GlobalTestSupply.com
Find Quality Products Online at: sales@GlobalTestSupply.com

•Déballage
- Déballez l’appareil avec précaution
- En cas de dommage, établiez immédiatement un constat
correspondant (poste, chemins de fer ou transporteur)
•Volume de livraison
MS 3 basic
- Un agitateur MS 3 basic
- Bloc d’alimentation
- Support standard MS 3.1
- Support universel MS 3.3
- Insert MS 1.21
- Mode d’emploi
MS 3 digital
- Un agitateur MS 3 digital
- Bloc d’alimentation
- Support standard MS 3.1
- Support universel MS 3.3
- Insert MS 1.21
- Support pour microtiter MS 3.4
- Portoir pour tubes à essaisMS 1.32
- Mode d’emploi
18
• Utilisation
4Sert à mélanger des liquides
- Mode „Touch“ pour tubes à essais individuels
- Mode „continu“ pour un ou plusieurs récipients
• Secteur d’utilisation
- Laboratoires - Écoles
- Pharmacies - Universités
La protection de l’utilisateur n’est plus garantie si l’appareil est
utilisé avec un accessoire n’ayant pas été fourni ou conseillé par
le fabricant ou si l’appareil est utilisé de manière non conforme
aux prescriptions du fabricant.
Déballage Utilisation conforme
www.GlobalTestSupply.com
Find Quality Products Online at: sales@GlobalTestSupply.com

Power
Power
0 0 0
Allumer
l’appareil
Start
Stop
Passage en
fonctionnement
"Continu"
Mode A
Mode de fonctionnement "Continu"
Vitesse de rotation jusqu'à 1300 rpm
Changement de mode
A B
Mode A
Mode de fonctionnement "Intermittent"
Vitesse de rotation jusqu'à 3000 rpm
B A
1
4
Power
Éteindre l’appareil et
allumer de nouveau, voir 1
Réglage du minuteur /
0 0 0
0 0 5
1 0 0 1 0 1
Mode seconds
Passage en mode
mode minutes
Le compte à rebours réglé est lancé:
Éteindre l’appareil
Power
Allumer l’appareil:
Maintenir le bouton “1” enfoncé
et presser le bouton "Power"
Power
1
0 0 5
Mode minutes
Le compte à rebours réglé est lancé:
Réglage de la
vitesse de rotation
2
3
Avant la mise en service, placez
le bouton rotatif en butée.
Mode B
Modes de fonctionnement
"Intermittent" et "Continu"
Vitesse de rotation jusqu'à 3000 rpm
0 0 0
Start
Stop
Start
Stop
1 0 0 1 0 1
Éteindre l’appareil
Power
Allumer l’appareil:
Maintenir le bouton "Start/Stop" enfoncé
et presser le bouton "Power"
(= Réglage d’usine)
Start
Stop
une fois le compte à rebours terminé
un signal sonore retentit
une fois le compte à rebours terminé
un signal sonore retentit
Ne concerne pas
MS 3 BASIC
Modification du
réglage du minuteur La dernière valeur réglée est achée
(Réglage d’usine=000)
Si ces conditions sont remplies,
l’appareil est prêt à fonctionner après
avoir connecté la prise de secteur.
19
Mise en service
Réglage Affichage
Action
www.GlobalTestSupply.com
Find Quality Products Online at: sales@GlobalTestSupply.com

Power
Power
0 0 0
Allumer
l’appareil
Start
Stop
Passage en
fonctionnement
"Continu"
Mode A
Mode de fonctionnement "Continu"
Vitesse de rotation jusqu'à 1300 rpm
Changement de mode
A B
Mode A
Mode de fonctionnement "Intermittent"
Vitesse de rotation jusqu'à 3000 rpm
B A
1
4
Power
Éteindre l’appareil et
allumer de nouveau, voir 1
Réglage du minuteur /
0 0 0
0 0 5
1 0 0 1 0 1
Mode seconds
Passage en mode
mode minutes
Le compte à rebours réglé est lancé:
Éteindre l’appareil
Power
Allumer l’appareil:
Maintenir le bouton “1” enfoncé
et presser le bouton "Power"
Power
1
0 0 5
Mode minutes
Le compte à rebours réglé est lancé:
Réglage de la
vitesse de rotation
2
3
Avant la mise en service, placez
le bouton rotatif en butée.
Mode B
Modes de fonctionnement
"Intermittent" et "Continu"
Vitesse de rotation jusqu'à 3000 rpm
0 0 0
Start
Stop
Start
Stop
1 0 0 1 0 1
Éteindre l’appareil
Power
Allumer l’appareil:
Maintenir le bouton "Start/Stop" enfoncé
et presser le bouton "Power"
(= Réglage d’usine)
Start
Stop
une fois le compte à rebours terminé
un signal sonore retentit
une fois le compte à rebours terminé
un signal sonore retentit
Ne concerne pas
MS 3 BASIC
Modification du
réglage du minuteur La dernière valeur réglée est achée
(Réglage d’usine=000)
Si ces conditions sont remplies,
l’appareil est prêt à fonctionner après
avoir connecté la prise de secteur.
20
Réglage Affichage
Action
Modes de fonctionnement
Modus A
(avec limitation de
vitesse de rotation)
Modus B
(sans limitation vitesse
de rotation)
Mode intermittent
(
avec support de standard
MS 3.1)
max. 3000 rpm max. 3000 rpm
Continuous mode
(avec touts les supports)
max. 1300 rpm max. 3000 rpm
www.GlobalTestSupply.com
Find Quality Products Online at: sales@GlobalTestSupply.com
Other manuals for MS 3 basic
3
This manual suits for next models
2
Table of contents
Other IKA Paint Sprayer manuals

IKA
IKA KS 3000 i control User manual

IKA
IKA KMO 3 basic User manual

IKA
IKA Roller 6 basic User manual

IKA
IKA KS 4000 i control User manual

IKA
IKA Vortex 1 User manual

IKA
IKA KS 4000 i control User manual

IKA
IKA KS 4000 i control User manual

IKA
IKA Vortex 3 User manual

IKA
IKA HS 260 Basic User manual

IKA
IKA MS 3 basic User manual