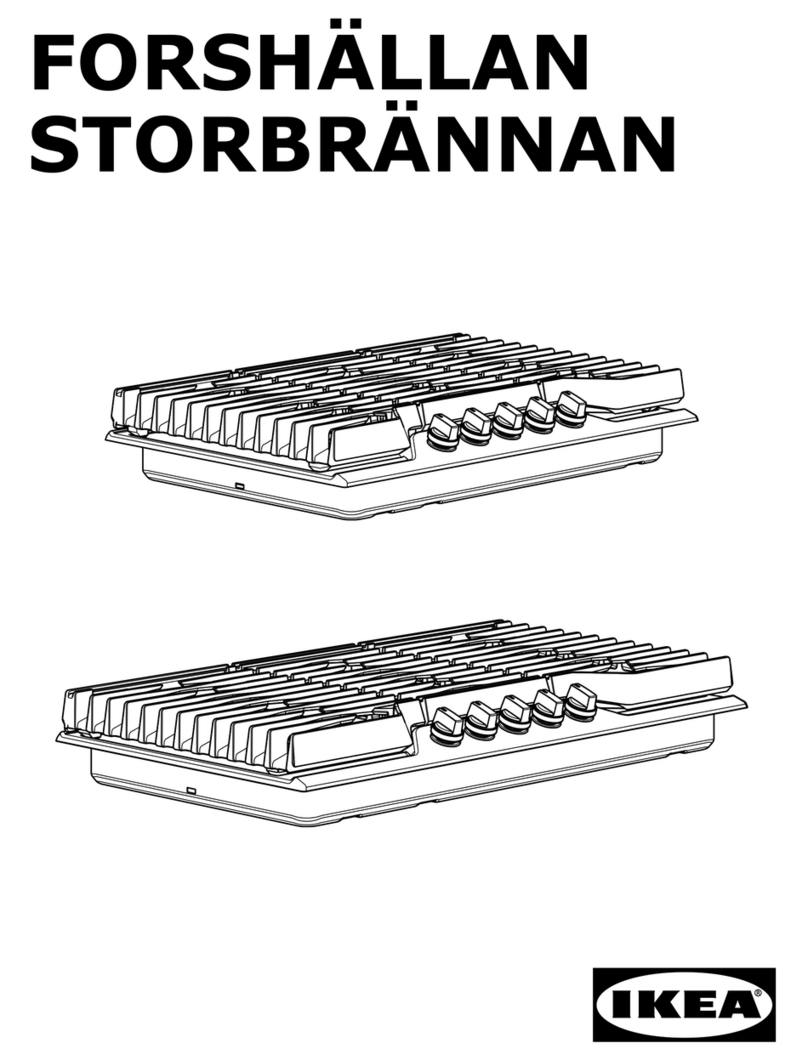
IKEA GRILJERA User manual

GRILJERA
GB
IT


ENGLISH 4
ITALIANO 33
Please refer to the last page
of this manual for the full list
of IKEA appointed Authorized
Service Centre and relative
national phone numbers.
Consultare l’ultima pagina
di questo manuale dove è
riportato l’elenco completo
dei Centri Assistenza IKEA
con i relativi numeri telefonici
nazionali.

ENGLISH 4
Your safety and that of others are
very important.
This manual and the appliance
itself provide important safety
warnings, to be read and observed
at all times.
This is the danger symbol,
pertaining to safety, which
alerts users to potential risks to
themselves and others.
All safety warnings are preceded
by the danger symbol and the
following terms:
DANGER! Indicates a
hazardous situation which, if not
avoided, will cause serious injury.
WARNING! Indicates a
hazardous situation which, if not
avoided, could cause serious injury.
All safety warnings give specic
details of the potential risk present
and indicate how to reduce risk of
injury, damage and electric shock
resulting from improper use of the
appliance. Carefully observe the
following instructions:
- Use protective gloves to perform
all unpacking and installation
operations.
- The appliance must be
disconnected from the power
supply before carrying out any
installation work.
- Installation and maintenance
must be carried out by
a qualied technician,
in compliance with the
manufacturer’s instructions and
local safety regulations. Do not
repair or replace any part of
the appliance unless specically
stated in the user manual.
- Power cable replacement must
be carried out by qualied
electician. Contact an authorizes
service centre.
- Regulations require that the
appliance is earthed.
- The power cable must be long
enough for connecting the
appliance, once tted in its
housing, to the power supply
socket.
Do not store or use gasoline or
other ammable vapors and liquids
in the vicinity of this appliance.
What to do if you smell gas:
- Do not try to light any appliance.
- Do not touch any electrical
switch.
- Do not use any phone in your
building.
Safety Information
Table of contents
Safety Information 4
Product description 8
Control panel 9
Daily use 11
Cleaning and maintenance 17
What to do if ... 19
Technical data 21
Installation 23
Electrical connection 29
Environmental concerns 30
IKEA GUARANTEE 31

ENGLISH 5
- Immediately call your gas
supplier from a neighbor’s
phone. Follow the gas supplier’s
instructions.
- If you cannot reach your gas
supplier, call the re department.
- Installation and service must
be performed by a qualied
installer, service agency or the
gas supplier.
- Use appliance in well ventilated
rooms only.
- The electrical and gas
connections must comply with
local regulations.
- When the appliance is
installed, provide a multi-pole
circuit breaker with a contact
separation (at least 3 mm)
in all poles that provide full
disconnection under overvoltage
category III and must be
incorporated in the xed wiring
in accordance with the national
wiring rules.
- Do not use multiple plug
adapters or extension leads.
- Do not pull the power supply
cable in order to unplug the
appliance.
- The electrical components must
not be accessible to the user
after installation.
- If the surface of the induction
plate is cracked, do not use it
and switch off the appliance to
avoid the possibility of electric
shock (only for models with
induction function).
- Use only exible or rigid metal
hose for gas connection.
- Do not touch the appliance with
any wet part of the body and do
not operate it when barefoot.
- This appliance is designed solely
for use as a domestic appliance
for cooking food. No other type
of use is permitted (e.g.: heating
rooms). The Manufacturer
declines all responsibility for
inappropriate use or incorrect
setting of the controls.
- The use of a gas appliance
produces heat and humidity in
the room. Make sure the room
is well-ventilated, or install an
extractor hood with exhaust
duct.
- Domestic animals should be kept
away from the appliance.
- In case of prolonged use,
additional ventilation may
be necessary (by opening a
window or increasing the hood
extraction speed).
- After use, make sure the knobs
are in off position and close the
main gas supply cock or the gas
cylinder valve.
- Overheated oils and fats catch
re easily. Always remain
vigilant when cooking foods rich
in fat, oil or alcohol (e.g. rum,
cognac, wine).
- Unattended cooking on a hob
with fat or oil can be dangerous
and may result in re. NEVER try
to extinguish a re with water,

ENGLISH 6
but switch off the appliance and
then cover ame e.g. with a lid
or a re blanket.
Danger of re: do not store items on
the cooking surfaces.
- Keep the packaging materials
out of the reach of children.
- Before cleaning or maintenance
wait for hob to cool down.
- This appliance can be used by
children aged from 8 years and
above and persons with reduced
physical, sensory or mental
capabilities or lack of experience
and knowledge if they have
been given supervision or
instruction concerning use of the
appliance in a safe way and
understand hazards involved.
Children shall not play with the
appliance. Cleaning and user
maintenance shall not be made
by children without supervision.
- The accessible parts of the
appliance may become very
hot during use. Young children
should be kept away from the
appliance and supervised to
ensure that they do not play with
it.
- The appliance and its accessible
parts become hot during use.
Care should be taken to avoid
touching heating elements.
Children less than 8 years old
shall be kept away, unless
continuosly supervised.
- During and after use, do not
touch the heating elements or
interior surfaces of the appliance
- risk of burns. Do not allow the
appliance to come into contact
with cloths or other ammable
materials until all the components
have cooled sufciently.
- At the end of cooking, exercise
caution when opening the
appliance door, letting the hot
air or steam exit gradually
before accessing the oven. When
the appliance door is shut, hot
air is vented from the aperture
above the control panel. Do not
obstruct the vent apertures.
- Use oven gloves to remove pans
and accessories, taking care not
to touch the heating elements.
- Do not place ammable
materials in or near the
appliance: a re may break out
if the appliance is inadvertently
switched on.
- Do not heat or cook sealed jars
or containers in the appliance.
The pressure that builds up
inside might cause the jar
to explode, damaging the
appliance.
- Do not use containers made of
synthetic materials.
- Overheated oils and fats catch
re easily. Always remain
vigilant when cooking foods rich
in fat and oil.
- Never leave the appliance
unattended during food drying.
- If alcoholic beverages are used
when cooking foods (e.g. rum,

ENGLISH 7
cognac, wine), remember that
alcohol evaporates at high
temperatures. As a result, there is
a risk that vapours released by
the alcohol may catch re upon
coming into contact with the
electrical heating element.
- Never use steam cleaning
equipment.
- Do not touch the oven during the
pyrolysys cycle. Keep children
away from the oven during the
pyrolysis cycle.(only for ovens
with Pyrolisis function).
- Do not use harsh abrasive
cleaners or sharp metal scrapers
to clean the oven door glass
since they can scratch the
surface, which may result in
shattering of the glass.
- Ensure that the appliance is
switched off before replacing the
lamp to avoid the possibility of
electric shock.
- This product is not intended
to be installed and operated
outdoors. Save these instructions.
Scrapping of household
appliances
- This appliance is manufactured
with recyclable or reusable
materials. Dispose of it in
accordance with local waste
disposal regulations. Before
scrapping, cut off the power
supply cable.
- For further information on
the treatment, recovery and
recycling of household electrical
appliances, contact your
competent local authority, the
collection service for household
waste or the store where you
purchased the appliance.

ENGLISH 8
6
1 5
7
8
9
10
11
234
Product description
Cooktop
1Rapid burner
2Semirapid burner
3Triple ring burner
4Semirapid burner
5 Auxiliary burner
Oven
6Control panel
7 Ventilation opening
8Grill heating element
9Rear lamp
10 Oven fan
11 Oven door
Accessories
Wire shelves Drip tray Side grids
2x 1x 2x
Wok adaptor Telescopic runner
1x 4x

ENGLISH 9
Oven controls
1Cooking time selector knob
6Thermostat selector knob
2Yellow thermostat led light
Red oven led light t
7Function selector knob
Cooktop controls
3Front left burner control knob*
4Rear left burner control knob*
5Middle burner control knob*
8Front right burner control knob*
9Rear right burner control knob*
*
The oven and cooktop control knobs are not interchangeable.
After cleaning or servicing, they must be returned to their original positions.
Control panel
1 32 45 6 7 8 9

ENGLISH 10
Switching on the oven
• Turn the selector knob to the required
function. The red oven light switches on.
• Turn the thermostat knob clockwise to
the required temperature. The orange
thermostat led lights up, switching off
again when the oven reaches the selected
temperature. At the end of cooking, turn the
knobs to .
Cooking time selector
To set cooking time, after selecting the required
cooking function, turn the knob right round in
a clockwise direction and then turn it back in
the opposite direction to the desired cooking
duration.
This selector can be used to set a cooking time
of between 1 and 55 minutes.
How to operate the cooktop
Using the gas burners
The following symbols are given near each
knob on the front panel:
Full circle Tap closed
Large ame Max. opening
Small ame Min opening
The minimum position is when the knob is
turned fully anticlockwise. All the operating
positions must be chosen between the min. and
max. positions, and never between max. and
off.
Automatic electric ignition
To light one of the burners, press the knob
corresponding to the burner and turn it
anticlockwise to Max. Keep the knob pressed
for automatic lighting of the burner. In case of a
power failure or no current, the burner can also
be lit with a match.
Safety valve
To light the burners, carry out the same
operations given above. Once the knobs are
turned to the opening position they must be
kept pressed for about 10 seconds.
If for any reason the burner ame goes out, the
safety valve automatically cuts in, shutting off
the gas to the relevant burner.

ENGLISH 11
Daily use
Oven functions Description of function
Oven OFF -
GRILL WITH FAN To grill large joints of meat (roast beef and other roast meats).
The oven door must be kept closed during the cooking cycle.
When cooking meat, it is advisable to pour water in the drip
tray placed on the rst/second level. This will reduce smoke
and spattering of fat. Turn the meat during grilling.
GRILL To grill steak, kebabs and sausages, to cook vegetables au
gratin and to toast bread. Preheat the oven for 3 - 5 min. It is
advisable to use the 4th level for cooking. During cooking the
oven door must remain closed. When cooking meat, pour a
little water into the drip tray (on the 3rd level) to reduce smoke
and fat spatters.
FORCED AIR To cook a variety of food requiring the same cooking
temperature on a maximum of two shelves at the same time
(e.g.: sh, vegetables, cakes). This function can be used to cook
different foods without odours being transferred from one food
to another. Use the 2rd level to cook on one shelf only. To cook
on two shelves, use the 1st and 3rd levels. Preheat the oven to
the required temperature and place the food in it when the set
temperature is reached.
BOTTOM HEATING
WITH FAN
To nish cooking food with a very liquid consistency and to
obtain crisp, golden bases. Also useful for thickening sauces.
It is advisable to place food on the 2nd cooking level. Preheat
the oven.
CONVECTION BAKE For baking cakes with liquid lling (sweet or savoury), on one
level. If necessary, change the positions of the dishes on the
shelf to cook food more evenly.
CONVECTION Function suitable for cooking any type of dish on one level.
Preheat the oven to the required temperature and place the
food in it when the set temperature is reached. It is advisable
to use the second level for cooking.
SPECIAL FUNCTIONS

ENGLISH 12
Oven functions Description of function
DEFROST
To speed up defrosting of food. Place food on the middle shelf.
Leave food in its packaging in order to prevent it from drying
out on the outside. Put thermostat knob in 0 position.
KEEP WARM
For keeping just-cooked food hot and crisp (e.g: meat, fried
food or ans). Place food on the middle shelf. Put thermostat
knob in 50-75 °C position.
ECO FORCED AIR
To cook stuffed roasts and meat in pieces on one shelf. This
function uses delicate fan assistance, which prevents excessive
drying of foods. In order to maximize energy efciency, it is
advisable not to open the door during cooking. It is advisable
to use 3rd level. The oven does not have to be preheated.
LIGHT To switch on the oven light.

ENGLISH 13
Advice and tips regarding use
Cakes and bread:
- Heat the oven for at least 15 minutes before
you start cooking bread or cakes.
- Do not open the door during baking
because the cold air would stop the yeast
from rising.
- When the cake is cooked turn the oven off
and leave it in for about 10 minutes.
- Do not use the enamelled oven tray or drip
pan, supplied with the oven, to cook cakes
in.
- How do you know when the cake is
cooked?
About 5 minutes before the end of cooking
time, put a cake tester or skewer in the
highest part of the cake. If it comes out
clean the cake is cooked.
- And if the cake sinks? The next time use less
liquids or lower the temperature 10°C.
- If the cake is too dry: Make some tiny holes
with a toothpick and pour some drops
of fruit juice or spirits on it. The next time,
increase the temperature 10°C and set a
shorter cooking time.
- If the cake is too dark on top: the next time
put the cake on a lower shelf, cook it at a
lower temperature and longer.
- If the top of the cake is burnt: cut off
the burnt layer and cover with sugar or
decorate it with cream, jam, confectioner’s
cream, etc..
- If the cake is too dark underneath: the next
time place it on a higher shelf and cook it at
a lower temperature.
- If the cake or bread is cooked nicely outside
but is still uncooked inside: the next time use
less liquids, cook at a lower temperature
and longer.
- If the cake will not come out of the tin: slide
a knife around the edges, place a damp
cloth over the cake and turn the tin upside
down.
The next time grease the tin well and
sprinkle it with our or bread crumbs.
- If the biscuits will not come away from
the baking tray: put the tray back in the
oven for a while and lift the biscuits up
before they cool. The next time use a
sheet of baking parchment to prevent this
happening again.
Meat
- If, when cooking meat, the time needed is
more than 40 minutes, turn the oven off 10
minutes before the end of cooking time to
exploit the residual heat (energy saving).
- Your roast will be juicier if cooked in a
closed pan; it will be crispier if cooked
without a lid.
- Normally white meat, poultry and sh need
medium temperatures (less than 200°C).
- To cook “rare” red meats, high temperatures
(over 200°C) and short cooking times are
needed.
- For a tasty roast, lard and spice the meat.
- If your roast is tough: the next time leave
the meat to ripen longer.
- If your roast is too dark on top or
underneath: the next time put it on a higher
or lower shelf, lower the temperature and
cook longer.
- Your roast is underdone? Cut it in slices,
arrange the slices on a baking tray with the
gravy and nish cooking it.
Grilling
- Sparingly grease and avour the food
before grilling it.
- Always use the grill pan to catch the juices
that drip from the meat during grilling.
- Always put a little water in the drip pan.
The water prevents the grease from burning
and from giving off bad smells and smoke.
Add more water during cooking because it
evaporates.
- Turn the food half way through cooking.
- If you are grilling fatty poultry (goose)
pierce the skin so the fat can drip away.
Preheating
if needed, preheat the oven at 180°C with

ENGLISH 14
Forced Air function. This is the quickest function
to pre-heat the cavity
Remove all trays and shelves before starting the
pre-heat cycle. This will save energy and make
pre-heating quicker

ENGLISH 15
Cooking - Baking tables
Foods Function Weight
kg Position
of the
oven
shelf
from the
bottom
Cooking by natural
convection Cooking by forced
convection (with fan)
Temperatures
in °C Cooking
time in
minutes
Temperatures
in °C Cooking
time in
minutes
MEAT
Roast veal 1 2 220-225 100-120 190 100-120
Roast beef 1 1 220-225 40-50 190 40-50
Roast pork 1 2 220-225 100-120 190 100-120
Roast lamb 1 1 220-225 100-120 190 100-120
GAME
Roast hare 1 2 200-Max 50-60 200-Max 50
Roast
pheasant 1 2 200-Max 60-70 200-Max 60
Roast
partridge 1 2 200-Max 50-60 200-Max 50
POULTRY
Roast chicken 1 2 220-225 80-90 190 70-80
Roast turkey 1 2 220-225 100-120 190 9 0 - 110
Roast duck 1 2 220-225 9 0 -110 190 80-100
FISH
Roast sh 1 2 200 30-35 170 -19 0 25-30
Casseroled
sh 1 2 175 20-25 160-170 15-20
BAKED PASTA
Lasagne 2,5 1210-225 60-75 225-Max 30-40
Cannelloni 2,5 1210-225 60-75 225-Max 30-40
PIZZA 1 2 225-Max 25-30 225-Max 20-25
BREAD 1 2 225-Max 20-25 220 20
PASTRIES
Biscuits in
general 2190 15 170 -19 0 15
Shortcrust
pastry 2200 20 190-200 20
Victoria
sponge 0,8 2200 40-45 190-200 40-45

ENGLISH 16
Foods Function Weight
kg Position
of the
oven
shelf
from the
bottom
Cooking by natural
convection Cooking by forced
convection (with fan)
Temperatures
in °C Cooking
time in
minutes
Temperatures
in °C Cooking
time in
minutes
CAKES
Angel cake 0,8 2190 52 170 -19 0 45
Fruit cake 0,8 2200 65 190-200 65
Chocolate
cake 0,8 2200 45 190-200 45
The values given in the tables (temperatures and cooking times) are approximate and may vary
according to each person’s cooking habits. This table gives cooking times on only one shelf. If you
are cooking with a fan oven and you are using more than one shelf (placing the shelves on the 1st
and 3rd or 2rd and 4rd position) cooking time will be about 5 to 10 minutes longer.
Grilling tables
Foods Function Weight
kg Position
of the
oven
shelf
from the
bottom
Cooking by natural
convection Cooking by forced
convection (with fan)
Temperatures
in °C Cooking
time in
minutes
Temperatures
in °C Cooking
time in
minutes
1st
side 2nd
side 1st
side 2nd
side
MEAT
Chop 0,50 3225-Max 12-
15
12-
15
200 15 10
Beefsteaks 0 ,15 3200-225 55= ==
Half chicken
(each half
0.5 kg)
1 2 225 20 20 = = =
FISH
Trout 0,42 3225-Max ==200 10 10
Sole 0,20 3225-Max ==200 7 7
BREAD
Toast 3225-Max 2-3 2-3 200 2-3 2-3
The values given in the tables (temperatures and cooking times) are approximate and may vary
according to each person’s cooking habits. In particular, temperatures and times for grilling meat will
greatly depend on the thickness of the meat and on personal tastes.

ENGLISH 17
Cleaning and maintenance
WARNING!
- Never use steam cleaning equipment.
- Only clean the oven when it is cool to the
touch.
- Disconnect the appliance from the power
supply.
Disconnect the appliance from the electrical
power supply before carrying out any cleaning
operation.
• Clean using a cloth moistened with warm
soapy water or diluted liquid detergent.
• Do not use abrasive or corrosive products,
chlorine products or steel wool.
• Do not use ammable products.
• Do not leave acidic or alkaline substances
such as vinegar, salt, lemon juice, etc., on
the hob.
• Use safety gloves
Stainless steel surface
• Clean with a specic commercial product.
Cleaning the burners
To clean the hob burners, lift them upwards out
of their seats (Fig. 1 and 2), then place them
in a solution of hot water and non-abrasive
detergent for about 10 minutes. After cleaning
and washing the burners, carefully dry them.
Always make sure that the openings are
not blocked. It is advisable to carry out this
operation at least once a week or whenever
necessary. Make sure to properly ret the
burners, turning them slowly so that the four
sectors under the burner cap engage the
injector holder seat (if perfectly centred, the
burner lowers a little and locks in place).
Fig. 1
Fig. 2
Grid maintenance
• Clean the grids with a sponge and
detergent whenever they are dirty.
• The grids will change colour near the
burners. This is perfectly normal and is due
to the high temperature reached during
cooking.
Oven cleaning
• After nishing cooking, wait for the
oven to cool, then clean it to prevent the
accumulation of cooking residuals.
• For stubborn dirt, use a specic oven
cleaning product following the instructions
given on the package.
• Clean the outside of the oven with a sponge
and tepid water.
• Do not use abrasives or steel wool.
• Clean the door glass with a liquid
detergent.
• Wash the accessories in the sink, using an
oven cleaner.

ENGLISH 18
Removal of oven shelf carriers
• Interior: the oven shelf carriers can be
removed for easier cleaning. To do this,
remove all the shelves and spring off the
side carriers (Fig. 3).
• To allow for a better cleaning of the side
grids, you can extract them this way:
1. Push with a nger on the last of the slots to
release the grid from its hold.
2. Lift it towards the top and extract the grid.
To put them back into place, reverse the
order of this operation.
Fig. 3
Changing the oven lamp:
1. Electrically disconnect the oven.
2. Draw out the lateral grids as described.
Then, remove the glass protection cap
(V) from the bulb socket, lifting it with a
screwdriver (C) placed between the cap
and the oven wall and replace the lamp. Fit
the accessories back in reverse order.
3. Change the lamp (see note).
4. Ret the lamp cover.
5. Electrically reconnect the oven.
NOTE: only use 15 W 230 V lamps, type E-14,
T300°C, available from our Authorized Service
Centre.
i
IMPORTANT: do not use the oven without
retting the lamp cover.
Drawer compartment
You must not place ammable materials or
plastic utensils in the drawer compartment
(placed below the oven).

ENGLISH 19
What to do if ...
PROBLEM POSSIBLE CAUSE SOLUTION
The appliance does not work The main power supply
and the appliance is not
electrically connected
Connect the product to the
power supply
The oven does not work The main power supply
and the appliance is not
electrically connected
Connect the product to the
power supply
The oven selector turned
to
Turn the oven selector and select
a cooking function
The oven selector turned
to
Turn the oven selector and select
a cooking function.
The burner does not light The mains power supply
and the appliance is not
electrically connected
Connect the product to the
power supply
The gas line is closed Open the gas pipe line, or gas
cylinder
The openings of the
burner are sealed or dirty
Clean the burner (See the
paragraph “Cleaning and
Maintenance”)
The burner was
positioned badly after
cleaning
Place the burner correctly after
cleaning (See the paragraph
“Cleaning and Maintenance”)
The burner cap was
positioned badly after
cleaning
Place the burner cap correctly
after cleaning (See the
paragraph “Cleaning and
Maintenance”)
The burner does not stay lit The operation of ignition is
carried out too quickly
Repeat lighting operation,
turning the knob to the symbol
representing the small ame

ENGLISH 20
Before calling the Authorized Service Centre
1. See if you can solve the problem on your
own (see “What to do if ...” table).
2. Switch the appliance off and on again to
see if the problem has disappeared.
If the fault persists after the above checks,
contact IKEA Authorized Service Centre.
Always specify:
• the type of fault;
• exact type and model of oven;
• the Authorized Service Centre number (the
number given after the word “Service” on
the rating plate) located on the back of the
product;
• your full address;
• your telephone number.
For repairs, contact IKEA Authorized Service
Centre.
Failure to comply with these instructions can
compromise the safety and quality of the
product.
Other manuals for GRILJERA
3
Table of contents
Languages:
Other IKEA Kitchen Appliance manuals
Popular Kitchen Appliance manuals by other brands

Spice
Spice TESEKO SPP025 instruction manual

Metos
Metos pes 60 Installation and operation manual

Parkinson Cowan
Parkinson Cowan CSIG 417 Operating and installation instructions

Springlane
Springlane Vince instruction manual

Edesa
Edesa ART29614 Operation manual

Bosch
Bosch Styline HomeProfessional MFQ4 Series user manual

Caple
Caple WI3123GM instruction manual

OMAS
OMAS GL-250 Instructions for use

Berkel
Berkel BMS 22 T Operation and maintenance manual

cecotec
cecotec Rock'nToast Fifty-fifty instruction manual

Barista Technology
Barista Technology PUQpress Maintenance and Repair Manual

KitchenAid
KitchenAid KUBR204ESB Use & care guide