Inepro PM - Copy 1600T for iR1600 User manual

© 2019 Inepro B.V. All rights reserved
Installation Manual | PM - Copy 1600T for iR1600 /
iR2000
PM - Copy 1600T for
iR1600 / iR2000


PM - Copy 1600T for iR1600 / iR2000
Congratulations on your selection of the Inepro PM - Copy 1600T for iR1600 / iR2000.
We are certain you will be pleased with your purchase of one of the flexibele solutions
of the market.
We want to help you get the best result from your PM - Copy 1600T for iR1600 /
iR2000. This manual contains information on how to do that; please read it carefully.
Due to continuous product improvements this manual is subject to changes without
notice.
We strongly recommend you read the license agreement to fully understand its
coverage and your responsibilities of ownership.
Your Inepro dealer is dedicated to your satisfaction and will be pleased to answer your
questions and your concerns.
Best wishes,
Inepro BV.
The most versatile payment solution

All rights reserved. No parts of this work may be reproduced in any form or by any means -
graphic, electronic, or mechanical, including photocopying, recording, taping, or information
storage and retrieval systems - without the written permission of the publisher.
Products that are referred to in this document may be either trademarks and/or registered
trademarks of the respective owners. The publisher and the author make no claim to these
trademarks.
While every precaution has been taken in the preparation of this document, the publisher and
the author assume no responsibility for errors or omissions, or for damages resulting from the
use of information contained in this document or from the use of programs and source code
that may accompany it. In no event shall the publisher and the author be liable for any loss of
profit or any other commercial damage caused or alleged to have been caused directly or
indirectly by this document.
Revision number R 1. This revision of the manual can be applied to products with version 4.6.0
or higher.
Publisher
Managing Editor
Technical Editors
Cover Design
Inepro B.V.
K. de Graaf
P. Grimmerink
K. de Graaf
Production
Inepro B.V.
Team Coordinator
R. Groen
H. Wagenaar
PM - Copy 1600T for iR1600 / iR2000
J. van den Berg
PM - Copy 1600T for iR1600 / iR2000
P. Blom

http://www.inepro.com
Table of Contents
Installation 1
.................................................................................................... 4Fitting the interface print
.................................................................................................... 5Routing cables
.................................................................................................... 7Interface with the keyboar d
.................................................................................................... 9Connect the cables
.................................................................................................... 10A ssembling the wires on the PCBs
Troubleshooting 15


ATTENTION!!
Read this manual carefully before installing the PM - C opy 1600T for iR1600 / iR2000!
Mains connection
Guar entee
Security
Before connecting the appliance to the mains, check that the mains supply v oltage corresponds
to the v oltage printed on the ty pe plate of the adapter. If the mains v oltage is different, consult
y our supplier.
No guarantee can be giv en if safety regulations are not follow ed.
A lw ay s disconnect the pow er supply before handling any thing inside the dev ice.
This dev ice is in conformity w ith the EM C directiv e and low -v oltage directiv e.
CE Confor mité Eur opeène (C onform European Nor m)
WEEE Dir ective ( Waste of Electr ical and Electronic Equipment)
Inepro considers it important to properly take the climate into account. We therefore produce as
many climate-friendly products. Y our new dev ice contains materials w hich can be recy cled and
then reused. A t the end of life, specialized companies can dismantle the dev ice, to materials which
can be reused in order to recy cle and reuse. F or example, the materials that must be discarded w ill
be limited to a minimum. P lease take into account the rules and regulations in y our area regarding
the rules about disposal of packaging materials, exhausted bateries and old equipment.
Thank y ou, Inepro BV
This dev ice may only be used indoors.
Indoor User O nly
Directives
Due to continuous product improv ements this manual is subject to change without notice. This
document describes the technical and functional operation of the PM - C opy 1600T for iR1600 /
iR2000. G reatest care has been taken drafting the information in this manual and it may be said
that it is reliable. H ow ev er, the producer is not liable for any shortcomings in the text or
incompleteness of the information. Thank y ou for y our decision to use the P M - C opy 1600T for
iR1600 / iR2000.
T his document:
I
Installation
Part

2 - PM - Copy 1600T for iR1600 / iR2000
Installation
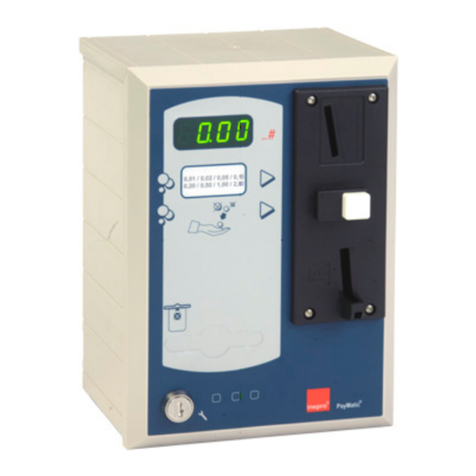
In this manual we will install a PayMatic® PMC1600-T
payment system on a Canon iR1600 or iR2000 copier
Various steps are necessary to connect the
payment system to the copier.
1. Fitting the interface print
2. Laying of cables
3. Soldering of cables to the underside of the keyboard
4. Fixing cables on the interface print
5. Assembling the wires on the PCBs
The installation described in this manual applies to the usage
of a payment system. The complete installation supports 2
paper trays (A4 and A3) and the side input so that it is
possible to debit a total of 3 different prices. Thus, in case
there are more than 2 paper trays, debiting will not work
correctly. ADF (automatic document feeder) and printer
functionality are not supported!
Prices and specific copier settings
of the payment system must be set as follows:
Price settings;
F1 en F2 = A4 paper (paper tray 1)
F3 = A3 paper (paper tray 2)
F5 = Bypass (side input)
F4, F6, F7, F8 = non applicable

Installation
3
Specific iR 1600 copier settings;
F31 = 90 (9 sec)
F32 = ON
F41 = ON
F42 = OFF
F43 = OFF
F44 = OFF
F45 = OFF
F63 = ON
F64 = OFF
F87 = bin (binary)
Specific iR 2000 copier settings;
F31 = 90 (9 sec)
F32 = OFF
F41 = ON
F42 = OFF
F43 = OFF
F44 = OFF
F45 = OFF
F63 = ON
F64 = OFF
F87 = bin (binary)

Fitting the interface print
4 - PM - Copy 1600T for iR1600 / iR2000
Fitting the interface print
§
Disconnect the current supply of the copier
§
Remove the keyboard of the copier (for more information
as to the removal of the keyboard, see copier manual).
§
Install the interface print as shown on the photo
§
Do not replace the copier keyboard yet!

Installation
5
Routing cables
§
Remove left and rear panel of the copier (for more
information as to the removal of these panels, see copier
manual).
§
Fix the cables “To and From IPC device” and
“Papertray inputs and outputs and Power” alongside of
the original copier cable.
§
Pass the cables through the holes provided on the left
side of the copier, taking care the cables are long enough
to reach the interface below the keyboard.
§
Install the panels on the left side of the copier.

Routing cables
6 - PM - Copy 1600T for iR1600 / iR2000

Installation
7
Interface with the keyboard
To interface with the keyboard, cables need to be
soldered to the underside of the keyboard
§
To recognise the chosen paper format and to reset
“faulty” copy jobs, two cables, i.e. the “button outputs”
cable and the “paper format inputs” cable have to be
soldered to the underside of the keyboard. Solder the
connections as shown on the photos below.
§
It is also necessary to cut a print path. Therefore, see
illustration on the photo.
“Paper format inputs” cable:

Interface with the keyboard
8 - PM - Copy 1600T for iR1600 / iR2000
“Button outputs” cable:

Installation
9
Connect the cables
Connect the cables on the interface print.
§
Install the cable connectors as shown on the photo.
§
Install the keyboard connectors on the remaining two
positions of the interface print.
§
Replace the keyboard and secure the panels to the copier
(do not forget to secure the original keyboard connectors
as well)

Assembling the wires on the PCBs
10 - PM - Copy 1600T for iR1600 / iR2000
Assembling the wires on the PCBs
Four wires have to be fixed on different positions. These
connections supply the A4 paper tray release and A4 paper
debiting.
DC controller PCB
The DC controller PCB is located on the right side of the
copier. 4 wires have to be connected to this PCB.
Wire colour
DC controller PCB
Description
Red
J110 pin 7
CSTFD (SL15 cassette feed signal)
Yellow /brow n
J110 pin 3 w ire side
Ground (SW105)
Grey
J110 pin 3 connector side
Ground (SW105)
Blue
J110 pin 6
24VS
The yellow/brown and the grey wire both have to be
connected to the wire of the connector J110 pin 3. Therefore,
it is necessary to divide the wire into two.

Installation
11
Bypass debiting
Three wires have to be fixed on different positions for bypass
debiting and blocking.
Wire colour
DC controller PCB
Description
Violet
J106 pin 11
MPDF (SL101 MF feed signal)
White
J108 pin 1 w ire side
5VS (MF paper sensor PS105)
Dark brow n
J108 pin 1 connector side
5VS (MF paper sensor PS105)
The white and the brown wire both have to be connected
to the wire of the connector J108 pin 1. Therefore, it is
necessary to divide the wire into two
Two connections are in charge of the interface board power
supply.

Assembling the wires on the PCBs
12 - PM - Copy 1600T for iR1600 / iR2000
Image processor PCB
Wire colour
Image processor PCB
Description
Red/blue
J204 pin 1
12Vs
White/yellow
J204 pin 2
GND
On the DC controller PCB you will find the denomination
“J201” above the connector J204!
(PCB version FG68885)
Three connections only have to be installed if a second / A3
paper tray is used. These connections supply the A3 paper
tray release and A3 paper debiting.
This manual suits for next models
1
Table of contents
Other Inepro Payment Terminal manuals

Inepro
Inepro Back Office Suite User manual

Inepro
Inepro PayMatic P2000 User manual

Inepro
Inepro PayMatic - D2000 - Internet Timer User manual

Inepro
Inepro Sales Master User manual

Inepro
Inepro PayMatic 4B - Xerox MFP Manual

Inepro
Inepro PayMatic AD 2400 User manual

Inepro
Inepro PM - Copy Coin CM7000 - Xerox Config User manual

Inepro
Inepro Card Master CM500 User manual

Inepro
Inepro PayCon Touch - Pillar User manual

Inepro
Inepro PayCon Touch - First Time Log On User manual