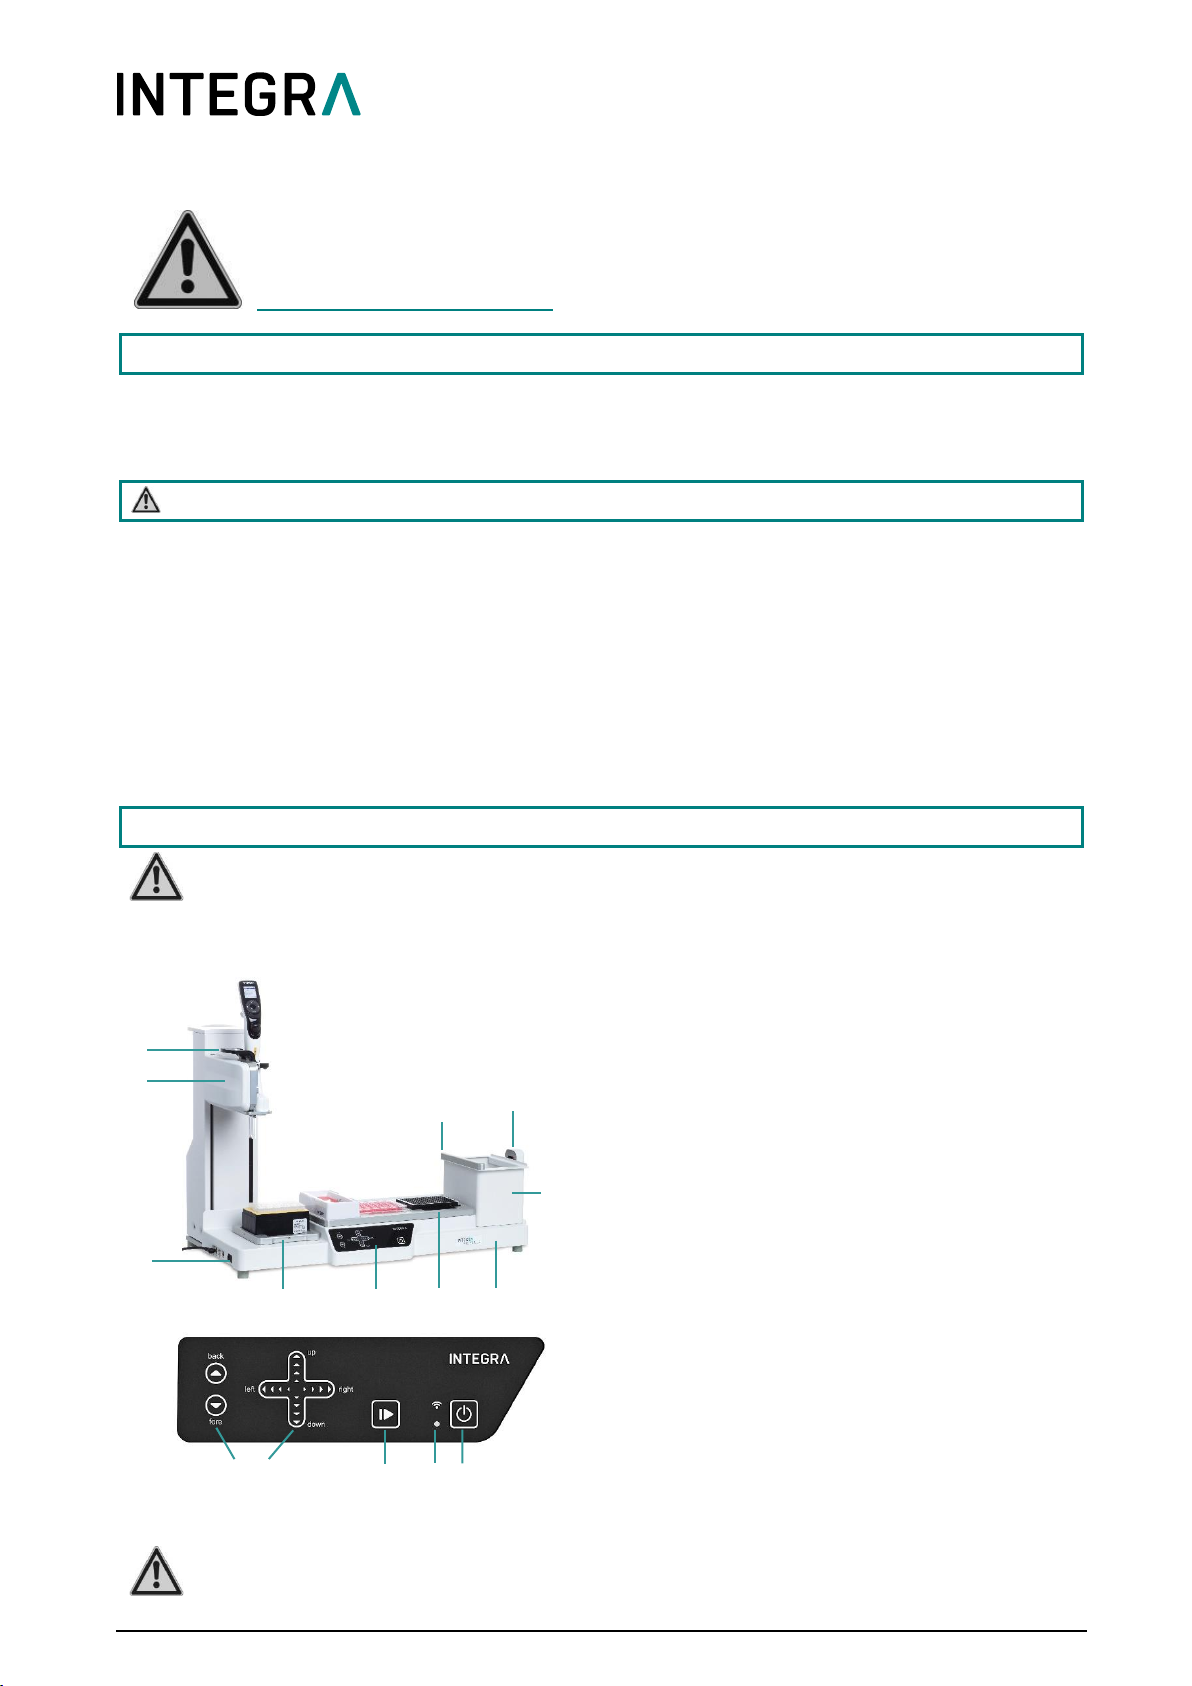
Integra ASSIST PLUS User manual
Other Integra Laboratory Equipment manuals

Integra
Integra WELLJET 5000 User manual

Integra
Integra VIAFLO ASSIST 4500 User manual

Integra
Integra VIAFLO 4011 VIAFLO 4012 User manual

Integra
Integra Evolve 3011 User manual

Integra
Integra Cusa Excel User manual

Integra
Integra MEDIACLAVE 10 Operating instructions

Integra
Integra ASSIST PLUS User manual

Integra
Integra VACUSIP User manual

Integra
Integra PIPETBOY pro User manual

Integra
Integra VIAFLO ASSIST 4500 User manual

Integra
Integra VIAFLO User manual

Integra
Integra MEDIACLAVE 10 User manual

Integra
Integra ASSIST PLUS User manual

Integra
Integra MEDIAJET User manual

Integra
Integra VACUSAFE User manual

Integra
Integra VIAFLO 96 User manual

Integra
Integra MINI 96 User manual

Integra
Integra CELLROLL User manual

Integra
Integra FLAMEBOY User manual

Integra
Integra Evolve 3011 User manual


Popular Laboratory Equipment manuals by other brands

Qiagen
Qiagen DML 3000 user manual

Queensgate
Queensgate NANOSCAN OP400 Quick start instructions

Conviron
Conviron GEN1000-GE Operator's manual

Parr Instrument
Parr Instrument 4560 Operating instructions manual

IKA
IKA IC control operating instructions

Agilent Technologies
Agilent Technologies 5800 ICP-OES user guide

Endress+Hauser
Endress+Hauser Cleanfit CPA875 operating instructions

NI
NI PXI-5422 CALIBRATION PROCEDURE

Collomix
Collomix Aqix operating instructions

SPEX SamplePrep
SPEX SamplePrep 6875 Freezer/Mill Series operating manual

Ocean Insight
Ocean Insight FLAME-NIR+ Installation and operation manual

Parker
Parker ALIGN-MG-NA Installation, operation and maintenance manual