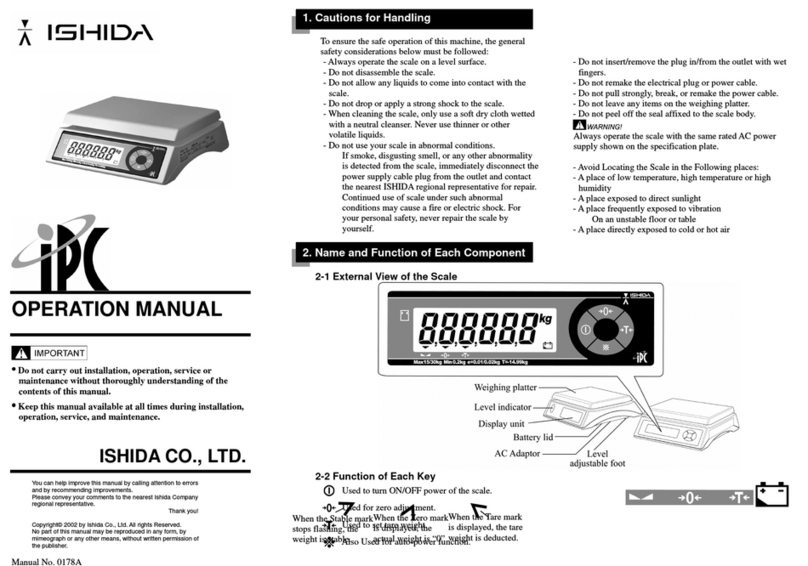
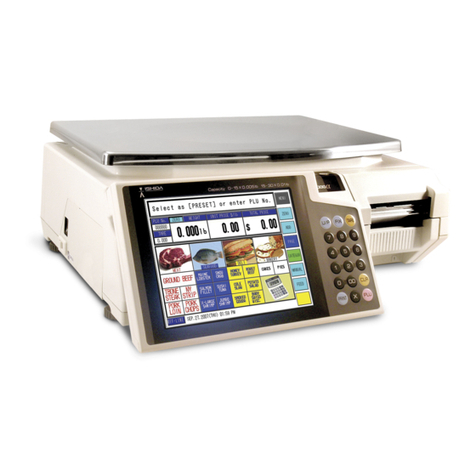
ISHIDA AC-4000H User manual

IMPORTANT
•Do not carry out installation, operation, service, or
maintenance until thoroughly understanding the
contents of this manual.
•Keep this manual available at all times for installation,
operation, service, and maintenance.
Manual No. 085-7323-08
AC-4000H
SERVICE MANUAL
System Scale Printer

You can help improve this manual by calling attention to errors and by recommending improvements.
Please convey your comments to the nearest Ishida Company regional representative. Thank you!
Copyright ©2006 by Ishida Co., Ltd. All Rights Reserved.
No part of this manual may be reproduced in any form, by mimeograph or any other means, without
written permission of the publisher.
To Provide Service Safely
In order to properly conduct maintenance and prevent the occurrence of accidents, be sure to perform
the operations below.
•Turn OFF the power switch, and unplug the power cord from the outlet.
•Keep the area around the machine clean.
Particularly with disassembly, if the power is switched ON when an object such as a detached screw is
left inside the main unit, serious damage may occur.
•Do not pull directly on the cords of the internal wiring. Doing so may result in broken wires or poor
connections. Always grasp the connector when plugging/unplugging a cord.
Pay particular attention to the thermal head cable.
•The thermal head and print head can be easily scratched, so be careful when cleaning them.
•Cautions are explained for each point of assembly and adjustment. To ensure proper operation, read
this manual thoroughly so that you fully understand it.

Precautions
i AC-4000H Service Manual No. 085-7323-08
SERVICE SAFETY
For correct maintenance, and to prevent accidents, please adhere to the following items dur-
ing service.
•Ensure that the power switch is OFF before any maintenance work and remove the power cable
from the main power outlet.
•Keep the machine surroundings clean and tidy. Take additional care, especially during disassembly,
not to leave screws etc. inside the machine as this may lead to serious injury.
•Do not pull internal wiring cables as cable breaks, poor contact, etc. may take place. Always hold
the connector end before removing. Take special care with thermal head cable, where poor contact
may lead to damage.
•Take care when cleaning thermal heads and print heads, as these are easily damaged.
•There are precautions relating to assembly and adjustment parts. Read and understand the manual
thoroughly before attempting maintenance.
SAFETY CONSIDERATIONS
For safe operation, the following safety considerations must be observed.
Grounding
This machine requires protective grounding for safe operation. To avoid potential shock hazards, a
protective grounding conductor for the machine must be securely connected to the main grounding
provision by qualified service personnel.
Do not remove covers or enclosures
To avoid personal injury and shock, do not open or remove any covers or enclosures of the machine
unless specified in the manual.
Do not perform unspecified maintenance
For your personal safety, do not perform any maintenance procedures which are not specified in the
manual.
Disconnect power supply before servicing
To ensure your personal safety, disconnect the power supply before servicing.

Precautions
AC-4000H Service Manual No. 085-7323-08 ii
XWhen cleaning the machine, only use a
soft dry cloth or a cloth wetted with a
neutral cleanser.
Never use thinner or other volatile
liquids.
XDo not apply a strong shock to the scale.
XDo not allow any liquids to come into con-
tact with the machine.
XDo not disassemble the machine.
Power Supply
•Use the appropirate voltage after referring to the specification
plate located on the machine.
•Use a dedicated power source.
(Voltage fluctuation may cause the machine to malfunction)

Precautions
iii AC-4000H Service Manual No. 085-7323-08
Avoid the following areas when installing the machine
Level adjustment
zAlways ensure that the machine is level. If the machine is not level, weighing may not be accurate.
zAdjust the machine to a level position until the bubble is completely centered in the round level
indicator.
zAreas subject to high temperatures or high
humidity
zAreas exposed to direct sunlight
zAreas where water or other liquids are
easily spilled on the machine
zAreas subject to a lot of dust or dirt
zAreas with large voltage fluctuations
zAreas subject to excissive vibration or
unstable surfaces
zAreas exposed to direct cold air
zAreas subject to low temperatures
zAreas where the scale is not level

Contents
AC-4000H Service Manual No. 085-7323-08 iv
Contents
CHAPTER 1 OVERVIEW
1.1 Appearance and Name of Each Part ................................................................................... 1-1
1.2 Display ................................................................................................................................. 1-1
1.3 Key Sheet ............................................................................................................................ 1-2
1.4 Printer ................................................................................................................................. 1-2
1.5 Main Specifications .............................................................................................................. 1-3
1.6 Layout of components.......................................................................................................... 1-4
CHAPTER 2 INSTALLATION
2.1 Packed Goods ..................................................................................................................... 2-1
2.2 Installation Environment....................................................................................................... 2-2
2.3 Installing the main body ....................................................................................................... 2-2
2.4 Installing the weigh platter ................................................................................................... 2-3
2.5 Label Loading ...................................................................................................................... 2-3
2.6 Power Cable Connection ..................................................................................................... 2-5
2.7 Power Switch “ON” .............................................................................................................. 2-5
2.8 Customer’s Specification Setup (Initialization, Setup, and Registration)............................. 2-6
2.9 Normal Mode Display........................................................................................................... 2-7
2.10 Label Batch Print Mode ...................................................................................................... 2-8
2.10.1 Basic operation ........................................................................................................ 2-8
2.10.2 Additional functions.................................................................................................. 2-9
2.10.3 Label batch printing on continuous paper................................................................ 2-9
2.11 Scroll Message Display .................................................................................................... 2-10
2.12 Campaign Function........................................................................................................... 2-10
CHAPTER 3 TEST MODE
3.1 Test Mode Menu List............................................................................................................ 3-1
3.2 Test Mode Start .................................................................................................................... 3-2
3.3 Hardware Test...................................................................................................................... 3-2
A/D check.......................................................................................................................... 3-2
KEY CHECK...................................................................................................................... 3-4
DISPLAY CHECK.............................................................................................................. 3-4
RS232C CHECK ............................................................................................................... 3-5
APPLICATION PROGRAM No. ........................................................................................ 3-5
BIOS PROGRAM No. ....................................................................................................... 3-6
3.4 RAM Clear ........................................................................................................................... 3-7
SRAM CLEAR................................................................................................................... 3-7
SETUP CLEAR ................................................................................................................. 3-8
TEST DATA SET ............................................................................................................... 3-8
APPLICATION COPY ....................................................................................................... 3-9
BIOS COPY ...................................................................................................................... 3-9
BOOT COPY ................................................................................................................... 3-10

Contents
v AC-4000H Service Manual No. 085-7323-08
3.5 Printer Head....................................................................................................................... 3-11
PRINTER HEAD ............................................................................................................. 3-11
RESISTANCE.................................................................................................................. 3-11
PRINT USAGE IN km ..................................................................................................... 3-12
3.6 Label Sensor Check........................................................................................................... 3-13
3.7 Total Memory ..................................................................................................................... 3-14
3.8 ROM Switch ....................................................................................................................... 3-15
3.9 Peel Sensor Check ............................................................................................................ 3-17
3.10 Machine Type Check ........................................................................................................ 3-18
CHAPTER 4 SETUP MODE
4.1 Setup Mode Menu................................................................................................................ 4-1
4.2 Starting Procedure for Each Mode....................................................................................... 4-2
4.3 Starting Procedure for Setup Mode ..................................................................................... 4-2
4.4 Label Format........................................................................................................................ 4-3
LABEL FORMAT No.......................................................................................................... 4-3
LABEL LENGTH + GAP.................................................................................................... 4-3
LABEL WIDTH .................................................................................................................. 4-4
LABEL SENSOR DISTANCE ............................................................................................ 4-4
LABEL DIE-CUT, CONTINUOUS...................................................................................... 4-4
STORE NAME, ADDRESS ............................................................................................... 4-4
FIELD TITLE PRINT ......................................................................................................... 4-5
PEEL SENSOR ................................................................................................................. 4-5
TEST ITEM No.................................................................................................................. 4-5
THERMAL HEAD CHECK................................................................................................. 4-5
SUBTOTAL LABEL FORMAT No. ..................................................................................... 4-6
STORE No. PRINT ........................................................................................................... 4-6
MACHINE No. PRINT ....................................................................................................... 4-6
LABEL FORMAT EDIT ...................................................................................................... 4-7
FORMAT No. + [PLU]........................................................................................................ 4-7
UNIT ................................................................................................................................. 4-8
DEFAULT PLU .................................................................................................................. 4-8
UNIT DATA........................................................................................................................ 4-9
NUMBER OF UNITS......................................................................................................... 4-9
LABEL LENGTH................................................................................................................ 4-9
4.5 POS Code.......................................................................................................................... 4-10
POS FLAG 8/3 ................................................................................................................ 4-10
10 DIGIT FLAG 8/13 ....................................................................................................... 4-10
POS TYPE ...................................................................................................................... 4-10
BAR TYPE....................................................................................................................... 4-11
ITF ............................................................................................................................... 4-12
MANUFACTURE CODE ................................................................................................. 4-12
4.6 Item Code .......................................................................................................................... 4-13
BARCODE POSITION .................................................................................................... 4-13
DEPARTMENT CODE .................................................................................................... 4-13
GROUP CODE................................................................................................................ 4-13

Contents
AC-4000H Service Manual No. 085-7323-08 vi
4.7 Default Data ....................................................................................................................... 4-14
DATE PRINT FLAG......................................................................................................... 4-14
USED BY ........................................................................................................................ 4-14
PACKING TIME FLAG .................................................................................................... 4-14
EXPIRY TIME FLAG ....................................................................................................... 4-15
BEST BEFORE FLAG..................................................................................................... 4-15
BEST BEFORE DATE..................................................................................................... 4-15
UNIT TYPE...................................................................................................................... 4-15
4.8 Total Mode Select .............................................................................................................. 4-16
DAILY TOTAL .................................................................................................................. 4-16
WEEKLY TOTAL ............................................................................................................. 4-16
MONTHLY TOTAL........................................................................................................... 4-16
4.9 Open Price ......................................................................................................................... 4-17
4.10 PLU Select ........................................................................................................................ 4-18
SALES MODE................................................................................................................. 4-18
UNIT PRICE .................................................................................................................... 4-18
MD (Mark Down) FLAG................................................................................................... 4-18
MD (Mark Down) PRICE ................................................................................................. 4-18
FIXED WEIGHT .............................................................................................................. 4-19
PCS (Quantity) ................................................................................................................ 4-19
TARE ............................................................................................................................... 4-19
DATE PRINT ................................................................................................................... 4-19
USED BY ........................................................................................................................ 4-19
BEST BEFORE DATE FLAG .......................................................................................... 4-20
BEST BEFORE DATE..................................................................................................... 4-20
PACKING TIME FLAG .................................................................................................... 4-20
PACKING TIME DATA..................................................................................................... 4-20
EXPIRY TIME FLAG ....................................................................................................... 4-20
EXPIRY TIME DATA ....................................................................................................... 4-21
ITEM CODE .................................................................................................................... 4-21
BARCODE TYPE ............................................................................................................ 4-21
POS CODE TYPE........................................................................................................... 4-21
POS CODE FLAG........................................................................................................... 4-21
POS CODE ..................................................................................................................... 4-22
OPEN PRICE .................................................................................................................. 4-22
EXTRA MESSAGE 1....................................................................................................... 4-22
EXTRA MESSAGE 2....................................................................................................... 4-22
EXTRA MESSAGE 3....................................................................................................... 4-22
COUPON MESSAGE...................................................................................................... 4-23
LOGO IMAGE 1 .............................................................................................................. 4-23
LOGO IMAGE 2 .............................................................................................................. 4-23
LABEL FORMAT No........................................................................................................ 4-23
UPPER LIMIT.................................................................................................................. 4-23
LOWER LIMIT................................................................................................................. 4-24
UNIT TYPE...................................................................................................................... 4-24
DEPARTMENT CODE .................................................................................................... 4-24
GROUP CODE................................................................................................................ 4-24
RESISTER CODE........................................................................................................... 4-24
COST PRICE .................................................................................................................. 4-25
POP MESSAGE.............................................................................................................. 4-25

Contents
vii AC-4000H Service Manual No. 085-7323-08
4.11 System ............................................................................................................................... 4-26
SYSTEM ......................................................................................................................... 4-26
PLU ............................................................................................................................... 4-26
COMMODITY NAME ...................................................................................................... 4-26
PRESET KEY.................................................................................................................. 4-26
STOREADDRESS.......................................................................................................... 4-27
DATE ............................................................................................................................... 4-27
EXTRA MESSAGE 1....................................................................................................... 4-27
OPEN PLU ...................................................................................................................... 4-27
ITEM LIST ....................................................................................................................... 4-27
RS232C COMMUNICATION........................................................................................... 4-28
COUPON MESSAGE...................................................................................................... 4-28
EXTRA MESSAGE2........................................................................................................ 4-28
EXTRA MESSAGE3........................................................................................................ 4-28
TCP/IP COMMUNICATION............................................................................................. 4-28
OPERATOR NAME ......................................................................................................... 4-29
TITLE MESSAGE............................................................................................................ 4-29
ADVERTISEMENT MESSAGE....................................................................................... 4-29
DEPARTMENT................................................................................................................ 4-29
GROUP ........................................................................................................................... 4-29
CAMPAIGN ITEM............................................................................................................ 4-30
4.12 Ethernet Setup ................................................................................................................... 4-31
IPADDRESS SETUP...................................................................................................... 4-31
GATEWAYADDRESS SETUP........................................................................................ 4-32
SUBNET MASK SETUP ................................................................................................. 4-33
SERVER ADDRESS SETUP .......................................................................................... 4-34
LOG-IN NAME ADDRESS SETUP ................................................................................. 4-35
PASSWORD SETUP ...................................................................................................... 4-35
MAC ADDRESS SETUP ................................................................................................. 4-36
DHCP SETUP ................................................................................................................. 4-37
NETWORK STATUS ....................................................................................................... 4-38
4.13 System Timer .................................................................................................................... 4-39
4.14 Password Setup................................................................................................................ 4-40
REGISTRATION ............................................................................................................. 4-40
TOTAL ............................................................................................................................. 4-40
SUBTRACTION .............................................................................................................. 4-41
SETUP ............................................................................................................................ 4-41
PASSWORD CHANGE ................................................................................................... 4-41
4.15 Machine Number Setup .................................................................................................... 4-42
CHAPTER 5 ELECTRICITY COMPOSITION
5.1 Block wiring diagram............................................................................................................ 5-1
5.2 Main Board [PK-950B] ......................................................................................................... 5-2
5.3 Connector Specifications ..................................................................................................... 5-3
5.4 PK-229A (A/D board) ........................................................................................................... 5-7
5.5 Lithium Battery ..................................................................................................................... 5-7
5.6 Power Unit (PB-LSF150-S).................................................................................................. 5-8
5.7 PK-232 (TCP/IP) .................................................................................................................. 5-9
5.8 PK-236A (Span switch) ...................................................................................................... 5-10
5.9 PK-240 (DC/DC converter) ................................................................................................ 5-10
5.10 P-862A (Key board) ........................................................................................................... 5-11

Contents
AC-4000H Service Manual No. 085-7323-08 viii
CHAPTER 6 TROUBLESHOOTING
6.1 Error List .............................................................................................................................. 6-1
6.2 Symptom, Cause, And Measures ........................................................................................ 6-4
CHAPTER 7 PARTS REPLACEMENT
7.1 Removing the covers ........................................................................................................... 7-1
Removing the front cover (shop side) ............................................................................... 7-1
Removing the rear cover (customer side)......................................................................... 7-2
7.2 Detaching Internal Parts ...................................................................................................... 7-3
Detaching the keyboard relay board (P-862A).................................................................. 7-3
Detaching the key sheet.................................................................................................... 7-3
Detaching the operator display ......................................................................................... 7-3
Detaching the customer display ........................................................................................ 7-4
Detaching the power supply.............................................................................................. 7-4
Detaching the span switch (PK-236A) .............................................................................. 7-4
Detaching the PK-232 (TCP/IP) ........................................................................................ 7-5
Detaching the PK-240 (DC/DC converter) ........................................................................ 7-5
Detaching the PK-229A (A/D board) ................................................................................. 7-6
Detaching the PK-950B (Main board) ............................................................................... 7-6
Detaching the load cell...................................................................................................... 7-7
limit adjustment ................................................................................................................. 7-7
Detaching the thermal head .............................................................................................. 7-8
Cleaning the thermal head ................................................................................................ 7-9
Adjusting the belt tension .................................................................................................. 7-9
Cleaning the label sensor/peel sensor.............................................................................. 7-9
7.3 Periodical Replacement Parts ........................................................................................... 7-10

Chapter 1 Overview
1-1 AC-4000H Service Manual No. 085-7323-08
CHAPTER 1OVERVIEW
1.1 Appearance and Name of Each Part
Weigh platter
Power switch
Fuse
Key sheet
Upper surface: Operation key sheet
Lower surface: Program key sheet
Printer
Operator display
Customer display
1.2 Display
kgMASS
ZERO PEEL
R/kg R AMOUNT
NET SAVE AUTO PLU

Chapter 1 Overview
AC-4000H Service Manual No. 085-7323-08 1-2
1.3 Key Sheet
':64#
6':6 6':6
/5)
%17210
#&8
/'55#)' '&+6(70%6+105
%*#4#%6'456;.'
'&+6(70%6+105
4'21460#/'5
5#.'54'21465
2(
-';5
&#+.;
)4#0&
5#.'5616#.
%#5'
&'26 )4172
5*+(6
5*+(6
12'4#614
'
.19'4
6+/'
2.7
.+56
5614'
0#/'
$#4
%1&'
$5
%*#4
&'.'6'
&'.'6'
<'41 *'.2
'''1'
+7
ޔ
ޔ
.+0' +05'46 '0&
%.4
2.7
2.7
'06'4
6#4'
4'5'6 /1&'
㧍
%
01# '
#
Ǫ
Έ
㨪
㨪
㧏
㧐
㧑
㧒
㧛
#&8
'&+6
2.7
014/#.
70&'4
.+0'
+6#.+%
4'8'45'
$1.&
$1.&
5+<' %12;
24+%'
24+%'
2#2'4
24+06
24+06
(''&
%*#0)'
39'46;7+1
#5&()*,-
<:%8$0/
.
2
52#%'
52#%'
'&+6
0'9
.+0'
"
!
1.4 Printer
Label holding shaft
Label guide
Release lever
Printer head
Peeling bar
Label sensor
Printer unit
Winding sleeve
U-pin

Chapter 1 Overview
1-3 AC-4000H Service Manual No. 085-7323-08
Item
Weighing capacity
Minimum graduation
Weighing accuracy
Load cell
Size of main body
Weigh platter material and size
Printer
Label roll size
Label length
Sensor
Key
Display
Operating temperature
Operating humidity
Power supply
Power consumption
Weight
Memory capacity
Interface
Cash drawer
TCP/IP
LAN cable
SRAM
Content
15kg or 30lb
5g or 0.01 lb
1/3000 (Single range)
HBM made
412(W) x 357(D) x 767(H) mm
267 mm (diameter)
Backing paper width...Max. 67mm, Label width...38 to 64mm,
Effective print width...Max. 60mm, Print speed...80mm/second
Inner diameter: 40mm, Outer diameter: 100mm
30 to 240mm
Peel sensor
Membrane switch (120 keys)
Fluorescent display tube: 23 digits
(Both for customer and operator displays)
Character height: 10.1mm, 256 x 16 dots
-5 to 40°C
Main body: Max. 95% (40°C), No condensation
Printer: Max. 80% (40°C), No condensation
Varies depending on where the machine is used.
(Specified on the rating plate)
Stand-by: Approx. 40W
Operating: Approx. 100W
15kg
Standard: 1MB
Factory option: 2MB
RS232C (D-sub 9 pin)
Output: DC24V/500mA
10 baseT
Direct connection: Crossing cable
When using Hub: Straight cable
1M bytes (1,024k bytes)
SRAM mapping
1. Fixed data: Approx. 19k bytes
Approx. 1k bytes for fixed data year, print speed, and print density,
etc., and the remainder is the reserves.
2. Logo data: Approx. 56k bytes
3. SRAM file: Approx. 949k bytes
949k bytes for registration
9k bytes for file creation (940k bytes available after RAM is
cleared)
PLU, Store name/address, Extra message 1/2/3, Coupon,
Preset, Label format, Field title, and Operator
1.5 Main Specifications

Chapter 1 Overview
AC-4000H Service Manual No. 085-7323-08 1-4
1.6 Layout of components
Weigh platter
Keyboard relay board
(P-862A)
A/D board
(PK-229A) Power supply
RS232C
Power receptacle
TCP/IP port
(PK-232)
Main board
(PK-950B)
Printer unit
DC/DC converter
(PK-240)
Customer display
Operator display
Span switch
(PK-236A)
Load cell
Fuse
Top cover
Front cover
Rear cover
Power switch

Chapter 2 Installation
2-1 AC-4000H Service Manual No. 085-7323-08
CHAPTER 2INSTALLATION
2.1 Packed Goods
Open the packing case and check whether there are all the packed goods (machine and attachments)
and if there are any damaged parts.
7
6
4
3
21
5
1. Operation manual,
Installation procedures,
Keysheet
2. Screws
3. Arm
4. Thermal head cleaner
5. Power cable
6. Weigh platter
7. Main body

Chapter 2 Installation
AC-4000H Service Manual No. 085-7323-08 2-2
2.2 Installation Environment
•Install the machine to the pipe securely fastened.
(Withstand load: 150 kgf)
•Install the machine in the place where the liquid
such as water does not splash.
•Avoid the place where direct sunshine strikes for a
long time.
•Install the machine in the place where the influ-
ence such as the winds is not received.
•Secure the installation space enough.
2.3 Installing the main body
Install the main body to the pipe according to the
accompanying installation procedures.
357mm
412mm
152mm
350mm
357mm
352mm
767mm
65mm
152mm
80mm

Chapter 2 Installation
2-3 AC-4000H Service Manual No. 085-7323-08
2.4 Installing the weigh platter
1Install the weigh platter to the arm with two screws.
2Install the arm to the main body.
2.5 Label Loading
1Open the printer cover.
2Pull the release lever to raise the print head.
Printer cove
r
Release lever
Print head
Weigh platter
Arm

Chapter 2 Installation
AC-4000H Service Manual No. 085-7323-08 2-4
3Remove labels from first 30 cm (12inches) of back-
ing paper.
4Slide a new label roll onto the label holding shaft,
and pass the labels through the label sensor and
the printer unit as shown on the right.
5 Secure the end of the backing paper to the wind-
ing sleeve with a U-pin.
6Depress the print head until it locks securely.
7Close the printer cover.
30 cm
Label holding shaft
Label guide
Release lever
Printer head
Peeling bar
Label sensor
Printer unit
Winding sleeve
U-pin
U-pin
Winding
sleeve

Chapter 2 Installation
2-5 AC-4000H Service Manual No. 085-7323-08
2.6 Power Cable Connection
•Insert the power cable into the receptacle at the top of the main body.
•Insert the power cable plug into the power outlet.
Note: The power outlet shape varies according to customers.
Power outlet Power cord
Power receptacle
Ensure to establish a ground at the customer side.
110 V /220 V input power supply can be used. However, set the jumper lead to the required
voltage display side before the power is turned ON.
220V110V
Power supply
(PB-LSF150-S)
2.7 Power Switch “ON”
•Turn on the power switch located at the left side of
main body.
Note: Push the “O” side of the switch to urn off the
power.
OFF
ON

Chapter 2 Installation
AC-4000H Service Manual No. 085-7323-08 2-6
2.8 Customer’s Specification Setup
(Initialization, Setup, and Registration)
Set up required specifications according to the following sequence.
Test mode (Refer to Chapter 3 “Test Mode”)
⎯⎯⎯⎯⎯⎯⎯⎯⎯ 1. Hardware test................................................................ P.3-2
⎯⎯⎯⎯⎯⎯⎯⎯⎯ 2. RAM clear ..................................................................... P.3-7
⎯⎯⎯⎯⎯⎯⎯⎯⎯ 3. Printer head .................................................................. P.3-11
⎯⎯⎯⎯⎯⎯⎯⎯⎯ 4. Label sensor check....................................................... P.3-13
⎯⎯⎯⎯⎯⎯⎯⎯⎯ 5. Total memory................................................................. P.3-14
⎯⎯⎯⎯⎯⎯⎯⎯⎯ 6. ROM switch................................................................... P.3-15
⎯⎯⎯⎯⎯⎯⎯⎯⎯ 7. Peel sensor check ........................................................ P.3-17
8. Machine type check ...................................................... P.3-18
Setup mode (Refer to Chapter 4 “Setup Mode”)
⎯⎯⎯⎯⎯⎯⎯⎯⎯ 1. Label format .................................................................. P.4-3
⎯⎯⎯⎯⎯⎯⎯⎯⎯ 2. POS code...................................................................... P.4-10
⎯⎯⎯⎯⎯⎯⎯⎯⎯ 3. Item code ...................................................................... P.4-13
⎯⎯⎯⎯⎯⎯⎯⎯⎯ 4. Default data................................................................... P.4-14
⎯⎯⎯⎯⎯⎯⎯⎯⎯ 5. Total mode select .......................................................... P.4-16
⎯⎯⎯⎯⎯⎯⎯⎯⎯ 6. Open price..................................................................... P.4-17
⎯⎯⎯⎯⎯⎯⎯⎯⎯ 7. PLU selection................................................................ P.4-18
⎯⎯⎯⎯⎯⎯⎯⎯⎯ 8. System .......................................................................... P.4-26
⎯⎯⎯⎯⎯⎯⎯⎯⎯ 9. Ethernet setup............................................................... P.4-31
⎯⎯⎯⎯⎯⎯⎯⎯⎯ 10. System timer ................................................................. P.4-39
⎯⎯⎯⎯⎯⎯⎯⎯⎯ 11. Password setup ............................................................ P.4-40
12.Machine number setup ................................................. P.4-42
Other manuals for AC-4000H
2
Table of contents
Other ISHIDA Scale manuals

ISHIDA
ISHIDA SR-2000 alpha User manual

ISHIDA
ISHIDA BC-300 User manual

ISHIDA
ISHIDA Uni-5 User manual

ISHIDA
ISHIDA MTE-300 User manual

ISHIDA
ISHIDA IGB Series User manual

ISHIDA
ISHIDA INS-100 9k User manual

ISHIDA
ISHIDA BC-4000 User manual

ISHIDA
ISHIDA NOVA-II User guide

ISHIDA
ISHIDA IPC 3kg User manual

ISHIDA
ISHIDA Uni-3 User manual

ISHIDA
ISHIDA BC-3000 User manual

ISHIDA
ISHIDA UNI-7 User manual

ISHIDA
ISHIDA AC-4000B User manual

ISHIDA
ISHIDA INS-100 User manual

ISHIDA
ISHIDA AC-3000 User manual

ISHIDA
ISHIDA CWS-02 Quick guide

ISHIDA
ISHIDA Uni-3 User manual

ISHIDA
ISHIDA IGB-60 User manual

ISHIDA
ISHIDA IWX-150/30 User manual

ISHIDA
ISHIDA AC-4000 Series User manual