manuals.online logo
Brands
  1. Home
  2. •
  3. Brands
  4. •
  5. jablotron
  6. •
  7. Security Sensor
  8. •
  9. jablotron JA-152SHM User manual

jablotron JA-152SHM User manual

JABLOTRON ALARMS a.s.
Pod Skalkou 4567/33 46601 Jablonec n. Nisou
Czech Republic www.jablotron.com
||
|
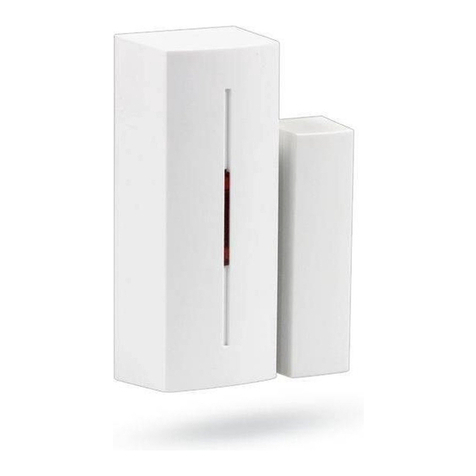
The JA-152SHM wireless shock or tilt detector with magnetic
contact
JA-152SHM 1 / 2 MLB55202
The product is a wireless component of the JABLOTRON system.
It is a combined shock or tilt detector with external input. It occupies two
separate enrolment addresses in the control panel. The product can be
installed by a trained technician with a valid certificate issued by an authorized
distributor.
The product is compatible with the JA-103K, JA-107K or above.
Installation
It is always necessary to have a look at how the detector is used.
We do not recommend installing the detector directly onto metal surface
that can negatively affect wireless communication with a control panel.
The detector responds to vibrations and shocks caused by the pad to
which it is mounted when the shock mode is selected. The mechanical
contact must be sufficient for a good transmission of shocks to
the detector. The detector should be placed in locations where stronger
shocks are expected – i. e. further away from fixed edges of windows or
door frames.
When in a tilt mode, the detector reacts to a change in its position. –
e. g. on a window casement.
There are two different types of permanent magnets in the package –
a standard magnet in a plastic housing (A) and a ring-shaped magnet (B)
for use in places where there is not enough space for a standard magnet
or for counter-sinking the magnet into a door or window’s inner frame.
The detector activation distance threshold (only applicable to non-
ferromagnetic installation surfaces) is 26 / 17 mm for the Z axis. For other
types of magnets, the detection threshold characteristic may vary.
Figure: 1 – place for locking screw, 2 – cover tab, 3 – LED indication,
4 – battery, 5 – serial number, 6 – terminals, 7 – cover tamper contact
Axis
X
Y
Z
Activation distance (mm)
13
27
27
Deactivation distance (mm)
7
21
20
Table 1: distances for opening and closing on a non-magnetic base.
Axis
X
Y
Z
Activation distance (mm)
13
28
28
Deactivation distance (mm)
9
19
21
Table 2: distances for opening and closing on the magnetic base.
1. Open the detector cover by pressing the cover tab (2).
2. Mount the rear pad onto the required place. If it´s needed, put
the cables through the rear plastic pad. The length of cables to
the detector should not exceed 3 m; choose the place of installation
accordingly.
3. Attach the selected magnet to the moving part of the door (window)
with screws. The lower edge of the standard magnet has to be at
the same height as the lower edge of the detector. It is recommended
to attach the whorl-shaped magnet with a non-magnetic screw from
the package.
4. Connect the wires from external contact to the terminals, if they are
used.
5. Proceed according to the control panel installation manual.
Basic procedure:
a. In the F-link software, select the required position in
the Devices window and launch the enrolment mode by
clicking on the Enrol option.
b. Insert the battery (mind the correct polarity). The enrolment
signal is transmitted when the battery is inserted into
the detector. Note – the detector occupies 2 positions (each
input has its own position). Should the second position be
occupied, it will be automatically overwritten.
6. Close the detector cover.
7. In order to comply with norms, the front cover must be secured with
the supplied locking screw (1).
8. Configure the detector by following the Internal settings chapter in
this manual.
Notes:
−The detector can also be enroled into the system by entering its
serial number (5) into the F-link software (1400-00-0000-0001).
You can find the sticker with serial number under a bar code,
located on the battery holder.
−If only the first input is used, the second input can be deleted by
pressing “Delete” to release the position for another device.
−By deleting the first input position, the module will be deleted
completely.
Detector communication in the system
The detector uses bi-directional asynchronous communication which
allows you to change the internal settings remotely and at the same times
does not consume a lot of battery capacity.
After enrolment to the system, the detector operates in an accelerated
mode, until the service mode is exited (but no longer than 24 h). In this
mode, the detector checks every 90s whether system is still in service
mode or if new settings should be taken over.
In service mode, the detector communicates once every 19 minutes or
with each activation. Therefore, when switching from operational mode to
service mode, it can take up to 19 minutes for the detector to recognize
control panel status or internal settings change. This period can be
reduced by activating the detector or its tamper sensor.
Please note:
It is not necessary to wait 90 s (or 19 min) until the detector confirms
delivery of the new setting, when changes are applied. System
remembers the requested change and forwards the new settings to
the detector during the next period of regular communication.
Internal settings
The detector settings can be set in the Devices tab of the F-link
software. Click on the Internal settings button at the detector’s position
to open a dialogue window where you set (* indicates default settings):
Input 1 - Function: Shock* / Tilt / Disabled
Shock: The device responds to environmental shock input.
Activation of shock:
Turning on the detector option after the 1st shock will ignore any further
shocks for 10 seconds. After this 10 s, there will be a 30 s interval in which
the next possible jolt will be reported as an Input Activation. If no further
shocks occur within these 30 s, the 1st shock will be ignored - no Input
Activation will be reported in the system. By disabling the option, the
detector sends an Input Activation to the system as soon as the 1st shock
is detected.
Sensitivity:Detector sensitivity level. The detector ignores jolts/tilts that
do not exceed the sensitivity setting. Automatic shock sensitivity
adjustment: how to adjust the sensitivity:
To start the calibration from the peripheral, the system must be in
Service mode, then Activate tamper contact (open the plastic cover) and
within 5 seconds deactivate the tamper contact (close the plastic cover).
This procedure will switch on calibration directly from the peripheral -
indication as described below from point 3. When starting calibration from
the detector, the Yellow LED will not be lit (it is only lit if the peripheral has
an open internal setting in the F-Link). Calibration can be terminated by
activating the tamper contact (open the plastic cover).
1. LED off = detector waiting for connection. To continue, activate
the magnet (open and close the window/door)..
2. Yellow LED illuminated = detector has established
a connection. Start calibration to continue.
3. Glow yellow LED + regular double red LED = detector is ready
to start calibration. Activate magnet to continue.
The JA-152SHM wireless shock or tilt detector with magnetic
contact
JA-152SHM 2 / 2 MLB55202
4. Glow of yellow LED + rapid blinking of red LED = detector
calibration for approx. 4 s. Please calm the magnetic detector.
5. Glow yellow LED + slow flashing red LED = detector is ready
for calibration. To continue, activate the detector by opening
and closing the window/door. Confirmation of detector
calibration will be indicated by the red LED lighting for approx.
1 s. Then the red LED will go out and the setup status will
change to complete, the yellow LED will still be lit. Pulse mode:
Only activation of the detector is being sent to the control panel
unit.
Foreign magnetic field detection:Once turned off, the device will
calibrate its magnetic tamper detector. Should it detect a foreign magnetic
field within its vicinity once its been calibrated, or a change in its own
magnetic field is detected, the detector will indicate input activation and
a fault.
Note:When the foreign magnet detection is enabled, a window or
a door can only be opened in the direction in which the magnet movement
has been calibrated. Otherwise, the detector will indicate Activation and
fault. Therefore, this function cannot be used for windows or doors that
may be open in several ways (opening, tilting).
On:Responds to a change in the contact connected to the input.
Simple balanced input:Detection of 1 kΩ simply balanced loop of
external input or simple magnetic contact
Roller blind 1, Roller blind 2 – roller blind modes, responds to
repeated
and short opening pulses with sensitivity adjustable in two stages.
Shutter 1 = activation after 3 pulses within 2 minutes; Shutter 2 =
activation after 5 pulses within 2 minutes. If the input loop is interrupted
for more than 3 s, a tamper type alarm is generated. When using the INP
- Shutter 1 and INP - Shutter 2 modes, the module is idle for 10 s after the
activation is broadcast.
Detector testing
Optical indication is triggered with every activation when the system is
in service mode. Every single activation can be checked in F-link, on
the Diagnostics tab.
During normal operation, the optical indication is disabled.
Battery replacement
The system sends a report automatically when the battery is low.
Remember to switch the system to Service mode before changing
the batteries (otherwise a tamper alarm will be triggered). Check the right
function of the detector after battery replacement.
Technical specification
Power 1x alkaline battery type LR6 AA (1.5 V/2.4 Ah)
Please note: Battery is not included
Typical lifetime of battery aprox. 2 years (20 activation per day)
Low battery voltage <0.95 V
Current consumption in standby mode 74 μA
Maximum current consumption 80 mA
Communication band 868.1 MHz, JABLOTRON protocol
Maximum radio-frequency power (ERP) 18.2 mW
Communication range cca 300 m (open area)
Maximum lenght of cable for external detector 3 m
Dimensions 24 x 109 x 24 mm
Dimensions of magnet 16 x 55 x 15 mm
Weight (w/o battery) 35 g
Classification Security grade 2/Environmental class II
(according to EN 50131-1)
Operational environment indoor general
Operational temperature range -10 °C to +40 °C
Average operating humidity 75% RH, non-condensing
Certification body Trezor Test s.r.o. (no. 3025)
According to EN 50131-1, EN 50131-2-6, EN 50131-2-8,
EN 50131-5-3, EN 50131-6, ETSI EN 300 220-1,-2,EN 50130-4,
EN 55032, EN 62368-1, EN IEC 63000
Can be operated according to ERC REC 70-03
Recommended screw 2 x ø 3.5 x 40 mm (countersunk head)
JABLOTRON ALARMS a.s. hereby declares that the
JA-152SHM is in compliance with the relevant European Union
harmonisation
legislation: Directives No: 2014/53/EU,
2014/35/EU, 2014/30/EU, 2011/65/EU, when used as intended.
The original of the conformity assessment can be found at
www.jablotron.com – the Downloads Section
Note: Disposing of this product correctly will help save valuable
resources and prevent any potential negative effects on human
health and the environment, which could otherwise arise from
inappropriate waste handling. Please return the product to the
dealer or contact your local authority for further details of your
nearest designated collection point.

Other jablotron Security Sensor manuals

jablotron JB-EXT-TH-R User manual

jablotron

jablotron JB-EXT-TH-R User manual

jablotron JA-158P User manual

jablotron

jablotron JA-158P User manual

jablotron JA-151P-WG User manual

jablotron

jablotron JA-151P-WG User manual

jablotron JA-81M User manual

jablotron

jablotron JA-81M User manual

jablotron JA-158P User manual

jablotron

jablotron JA-158P User manual

jablotron JA-120PW User manual

jablotron

jablotron JA-120PW User manual

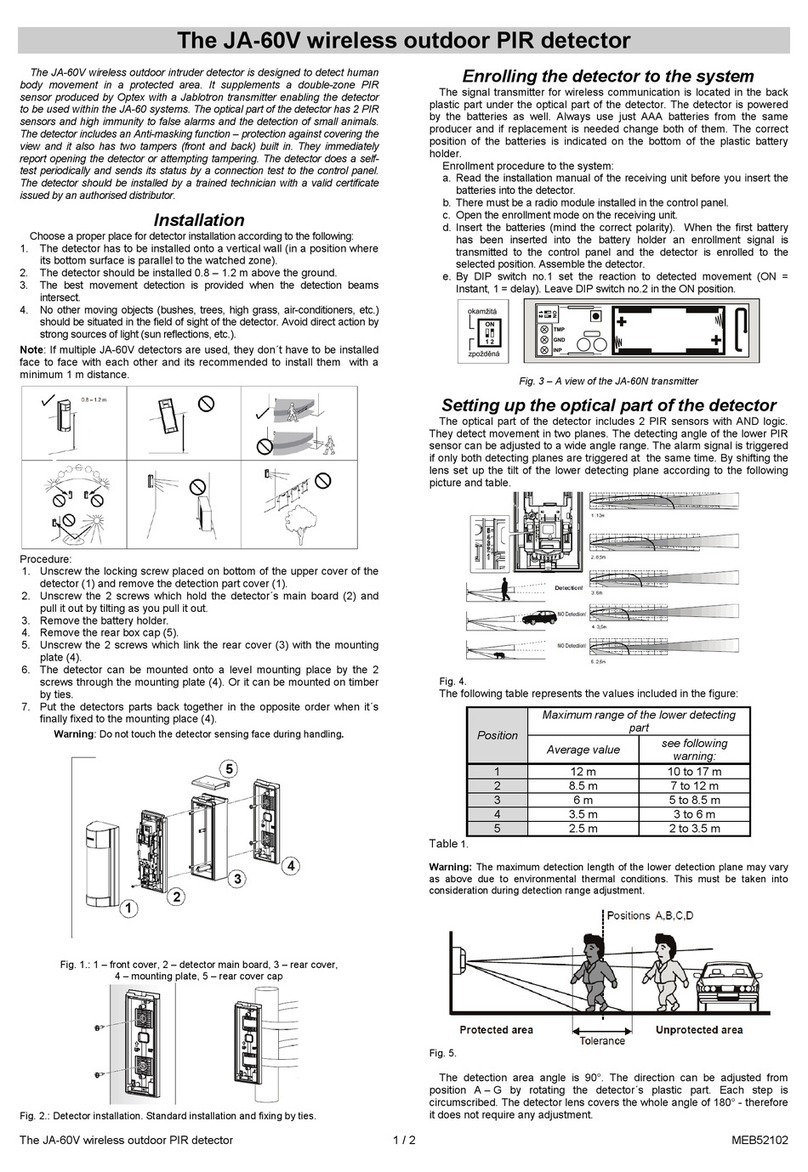
jablotron JA-60V User manual

jablotron

jablotron JA-60V User manual

jablotron JA-157P User manual

jablotron

jablotron JA-157P User manual

jablotron JA-80PB User manual

jablotron

jablotron JA-80PB User manual

jablotron JA-160PC User manual

jablotron

jablotron JA-160PC User manual

jablotron JA-89P User manual

jablotron

jablotron JA-89P User manual

jablotron JA-158P User manual

jablotron

jablotron JA-158P User manual

jablotron JA-151TH User manual

jablotron

jablotron JA-151TH User manual

jablotron JA-187P User manual

jablotron

jablotron JA-187P User manual

jablotron CA-550 User manual

jablotron

jablotron CA-550 User manual

jablotron JA-111ST User manual

jablotron

jablotron JA-111ST User manual

jablotron JA-88P User manual

jablotron

jablotron JA-88P User manual

jablotron JA-84P User manual

jablotron

jablotron JA-84P User manual

jablotron GS-133 User manual

jablotron

jablotron GS-133 User manual

jablotron JA-80PB User manual

jablotron

jablotron JA-80PB User manual

jablotron JA-85P User manual

jablotron

jablotron JA-85P User manual

jablotron JA-151P-WG User manual

jablotron

jablotron JA-151P-WG User manual

jablotron JA-181M User manual

jablotron

jablotron JA-181M User manual

jablotron JA-83P User manual

jablotron

jablotron JA-83P User manual

Popular Security Sensor manuals by other brands

Veris CW2L installation guide

Veris

Veris CW2L installation guide

Energy Saving Sensors HC-7B installation manual

Energy Saving Sensors

Energy Saving Sensors HC-7B installation manual

HANG KLD-3 user manual

HANG

HANG KLD-3 user manual

B.E.G. LUXOMAT PD2N-KNX-ST-FT Mounting instructions

B.E.G. LUXOMAT

B.E.G. LUXOMAT PD2N-KNX-ST-FT Mounting instructions

UEi COA1PK instruction manual

UEi

UEi COA1PK instruction manual

Velleman PEREL EMS105 user manual

Velleman

Velleman PEREL EMS105 user manual

Quantum LQM instructions

Quantum

Quantum LQM instructions

Mini Gadgets CD550Pro user manual

Mini Gadgets

Mini Gadgets CD550Pro user manual

Ferno Germa EasyFix PLUS Series Directions for use

Ferno

Ferno Germa EasyFix PLUS Series Directions for use

Response Alarms CA2000P Installation and operating instructions

Response Alarms

Response Alarms CA2000P Installation and operating instructions

Banner EZ-SCREEN SLSP14-450Q88 instruction manual

Banner

Banner EZ-SCREEN SLSP14-450Q88 instruction manual

Rielta CELSIUS-RK installation guide

Rielta

Rielta CELSIUS-RK installation guide

Gira 0318 04 installation instructions

Gira

Gira 0318 04 installation instructions

urmet domus 1033/016 instruction manual

urmet domus

urmet domus 1033/016 instruction manual

PCB Piezotronics 352A25/NC Installation and operating manual

PCB Piezotronics

PCB Piezotronics 352A25/NC Installation and operating manual

SECO-LARM ENFORCER RM-R100-TBQ user manual

SECO-LARM

SECO-LARM ENFORCER RM-R100-TBQ user manual

Kopp 3238.0009.3 Operation manual

Kopp

Kopp 3238.0009.3 Operation manual

Cedes GridScan/Mini-SB2 Installation and operation manual

Cedes

Cedes GridScan/Mini-SB2 Installation and operation manual

manuals.online logo
manuals.online logoBrands
  • About & Mission
  • Contact us
  • Privacy Policy
  • Terms and Conditions

Copyright 2025 Manuals.Online. All Rights Reserved.