2822
Work
Settings
Counters
Update
Documents
Light Theme
Dark Theme
Disconnect
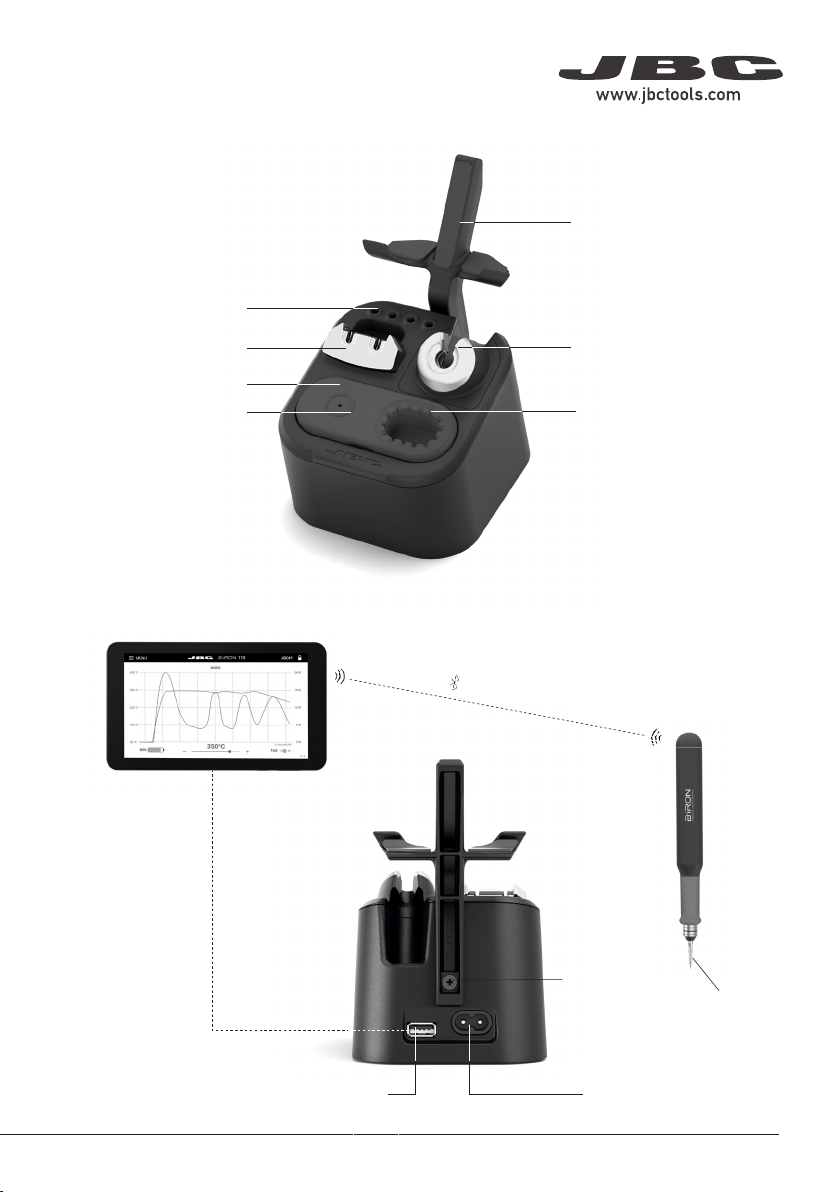
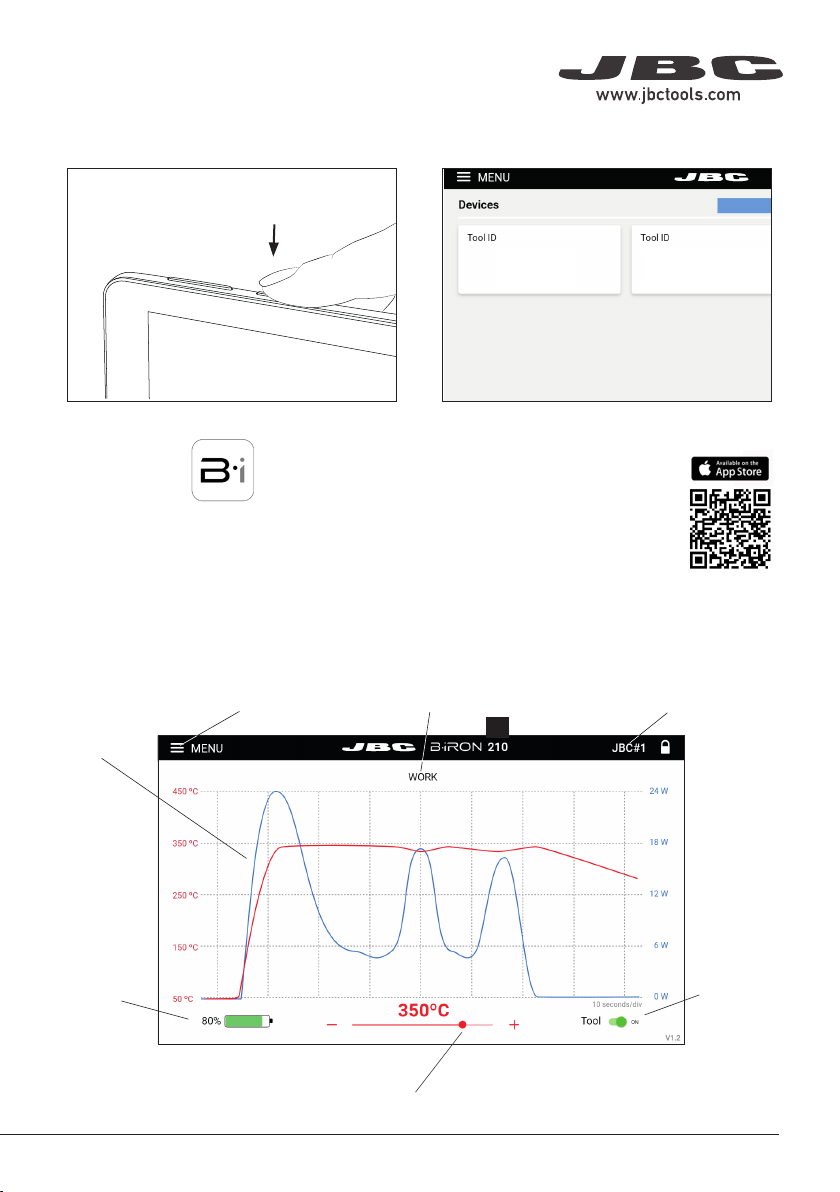
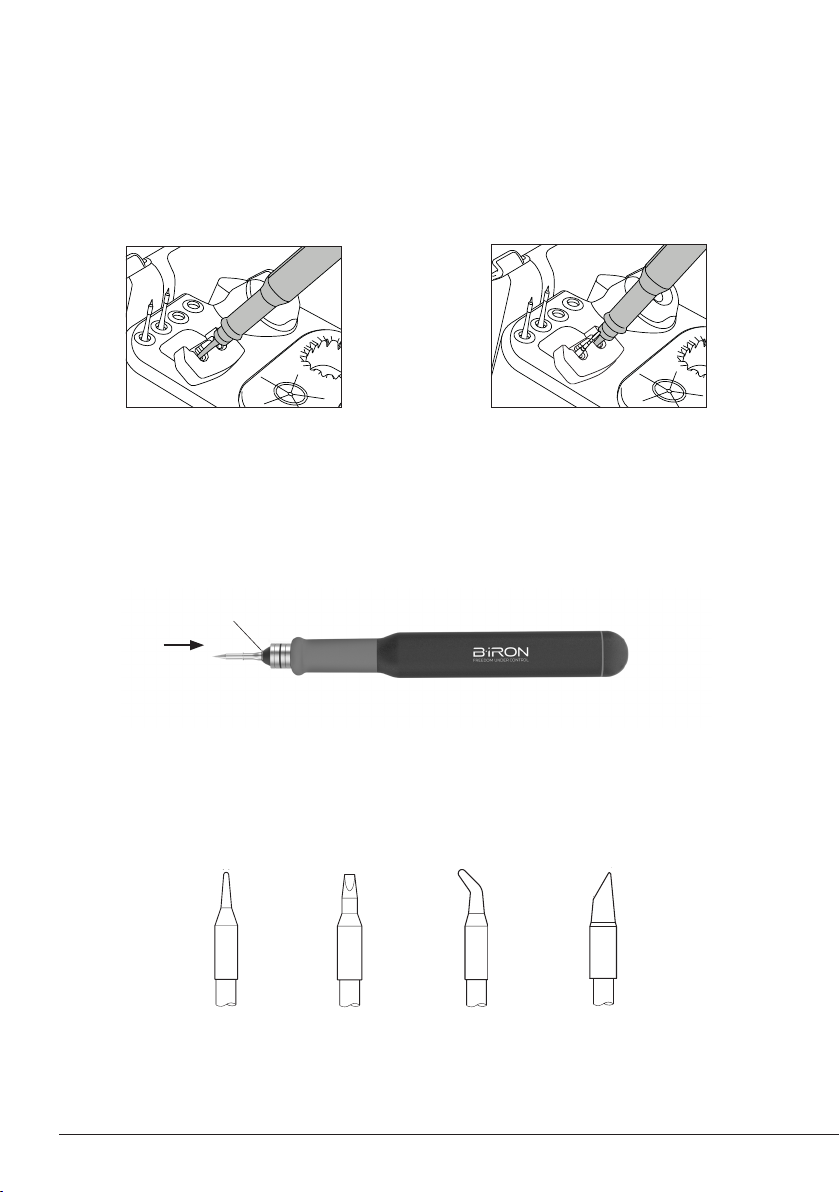
Tool1
Tool1
Tool1 Tool1 Tool2 Tool3
Tool Power Switch
Note: If desired, the tool can be switched off/on. Tab the Tool
Power Switch on the tablet screen (bottom right) to switch it off/on.
Operation
The JBC Most Efficient Soldering System
This revolutionary technology is able to recover tip temperature extremely quickly. This allows the user
to work at a lower temperature.
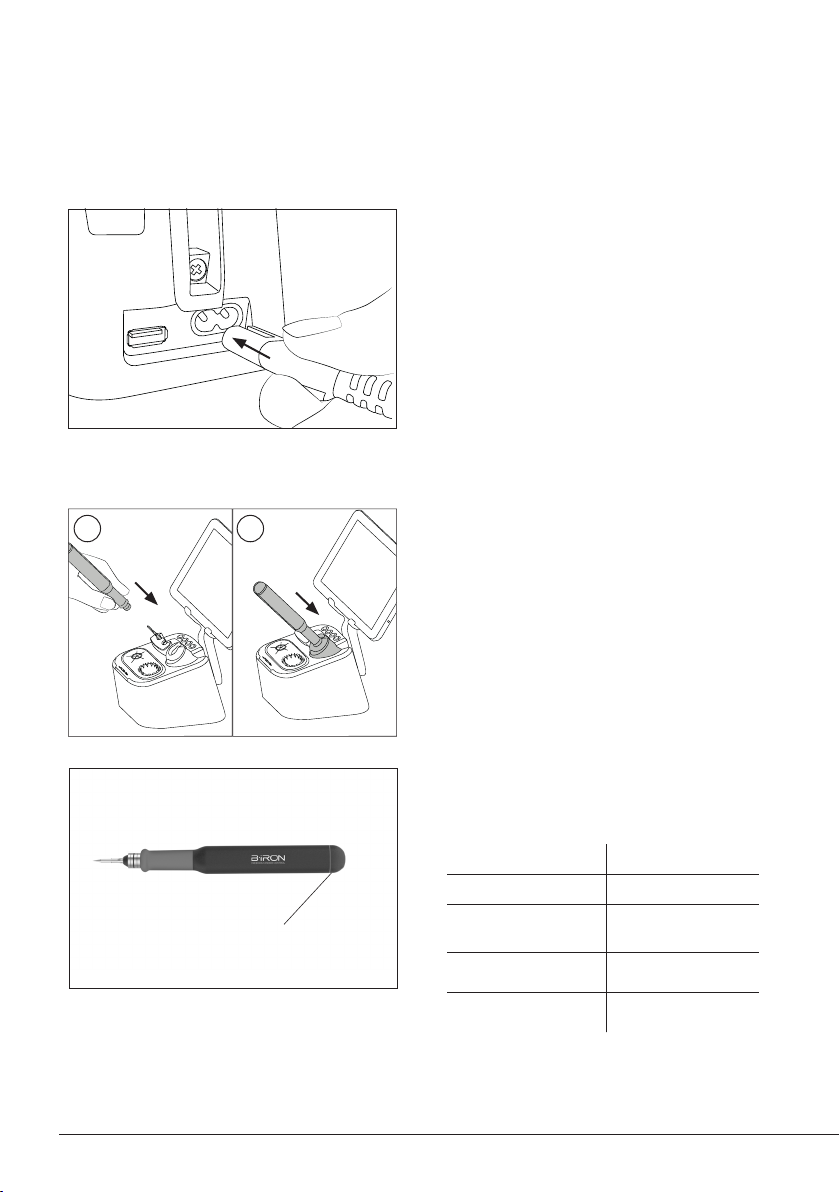
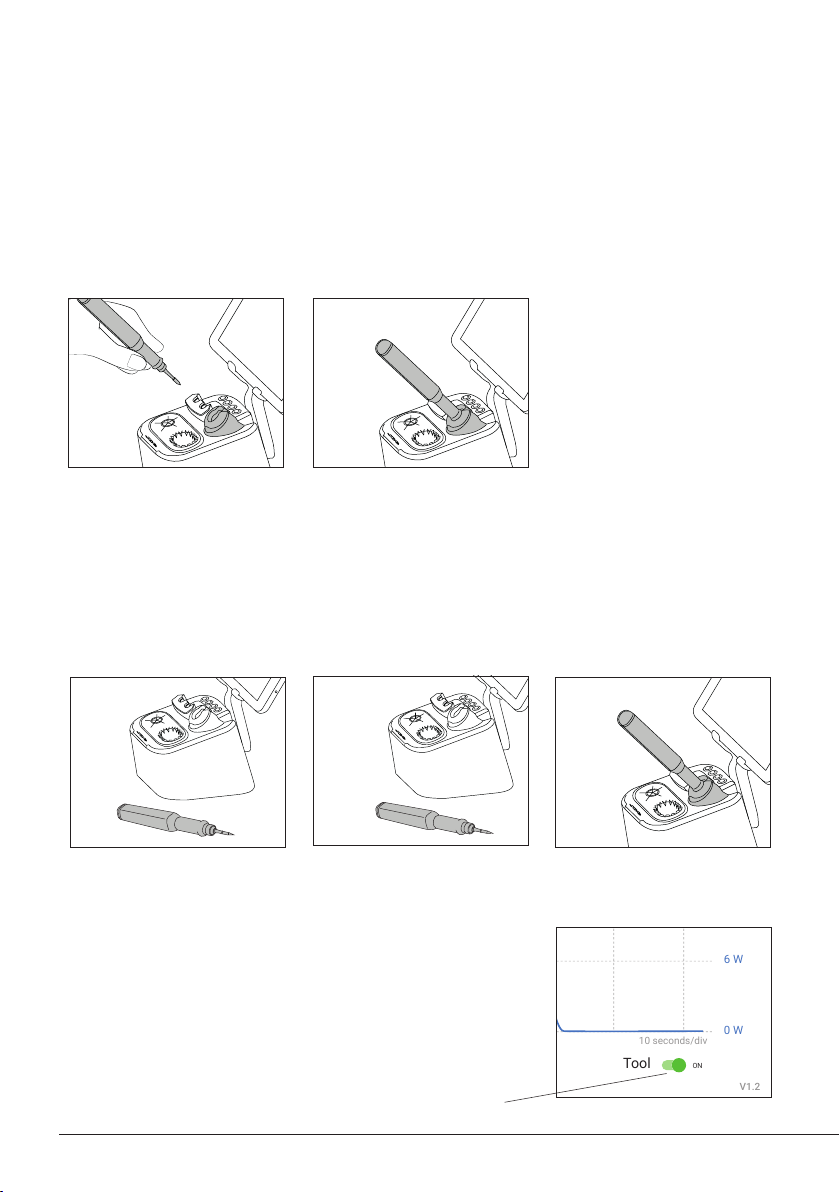
Work Charging and Hibernation
When the tool is lifted from the
stand the tip will heat up to the
selected temperature.
When the tool is in the stand
enters into Hibernation Mode
and cools down to room
temperature.
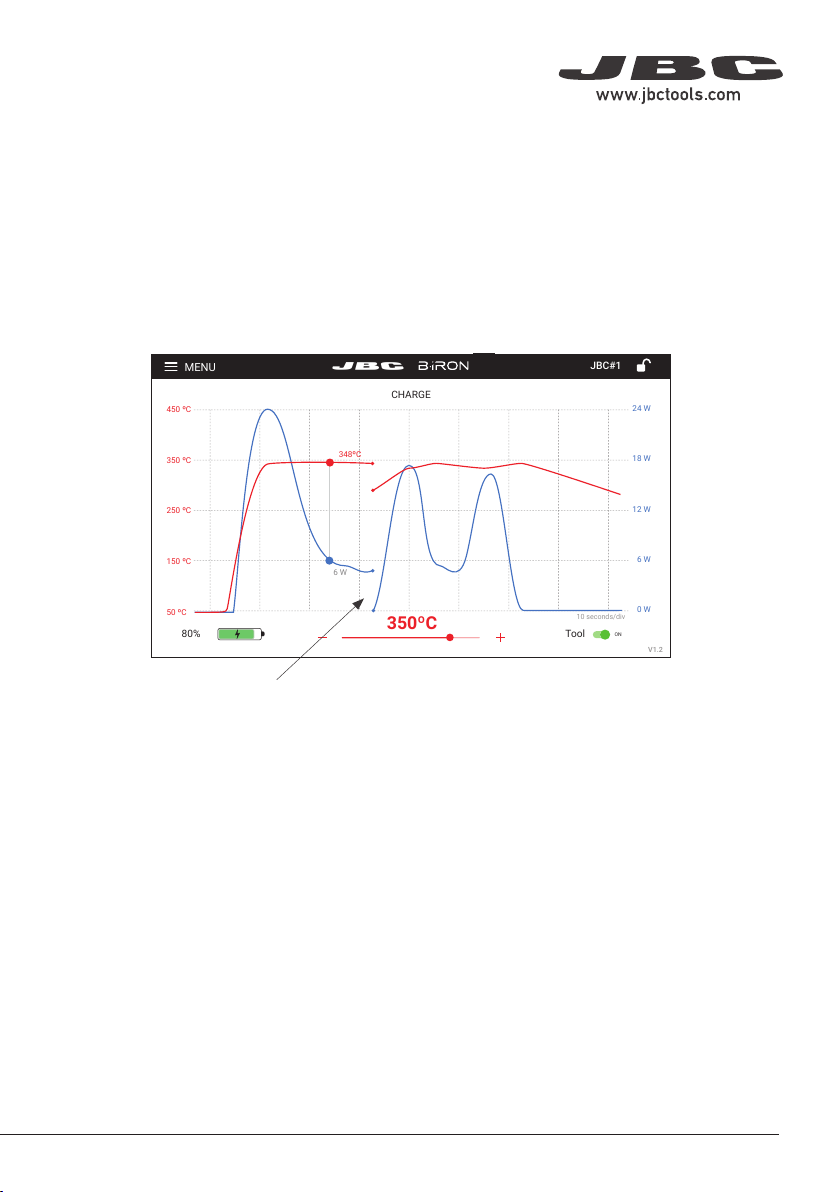
While the tool remains in the
stand, it charges.
Hibernation
When the tool is outside of the
stand and remains inactive (no
movement), the tool enters
Hibernation mode and cools
down to room temperature.
To turn the tool on, put it back
into the stand.
Note: When the tool is lifted from stand the Soldering System acts as follows:
If the tool has been inactive
for a longer period of time, it is
turned off.
long time
inactive
Turned Off Turned On
6