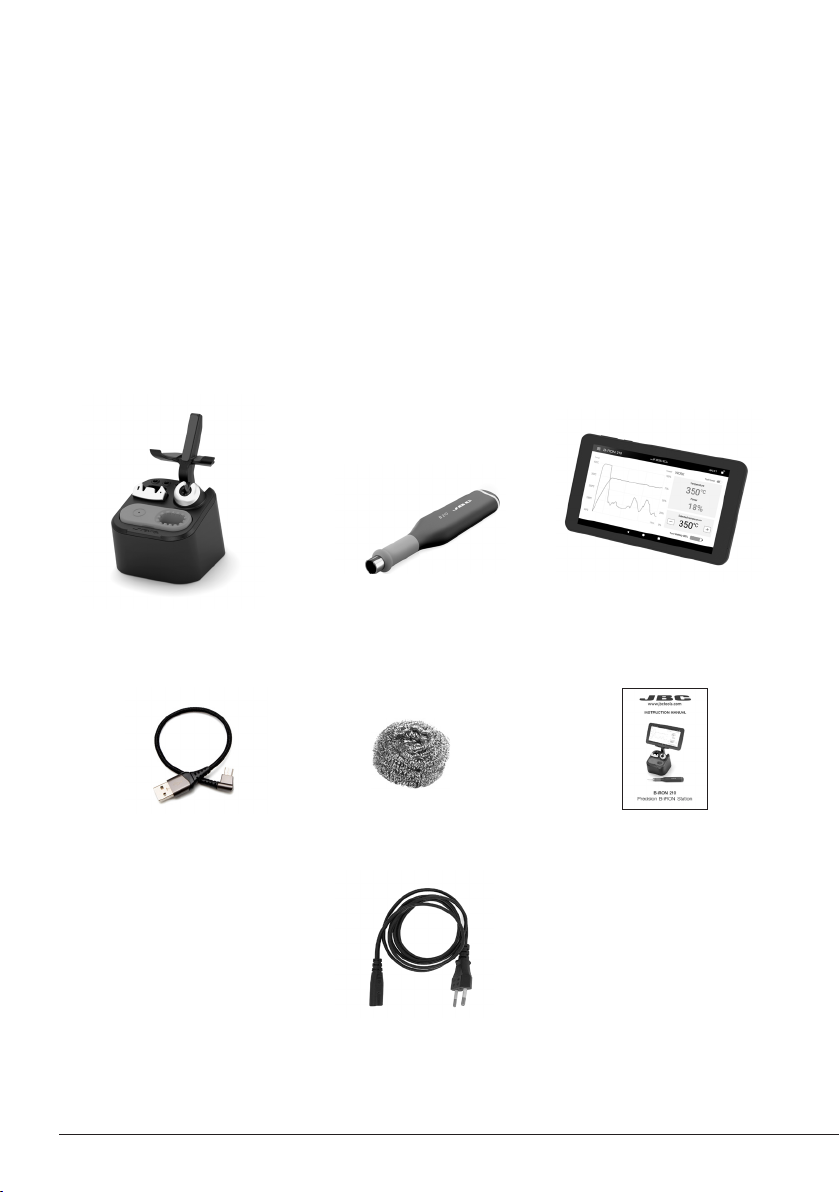
Packing List
The following items are included:
Power Cord ........................................................................................................................................................ 1 unit*
Ref. 0027380 120V - N. America, Taiwan 0027378 230V - United Kingdom
0027381 230V - India 0027379 230V - China
0027382 230V - Europe 0028103 100V - Japan
* according to purchased station reference.
Manual .............................. 1 unit
Ref. 0027779
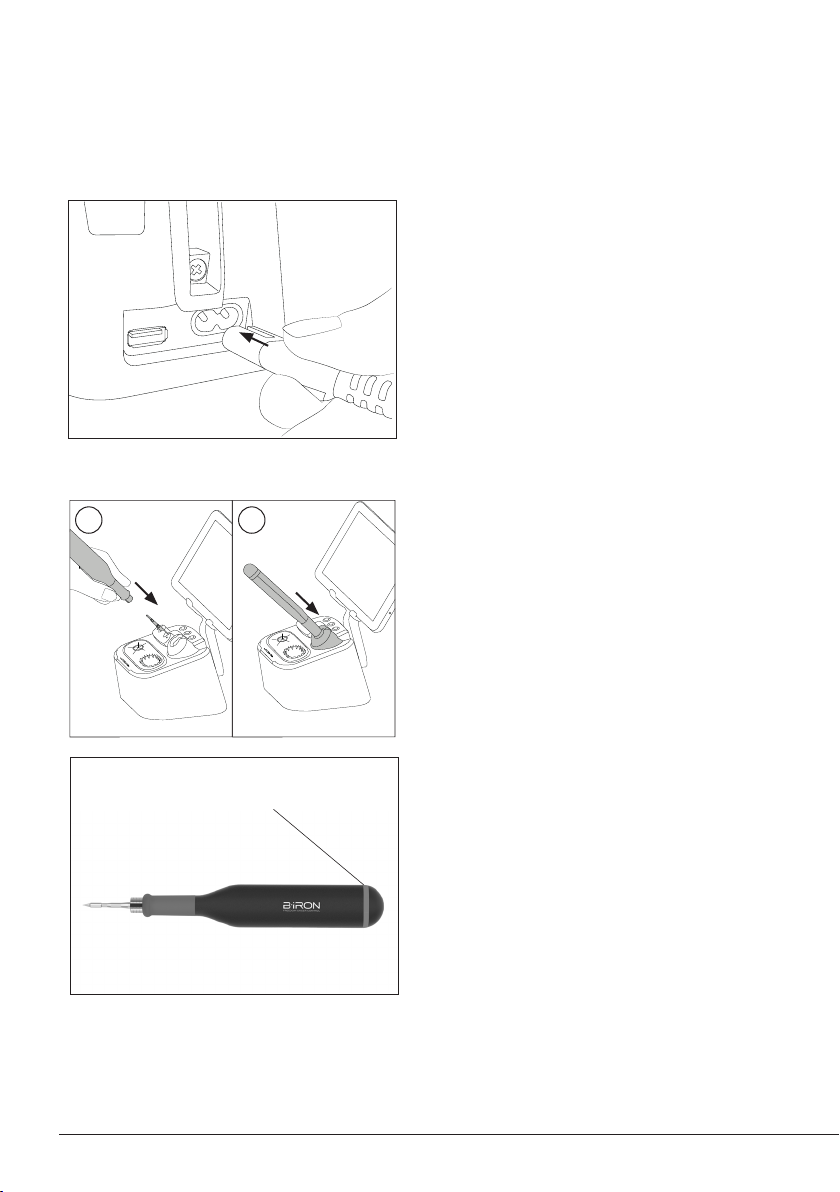
Stand for
B 210 Precision Tool ... 1 unit
Ref. B210-SA
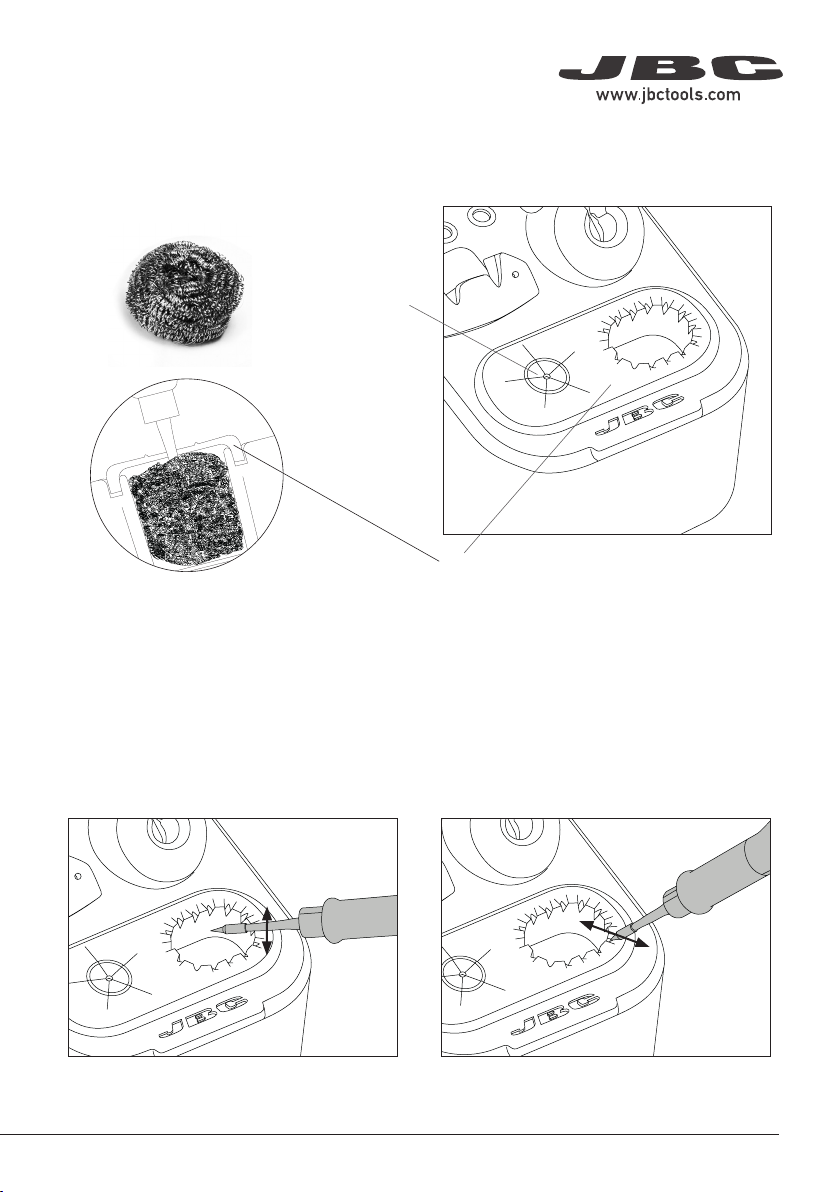
Brass Wool ..................... 1 unit
Ref. CL0300
already assembled in the stand
B 210 Precision Tool...1 unit
Ref. B210-A
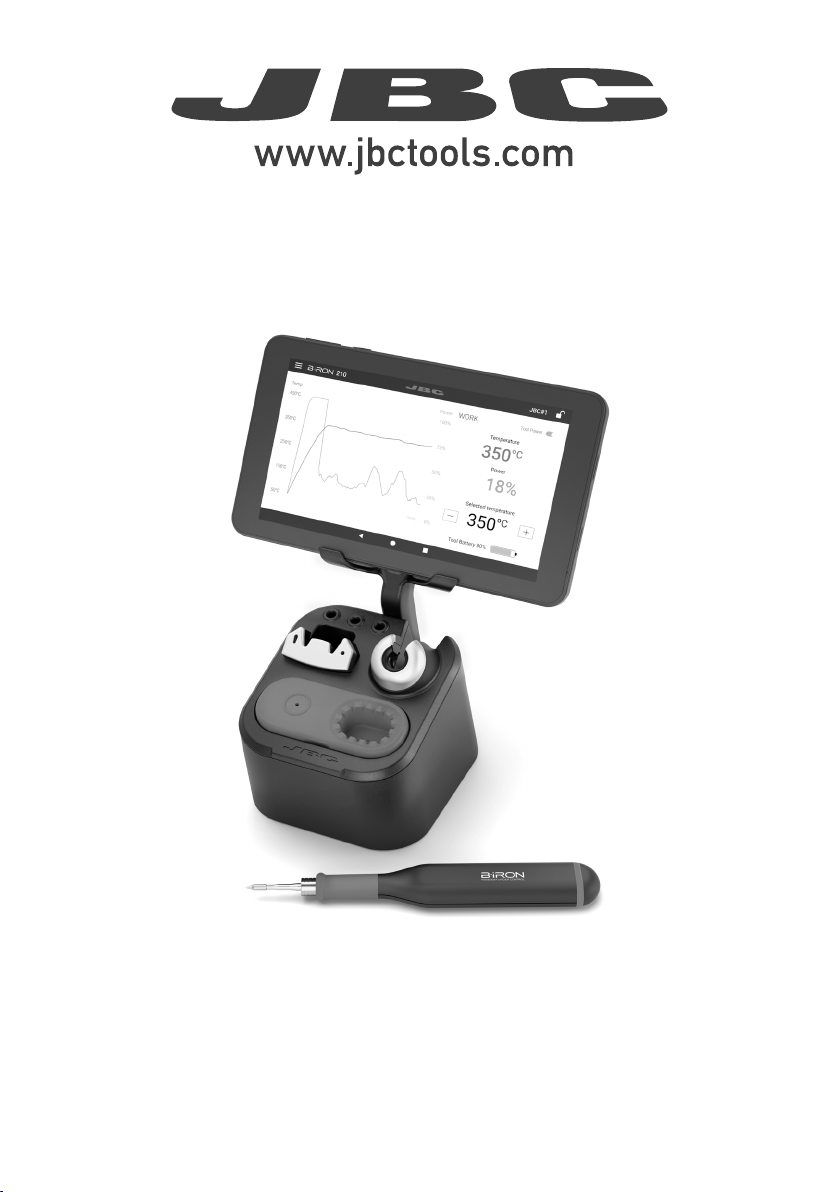
This manual corresponds to the following references:
Console included*:
BI210UA 120 V - N. America, Taiwan
BI210IA 230 V - India
BI210A 230 V - Europe
BI210KA 230 V - United Kingdom
BI210HA 230 V - China
BI210JA 100 V - Japan
Cable USB ....................... 1 unit
Ref. 0028092
B·iRON Console ........ 1 unit*
*included according purchased
reference
Console not included*:
BI210UQA 120 V - N. America, Taiwan
BI210IQA 230 V - India
BI210QA 230 V - Europe
BI210KQA 230 V - United Kingdom
BI210HQA 230 V - China
BI210JQA 100 V - Japan
2