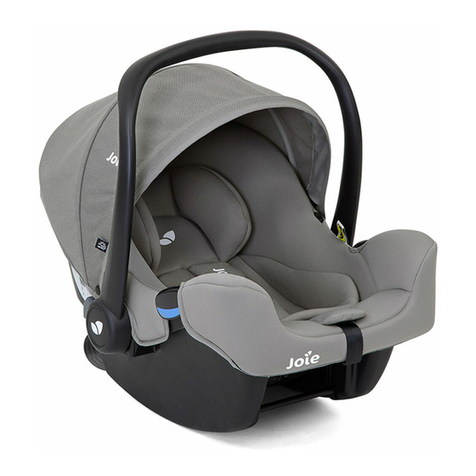
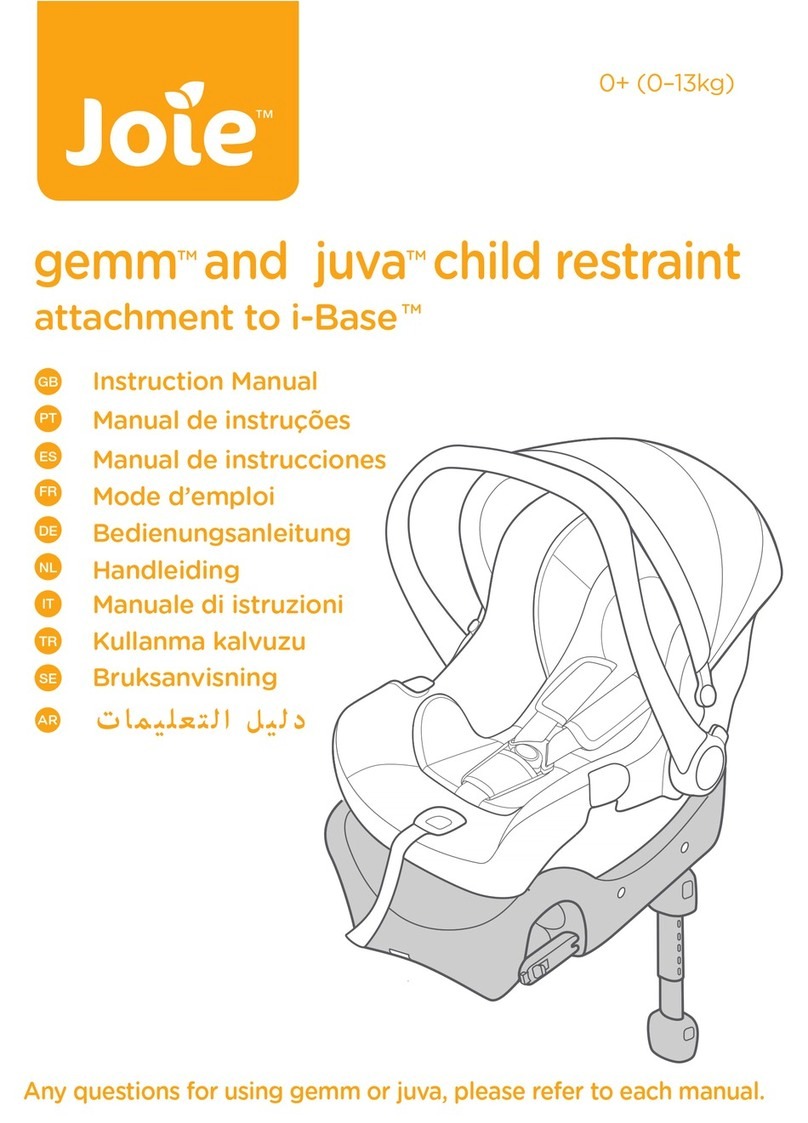
Joie juva User manual

car seat
™
0+ (0–13kg)
Instruction Manual
Manual de Instruções
Manual de instrucciones
Manuel d’utilisateur
Bedienungsanleitung
Handleiding
Manuale di istruzioni
Kullanma klavuzu
GB
PT
ES
FR
IT
DE
NL
TR
C and D
juva

1 2
1
23
23
16
17
19 20
21
22
1
2
3
4
5
6
7
9
10
11
18
12
13
14
15
67
3
2
1
1
2
1
23
2
2
1
3
3
1
A
I
R
B
A
G
45
8

3 4
16
14 15
12
10
8
13
11
9
1
21
17
19
18

5 6
!
!
!
1
3
2
22
25
21
23
24
26
27
2
3
1
1
2
A
I
R
B
A
G
20

7 8
28
30
29
31
1
2
33
34
35
32
36
1
1
3
1
2
2

910
37 38
39
1
40
1
41 42

11 12
43
46
45
44 47
48 49

14
Contents
Reference Figures 1 - 12
WARNINGS 15 - 16
Emergency 17
Product Information 17
i. for Seat Only 17
ii. for Seat with Base 18
Parts List 19
Concerns on Installation 19
Aeroplane lnstallation 20
Handle Adjustment 20
Shoulder Harness Position 20
Shoulder Harness Strap Height Adjustment 21
Securing Child in the Infant Car Seat 21
Infant Car Seat Installation 22
i. Installing without Base 22
ii. Installing with Base 23
a. Installation with 3-point-belt 23
b. Installation with ISOFIX System 25
Use with Joie Strollers 26
Detaching Seat Pad 27
Care and Maintenance 28
Vehicle Fitting Information 29
GB Welcome to Joie™
Congratulations on becoming part of the Joie family!We are so excited
to be part of your journey with your little one. While traveling with the
Joie JUVA™ car seat you are using a high quality, fully certified safety
Group 0+ infant car seat. This product is suitable for use with children
weighing under 13kg (approximately 1.5 years old or under). Please
carefully read this manual and follow each step to ensure a comfortable
ride and best protection for your child.
Please Confirm
This infant car seat can be installed using a 3 point retractable adult
seat belt approved to ECE R16 or similar standard
OR
In vehicles with ISOFIX anchorage systems provided
These instructions show the use of the infant car seat and the base.
Please keep the Instruction Manual handy for future reference.
IMPORTANT: KEEP FOR FUTURE REFERENCE. PLEASE READ
CAREFULLY.
Please always keep the instruction manual in the storage compartment
at the bottom of the base.
This carseat is approved to European Regulation No. 44, 04 series of
amendments. Please read all the instructions in this manual before
installing and using the product.
Visit us at joiebaby.com to download manuals, see more
exciting Joie products and register your car seat.

15 16
WARNING
!Please check before you purchase this Infant car seat if it can be
installed properly in your vehicle.
!NO Infant car seat can guarantee full protection from injury in an
accident. However, proper use of this Infant car seat will reduce the
risk of serious injury or death to your child.
!This Infant car seat is designed ONLY for a child weighing
under 13kg.
!DO NOT use or install this Infant car seat until you read and
understand the instructions in this manual and in your vehicle
owner's manual.
!DO NOT install this car seat without following the instructions in this
manual or you may put your child at serious risk of injury or death.
!NEVER leave your child unattended when in the car seat.
!DO NOT make any modification to this Infant car seat or use it along
with component parts from other manufacturers.
!DO NOT use this Infant car seat if it has been damaged or has
missing parts.
!DO NOT have your child in large/oversized clothes because this may
prevent your child from being properly and securely fastened by the
shoulder harness straps and the crotch strap between the legs.
!DO NOT leave this Infant car seat or other items unbelted or
unsecured in your vehicle because unsecured Infant car seat can be
thrown around and may injure occupants in a sharp turn,
sudden stop, or collision.
!Do not place the car seat in seating positions where an active frontal
airbag is installed. Death or serious injury may occur. Please refer-
ence vehicle owner’s manual for more information.
!NEVER use a second-hand Infant car seat or an infant car seat
whose history you do not know because they may have structural
damage that endangers your child’s safety.
!NEVER use ropes or any other substitutes to secure car seat in
vehicle or to secure child into car seat. Only use vehicle belt or the
ISOFIX system to secure car seat in vehicle.
!DO NOT use this Infant car seat without the seat cover and
inner padding.
!DO NOT put anything other than the recommended inner cushions
in this Infant car seat.
!The seat cover and inner padding should not be replaced with any
besides the ones recommended by the manufacturer. The seat cover
and inner padding constitute an integral part of the Infant car seat
performance.
!Be sure that the car seat is installed in such a way that no part of it
interferes with movable seats or in the operation of vehicle doors.
!DO NOT continue to use this car seat after it has suffered any type
of crash, even a minor one. Replace immediately as there may be
invisible, structural damage from the crash.
!Remove this infant car seat from the vehicle seat when it is not in
regular use.
!Consult the retailer for issues concerning maintenance, repair and
part replacement.
!To avoid the risk of falling out, always secure the child using the
safety harness when the child is placed in car seat, even when the
car seat is not in the vehicle.
!Before carrying the infant car seat by hand, ensure that the child is
fastened with the safety harness, and that the handle is correctly
locked in a vertical position.
!To avoid serious injury or death, NEVER place infant car on
elevated surface seat with child in it.
!The parts of this car seat should not be lubricated in any way.
!Always secure child in car seat, even on short trips, as this is when
most accidents occur.
!DO NOT use this car seat for more than 5 years after the purchase
date as parts may degrade over time, or from exposure to sunlight,
and may not perform adequately in a crash.
!Please keep this car seat away from sunlight, otherwise it may be
too hot for child’s skin.
!Frequently check the ISOFIX guides for dirt and clean them if
necessary. Reliability can be effected by ingress of dirt, dust, food
particles etc.
!DO NOT place any objects in the load leg area in front of your base.
!Correct Installation is only permitted by use of a 3 point adult seat
belt or by use of the ISOFIX connectors. Combined use of seat belt
and ISOFIX is not permitted.

17 18
Emergency
In case of emergency or accidents, it is most important to have your
child taken care of with first aid and medical treatment immediately.
Product Information
i. for Seat Only
1. This infant car seat is a ‘Universal’ child restraint. It is approved to
European Regulation No. 44, 04 series of amendments, for general
use in vehicles and it will fit most, but not all, car seats.
2. A correct fit is likely if the vehicle manufacturer has declared in
the vehicle handbook that the vehicle is capable of accepting a
‘Universal’ child restraint for this age group.
3. This infant car seat child restraint has been classified as ‘Universal’
under more stringent conditions than those which applied to
earlier designs which do not carry this notice.
4. Seat positions in other cars may also be suitable to accept
the child restraint. If in doubt, consult either the child restraint
manufacturer or the retailer.
ii. for Seat with Base
The Joie Car Seat with Base is a "Semi Universal ISOFIX Class C and
D Child Restraint" and should be fitted using at 3 point adult seat belt
approved to ECE R16 or the ISOFIX connections. Please refer to the
Vehicle Fitting Information at the back of this manual.
For Installation with 3-point-belt
It will fit vehicles fitted with 3-point retractor safety-belts.
Seat positions in other cars may also be suitable to accept this child
restraint. If in doubt, consult either the child restraint manufacturer
or the retailer.
For Installation with ISOFIX System
This is an ISOFIX CHILD RESTRAINT SYSTEM. It is approved to
Regulation No. 44, 04 series of amendments for general use in
vehicles fitted with ISOFIX anchorages systems.
It will fit vehicles with positions approved as ISOFIX positions (as
detailed in the vehicle handbook), depending on the category of the
child seat and of the fixture.
The ISOFIX size class for which this device is intended is C and D.
Product Infant Car Seat
Suitable for Child weighing under 13kg
Mass Group Group 0+
Materials Plastics, metal, fabrics
Patent No. Patents pending

19 20
Fig. 1.1 Seat Pad
Fig. 1.2 Stroller Fix Release
Button A
Fig. 1.3 Side Guide
Fig. 1.4 Insert
Fig. 1.5 Adjustment Webbing
Fig. 1.6 Harness Adjustment
Button
Fig. 1.7 Crotch Pad
Fig. 1.8 Shoulder Harness
Fig. 1.9 Hood
Fig. 1.10 Harness Connectors
Fig. 1.11 Harness Buckle
Fig. 1.12 Handle
Parts List
Fig. 1.13 Handle Button
Fig. 1.14 Rear Guide
Fig. 1.15 Stroller Fix Release
Button B
Fig. 1.16 ISOFIX Connector
Fig. 1.17 Shell Indicator
Fig. 1.18 ISOFIX Guides
Fig. 1.19 Load Leg
Fig. 1.20 Load Leg Indicator
Fig. 1.21 Load Leg
Adjust Button
Fig. 1.22 Car Seat Release
Button
Fig. 1.23 Lock-off
Please make sure there are no missing parts. Please contact the
retailer if anything is missing.
Concerns on Installation
!DO NOT install this Infant car seat on vehicle seats with Lap Belts
without the Base. (Fig. 2)
!This Infant car seat is suitable for vehicle seats with a 3-point
Retractor Safety Belt (with or without base) ONLY (Fig. 3),
and ISOFIX anchor points WITH the Base. (Fig. 4)
!DO NOT install this Infant car seat on vehicle seats that face
sideways or rearward with respect to the moving direction of the
vehicle. (Fig. 5.1)
!DO NOT place rear-facing car seat on front seat with air bag
(Fig. 5.2), death or serious injury may occur. Please reference
vehicle owner’s manual for more information.
!It is recommended to install this Infant car seat on the rear
vehicle seat. (Fig. 5.3)
!DO NOT install this Infant car seat on vehicle seats unstable
during installation.
!To know more detailed installation information for seat with base,
please refer to the section 'Vehicle Fitting Information'.
Aeroplane lnstallation
! The Juva can only be installed using a lap belt if being used in an
aircraft without the base. Do not install in a vehicle using a lap belt.
! When being used in an aircraft, the infant car seat must only be
installed rear facing on the seat.
Handle Adjustment
The handle of the infant car seat can be adjusted to 3 positions. (Fig. 6)
Position 1 Position for car, hand or stroller transportation.
Position 2 Rocking position.
Position 3 Baby chair position.
To adjust the handle, squeeze the handle buttons on both sides to
release it (Fig. 7.1), and then rotate the handle until it clicks into any of
the 3 positions. (Fig. 7.2)
Shoulder Harness Position
Check that shoulder harnesses are set at the proper height. Please
choose the proper pair of shoulder harness slots according to the
child's height.
!Shoulder harnesses must go into the harness slots nearest
to your baby’s shoulders (Fig. 8), but not above the
shoulder line. (Fig. 9)

21 22
!If the shoulder harnesses are not at the proper height, your child
might come free from the car seat during an accident.
Shoulder Harness Strap Height
Adjustment
1. Press the adjustment button at the front of the seat and pull
the shoulder harnesses to loosen them. (Fig. 10)
2. At the back of the seat, take the harness ends off the metal
junction plate. (Fig. 11)
3. Pull the harnesses through the slots in the seat (Fig. 12.1),
insert them into the appropriate set of slots. (Fig. 12.2)
a.Thread the shoulder strap through shoulder harnesses.
b.Thread the shoulder harness anchor through the shoulder
harness slot.
c.Thread the shoulder strap through the shoulder harness slot.
4. Reassemble the harness ends onto the junction plate. (Fig. 13)
!Thread the shoulder strap through the shoulder harness anchor.
(Fig. 13.1)
!The shoulder harnesses must be placed behind the
two metal tubes.
!During adjustment, make sure the shoulder harnesses
are not twisted.
!Use extreme care in threading the shoulder harnesses
according to the figure. If the shoulder harnesses are not
secure, they will not protect your baby properly
Securing Child in the Infant Car Seat
1. While pressing the harness adjustment button, pull completely the
two shoulder harnesses of the infant car seat. (Fig. 15)
2. Unlock the buckle of the harnesses by pressing the red button.
(Fig.16)
3. Place child into the infant car seat and lock the buckle. (Fig. 17 & 18)
4. Tighten the shoulder harnesses by pulling adjustment webbing.
(Fig. 19)
!Make sure the space between the child and the shoulder
harnesses is about the thickness of one hand.
Infant Car Seat Installation
The installation instructions vary depending on whether or not you
are using the base. Please refer to the proper section.
!Do not place the infant car seat on front vehicle seat with
airbag. Death or serious injury can occur. (Fig. 20)
!When using the infant car seat in a vehicle seat, please adjust
the handle to position 1. (Fig. 6.1)
!Face your car seat or base toward the rear of the vehicle.
i. Installing without Base
After fitting the harness to your child and determining which rear
vehicle seat location is best, you are ready to install your
infant car seat.
1. The insert is for infant's protection. Infant weighing under 10kg
must use the insert.
2. Before using the insert, please add the foam. (Fig. 14)
3. After the child is placed in the seat, check if the shoulder
harnesses are set to the correct height.
Note

23 24
2. After placing the base on the vehicle seat, squeeze load leg adjust
button to extend the load leg to floor (Fig. 26.1), the load leg
indicator shows green means it is installed correctly, red means it is
installed incorrectly. (Fig. 26.2)
! The load leg has 12 positions. When the load leg indicator
shows red this means the load leg is in the wrong position.
! Make sure the load leg is secure by pressing down on the front
of the base.
3. Open the lock-off and route the vehicle safety belt through the
belt path (Fig. 27.1), and lock it into the buckle (Fig. 27.2), close the
lock-off. (Fig. 27.3)
4. Tighten the vehicle safety belt as much as possible while pushing
down on the base, and check it is not loose or twisted.
! Check that the safety belt does not move by pulling and pushing
hard on base. If belt loosens or lengthens, repeat procedure.
The installed base is shown as Fig. 28
!Please ensure that there is no gap between the seat and the
bottom of the base.
!The safety belt must go under the lock-off, not over the lock-off.
(Fig. 28.1)
!The safety belt must be locked into the buckle. (Fig. 28.2)
!The load leg must be installed correctly with green
indicator. (Fig. 28.3)
5. Push the car seat down into the base (Fig. 29), if the car seat is
secure, the car seat indicator shows green. If the car seat is not
secure, the indicator shows red. (Fig. 30)
! Pull up on the car seat to be sure it is securely latched into
the base.
6. To release the car seat, pull the car seat up while squeezing the car
eat release button. (Fig. 31)
1. Place the infant car seat onto the vehicle seat where you wish to
put it. Pull the vehicle safety belt out and lock it into the vehicle
buckle, sliding the vehicle lap belt into the side guides of the
infant car seat. (Fig. 21)
! The handle should be in the carry position.
2. Slide shoulder belt into the rear guide. (Fig. 22)
3. Pull the belt to fasten the infant car seat tightly and securely.
(Fig. 23)
!Tension the vehicle safety belt as much as possible, check that
it is not loose or twisted.
!The vehicle safety belt shall not cause pressure on any
part of the child.
Correctly assembled vehicle safety belt is shown as Fig. 24
!Lap belt must pass through the two side guides, as Fig. 24.1
!The vehicle buckle is locked correctly, as Fig. 24.2
!Shoulder belt must pass through the rear guide, as Fig. 24.3
ii. Installing with Base
!This base is only to be used with certain Joie infant car seats.
A proper installation can be done either with the 3-point-belt or
ISOFIX system.
!A simultaneous use of both systems is not permitted.
a. Installation with 3-point-belt
1. Unfold the load leg from storage compartment. (Fig. 25)

25 26
Use with Joie Strollers
Your infant car seat is designed to attach to certain Joie stroller models
featuring a special tray, armbar or calf support.
!Please make sure your stroller can fit the infant car seat
before purchasing it.
!Never allow more than one baby in the travel system at one time.
!Please brake your stroller before assembling the infant car seat.
!Check that the parts used to fix the infant car seat are securely
fastened on the stroller.
!Recline the stroller seat back to the lowest position.
To assemble the infant car seat on Joie strollers, please follow
these steps:
1. Place car seat into stroller so notches in rockers fit over
edge of armbar, tray or calf support. The car seat will then
automatically click into place. (Fig. 37 & 38 & 39 & 40 )
!If armbar has fabric cover, please detach the Velcro on
armbar cover first. (Fig. 39.1)
!For the stroller with a special calf support, please adjust
the calf support to the vertical position, detach the Velcro,
and then lift the fabric cover. (Fig. 40.1)
2. Use the straps on both sides of stroller to fix the car seat.
( Fig. 41 & 42 & 43)
!Try pulling the car seat upwards to check that it is
fitted correctly.
To remove the car seat, release the straps from the car seat, pull up
the stroller fix release button B to release the car seat from tray,
armbar or calf support, and then lift car seat out of stroller.
Please refer to Fig. 44 & 45 & 46
b. Installation with ISOFIX System
1. Unfold the load leg from storage compartment. (Fig. 25)
2. Fit the ISOFIX guides with the ISOFIX anchor points. (Fig. 32)
The ISOFIX guides can protect the surface of the vehicle seat from
being torn. They can also guide the ISOFIX connectors.
3. Rotate the ISOFIX connectors 180 degrees until they are pointing
in the direction of the ISOFIX guides. (Fig. 33)
4. Line up the ISOFIX connectors with the ISOFIX guides, and then
click both ISOFIX connectors into the ISOFIX anchor points. (Fig. 34)
!
Make sure that both ISOFIX connectors are securely attached to
their ISOFIX anchor points. There should be two audible clicks
and the colors of the indicators on the both ISOFIX connectors
should be completely green. (Fig. 34.1)
!Check to make sure the base is securely installed by pulling on
the both ISOFIX connectors.
5. Please refer to step 2 in section 'a. Installation with 3-point-belt'
for adjustment of load leg.
The completely assembled base is shown as Fig. 35
! The ISOFIX connectors must be attached and locked onto the
ISOFIX anchor points. (Fig. 35.1)
!The load leg must be installed correctly with green
indicator. (Fig. 35.2)
6. Please refer to step 5, 6 in section 'a. Installation with 3-point-belt'
to use the infant car seat.
7. To remove the base, pull the base backwards while pressing the
buttons on the ISOFIX connectors. (Fig. 36)

27 28
Care and Maintenance
!After removing the foam of insert, please store it somewhere that
the child cannot access it.
!Please wash the seat cover and inner padding with cold water
under 30°C.
!Do not iron the soft goods.
!Do not bleach or dry clean the soft goods.
!Do not use undiluted neutral detergent, gasoline or other organic
solvent to wash the infant car seat or base. It may cause damage
to the infant car seat.
!Do not twist the seat cover and inner padding to dry with great
force. It may leave the seat cover and inner padding with
wrinkles.
!Please hang dry the seat cover and inner padding in the shade.
!Please remove the infant car seat and base from the vehicle seat
if not in use for a long period of time. Put the infant car seat in a
cool, dry place and somewhere your child cannot access it.
Detach Seat Pad
To detach the seat pad, you should refer to the following steps:
1. You must remove the insert first. To do this simply unlock the
buckle, then unclip the snaps on both sides of the insert and pull out
away from the seat.
2. Remove the crotch pad by detaching the Velcro.
3. Remove the safety buckle from the crotch pad.(Fig. 47)
4. You must remove the shoulder harnesses and shoulder pads. To do
this please refer to the section 'Shoulder Harness Strap Height
Adjustment'.
5. Pull out the fastening pieces underneath the edge of the seat.
(Fig. 48)
6. Detach the seat pad from around the adjustment button as
shown in Fig. 49
To refit the seat pad simply reverse the steps above, however make
sure that the shoulder harnesses are not crossed over and not twisted.

45 46
Conteúdo
Imagens de referência 1 - 12
ADVERTÊNCIAS 47- 49
Emergência 49
Informações do produto 49
i. para uso sem a base 49- 50
ii. para uso com a base 50- 51
Lista de Peças 51
Preocupações na instalação 51- 52
Instalacao no aviao 52
Ajuste da alça 52
Posição do cinto dos ombros 53
Ajuste de altura da alça do ombro 53- 54
Prender a criança na cadeirinha 54
Instalação da cadeirinha 54-55
i. Instalação sem a base 55-56
ii. Instalação no carrinho 56
a.instalação de um cinto de 3 pontos 56- 57
b.Instalação com o sistema ISOFIX 58
Uso com carrinho Joie 59
Remover partes macias 60
Cuidados e Manutenção 61
PT Bem-vindo à Joie™
Parabéns por se tornar parte da família Joie! Estamos realmente anima¬dos por
fazer parte desta jornada com seu pequeno. Enquanto estiver viajando com a
cadeirinha Joie JUVA™, você estará usando um produto de alta qualidade, com
total certificado de segurança para o Grupo 0+. Este produto é apropriado para
uso com crianças que pesam menos de 13 kg (aproximadamente 1 ano e meio de
idade ou menos). Por favor, leia atentamente este manual e siga cada etapa para
assegurar um pas¬seio confortável e com a melhor proteção para o seu filho.
Por favor, confirme
Esta cadeira de carro para crianças pode ser instalada utiilizando um
cinto de segurança para uma cadeira de adultos com 3 pontos retrátil
aprovado ECE R16 ou por uma norma semelhante.
OU
Em veículos com sistemas de fixação fornecidos ISOFIX
Estas instruções apresentaam a maneira de uso da cadeira de carro
para crianças e da base. Por favor, guarde o Manual de instruções à
mão para referência futura.
IMPORTANTE: GUARDE O MANUAL PARA REFERÊNCIA FUTURA.. POR
FAVOR, LEIA COM ATENÇÃO.
Por favor, guarde sempre o manual de instruções no compartimento de
armazenagem, na parte inferior da base.
Esta cadeira de carro é aprovada pelo Regulamento Europeu no. 44,
da série 4 de mudanças. Leia, por favor, todas as instruções contidas
neste manual antes de instalar e usar o produto.
Acesse joiebaby. para baixar os manuais, veja mais produtos interes-
santes e registre sua cadeira para carro.
Visítenos en joiebaby.com para descargar manuales, ver más produc-
tos Joie y para registrar su silla de coche.

47 48
ADVERTÊNCIAS
! Antes de comprar esta cadeira de carro para crianças, por favor,
verifique se ela pode ser instalada corretamente em seu veículo.
! QUALQUER cadeira de carro para crianças não pode garantir total
proteção em termos de prejuízo causado por um acidente. No en-
tanto, o uso apropriado da cadeira de carro para crianças vai reduzir
o risco de ferimentos graves ou da morte do seu filho
!Esta cadeira para crianças é projetada APENAS para uma criança
com peso inferior a 13 kg.
!NÃO usar ou instalar a cadeira de carro para crianças, se você não
leu antes e não compreendeu as instruções contidas neste manual e
no manual do usuário para o seu veículo.
! NÃO instale esta cadeira de carro para crianças sem respeitar as
instruções contidas neste manual que você pode colocar seu filho
para o risco de ferimentos graves ou mesmo morte.
!
NUNCA deixe a criança sozinha enquanto estiver na cadeira de carro.
!NÃO modifique de qualquer forma esta cadeira de carro para
crianças ou não use esta cadeira com peças de reserva de outros
fabricantes.
!NÃO utilize esta cadeira de carro para crianças, se tiverem qualquer
dano ou em caso de falta de certas partes de sua estrutura.
!NÃO vestir seu filho com roupas que são grandes / ou têm taman-
hos grandes, pois isso pode evitar que seu filho coloque em segu-
rança com os cintos de ombro, com a cintura que está posicionada
entre as pernas.
!NÃO deixe esta cadeira de carro para crianças ou outras peças, sem
ser asseguradas com correias em seu veículo, porque uma cadeira
de carro para crianças que não está posicionado de forma segura
poderia ser rejeitada e poderia causar lesões aos passageiros em
uma curva difícil a uma parada súbita ou colisão.
! Não coloque o banco de carro numa posição de assentamento onde
esteja instalado um airbag frontal ativo. Poderia haver lesões graves
ou mesmo morte. Para mais informações, por favor, consulte o
manual do usuário do seu veículo
!NUNCA use uma cadeira de carro para crianças de segunda mão
para crianças ou uma cadeira de carro para crianças que não
conhecem todos os detalhes, pois pode ter defeitos estruturais que
podem comprometer a segurança do seu filho
!NUNCA use cordas ou quaisquer outros substitutos para asse-
gurar o assento de carro no veículo ou para colocar a criança em
condições de segurança na cadeira de carro.
!
NÃO utilize esta cadeira do carro sem a tampa para a cadeira e forro interior.
!
NÃO utilize outros artigos do que os forros recomendados para o interior.
!A tampa do assento e o forro interior não devem ser substituídos por
outros artigos do que os recomendados pelo fabricante. A tampa da
cadeira e o forro interior apresentam parte integral no desempenho
da cadeira de carro para crianças.
!Assegure-se que a cadeira de carro é instalada de tal modo que
qualquer parte não está em contacto com os assentos móveis ou
com as portas de veículos.
!NÃO continuar o uso desta cadeira de carro, se tivesse havido qual-
quer tipo de acidente, mesmo de um menor. Substitua, assim como
visto, qualquer sinal de danos do acidente.
!Substitua a cadeira de carro para crianças do banco traseiro do
veículo se não for utilizada corretamente.
! Consulte o fornecedor em matéria de manutenção, reparações e
substituição de qualquer peça.
! Para evitar o risco de cair, sempre coloque a criança na cadeira de
carro seguramente usando o cinto de segurança mesmo quando a
cadeira de carro não está no veículo.
! Antes de transportar a cadeira para crianças, tome as medidas
relativas aos requisitos de segurança para crianças usando o cinto
de segurança e certificando-se que o cabo está devidamente blo-
queado na posição vertical.
! Para evitar ferimentos graves ou mesmo a morte, NUNCA coloque o
carrinho de bebê em uma cadeira é posicionado sobre uma superfí-
cie elevada com a criança ao interior.
! As peças da presente cadeira de carro não devem ser lubrificadas
em qualquer forma.
! Coloque sua criança com segurança na cadeira de carro, mesmo
quando você tem que fazer viagens curtas, já que estes são casos
em que a maioria dos acidentes ocorrem.
! NÃO utilize esta cadeira de carro mais de cinco anos a partir da data
da compra pois as peças seriam prejudicadas ao longo do tempo ou
devido à exposição à luz solar e não podem reagir adequadamente
em caso de acidente.
! Por favor mantenha esta cadeira de carro longe da luz solar, caso con-
trário, podería ser um meio demasiado quente para a pele do bebê.
! Verifique sempre as peças de guia ISOFIX e limpá-los de impurezas,

49 50
se necessário. A confiabilidade pode ser afetada pela penetração
das impurezas, da poeira, das partículas de alimentos etc.
! NÃO coloque quaisquer objectos ao lado do apoio em frente da
base.
! A instalação correta é permitida apenas ao usar um cinto de 3 pon-
tos de assento para adultos ou de suas peças de ligação ISOFIX.
Não permetido o uso combinado de cintos de segurança com
ISOFIX.
Emergência
Em caso de emergência ou acidentes, o mais importante é que seu filho
receba os primeiros socorros e tratamento médico imediatamente.
Leia todas as instruções contidas neste manual antes de usar o produto.
Se você ainda tiver dúvidas, consulte seu revendedor diretamente.
Informações do produto
i. para uso sem a base
1. Esta cadeira de bebê é um dispositivo de retenção para crianças da
categoria “universal”. É aprovada pela Norma Europeia nº 44, série
04 de alterações, para uso geral em veículos e se adéqua à maior
parte, mas nem todos, os bancos de carros.
2. É possível uma instalação correta se o fabricante do veículo tiver
indicado no manual do mesmo que o veículo aceita contenção para
crianças “universal” para este grupo etário.
3. Esta cadeira de bebê foi classificada como “universal” com base
em condições mais rigorosas do que aquelas aplicadas a modelos
anteriores que não possuem esta classificação.
4. As posições da cadeira de carro em outros carros podem também
ser adequadas para o dispositivo de suporte da criança. Se houver
dúvidas, consulte o fabricante ou o fornecedor do dispositivo de
apoio.
ii.Para a cadeira com base
A cadeira de carro Joie com base é um dispositivo "Semi Universal
ISOFIX Classe C e suporte para crianças D" e deve ser fixado com um
cinto de segurança para adultos de 3 pontos aprovado por ECE 16 ou
as peças de ligação ISOFIX. Por favor, consulte as informações sobre
o montagem no veículo na parte traseira.
Para a instalação com cinto de 3 pontos
Será adequada para os veículos que estão equipados com cintos de
segurança de 3 pontos retráteis. As posições da cadeira em outros
carros também podem ser apropriadas para este suporte para
criança. Se houver dúvida, consulte o fabricante ou o fornecedor de
suporte para as crianças.
Para a instalação com o sistema ISOFIX
Este é um SISTEMA DE SUPORTE PARA CRIANÇAS ISOFIX. É
aprovado pela Regra no. 44, 04 série de alterações para uso geral
em veículos equipados com sistemas de fixação ISOFIX.
Será apropriado para veículos com posições aprovadas como
posições ISOFIX (como detalhado no manual do veículo) de acordo
com a categoria de cadeira de criança e com o dispositivo de fixação.
As classes de tamanhos ISOFIX para que foi criado este dispositivo
são C e D.

51 52
Fig. 1.1 Almofada do assento
Fig. 1.2 Botão de liberação A
Fig. 1.3 Guias laterais
Fig. 1.4 Redutor Interno
Fig. 1.5 Tira de ajuste
Fig. 1.6 Botão de ajuste das
alças
Fig. 1.7 Acolchoado da fivela do
cinto
Fig. 1.8 Alça de ombro
Fig. 1.9 Capota
Fig. 1.10 Presilhas do cinto dos
ombros
Fig. 1.11 Fivela de Segurança
Fig. 1.12 Alça da cadeirinha
Lista de Peças
Fig. 1.13 Botão da alça da
cadeirinha
Fig. 1.14 Guia posterior
Fig. 1.15 Botão de liberação B
Fig. 1.16 Peça de ligação
ISOFIX
Fig. 1.17 Dispositivos de guia
ISOFIX
Fig. 1.18 Botão de ajuste
suporte
Fig. 1.19 Perna de apoio
Fig. 1.20
Indicador da perna de apoio
Fig. 1.21
Botão de ajuste da
perna de apoio
Fig. 1.22
Botão de liberação da
cadeira de carro
Fig. 1.23 Trava do cinto de
segurança
Preocupações na instalação
!NÃO instale esta cadeira de bebê em bancos com cintos de
segurança de 2 pontos retráteis. (Fig. 2)
! Esta cadeira de carro para crianças é adequada APENAS para as
cadeiras de veículos com cinto de segurança retrátil de 3 pontos
(com ou sem base) (Fig. 3) e para pontos de fixação ISOFIX COM a
base (Fig. 4)
! NÃO instale esta cadeira de bebê em bancos voltados para o lado
ou para trás em relação ao sentido do movimento do veículo. (Fig.
5.1)
! NÃO coloque a cadeira de carro ao inverso no banco da frente que
tem bolsas de ar (Fig. 5.2), pois podem ocorrer lesões graves ou
mesmo morte. Para mais informações consulte o manual do usuário
do veículo.
! Recomendamos a instalação da cadeira de carro para crianças no
banco de trás do veículo. (Fig. 5.3)
! NÃO instale esta cadeira de bebê em bancos de veículos instáveis
durante a instalação
!Para informações mais detalhadas sobre a instalação da cadeira de
carro com base, por favor, consulte a seção "Informações sobre
encaixe no veículo.
Instalacao no aviao
! Juva pode ser instalado com apenas um cinto subabdominal,
se usar em aviao, sem suporte.. Nao instale em um veiculo
com um cinto subabdominal.
! Ao usar em um aviao, o assento de carro para criancas deve
ser instalado apenas com a parte posterior para o assento.
Ajuste da alça
A alça da cadeira de bebê pode ser ajustada para 3 posições (Fig. 6)
Posição 1 Posição para o transporte de mão, automóvel ou carrinho.
Posição 2 Posição de balanço
Posição 3 Posição de cadeira de bebê.
Para ajustar a alça, aperte os botões em ambos os lados da alça para
soltá-la (Fig. 7.1), e gire a alça até ouvir um clique em qualquer uma
das 3 posições. (Fig. 7.2)
O encaixe é diferente para cada modelo, cada modelo tem apenas um
encaixe. Por favor, certifique-se de que não haja peças faltando, e se
houver, entre em contato com seu revendedor.
Producto
Adecuado para
Grupo de masa
Materiales
Numero de patente
Silla de coche para niños
Niños que pesan menos de 13 kg
Grupo 0+
Plástico, metal, telas
Patentes en espera

53 54
Posição da alça do ombro
Verifique se as alças dos ombros estão ajustadas na altura apropriada.
Escolha as ranhuras apropriadas de ajuste do ombro de acordo com a
altura da criança.
! As alças dos ombros devem ser inseridas nas ranhuras mais
próximas aos ombros do seu bebê (Fig. 8), mas não acima da
linha do ombro. (Fig. 9)
! Se as alças do ombro não estiverem na altura adequada, a criança
pode ser impulsionada da cadeirinha para bebê se houver um
acidente.
Ajuste da altura da alça de ombro
1. Destrave a fivela de segurança, pressionando o botão vermelho.
(Fig. 10)
2.Na parte de trás da cadeirinha, remova as tiras dos ombros da
presilha de junção metálica. (Fig. 11)
3. Puxe as alças através das aberturas na cadeirinha (Fig. 12.1), e, em
seguida, insira-as no conjunto adequado de aberturas. (Fig. 12.2)
a. Passe a correia para os ombros através do cinto para os
ombros.
b. Passe o dispositivo de aperto do cinto para os ombros através o
orifício do cinto para os ombros.
c. Passe a correia para os ombros através o orifício do cinto para
os ombros.
4. Recoloque as tiras dos ombros na presilha de junção metálica. (Fig. 13)
!
Passe a correia para os ombros através o dispositivo de aperto do
cinto para os ombros. (Fig. 13.1)
!
As alças dos ombros devem ser colocadas na parte de trás dos
dois tubos de metal.
! Durante o ajuste, verifique se as alças dos ombros não estão torcidas.
!
Tenha muito cuidado ao introduzir as alças do ombro de acordo
com a figura. Se as alças dos ombros não estiverem seguras, elas
não protegerão o seu bebê adequadamente.
Prender a criança na cadeirinha
1. Aperte o botão de ajuste localizado na parte dianteira da cadeira de
bebê, puxe completamente as duas tiras da alça do ombro da
cadeira de bebê. (Fig. 15)
2. Destrave a fivela de segurança pressionando o botão vermelho. (Fig.16)
3. Coloque a criança na cadeira de bebê e trave a fivela. (Fig. 17 & 18)
4. Aperte as tiras da alça do ombro puxando as tiras de tecido de
ajuste. (Fig. 19)
!Certifique-se de que o espaço entre a criança e as tiras da alça de
ombro seja da grossura de uma mão.
Instalação da cadeirinha
As instruções de instalação variam dependendo se você está ou não
usando a base. Por favor, consulte a seção apropriada.
1. O redutor interno é para a proteção da criança. Crianças com
peso inferior a 10 kg devem usar o redutor.
2. Antes de usar o redutor interno, monte a espuma. (Fig. 14)
3. Depois de colocar a criança no assento, certifique-se que as tiras
da alça de ombro estão na altura apropriada.
Nota
Other manuals for juva
5
Table of contents
Languages:
Other Joie Car Seat manuals

Joie
Joie trillo shield User manual

Joie
Joie spin 360 signature User manual

Joie
Joie every stage User manual

Joie
Joie gemm User manual

Joie
Joie i-Spin 360 E User manual

Joie
Joie Trillo C1220GA User manual

Joie
Joie gemm User manual

Joie
Joie i-Gemm User manual

Joie
Joie i-Trillo FX User manual

Joie
Joie i-Jemini User guide