5
SYNCHRONISATION AND START-UP
PRECAUTIONS FOR BATTERY CHARGING
Remove the battery from the grip of your Racing Drone. Connect the USB terminal of the
charger to the charging source you want to use (for example: a PC, a console, a mobile
charger or any other USB terminal). Once connected to both ends, a red light on the USB
charger will light up, indicating that your Racing Drone is charging. As soon as this light goes
off, the charging process has been completed.
To verify that the charging has been performed correctly, check that both ends of the charging
cable are properly connected and that the USB light is off. The charging time will depend on
the initial battery charge level and the output power (amps) of the power source to which the
USB terminal is connected.
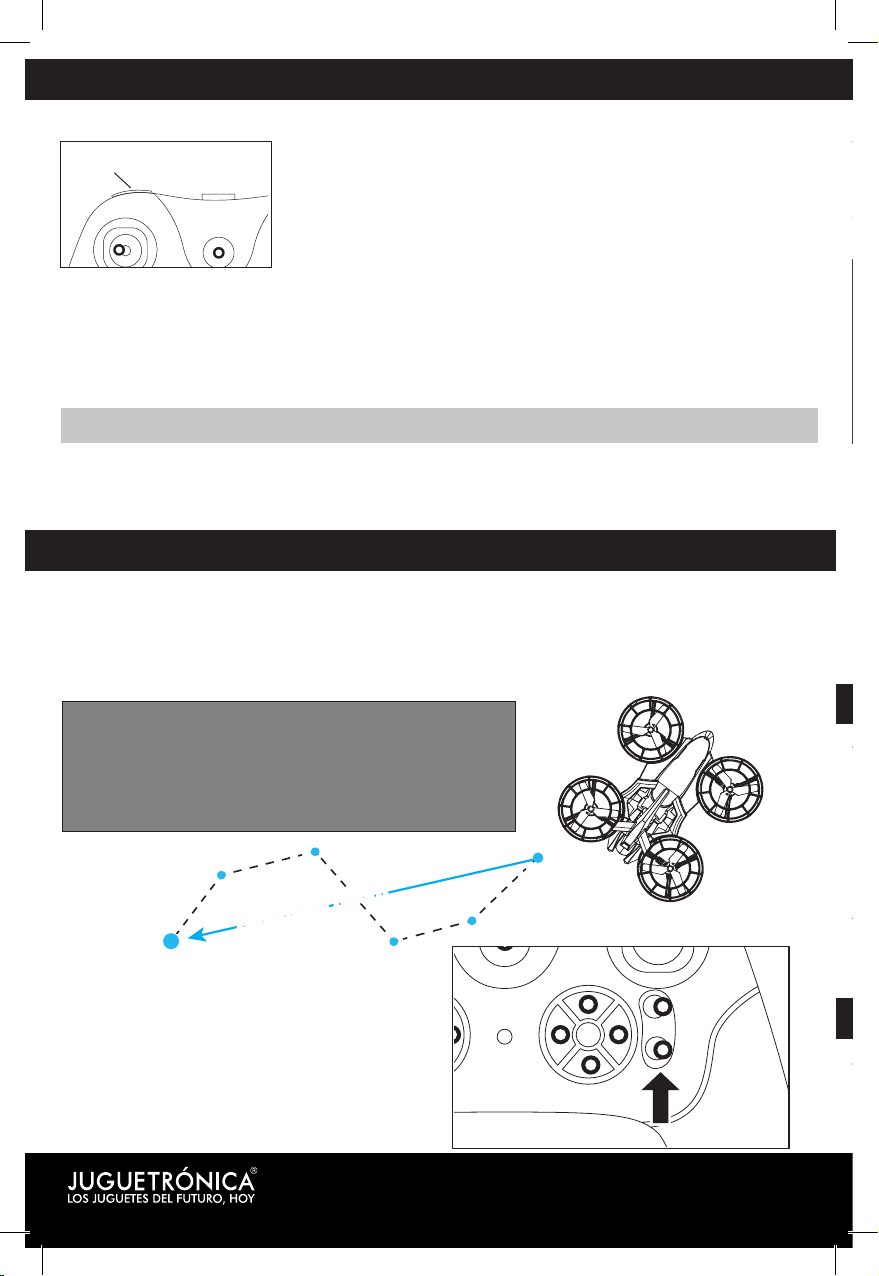
1. Connect the battery of the Racing Drone having previously checked if it has been charged
correctly. Make sure the switch is turned to the ON position.
2. Place the drone on a flat surface.
3. Turn on the transmitter. Move downwards the left control lever of the transmitter. Slowly
move the left control lever up until reaching its limit and then lower it also very slowly.
If the abovementioned steps have been performed correctly, the moment the left control lever
reaches back its initial position (mid), the lights of the Racing Drone will stop blinking. This
indicates that the transmitter and the Racing Drone are now correctly synchronised. Press auto
departure button to iniciate the fligth.
If once in the air the drone does not remain stable, land it and turn off both the
transmitter and the drone. Then, resynchronise it, making sure the drone is placed on a
flat and horizontal surface while you do so. If the drone continues to fly uncontrollably,
check the TRIMMING section on page 7.
PRECAUTIONS
Racing Drone is equipped with a rechargeable Li-Po battery.
1. Do not use or leave the battery near a fire or a heat source.
2. Do not knock or throw the battery against any hard surfaces.
3. Do not immerse the battery in water and always keep it in a cool, dry place.
4. When charging the battery, you should monitor it regularly.
5. Do not overcharge the battery.
6. Do not connect the battery to an electrical outlet with a different voltage.
7. Do not damage or drill the battery with any kind of sharp object.
8. Do not place the battery near or transport it together with any metal object.
9. Never charge the battery for more than an hour.
10. Never dispose of batteries in a fire or incandescent source.
11. The battery should only be charged under adult supervision.
12. If you are storing the battery for a long period of time always do it with an intermediate
charge level, neither fully charged nor discharged.
13. In case of storage of the battery, check its charging level frequently to avoid it from
discharging completely, which would damage it.
14. Use only the transformer included in the contents of this product.
15. Never leave the battery unattended when charging.
16. If, for any reason, the charger does not automatically stop charging, the battery may
catch fire. Therefore, always monitor the charging process.
17. Fast loads cannot be used. The charging current for the batteries must be respected.
18. Batteries should be stored at a charging level between half charged and fully charged.
If you store them fully discharged, they will be damaged. That’s why new batteries are
always half charged.
19. Always dispose of used batteries responsibly.
Trimming Right
Displacement
Trimming Backwards
Trimming Left
Displacement


 user manual")