4
Top menu screen operation
You can select the source or enter the
setting menu on the top menu screen.
Press MENU to display the top menu
screen, turn the volume knob to select the
item, then press the knob to confirm the
selection.
• If no operation is done for about 10
seconds, the operation will be canceled.
• To exit, press .
Basics
Faceplate Attach How to reset
Your preset adjustments
will also be erased.
Detach
Volume knob (turn/press)
Faceplate-open button
Remote sensor
Monitor
To Do this
Turn on the power Press B/SOURCE.
(The buttons on the faceplate light up.)
• Press and hold to turn off the power.
Adjust the volume Turn the volume knob.
Press the volume knob to mute the sound.
• Press again to cancel.
Select a source • Press B/SOURCE repeatedly.
• Press MENU to display the top menu screen, and turn
the volume knob to select the source, then press the
knob.
Display the clock Press and hold CLOCK.
Initial setting — Clock adjustment
Synchronizing the clock time with FM Radio Data System
Activate [RDS Clock Sync]. (➜6)
Adjusting the clock manually
1 Press B/SOURCE to turn on the power.
2 Press MENU to display the top menu screen.
3 Turn the volume knob to select [Settings], then press the knob to
display the setting menu.
4 Turn the volume knob to select [], then press the knob to display
the [Settings/General] menu.
5 Turn the volume knob to select [Time], then press the knob.
6 Turn the volume knob to select the time format ([12 Hour] or
[24Hour]), then press the knob.
7 Turn the volume knob to select [Adjust], then press the knob.
8 Turn the volume knob to adjust the hour, then press the knob.
9 Turn the volume knob to adjust the minute, then press the knob.
10 When [12 Hour] is selected in Step 6: turn the volume knob to
select AM or PM, then press the knob.
11 Press to exit.
• If no operation is done for about 10 seconds, the operation will be
canceled.
• To return to the previous layer, press .
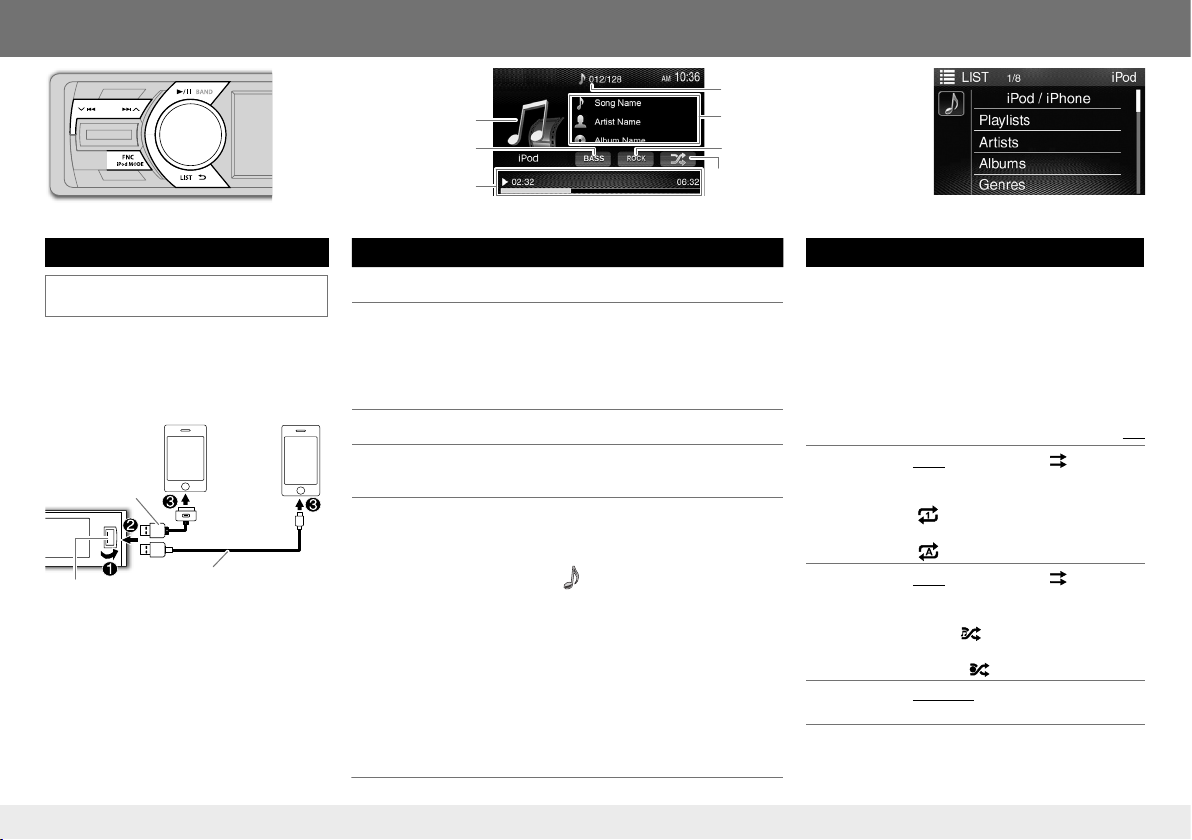
KD-AV41BT KD-AV31
Top menu screen
For KD-AV41BT:
[iPod]
or
[USB]
(
[iPod]
appears when the iPod/iPhone is connected.)
KD-AV41BTMQ.indb4KD-AV41BTMQ.indb42016/01/0611:372016/01/0611:37