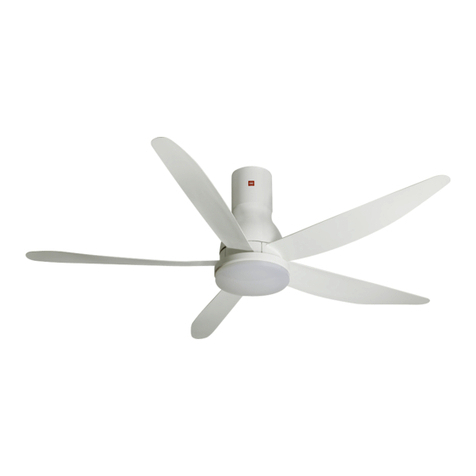
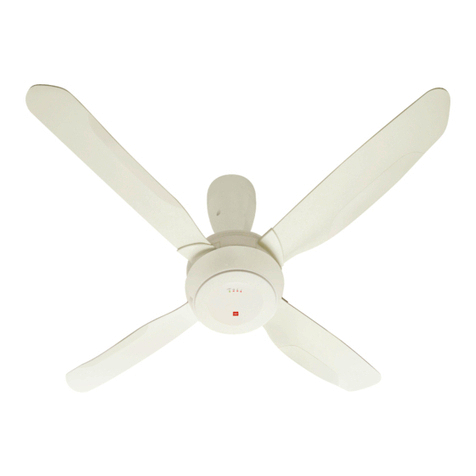
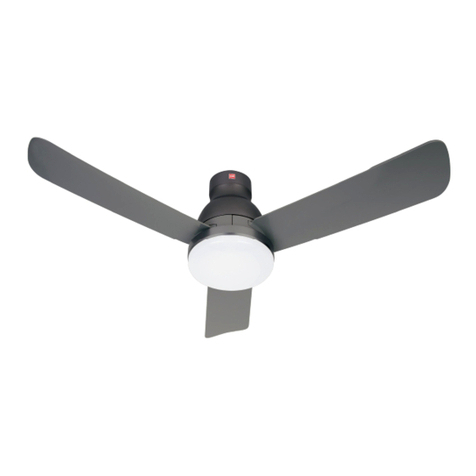
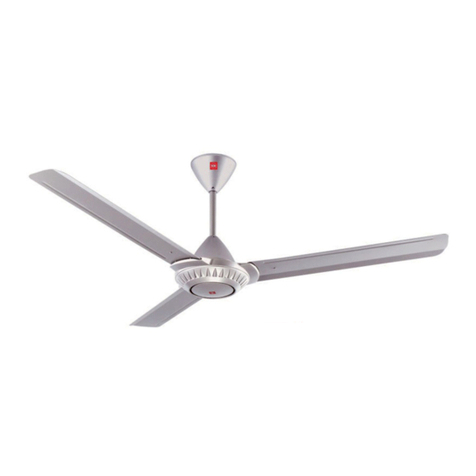
KDK E48HP User guide

Application Instructions
Ceiling Fan
Model No. / ဴ
E48HP
E48GP
Application Instructions
Ceiling Fan
Thank you for purchasing this KDK
product.
Before operating this product, please read the
instructions carefully, and save this manual for
future use.
System Overview
2 - 3
How to prepare for setup
4 - 5
How to connect product to home
network
5 - 10
How to register product to smart
devices
11 - 12
How to use
13 - 25
How to cancel registration of ceiling fan
26
Copyright
27 - 30
Contents
ᔖҢแԒᇳ݂
Ӥ
ཐᗂௌᗊີ KDK ࠢȄ
ᐇհԪࠢࠉȂрಠᎧᇳ݂Ȃٮ߳Ԇҏ
ЙыоհРࡣՃȄ
فಛ྅
2 - 3
ԃդྥര೩ည
4 - 5
ԃդࠢڗড়Ңᆩၯ
5 - 10
ԃդӵසኋ೩രΰຝыࠢ
11 - 12
ԃդٺҢ
13 - 25
ԃդڥӤຝы
26
ގ᠌
27 - 30
Ҭᓃ
Complies with
IMDA Standards
DA108995

•
Requires the App to work with smart devices with Android 6 and
above, or iOS 12 and above.
There is no guarantee that the App will work well if the
Operating System is below Android 6 or iOS 12.
•
The Network Adaptor is designed specifi cally as a terminal for
“KDK Ceiling Fan” App.
•
The Wi-Fi network coverage must reach the ceiling fan
installation location.
•
This product may have latency in operation for 1 to 3 seconds
due to the command need to send through the server.
•
1 ceiling fan can be registered by 4 user accounts.
•
1 user account can register and control 8 ceiling fan
simultaneously.
ġ˙
ҏᔖҢแԒᎌҢܻġAndroid 6ġܖġ iOS 12ġЅоΰفಛޟසኋ೩
രȄ
Ϛ߳ᜌҏᔖҢแԒӵġAndroid 6ġܖġ iOS 12ġоήޟհཾفಛΰ
يԁၼȄ
ġ˙
ᆩၯϭњடߞ೩࣏ġ“KDK Ceiling Fan”ġᔖҢแԒޟΙএತ
ᆒȄ
˙
Wi-Fiġᆩၯ҆᙭ᇐڗӤԊ၆՝ညȄ
ġ˙
ҥܻڼхሯႆթ݈ᏢีଚȂࠢџོԤġ1 ڗġ3 ޟၼ
۽ᒶȄ
˙
1ġѮӤџԤġ4ġএຝыҢИழဴȄ
˙
1ġএҢИழဴџӣຝыٮڙġ8 ѮӤȄ
2
Network Adaptor /
ᆩၯϭњ
System Overview فಛ྅
Router /
ၯҥᏢ
Internet /
ϣᖒᆩ
Smart devices /
සኋ೩ര
Items you need to prepare
(purchase and subscribe separately) /
ձሯѪྥര
(ᗊີܖᗊޟސࠢ)
Download from App Store & Play Store /
ġApp Store ڷġPlay Store
KDK Ceiling Fan
Network Adaptor / ᆩၯϭњ
Wi-Fi Module (built-in)
Model / ဴ
DNSK-P11
Input Voltage / ᒯΣႫᔆ
DC 5V (From Ceiling Fan Unit)
Current Consumption / Ⴋࢺૉ
Tx/Rx max. 290/100 mA
Wi-Fi standard / Wi-Fi ྥ
IEEE 802.11 b/g/n
Frequency range / ᓜጒ൜
2.4 GHz band
Encryption / ё
WPA2-PSK (TKIP/AES)
Specifi cation / ೣ
Precaution / ωЖ
•
DO NOT disassemble or alter this Network Adaptor in any way.
•
DO NOT remove this Network Adaptor from the ceiling fan
during operations.
•
Data transmitted and received over radio waves may be
intercepted and monitored.
•
Please be cautioned when go near to the ceiling fan or cleaning
the ceiling fan. Due to another user might switch on the ceiling
fan away from home. If the ceiling fan is controlled by App,
ceiling fan will turn on 3 seconds after the buzzer beeps.
Type of wireless / ฒጣ Frequency band / ᓜࢲ Max. EIRP (dBm) /
ശσԤᒭৢђ (dBm)
WLAN 2412 - 2472 MHz 20 dBm
Maximum radio-frequency power transmitted in the
frequency bands
ġ˙
ϚܶڣܖоӈդПԒᡐԪᆩၯϭњȄ
ġ˙
ၼႆแϛȂϼԪᆩၯϭњӤΰܶήȄ
ġ˙
ႆฒጣႫݰ༈ᒯڷԝޟၥџೝᄠᕕٮೝᅿຜȄ
ġ˙
ᎬߖӤܖ఼ዓӤȂݧཎԊӒȄġӰ࣏ڏтҢИџሉᆒ
ంӤȄġԃݎӤҥᔖҢแԒڙޟȂ٥ቄӤོӵြቁ
Ꮲġ3ġࡣంȄ
ӵᓜࢲϱ༈ᒯޟശσৢᓜђ

3
■ Remote Control
1
OFF/ON Button
Press to activate or stop the Ceiling Fan.
“ON” - Short beeping sound.
“OFF” - Long beeping sound.
2
‘+’ SPEED Button
Increase Fan Speed, maximum fan speed is 10.
3
‘-’ SPEED Button
Decrease Fan Speed, minimum fan speed is 1.
4
REVERSE Button
Change the direction of fan rotation (clockwise,
anticlockwise).
5
Wi-Fi Button
Press to activate or off the Ceiling Fan wireless network.
“ON” - Short beeping sound.
“OFF” - Long beeping sound.
6
NIGHT LIGHT Button
Press to select Night Light setting.
7
WARM COLOR Button
Press to select Light color - Warm.
8
WHITE COLOR Button
Press to select Light color - White.
9
‘+’ LIGHT Button
Increase light brightness gradually.
10
‘-’ LIGHT Button
Decrease light brightness gradually.
11
LIGHT OFF/ON Button
Turn off or turn on the Light.
“ON” - Short beeping sound.
“OFF” - Long beeping sound.
1
OFF/ONġࡸ໖
ࡸή։џంଢ଼ܖୄХӤȄ
“ON” - ีюߴޟɆქɇᖐȄ
“OFF” - ีюߝߝޟɆქɇᖐȄ
2
‘+’ SPEED ࡸ໖
ቨёഀ࡙Ȃശσഀ࡙࣏ġ10Ȅ
3
‘-’ SPEED ࡸ໖
ճഀ࡙Ȃശωഀ࡙࣏ġ1Ȅ
4
REVERSE ࡸ໖
ᡐఋᙽПөĩବȃଛବĪȄ
5
Wi-Fi ࡸ໖
҈ܖᜰഖӤฒጣᆩၯȄ
“ON” - ีюߴޟɆქɇᖐȄ
“OFF” - ีюߝߝޟɆქɇᖐȄ
6
NIGHT LIGHT ࡸ໖
ᒵᐅۇӎ೩ညȄ
7
WARM COLOR ࡸ໖
ᒵᐅᐷӎՓșླྀՓȄ
8
WHITE COLOR ࡸ໖
ᒵᐅᐷӎՓșҩՓȄ
9
‘+’ LIGHT ࡸ໖
ംᅚቨёӎޟ࡙߫Ȅ
10
‘-’ LIGHT ࡸ໖
ംᅚЍӎޟ࡙߫Ȅ
11
LIGHT OFF/ON ࡸ໖
ᜰᐷܖᐷȄ
“ON” - ีюߴޟɆქɇᖐȄ
“OFF” - ีюߝߝޟɆქɇᖐȄ
ġ■ልᏢ
OFF/ON
SPEED
REVERSE
OFF/ON
SPEED COLOR
WHITE
WARM
NIGHT
LIGHT
REVERSE
LIGHT
OFF/ON
LIGHT
• E48GP
1
2
3
4
5
8
9
710
611
• E48HP

4
App Installation / Ԋ၆ᔖҢแԒ
For Android user (Android 6 and above) /
Android ҢИĩAndroid 6ġЅоΰĪ
•
Open Play Store. / ҈ġPlay StoreȄ
•
Search for “KDK Ceiling Fan” App. / ཪષġ“KDK Ceiling
Fan” ᔖҢแԒ 。
•
Download and install. / ήၷٮԊ၆Ȅ
For iOS user (iOS 12 and above) /
iOSġҢИĩiOS 12ġЅоΰĪ
•
Open App Store. / ҈ġApp StoreȄ
•
Search for “KDK Ceiling Fan” App. / ཪષġ“KDK Ceiling
Fan” ᔖҢแԒ 。
•
Download and install. / ήၷٮԊ၆Ȅ
■
Note:
•
The App user interface image may change for version upgrade
without prior notice.
•
There is no charge for using this App. However, other charges
may be incurred for network connection.
App Setting / ᔖҢแԒ೩ည
Before setting
•
Confi rm the wireless router is connected to the network
correctly.
•
Confi rm the Wi-Fi of the smart devices is activated.
•
Smart devices and ceiling fan should be connected to the same
wireless router.
Get started on “KDK Ceiling Fan” App /
ۖٺҢġ“KDK Ceiling Fan” ᔖҢแԒ
Before using the App, ensure to read the Terms of service. To
continue, press “Accept the terms of service” button.
How to prepare for
setup
ԃդྥര೩ည
ġ■
രݧ:
ġ˙
ᔖҢแԒٺҢޱϭหџོӰގҏЀՄᡐȂ৽ϚѪ
ޣȄ
ġ˙
ҏᔖҢแԒϚԝາȄծȂᆩၯџོҡڏтາҢȄ
೩ညࠉ
ġ˙
ጂᇯฒጣၯҥᏢϐғጂᆩၯȄ
ġ˙
ጂᇯසኋ೩രϐంġWi-FiȄ
ġ˙
සኋ೩രᇄӤᔖڗӣΙএฒጣၯҥᏢΰȄ
ٺҢᔖҢแԒϞࠉȂ҆Ꭷ݈నȄࡸġ“Accept the
terms of service” ᗤ៉Ȅ

5
3
1
OFF/ON
SPEED
REVERSE
OFF/ON
SPEED COLOR
WHITE
WARM
NIGHT
LIGHT
REVERSE
LIGHT
OFF/ON
LIGHT
3
3
2
5
4
•
For new user, press “Register” to register account. /
ཱིҢИࡸġ“Register”ȂຝыழИȄ
•
For registered user, login using your Panasonic ID and password. /
ຝыٺҢޱٺҢġPanasonic ID ڷጆิᓃȄ
■
Note / രݧġ:
•
If enter wrong password several times, it will be locked for about an hour or
something. /
Ȇġ
ԃݎጆӻԩᒯΣᒿᇲȂழဴོೝᚇۡ约Ι㤮ω时оΰȄġ
1
After login, press “Connect product to network” to connect
product.
2
Switch ON the ceiling fan from the wall switch.
3
If the fan is rotating after the wall switch is on, turn OFF
the ceiling fan by pressing the OFF/ON button on remote
control.
4
Before connecting smart devices to product, please ensure
your smart devices have been connected to your Wi-Fi
router.
5
Press “Next”.
(If fan rotating) /
(ԃݎᙽଢ଼)
Login with Panasonic ID / ٺҢġPanasonic ID ิᓃ
■
Note / രݧġ:
•
This screen only appears during fi rst time
of ceiling fan network setup.
•
For second ceiling fan network setup,
please refer to page 13-
3
Connected
product.
Ȇġ
Ԫห༉ӵԩ೩ညӤᆩၯю౪Ȅ
Ȇġ
Πԩ೩ညӤᆩၯȂՃġ13-
3
ġ
ġġġϐࠢȄ
How to connect product to
home network
ԃդࠢڗড়Ңᆩၯ
1
ิᓃࡣȂࡸġ“Connect product to network” ։џࠢȄ
2
ႆᕓᏩᜰ҈ӤȄ
3
ԃݎ҈ᕓᏩᜰȂᙽଢ଼ȂࡸልᏢΰޟġOFF/ON
ᗤᜰഖӤȄ
4
සኋ೩രڗࠢϞࠉȂጂ߳සኋ೩രϐငڗġ
Wi-Fi ၯҥᏢȄ
5
ࡸġ“Next”Ȅ

6
6
7
OFF/ON
SPEED
REVERSE
OFF/ON
SPEED COLOR
WHITE
WARM
NIGHT
LIGHT
REVERSE
LIGHT
OFF/ON
LIGHT
6
6
Long press the Remote Control button for 5 seconds. The
ceiling fan should start making beep sound and enter Wi-Fi
setting mode.
7
Press “Yes” if the buzzer is beeping. Otherwise, press “No” to
repeat from beginning step.
Two methods to connect product to network:
Method 1 WPS (Wi-Fi Protected Setup)
Press WPS button on Wi-Fi router until the connection
established (Please refer your Wi-Fi router indication). Then,
press “Next”.
Method 2 AP (Access Point)
Press “No WPS button (Manual settings)” for access point set
up.
For detail Manual settings, please refer to page 8.
6
ߝࡸልᏢ ᗤġ5ġȄġӤۖีюြቁᖐȂ໌ΣġWi-Fiġ೩
ညԒȄ
7
ԃݎြቁᏢӵȂࡸġ“Yes”Ȅġ֏ࠌࡸ “No” ۖ؏ཱི
ۖȄ
ࠢڗᆩၯޟڍᆍПݲ:
Пݲġ1 WPSġĩWi-Fiġ߳៖೩ညĪġ
ࡸήġWi-FiġၯҥᏢΰޟġWPSġᗤޢڗ࡚ҳĩՃġWi-Fiġၯҥ
ᏢΰޟࡾҰĪȄġณࡣࡸġ“Next”Ȅ
Пݲġ2 APġĩΣᘈĪġ
ࡸġ“No WPS button (Manual settings)” ໌ΣΣᘈ೩ညȄ
ԤᜰЙଢ଼೩ညޟ၏ಠၥଉȂَġ8 Ȅ

7
SPEED
OFF/ON
SPEED
REVERSE
OFF/ON
SPEED COLOR
WHITE
WARM
NIGHT
LIGHT
REVERSE
LIGHT
OFF/ON
LIGHT
1
1
2
3
1
Connecting product to network Method 1 WPS (Wi-Fi
Protected Setup)
1
Press the “Speed +” button on the Remote Control. Make
sure the beep sound has changed pattern. Press “Yes” if the
buzzer is beeping. Otherwise, press “No” and refer to note.
2
If the buzzer have 5 seconds long beep sound, press “Yes”.
Otherwise, press “No”.
3
Press “Next”.
4
Refer Product Registration step on page 11 to continue.
■
Note / രݧġ:
•
Below screen appears if press “No” on
1
or “No” on
2
. Repeat from beginning
step or refer to FAQ.
•
If connection attempts failed several
times, restart your router.
Ȇġ
ԃݎӵ؏
1
ϛࡸġ“No” ܖӵ؏
2
ϛ
ġġġࡸġ“No” ᗤȂོю౪оήหȄġۖ
ġġġ؏ፒȂܖՃலَ୰ᚠȄ
Ȇġ
ԃݎӻԩѶఁȂཱིంଢ଼ၯҥᏢȄ
ࠢڗᆩၯПݲġ1ġWPSġ(Wi-Fiġ߳៖೩ည)
1
ࡸልᏢΰޟ “Speed +”ȄጂᇯြቁᖐԒีҡᡐϽȄġԃݎြ
ቁᏢӵȂࡸġ“Yes”Ȅ֏ࠌࡸ “No”ȂٮՃᇳ݂Ȅ
2
ԃݎြቁᏢีюġ5 ߝޟြቁᖐȂࡸġ“Yes”Ȅġ֏ࠌࡸġ“No”Ȅ
3
ࡸġ“Next”Ȅ
4
Ճġ11ġޟࠢຝы؏៉Ȅ
2

8
1
<iOS>
<Android>
2
<Android>
2
2
Connecting product to network Method 2 AP (Access Point)
•
Continue from page 6 Method 2. If the WPS function is not
available, connect the ceiling fan through manual setting.
1
Ensure that the smart devices are connected to the desired
network. Then press “Next”.
■
Note:
•
Only 2.4 GHz can be used.
2
Enable the location access.
Follow phone setting to enable the location access.
■
Note / രݧ :
•
Only 2.4 GHz can be used.
Ȇġ
ѫٺҢġ2.4 GHzȄ
■
Note / രݧ :
•
Only for fi rst time setup.
Ȇġ
༉Ңܻԩ೩ညȄ
ࠢڗᆩၯПݲġ2ġAPġ(Σᘈ)
Ȇġ
៉ġ6 ϞПݲġ2ȄġԃݎؠԤġWPSġђȂЙଢ଼ӤȄ
1
ጂ߳සኋ೩രϐΣܚሯᆩၯȄġณࡣࡸġ“Next”Ȅ
ġ■
രݧ:
Ȇġ
ѫٺҢġ2.4 GHzȄ
2
ంҢ՝ည୰Ȅ
ࡸྱႫၗ೩ညپంҢ՝ည୰Ȅ

9
SPEED
OFF/ON
SPEED
REVERSE
OFF/ON
SPEED COLOR
WHITE
WARM
NIGHT
LIGHT
REVERSE
LIGHT
OFF/ON
LIGHT
3
3
5
4
3
4
■
Note / രݧ :
•
If this takes more than
10 seconds, please turn
off your mobile data.
Ȇġ
ԃݎૉ຺ႆġ10ġȂ
ġġġᜰഖಋଢ଼ၥȄ
3
Press the “Speed -” button on the Remote Control. Make
sure the beep sound is change pattern. Then press “Yes”.
Otherwise, press “No”.
4
For certain smart devices which prompt for Wi-Fi
connection, press “Join” or select “Ceiling-Fan-wirelessAP”
from the Wi-Fi list.
For other smart devices which do not prompt for Wi-Fi
connection, please proceed to step
5
.
5
Press “Next”.
3
ࡸልᏢΰޟġ“Speed -”ȄġጂᇯြቁᖐᡐϽԒȄġณࡣࡸġ
“Yes”Ȅġ֏ࠌࡸ “No”Ȅ
4
ᄇܻඪҰġWi-Fiġޟසኋ೩രȂࡸġ“Join” ܖӵġWi-FiġӖߒ
ϛᒵᐅġ“Ceiling-Fan-wirelessAP”Ȅ
ᄇܻϚඪҰġWi-Fiġޟසኋ೩രȂஈ؏
5
Ȅ
5
ࡸġ“Next”Ȅ
<Option for Wi-Fi connection> /
<Wi-Fiġᒵ>

10
6
7
9
<iOS>
8
6
Please ensure the SSID is correct.
Enter the password of Wi-Fi router. Then, press “Connect”.
7
Confi rm that beeping changes to a 5-second long beep.
Then, press “Yes”. Otherwise, press “No”.
8
Only for iOS :
Connect smart devices connection back to the Wi-Fi router.
Press “Join”.
(Android user can go to step
9
).
9
Press “Next”.
Refer Product Registration step on page 11 to continue.
6
ጂ߳ġSSIDġғጂȄ
ᒯΣġWi-FiġၯҥᏢጆȄณࡣࡸġ“Connect”Ȅ
7
ጂᇯြቁᖐᡐ࣏ġ5 ߝޟქქᖐȄġณࡣȂࡸġ“Yes”Ȅ֏ࠌࡸġ
“No”Ȅ
8
༉ᎌҢܻġiOS:
සኋ೩രڗġWi-FiġၯҥᏢȄġ
ࡸġ“Join”Ȅ
ĩAndroid ٺҢޱџоၰᙽڗ؏ġ
9
Īį
9
ࡸġ“Next”Ȅ
Ճġ11ġޟࠢຝы؏៉Ȅ
■
Note / രݧ :
•
SSID = Wi-Fi network name
Send Wi-Fi connection settings
from smart devices to ceiling fan.
•
SSID = Wi-Fi ᆩၯӪᆎ
ġසኋ೩രޟġWi-Fiġ೩ညีġ
ġଚڗӤΰȄ
■
Note / രݧ :
•
Below screen appears if press “No” on
3
or “No” on
7
. Repeat from beginning step or refer to FAQ.
•
If this screen appears during any other operation, please try again from the beginning or refer to
FAQ.
Ȇġ
ԃݎӵ؏
3
ϛࡸġ“No” ܖӵ؏
7
ϛࡸġ“No” ᗤȂོю౪оήหȄġۖ؏ፒȂܖՃல
ġġَ୰ᚠȄ
Ȇġ
ԃݎӵڏтᐇհႆแϛю౪ԪϭȂᓞӔၐܖՃலَ୰ᚠ၌๎Ȅ

11
OFF/ON
SPEED
REVERSE
OFF/ON
SPEED COLOR
WHITE
WARM
NIGHT
LIGHT
REVERSE
LIGHT
OFF/ON
LIGHT
3
1
3
3
2
Product registration in the App
■
Note :
•
Products need to be registered before using “KDK Ceiling
Fan” App.
1
Select one product to register by pressing “Registration”.
2
Press “Yes” if the buzzer is beeping. Otherwise, press “No”
to follow the App to set ceiling fan to enter Wi-Fi setting
mode.
3
Press the Remote Control button. The ceiling fan
should change beeping sound to indicate that ceiling fan is
connecting to the App. Then, press “Yes”. Otherwise, press
“No”.
■
Note :
•
This may take up to a few minutes.
How to register product to
smart devices
ྸ൞Ჰឝ䁣ۏр䁱߀⭘
ӵᔖҢแԒΰຝыࠢ
ġ■
രݧ:
Ȇġ
ӵٺҢġ“KDK Ceiling Fan” ᔖҢแԒࠉሯຝыࠢȄ
1
ࡸġ“Registration” ᒵᐅΙএຝыޟࠢȄ
2
ԃݎြቁᏢӵȂࡸġ“Yes”Ȅ֏ࠌࡸġ“No”ȂၭᓍᔖҢแԒ೩
ညӤȂ໌ΣġWi-Fiġ೩ညԒȄ
3
ࡸልᏢ ᗤȄġӤᔖᡐြቁᖐȂоߒ݂Ӥғӵڗ
ᔖҢแԒȄġณࡣࡸġ
“Yes”Ȅġ֏ࠌࡸ “No”Ȅ
ġ■
രݧ:
Ȇġ
џሯඁϷមȄ

12
4
5
6
7
5
4
Confi rm that beeping changes to a 5-second long beep. After
that, beeping should stop.
Then press “Yes”. Otherwise, press “No”.
■
Note :
•
This may take up to a few minutes.
5
When registration page appear, type the Product name,
select at least 1 group to register, then press “Register”.
6
Once the registration is complete, the registered product
appears under “Product registered”.
7
Press “Back” to return to Main screen. You can control the
ceiling fan through the App now.
4
ጂᇯြቁᖐᡐ࣏ġ5 ߝޟქქᖐȄġԪࡣȂြቁᖐᔖ၎ୄХȄ
ณࡣࡸġ“Yes”Ȅġ֏ࠌࡸ “No”Ȅ
ġ■
രݧ:
Ȇġ
џሯඁϷមȄ
5
ю౪ຝыȂᒯΣࠢӪᆎٮᒵᐅՍЍġ1ġಢ໌ຝыȂ
ณࡣࡸġ“Register”Ȅ
6
ຝыׇԙࡣȂϐຝыࠢᡗҰӵġ“Product registered” ήȄ
7
ࡸ “Back” ߕӱкϭȄġ౪ӵௌџоႆᔖҢแԒڙӤ
ΟȄ
■
Note / രݧ :
•
Below screen appears if press “No” on
3
or “No” on
4
. Repeat from beginning step or refer to FAQ.
•
If this screen appears during any other operation, please try again from the beginning or refer to FAQ.
Ȇġ
ԃݎӵ؏
3
ϛࡸġ“No” ܖӵ؏
4
ϛࡸġ“No” ᗤȂོю౪оήหȄġۖ؏ፒȂܖՃல
ġġَ୰ᚠȄ
Ȇġ
ԃݎӵڏтᐇհႆแϛю౪ԪϭȂᓞӔၐܖՃலَ୰ᚠ၌๎Ȅ

13
2
3b
3c
3a
1
Use the “KDK Ceiling Fan” App
1
Press button to open the Main Menu.
2
Main Menu will display.
•
Connected product - To check the product status.
•
Group - To check grouping status.
•
Help - App assistance including FAQ, instruction manual.
3
Connected product
(a) Under Connected Product tab, to connect new product,
press “Connect new product to network”.
(b) Product registered and product not registered are shown.
Press on any registered product to view the details such as
“Name”, “Model Number”, “Serial number”.
(c) Product and Lighting preset* can be renamed. Group
selection can be changed also.
(d) Registered product could be removed from the App by
pressing “Delete product” button.
If the product is registered by one or more user accounts,
schedule setting will remain. If there is no other registered
account, schedule setting will be deleted. This will not reset
the network setting.
■
Note :
•
To reset network and ceiling fan schedule settings please
refer page 26.
How to use ྸֵ⭞
ٺҢ “KDK Ceiling Fan” ᔖҢแԒ
1
ࡸ ᗤ҈кຊȄ
2
ᡗҰкђߒȄ
•
Connected product - ᔮࢥࠢޑᄘȄ
•
Group - ࢥࣼಢޑᄘȄ
•
Help - ᔖҢแԒޟ݂Ȃѓࢂலَ୰ᚠڷٺҢЙыȄ
3
Connected product
(a) ӵġ“Connected Product” ᒵњήȂࡸġ“Connect new
product to network” پཱིࠢȄ
(b) ᡗҰϐຝыࠢڷҐຝыࠢȄġ
ᘈᔞӈդϐຝыࠢȂџࢥࣼɆӪᆎɇȃɆဴɇȃɆࠢו
ဴɇ้၏ಠၥଉȄ
(c) џڼӪࠢڷྱ݂Ⴑ೩īȄζџоಢȄ
(d) ᘈᔞ “Delete product” ᗤџоϐຝыࠢᔖҢแԒϛ
ւଶȄ
ԃݎΙএܖӻএٺҢޱழИຝыΟ၎ࠢȂࠌ߳ห೩ညȄ
ԃݎؠԤڏтຝыழဴȂห೩ညೝւଶȄġϚོۡᆩ
ၯ೩ညȄ
ġ■
രݧ:
Ȇġ
ԃሯ೩ᆩၯڷӤห೩ညȂᎧġ26ġȄ
3d
* Light settings control only for E48GP /
īġᐷӎ೩ညڙ༉ᎌҢܻġE48GP

14
544
4
Group
Select designated product that like to group together. The
group name can be changed under “Edit group”.
5
Help
For any inquiries, on Help page, user can access to
Frequently Asked Question, Instruction manual, Terms of
service, Copyright information and view the App version as
well.
4
Group
ᒵᐅདಢӫӵΙଔޟۡࠢȄџоӵġ“Edit group” ή
ಢӪȄ
5
Help
ԃԤӈդ୰ᚠȂҢИџоӵġ“Help” ΰ୰Ɇலَ୰ᚠɇ
ȃɆٺҢЙыɇȃɆ݈నɇȃɆގ᠌ၥଉɇȂٮࢥࣼߣᓃ
แԒގҏȄ

15
Main Screen setting / кᒉᄍ೩ည
Refresh - Update the ceiling fan status. /
ڕཱི - ཱིӤޑᄘȄ
Product Name / ࠢӪᆎ
Notifi cation - Warning message about the ceiling fan. /
ޣ - Ӥឌ֙ၥଉȄġ
Group section - Group registered in the account. /
တಢ - ӵழИϛຝыޟಢȄ
All Control - Control all products in the group
simultaneously. /
ڙӒഋ - ӣڙಢϛޟܚԤࠢȄ
Detail Setting - Detail setting for fan and light*. /
၏ಠ೩ည - ڷᐷӎޟ၏ಠ೩ည*Ȅ
Fan speed adjustment /
ഀ࡙ᐌ
Light brightness adjustment* /
ᐷӎ࡙߫ᐌ*
* Light settings control
only for E48GP /
īġᐷӎ೩ညڙ༉ᎌ
ġġġҢܻġE48GP

16
Night Light Setting* / ۇᐷ೩ည*
■
Note / രݧ :
•
After perform setting using remote control or by another
smart devices, swipe down the screen and release to
update the ceiling fan status.
Ȇġ
ٺҢልᏢܖڏтසኋ೩രׇԙ೩ညࡣȂџႆөήྤଢ଼
ġġġᒉᄍپཱིӤޑᄘȄ
Fan Setting / ೩ည
Fan On/Off /
İᜰ
Fan speed selection /
ഀ࡙ᒵᐅ
Yuragi function On/
Off /
Yuragi ђİᜰ
Fan setting /
೩ည
Light setting /
ᐷӎ೩ည
Light On/Off /
ᐷİᜰ
Scene setting /
ൟශ೩ည
Night Light
mode /
ۇᐷԒ
Light
adjustment /
ᐷӎᐌ
Color
temperature
adjustment
(Not applicable
for
Night Light) /
Փྣᐌ
ȞϚᎌҢܻۇ
ᐷȟ
Light Setting* / ᐷӎ೩ည*
3 Level brightness
adjustment /
3ġ࡙߫ᐌ
Light On/Off /
ᐷİᜰ
Scene setting /
ൟශ೩ည
Normal Light mode /
ලྱ݂Ԓ
Swipe down /
өήྤ
Schedule function /
หђ
Timer setting /
Ꮲ೩ۡ
Reverse function On/
Off /
І֚ђİᜰ
* Light settings control
only for E48GP /
īġᐷӎ೩ညڙ༉ᎌ
ġġġҢܻġE48GP

17
5
2
3
1
2
2
3
Group Control Setting
•
User can control all registered ceiling fans with one operation.
1
Press “All Control” button at main page.
2
Choose the Fan or Light* setting (can choose to set Group
control with fan only or light only or both).
3
Press the “Operation” button to enable Group control mode.
4
Set the setting (page 16) based on preferences.
5
Press “Apply”.
Scene Setting*
1
Press light setting.
2
Press the scene setting.
3
Select one of scene setting.
ಢڙ೩ည
Ȇġ
ҢИџоႆΙԩᐇհپڙܚԤϐຝыӤȄ
1
ӵкΰࡸġ“All Control” ᗤȄ
2
ᒵᐅܖᐷӎ* ೩ညȞџоѫᄇܖᐷ໌ಢڙȂܖᄇ
Πޱӣ໌ಢڙȟȄ
3
ࡸ “Operation” ࡸ໖ంҢಢڙԒȄ
4
ᐃԁ໌೩ညĩġ16 ĪȄ
5
ࡸġ“Apply”Ȅ
ൟශ೩ည*
1
ࡸᐷӎ೩ညȄ
2
ࡸൟශ೩ညȄ
3
ᒵᐅΙএൟශ೩ညȄ
* Light settings control
only for E48GP /
īġᐷӎ೩ညڙ༉ᎌ
ġġġҢܻġE48GP
1
3

18
1
3
2
4
5
1
24
3
5
6
Scene Setting* (continue from page 17)
•
User can customize scene setting.
1
Press light setting.
2
Adjust the light setting according to preference.
3
Press the scene setting.
4
Press “Overwrite preset”.
5
Select one of the scene setting to be replaced.
•
To edit preset name of scene.
1
Press light setting.
2
Press scene setting.
3
Select “Edit preset name”.
4
Select which scene to be renamed.
5
Enter new scene name.
6
Press “OK”
.
ൟශ೩ည* (៉ġ17ġ)
Ȇġ
ҢИџоՌൟශ೩ညȄ
1
ࡸᐷӎ೩ညȄ
2
ᐃԁᐌᐷӎ೩ညȄ
3
ࡸൟශ೩ညȄ
4
ࡸġ“Overwrite preset”Ȅ
5
ᒵᐅΙএޟൟශ೩ညȄ
Ȇġ
ጡᒮൟශޟႱ೩ӪᆎȄ
1
ࡸᐷӎ೩ညȄ
2
ࡸൟශ೩ညȄ
3
ᒵᐅġ“Edit preset name”Ȅ
4
ᒵᐅڼӪޟൟශȄ
5
ᒯΣཱིޟൟශӪᆎȄ
6
ࡸġ“OK”Ȅ

19
1
2
3
4
12
3
4
Timer Setting
•
Timer setting is only applicable for fan function.
To set the ON timer
■
Note :
•
ON Timer can only be activated when ceiling fan is OFF.
1
Press timer function button “ ”.
2
Set the required hours and minutes for the fan to turn ON.
3
Select the default melody for the ceiling fan when it is turned
ON.
4
Press “Done”.
To set the OFF timer
■
Note :
•
OFF Timer can only be activated when ceiling fan is ON.
1
Press timer function button “ ”.
2
Set the required hours and minutes for the fan to turn
OFF.
3
Enable SLEEP MODE function.(Optional)
(Sleep mode explanation at page 20)
4
Press “Done”.
■
Note / രݧ :
•
Sleep Mode can only be enabled
in OFF Timer setting.
Ȇġ
ᆃԒѫӵᏢᜰ೩ညϛ
ġġġంҢȄ
Ꮲ೩ۡ
Ȇġ
Ꮲ೩ည༉ᎌҢܻђȄ
Ꮲం೩ည
ġ■
രݧ:
Ȇġ
༉ӵӤᜰഖȂПџంଢ଼ᏢంȄ
1
ࡸᏢђࡸ໖ġ “ ”Ȅ
2
೩ည҈ޟڷϷȄ
3
ᒵᐅӤంޟᓶᇯఋࡡȄ
4
ࡸġ“Done”Ȅ
Ꮲᜰഖ೩ည
ġ■
രݧ:
Ȇġ
༉ӵӤంȂПџంଢ଼ᏢᜰഖȄ
1
ࡸᏢђࡸ໖ġ “ ”Ȅ
2
೩ညᜰഖޟڷϷȄ
3
ంҢᆃԒђȄȞџᒵȟ
ĩᆃԒᇳ݂ӵġ20ġĪ
4
ࡸġ“Done”Ȅ

20
Timer /
Ꮲ
24h 23h 22h 21h 20h 19h 18h 17h 16h 15h 14h 13h 12h 11h 10h 9h 8h 7h 6h
5h 4h 3h 2h 1h 0h
Speed 10 /
ഀ࡙
10
10→ 8 → 6 → 4 → 2 → 1 →→→→→→→→→→→→→
OFF /
ᜰഖ
10→ 8 → 6 → 4 → 2 → 1 →→→→→→→→→→→→
10→ 8 → 6 → 4 → 2 → 1 →→→→→→→→→→→
10→ 8 → 6 → 4 → 2 → 1 →→→→→→→→→→
10→ 8 → 6 → 4 → 2 → 1 →→→→→→→→→
10→ 8 → 6 → 4 → 2 → 1 →→→→→→→→
10→ 8 → 6 → 4 → 2 → 1 →→→→→→→
10→8→6→4→2→1→→→→→→
10→8→6→4→2→1→→→→→
10→8→6→4→2→1→→→→
10→8→6→4→2→1→→→
10→8→6→4→2→1→→
10→8→6→4→2→1→
10→8→6→4→2→1
10→8→6→4→2→
10→8→6→4→2
10→8→6→4→
10→8→6→4
10 → 8 → 6 →
10
→8→6
10 → 8 →
10 → 8
10 →
SLEEP MODE function
•
When the SLEEP MODE is enabled, the fan speed and timer
will gradually reduce until the fan is turned off .
•
The operation pattern of SLEEP MODE: Fan reduces two
speeds after every two hours (minimum speed 1), until
the Ceiling Fan is turned OFF.
■
Note:
•
SLEEP MODE can only use with OFF TIMER enabled.
•
To enable SLEEP MODE fan must be at least speed 2, and
OFF timer must be at least 2 hours.
•
SLEEP MODE function is deactivated, if TIMER SETTING is
changed.
The above SLEEP MODE pattern is based on fan set at Speed
10 and OFF timer set to various hours (from 24 hours to 2
hours).
Example / ᖞٽġ:
Ȇġ
ంҢᆃԒࡣȂഀ࡙ڷᏢംᅚճȂޢڗᜰ
ġġġġഖȄ
Ȇġ
ᆃԒޟၼԒĻġؐႤڍএωճڍএഀ࡙
ġȞശճഀ࡙ġ1ȟȂޢڗӤᜰഖȄ
ġ■
രݧ:
Ȇġ
ᆃԒѫӵంҢᏢᜰޟݷήٺҢȄ
Ȇġ
ంҢᆃԒȂഀ࡙҆ՍЍ࣏ġ2ȂٮиᏢᜰ҆
ġġġՍЍ࣏ġ2 ωȄ
Ȇġ
ԃݎΟᏢ೩ညȂࠌᆃԒђೝҢȄ
ᆃԒђ
ΰޟᆃԒஅܻ೩ည࣏ഀ࡙ġ10иᏢᜰഖ೩ည
࣏ӨএωȞġ24 ωڗġ2ωȟޟஅᙃϞΰȄ
Other manuals for E48HP
1
This manual suits for next models
1
Table of contents
Other KDK Fan manuals