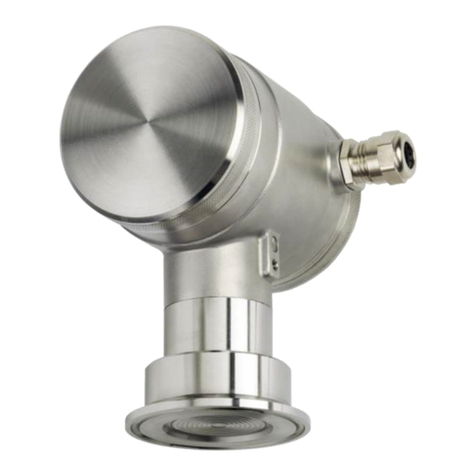
KLAY-INSTRUMENTS 2000-SAN Series User manual

H/EN/2000-SAN-3A/01-2021/24 KLAY INSTRUMENTS B.V.
INSTRUCTION MANUAL
Series 2000-SAN
PRESSURE- AND LEVEL TRANSMITTERS
According to 3A requirements (option G153)
WARNING
Read this manual before working with the product. For personal and system safety and for optimum product
performance, make sure you thoroughly understand the contents before installing, using, or maintaining the
Series 2000-SAN. Read the precautions and warnings on the last page.
Manufactured by:
Nijverheidsweg 5 7991 CZ DWINGELOO
P.O. Box 13 7990 AA DWINGELOO
Tel: +31 521-591550 The Netherlands
www.klay-instruments.com Fax: +31 521-592046 E-Mail: info@klay.nl

H/EN/2000-SAN-3A/01-2021/24 KLAY INSTRUMENTS B.V.
CONTENTS
SECTION
PAGE
1
Introduction
4
1.1
Description Series 2000–SAN
4
1.2
Barometric reference
4
2
Dimensional drawings
5
2.1
Dimensional drawing 2000-SAN 3A-W-Weld-on
5
2.2
Dimensional drawing 2000-SAN 3A-X7-DRD-FLANGE
6
2.3
Dimensional drawing 2000-SAN 3A-X4-VARIVENT
7
2.4
Dimensional drawing 2000-SAN 3A-TRI-CLAMP
7
3
Installing transmitter
8
3.1
Installing weld-on nipple
8
3.2
Installing transmitter Series 2000-SAN
8
3.3
Mounting position
9
3.4
Mounting position effect
9
3.5
Calibration
9
3.6
Wiring
9
4
Remaining
10
4.1
Digital local indicator
10
4.2
CE/EMC - Rules
10
4.3
External load
11
4.4
Intrinsically Safe (Ex version)
11/12
4.5
Functional safety - SIL
12
4.6
Traceability year of manufacturing
13
4.7
Software Revisions
13
5
Functions of push buttons
13
6
Programming points (P101-P114)
14
7
Reading on the display
14

Instruction Manual Series 2000-SAN-3A Klay Instruments B.V.
H/EN/2000-SAN-3A/05-2021/25
Page 3
8
Explanation programming points P101 to P114
15
P101
Zero adjustment (4 mA)
15
P102
Span adjustment (20 mA) without test
pressure
15
P103
Cancel mounting position effect
16
P104
Adjustment pressure unit on display
17
P105
Reverse output (20-4 mA)
18
P106
Adjustment damping (0 till 25 sec)
18
P107
Indication of process temperature
18
P108
Temperature in °C of °F
18
P109
Read out on display
18
P110
Simulation of current
19
P111
Linearization
20/21
P112
Density
22
P113
Write protection
22
P114
Response time from push buttons
22
P115
Service-menu
22
P116 Service -menu
22
9
Programming of the series 2000
23
9.1
Programming with the hand held terminal
23
9.2
Programming with DTM
23
9.3
Programming with PDA
23
10
Specifications
24
11
Precautions and warnings
25
Attachment: EC-Declaration of conformity
26

Instruction Manual Series 2000-SAN-3A Klay Instruments B.V.
H/EN/2000-SAN-3A/05-2021/25
Page 4
1 INTRODUCTION
The SERIES 2000-SAN are solid-state pressure- and level transmitters based upon a bridge
resistive silicon sensor, with a very high burst pressure. The sensor element is mounted in a
stainless steel foot. A very strong stainless steel "flush" diaphragm protects the sensor from the
process medium. Special oil fills the chamber surrounding the sensor and transfers pressure
from the flush mounted diaphragm to the sensor.
Pressure exerted on the sensor element creates a very small deflection of the silicon substrate
and bridge network. The resulting strain in the silicon resistors causes a change in the bridge
resistance that is proportional to the pressure applied. The transmitter electronics detects this
change in bridge resistance and converts it into 4-20 mA. The amplifier system is based on a
single Integrated Circuit, which ensures a perfect linearity in the 4-20 mA output.
Together with the Klay flush diaphragm technology the long term stability is perfect.
The Series 2000 and 2000-SAN are available as SIL2, proven in use (Option G200).
1.1 DESCRIPTION SERIES 2000-SAN
The SERIES 2000-SAN are specially designed to be non-clogging and capable of being
cleaned inside, therefore they have a flush mounted diaphragm so they fully meet the needs of
the food, chemical and pharmaceutical industries.
Various process connections can be delivered according to the 3A (74-07) requirements, such
as Tri-Clamps (1,5, 2, or 3’’), Varivent baseplate (from GEA Tuchenhagen), DRD flange and a
sanitary weld-on nipple 85 mm. Other connections e.g. SMS, IDF, Milk coupling, etc. can be
supplied but these are not currently available on our sensors marked with the 3-A Symbol.
Please consult Klay Instruments B.V.
1.2 BAROMETRIC REFERENCE
The SERIES 2000-SAN are in basic so-called "relative transmitter" which means that
barometric changes will not affect the zero (4 mA). The venting (4) is placed at the side of the
electronic housing and is the barometric reference to atmospheric. The venting must be kept
clean.

Instruction Manual Series 2000-SAN-3A Klay Instruments B.V.
H/EN/2000-SAN-3A/05-2021/25
Page 5
2 DIMENSIONAL DRAWINGS
2.1 DIMENSIONAL DRAWING 2000-SAN
PARTS DESCRIPTION
MATERIAL
1. Cover AISI 304
2. Pushbutton + Display(behind cover)
3. Cover with venting AISI 304
4. Venting PA
5. PG9 Cable Gland
6. 2xO-ring (55,25 x 2,62) EPDM
7. Electronics housing AISI 304
8. Lock ring AISI 304
9 Weld-on nipple ø85mm AISI 316 L
Drawing no. 1865
10. O-Ring (30x2) EPDM (3A)
11. Diaphragm AISI 316 L
12. Leakage Detection Port
13. Foot with sensor AISI 316 L
NOTE: The leakage detection hole in the weld-on nipple should be on the lowest point.
CLEANING PROCEDURE - Clean-Out-of-Place (COP)
On the model 2000-SAN-Range-W (85)-G150-G153 a special O-Ring is used (30x2, EPDM 3A
compound, class II for maximum 8% milk fat).
This O-ring material can perish in due time dependable on the application.
For this reason, it is strongly recommended to inspect and replace it with a new one at least once a year.
Dependable on the application it should be done more frequently.
In the event of leakage by the leakage detection port in the weld-on nipple the whole connection should
be cleaned (C.O.P.). This Cleaning Out of Place (C.O.P.) operation should be done in the following
sequence:
Shut down the process first.
Drain the system
Unscrew the transmitter from the weld-on nipple.
Discard the broken seal (O-Ring)
Rinse out any debris.
Clean the thread and surface carefully with a wet or dry brush, using a cleaning agent. (The
integrity of sealed product contact and non-product contact surfaces must not be compromised.)
Clean with warm water.
Replace the O-Ring. (Should be ordered from Klay Instruments)
Replace the transmitter into the weld-on nipple and make sure the transmitter is installed according
the requirements according to the 3A instruction manual of the transmitter (Option G153).
Apply a standard CIP or SIP cleaning activity.
3A-W-WELD-ON-G150

Instruction Manual Series 2000-SAN-3A Klay Instruments B.V.
H/EN/2000-SAN-3A/05-2021/25
Page 6
2.2 DIMENSIONAL DRAWING 2000-SAN
PARTS DESCRIPTION
MATERIAL
1.
Cover
AISI 304
2.
Pushbutton + Display
3.
(behind cover)
Cover with venting
AISI 304
4.
Venting
PA
5.
PG9 Cable Gland
6.
O-Ring (2x)
EPDM
7.
Electronics housing
AISI 304
8.
Flange
AISI 304
9.
Foot with sensor
AISI 316L
10.
Diaphragm
AISI 316
11.
Option: Weld on nipple
(extra price)
AISI 316L
12.
Packing ring
AISI 316 L
(65x50x1mm)
EPDM (3A)
NOTE: The leakage detection hole in the weld-on nipple should be on the lowest point.
NOTE: The packing material that we supply with our transmitters (weld-on or DRD
connection) are made by a special compound (no. 55650), EPDM 70 PC.
The transmitters will be delivered with a material certificate for all the wetted parts
(diaphragm, diaphragm ring, foot of the transmitter and weld-on nipple).
These material certificates are fully traceable and stored for at least 12 years.
3A-X7-DRD-FLANGE

Instruction Manual Series 2000-SAN-3A Klay Instruments B.V.
H/EN/2000-SAN-3A/05-2021/25
Page 7
2.3 DIMENSIONAL DRAWING 2000-SAN
PARTS DESCRIPTION
MATERIAL
1.
Cover
AISI 304
2.
Pushbuttons + Display
(behind cover)
3.
Cover with venting
AISI 304
4.
Venting
PA
5.
PG9 Cable Gland
6.
O-Ring (2x)
EPDM
7.
Electronics housing
AISI 304
10.
‘Varivent’ Baseplate
AISI 316
12.
Diaphragm
AISI 316L
2.4 DIMENSIONAL DRAWING 2000-SAN
PARTS DESCRIPTION
MATERIAL
1.
Cover
AISI 304
2.
Push buttons + Display
(behind cover)
3.
Cover with venting
AISI 304
4.
Venting
PA
5.
PG9 Cable Gland
6.
O-Ring (2x)
EPDM
7.
Electronics housing
AISI 304
8.
Foot with sensor
AISI 316L
9
Diaphragm
AISI 316L
NOTE:
As standard we do not supply an O-ring for the Varivent connection.
Make sure that the O-ring material is 3A approved. As standard we do not supply a packing ring
nor a clamp for the Tri Clamp connection. Make sure that the packing material is 3A compliant.
If we have to supply the O-ring or the packing rings (option and extra price),
the packing material is a special compound (no. 55650), EPDM 70 PC.
The transmitters will be delivered with a material certificate for all the wetted parts
(diaphragm, diaphragm ring, foot of the transmitter). These material certificates are fully traceable
and stored for at least 12 years.
3A-TRI-CLAMP
3A-X4-VARIVENT

Instruction Manual Series 2000-SAN-3A Klay Instruments B.V.
H/EN/2000-SAN-3A/05-2021/25
Page 8
3 INSTALLING TRANSMITTER
The diaphragm of the transmitter is protected with a special protection cap. Protect the
diaphragm until installation takes place. * DO NOT DAMAGE THE DIAPHRAGM. *.
3.1 INSTALLING WELD-ON NIPPLE
A skilled machinist or welder should perform installation of the weld-on nipple.
Weld Argon, MIG or TIG with the smallest welding pin.
1. Cut a hole in the process vessel/pipe to accept the weld-on nipple. The hole should
produce a tight fit when coupled with the weld-on nipple.
2. Prepare the vessel hole by beveling the edge to accept filler material.
3. Remove the weld-on nipple from the transmitter.
4. Remove the PTFE packing of the SERIES 2000-SAN.
WARNING
Improper installation may result in distortion of the
weld-on nipple. Excessive heat will distort the weld-on
nipple. Weld in sections as shown in the figure left.
Allow adequate cooling between passes. To reduce
the chances of distortion to the weld-on nipple, use a
mandrel.
Series 2000-SAN Part.no. 1019
Note:
The leakage detection hole in the weld-on nipple should be on the lowest point.
5. Position the weld-on nipple in the vessel hole and tack six places.
The weld sequence is shown in the figure above.
6. Weld the weld-on nipple in place using 0,03 to 0,045 in. (0,762 to 1,143 mm) stainless
rod as filler material in the beveled area. Adjust amperage for penetration.
7. Remove mandrel after the welding operation.
8. Edges and the welds must be polished after welding to make sure that the
roughness is < 0,8 μm.
3.2 INSTALLING TRANSMITTER SERIES 2000-SAN
1. Improper installation at the packing can cause a process leak.
2. Make sure to correctly locate the packing within the weld-on nipple.
3. Position the transmitter into the weld-on nipple and begin engaging threads.
The transmitter can be rotated prior to seating enabling the user to optimize access to
calibration adjustments, cable entry, and local indicator.
4. Once Lock ring (8) has been hand tightened, snug an additional turn with adjustable
pliers (1/8"). DO NOT DAMAGE THE THREAD.

Instruction Manual Series 2000-SAN-3A Klay Instruments B.V.
H/EN/2000-SAN-3A/05-2021/25
Page 9
3.3 MOUNTING POSITION
When the transmitter is mounted horizontally, the cable gland MUST be pointed downwards.
3.4 MOUNTING POSITION EFFECT
All transmitters are calibrated in vertical position.
If the transmitter is mounted in a different position, there will be a little zero shift.
If the transmitter is mounted up, there is a zero shift (e.g. 4,03 mA instead of 4mA). If the
transmitter is mounted down, there is a zero shift (e.g. 3.97 mA instead of 4 mA). After
installation of the transmitter the zero must be set to 4.00 mA with "P103" in the programming
mode.
This will not affect the span.
3.5 CALIBRATION
All transmitters are fully calibrated at the factory, to the conditions stipulated in user’s order.
When the buyer has not requested calibration, the transmitter will be calibrated at the highest
span. It is advisable to re-calibrate the transmitter after shipment.
3.6 WIRING
Under the cover (3) you will find the terminal board.
The push buttons "Zero", "Span" and "Prog" are under
the other cover (1). External loads must be placed in the
negative side of the 2-wire loop.
The figure left shows the wiring connection of the
transmitter. The 2-wires must be connected to 3 (-) and
4 (+) of the terminal board.
The screw terminal tightening torque range needs to be: minimum 1.0 Nm (8.85 in-lb); max. 1,2
Nm (10.62 in-lb).
Remove approx. 5 cm (2 in) of the cable mantle, strip approx. 1 cm (0.4 in) of insulation from
the ends of the individual wires. When using stranded cable apply the correct end sleeves for
the wires and make sure these are connected properly underneath the screw terminals.
The field wire conductor cross-section needs to be: minimum 0,2 mm2(24 AWG) and maximum
1,5 mm2(16 AWG). The transmitter must always be connected to earth.
The transmitter must be connected with standard two-
wire shielded cable. Do NOT run signal wiring in open
trays with power wiring, or near “heavy” electrical
equipment (E.g.: Frequency controller or heavy pumps).
Shielding must always be connected at the side of the
power supply. In case the process connection is already
connected to ground (e.g. via the tank or pipe line) Do
not connect the instrument to ground. Please ensure
that the instrument is not connected to ground
twice to prevent an 'earth loop'. In applications with
synthetic process connections, the enclosure (internal
or external) must be connected to ground.
The CER-2000 with a synthetic process connection must be connected to earth. Reversing the polarity will not
damage the transmitter, but the transmitter will not function until the + and –are properly connected.
Instruction Manual Series 2000-SAN-3A Klay Instruments B.V.
H/EN/2000-SAN-3A/05-2021/25
Page 10
4. REMAINING
4.1 DIGITAL LOCAL INDICATOR
All transmitters from the Series 2000 are standard equipped with a digital display.
In the standard execution the covers are "closed". The three push buttons and the display are
behind the cover (3). As an option an "open" cover can be delivered to achieve the display can
be used as a local display in the process. The full-scale point may be set to any value between
0000 and 9999 (4 digit). (Option: "I" extra price).
4.2 CE / EMC - Rules
All Klay transmitters are manufactured in accordance with the RFI / EMC directives and comply
with the CE standard. All transmitters are fitted with RFI filters, which provide optimum, trouble-
free operation. Our products are in conformity with EMC-Directive 2004/108/EC based on test
results using harmonized standards.
4.3 EXTERNAL LOAD The minimum power supply is based on the total circuit
resistance.
The maximum permissible load (Ri max.) in case of 24
Vdc is 600 Ω (Ohm).
By increasing the power supply, the external load can
be increased to 1200 Ohm / 36 Vdc. (see figure left).
Ri max = Power supply - 12 Vdc
(
min
.
supply
)
20 mA
0
200
400
600
800
1000
1200
1400
12 24 36

Instruction Manual Series 2000-SAN-3A Klay Instruments B.V.
H/EN/2000-SAN-3A/05-2021/25
Page 11
4.4 INTRINSICALLY SAFE and NON SPARKING (Ex version)
The Series 2000, Series 2000-SAN, Series CER-2000 and Series 2000-Hydrobar-cable are
also available for intrinsically safe (Zone 0). The Series 2000, Series 2000-SAN, Series 2000-
Cable and Series 2000-SAN-Cable are also available for Non-Sparking (Zone 2).
ATEX –DEKRA 20ATEX0025 X
IECEx –DEK 14.0079X
II 1G Ex ia IIC T4 Ga
Ex ia IIC T4 Ga
II 2D Ex ib IIIC T100°C Db (option G100, extra price)
Ex ib IIIC T100°C Db (option G100, extra price)
ATEX –DEKRA 20ATEX0026 X
II 3G Ex ec IIC T4 Gc (option G180, extra price)
Ex ec IIC T4 Gc (option G180, extra price)
The transmitters with EPL Gc (option G180) shall only be used in an area of at least
pollution degree 2, as defined in IEC 60664-1.
For use in a non-sparking area, the transmitter can be installed without the use of a (intrinsic
safe) barrier. The transmitter can be connected with the following nominal value’s:
UN= 12…26.5 Vdc; IN= 4…20 mA; PN= 0,28 W.
For use in an intrinsically safe area, use a certified power supply from 12 - 26,5 Vdc.
Installation of this device has to be carried out by a certified mechanic / installer.
For detailed explanation see “EC-Declaration of conformity” on the last page of this manual.
Transmitter type and options
Equipment category
Ambient temperature range
Pressure / Level Transmitter
Series 2000, Series 2000-SAN, Series 2000-Cable,
Series 2000-SAN-Cable, Series CER-2000,
Series 2000-Hydrobar-Cable and
Series 2000-Hydrobar-EXTD
With transparent indicator cover (Option I)
II 1G
-20 °C to +70 °C
Process temperature range:
-20 °C to +100 °C
Pressure / Level Transmitter
Series 2000, Series 2000-SAN, Series 2000-Cable
and Series 2000-SAN-Cable.
With closed covers, Option G180
ll 3 G
-20 °C to +70 °C
Process temperature range:
-20 °C to +100 °C
Pressure / Level Transmitter
Series 2000, Series 2000-SAN, Series 2000-Cable,
Series 2000-SAN-Cable, Series CER-2000,
Series 2000-Hydrobar-Cable, Series 2000-Hydrobar-
EXTD and Temperature Transmitter Type TT-2000
With closed covers, Option G100
II 1G
and
II 2D
-20 °C to +70 °C
Process temperature range:
-20 °C to +100 °C
The maximum surface temperature of lP6x enclosure T100 °C is based on a maximum ambient
temperature of 70 °C and maximum process temperature of 100 °C. This temperature is
determined with a dust layer of maximum 5 mm.
Electrical Data
Pressure / Level Transmitter Series 2000, Series 2000-SAN, Series 2000-Cable,
Series 2000-SAN-Cable, Series CER-2000, Series 2000-Hydrobar-Cable,
Series 2000-Hydrobar-EXTD and Temperature Transmitter Type TT-2000:
Supply/output circuit (terminals 3 ‘-’ and 4 ‘+’): in type of protection intrinsic safety Ex ia IIC, or
Ex ia lllC only for connection to a certified intrinsically safe circuit, with the following maximum
values: Ui= 26,5 Vdc; Ii= 110 mA; Pi= 0,9 W (linear source); Li= 1,4 mH; Ci= 63 nF
(without cable between terminals 3 ‘-’ and 4 ‘+’).

Instruction Manual Series 2000-SAN-3A Klay Instruments B.V.
H/EN/2000-SAN-3A/05-2021/25
Page 12
Cable length
The maximum length of the cable for the Series 2000-Cable, 2000-SAN-Cable and 2000-
Hydrobar-Cable is 100 m. Electrostatic charging of the cable and the protection cap by the flow
of non-conductive media (e.g. in stirring vessels or pipes) shall be avoided.
Special conditions for Safe use in Zone 0 and Zone 1
As category 1G equipment may be applied directly in the process, electrostatic discharge from
the cable and the protection cap of Pressure / Level Transmitter Series 2000-Hydrobar-Cable
by the flow of non-conductive media (e.g. in stirring vessels or pipes) should be avoided.
Special Instructions for Safe use in Zone 2
For use in non-sparking areas (Zone 2), the following should be taken into consideration:
As standard the transmitter is supplied without a certified cable gland. The cable entry
is fitted with a PE blanking plug for protection during transport. Remove the blanking
plug after installing the transmitter. When using a gland make sure it is certified and
complying with applicable protection level of the transmitter.
Always use the covers supplied by Klay Instruments B.V.
All transmitters from Klay Instrument are designed to last for at least 10 years under
normal process and environmental conditions. The gaskets and seals for the series
2000 are successfully tested according to IEC 60079-0 for temperature endurance (heat
and cold), resistance to impact and ingress protection by DEKRA Certification. In harsh
process and environmental conditions, the lifetime of gaskets and seals may be
reduced. Klay Instruments strongly advises to inspect these yearly and replace them
when necessary.
For use in a potentially explosive atmosphere caused by air/dust mixtures the following should
be taken into consideration:
The dust layer may not exceed a thickness of 5 mm.
as standard a transmitter is supplied with a certified cable gland (PG). When using a
different gland make sure it is certified and complying with applicable protection level of
the transmitter.
Always use the covers supplied by Klay Instruments B.V.
All certifications are in compliance with IECEx scheme rules, and the International Standards:
EN IEC 60079-0:2018, EN 60079-11:2012, IEC 60079-7:2015/ A1:2017, IEC 60079-11:2011
and IEC 17050-1:2010. The transmitters are certified for use in hazardous areas by DEKRA
Certification.
DO NOT REMOVE THE SCREW COVER(S) WHEN AN EXPLOSIVE
ATMOSPHERE MAY BE PRESENT.
4.5 FUNCTIONAL SAFETY - SIL
The device is certified as “Proven in use” for a Functional safety environment of SIL2 according
to IEC-61511 and SIL1 according to IEC-61508.
Note: Option SIL (Proven in use) is valid on transmitters with a serial number > 4309036, and only
applicable with software version V9.17.
When ordered as a SIL (Proven in use) transmitter, the safety manual will be supplied. (Option
G200). Detailed information can be found in the Safety manual of the instrument. The most
recent version of the Safety manual is available on: http://www.klay-instruments.com under
section “Downloads”.

Instruction Manual Series 2000-SAN-3A Klay Instruments B.V.
H/EN/2000-SAN-3A/05-2021/25
Page 13
4.6 TRACEABILITY YEAR OF MANUFACTURING
The year of manufacturing of the transmitter can be traced as follows: take the first two
numbers from the serial number that is engraved in the transmitter and add 1970 to it.
For example: if the serial number is 4309036. The year of manufacturing is 1970 + 43 = 2013.
4.7 SOFTWARE REVISIONS
Due to the improvements on the Series 2000, there are several software versions (revisions). For this
reason it is possible the transmitter you are working with does not support some options, which are
discussed in this manual. This instruction is applicable from software version V9.17 and higher. After
powering up, the transmitter will show the software version on the display.
5 FUNCTIONS OF PUSH BUTTONS
The Series 2000 SAN can be programmed easily by use of the
3 front panel pushbuttons (See picture right).
The display can show engineering units of:
mH2O, inH2O, bar and PSI.
The functions of the three pushbuttons will be explained below.
This button has 2 functions:
1. It can be directly used for adjusting the zero (zero / 4mA), with or without
a test pressure. When the zero (4 mA) must be adjusted at 0 (atmospheric
pressure), the button must be held until the word "ZERO" appears on the
display. The transmitter is now set to 4 mA.
2. Also, this button must be used for stepping down in the programming
menu or to decrease a value (-).
Note: For canceling the mounting position effect you have to use P103.
This button has 2 functions:
1. It can be directly used for adjusting the span (20 mA), when using a test
pressure (air). When a test pressure (e.g. 2 bar) is supplied to the transmitter, the
button must be held until the word "SPAN" appears on the display. The
transmitter is adjusted at 20 mA now. The span can also be adjusted without test
pressure (see P102).
2. Also, this button must be used for stepping up in the programming or to
increase a value (+).
This button has 2 functions:
1. It is used to adjust the 14 Programming Points (P101 to P114). Push it
once and P100 is displayed, use the [] (SPAN) to step to P101 etc.
2. This button must also be used for confirming the adjustments (enter).
For example, if you want to change the adjustment in bars (P104), the following
steps must be taken:
1. Push on [PROG] till "100" appears on the display.
2. Push on [SPAN] 4 times to go to point "P104" (adjustment pressure unit).
3. Push [PROG] to confirm this.
4. Push several times on [] (SPAN) to reach 3 (= bar). See also the
conversion table (page 11).
1 = mWC, 3 = bar, 5 = PSI, 11 = inch WC
5. Confirm this by pushing once at [PROG].
The transmitter is now adjusted to read in "bar".
ZERO

Instruction Manual Series 2000-SAN-3A Klay Instruments B.V.
H/EN/2000-SAN-3A/05-2021/25
Page 14
6. PROGRAMMING POINTS (P101 –P114)
The following points can be adjusted by
means of the three push buttons.
For an explanation of these points see page
11 to 18 of this manual.
To change one of these points you have to
push on [PROG] until "100" appears on the
display.
To go to from a lower program (P101) to a
higher one (P102), push on button []
(SPAN).
To confirm the adjustments, you always have
to press on [PROG].
*) Standard adjustments ex works.
Programming points:
P101
Zero adjustment (4 mA)
P102
Span adjustment (20 mA)
P103
Cancel mounting position effect
P104
Adjustment pressure unit
(See Conversion table)
P105
4-20 mA *)
20-4 mA (Reverse output)
P106
Adjustment damping (0 to 25 sec)
P107
Indication of process temp. (Read out on
display)
P108
0 = °C (*)
1 = °F
P109
Read out on display:
Curr (0) = current (4 - 20 mA) (*)
Unit (1) = pressure unit (conversion table)
PerC (2) = percentages
TenP (3) = temperature
Hect (4) = hectoliters
CB n (5) = Cubic meters
Ltr (6) = Liters
P110
Simulation of current
P111
Linearisation
nLin (0) = no Linearisation (*)
hCil (1) = cylindrical tank
ConU (2) = vertical tank with cone
SPHE (3) = vertical tank spherical cone
P112
Density
P113
Write Protection
P114
Response time from push buttons
7. READING ON THE DISPLAY
On the standard built-in displayseveral values can
be shown.
During the programming of the transmitter the
display shows all the information that is needed.
When the transmitter is in the process the display
gives all the information of the process pressure
or temperature. On the display the following units
can be showed: mH2O, inH2O, bar and PSI (see
also P104 and P109).
N.B.: The standard transmitter is supplied with two "closed" covers shielding the buttons and the display. As an
option an "open" cover (IP 65) can be fitted. The display can then be used as a local process display.
(Option: "I" extra price). The full scale can be set between -9999 and 9999 (4 digit).

Instruction Manual Series 2000-SAN-3A Klay Instruments B.V.
H/EN/2000-SAN-3A/05-2021/25
Page 15
8. EXPLANATION PROGRAMMING POINTS P101 to P114
P101
ZERO ADJUSTMENT (4 mA)
The transmitter as standard is adjusted to 4.00 mA at atmospheric pressure.
It is also possible to adjust a zero-suppression or elevation.
For example: zero elevation of 1 mWK.
1. Push at [PROG] until "100" is shown on the display.
2. Push once at [] / SPAN till "101".
3. Confirm this by pushing [PROG].
4. Now the display will show 0.00 mH2O. Push at [] till 1.00 mH2O is on the
display.
5. Confirm with [PROG].
6. The output of the transmitter will be lower than 4 mA. The output at
atmospheric pressure will be for example 3.68 mA.
When a pressure of 1 mWC is applied on the diaphragm the output will be
4.00 mA.
The elevation can be canceled by pushing at [ZERO] till zero disappears out of the
display. The transmitter is now adjusted at 4 mA at atmospheric pressure.
P102
SPAN ADJUSTMENT (20 mA) WITHOUT TEST PRESSURE
Before adjusting the span take care the right pressure unit is selected.
(See also P104 and P109).
Example: Adjustment of the span at 0 - 2 bar.
First off all, the pressure unit must be adjusted at "bar". (See P104 and P109).
1. Push [PROG] till "100" is shown on the display.
2. Push twice at [] / SPAN until "102" is on the display.
3. Confirm this by pushing [PROG].
4. Push [SPAN] (+) or [ZERO] (-) to select the measuring range that is
required.
5. Confirm by pushing [PROG].
The transmitter is adjusted now.
N.B.: P102 is the adjustment of the total span.
When a "compound" range must be adjusted (for example -1 till +3 bar), a
span of 4 bar must be programmed. At P101 (ZERO,4 mA), -1 bar must be
adjusted. Now the transmitter is adjusted at: - 1 bar = 4 mA and +3 bar = 20
mA.
N.B.: It is not possible to show values larger than '9999' or smaller than '–9999' on
the display. In this case the display will show:
- - - - For values larger than '9999'.
- - - - For values smaller than '–9999'.
As long as the display shows "- - - - ", the value will not be saved by
pressing "PROG".

Instruction Manual Series 2000-SAN-3A Klay Instruments B.V.
H/EN/2000-SAN-3A/05-2021/25
Page 16
P103
CANCEL MOUNTING POSITION EFFECT
All transmitters are calibrated vertically. When a transmitter of the Series 2000-SAN
is installed horizontally, there will be a small "mounting effect" on the zero
(4 mA). For example, the transmitter shows 4.03 mA instead of 4.00 mA.
This can be easily canceled with P103. In P103 there are three options:
1. ESC:
Nothing can be changed.
Leave without doing anything. (confirm with PROG).
2. RESET:
Use this option when you are not sure if P103/SET has been done in a
proper way. (confirm with PROG).
when using this option, the original factory setting will be valid.
3. SET:
Canceling mounting position effect. (confirm with PROG).
When "SET" is selected the transmitter is automatically adjusted at 4.00 mA.
The span will not be affected.
CAUTION: Do not apply pressure while executing "cancel mounting position effect"
N.B.: From revision 2 the description above is valid. Transmitters working with
software revision 1 will direct process cancel mounting position.

Instruction Manual Series 2000-SAN-3A Klay Instruments B.V.
H/EN/2000-SAN-3A/05-2021/25
Page 17
P104
ADJUSTMENT PRESSURE UNIT ON DISPLAY (See Conversion table)
Several engineering units can be shown on the display by using a conversion factor.
(See conversion table below). Four engineering units will light up on the display
(mH2O, inH2O, bar and PSI).
N.B.: To show one of the engineering units, P109 must be adjusted at 1
(= pressure unit).
1. Press [PROG] until "100" appears on the display.
2. Push 4x []to get to point P104 (pressure unit setting).
3. Now press [PROG] to confirm this.
4. Now press []or []and set it to the correct pressure unit. See also the
conversion table below. The number in brackets, see Display column,
represents the menu options of transmitters with other software. Example:
3 = bar.
5. Then press [PROG] again to confirm. The transmitter is now set to read in
"bar".
Conversion table:
DISPLAY:
CONVERSIE FACTOR:
mH2O (mWK) * (1)
1.000
mmH2O (mm WK) (2)
1000
bar * (3)
0.09806
Mbar (4)
98.0665
PSI * (5)
1.4223
Atm (6)
0.0967
KPa (7)
9.80665
MPa (8)
0.009807
Kgf/cm2 (9)
0.1
mm HG (10)
73.556
inH20 ("WK) * (11)
39.37
"HG (12)
2.895906
*) Pressure units that can be shown on the display. When the value of the
highest range is larger than 9999, "NA" will appear in the display (Not
Applicable). Another unit must be chosen.

Instruction Manual Series 2000-SAN-3A Klay Instruments B.V.
H/EN/2000-SAN-3A/05-2021/25
Page 18
P105
REVERSE OUTPUT (20 - 4 mA)
The transmitter as standard is adjusted to 4-20 mA.
Push on [PROG] and go to P105.
Push once at [] to change the output to 20-4 mA (Reverse output).
Push at [PROG] to confirm this.
Now the transmitter will give 20 mA at atmospheric pressure.
P106
ADJUSTMENT DAMPING (0 till 25 sec)
In P106 an electronic damping can be adjusted between 0 and 25 seconds.
This can be done with the push buttons [] (up) and [] (down).
Always confirm by pushing once at [PROG].
P107
INDICATION OF PROCESS TEMPERATURE (READ OUT ON DISPLAY)
1. Push [PROG] until "100" is shown on the display.
2. Push 7 times at [], go to [P107].
3. Push [PROG] to confirm this. Now the process temperature appears on the
display (Indication: +/-2C).
This will remain on the display. To get the actual pressure back on the display you
have to push again on P107 until the actual pressure appears on the display again.
P108
TEMPERATURE IN °C OR °F
The temperature of the transmitter is standard adjusted at C ("DEGR"). When
pushing at [] in P108, this will change into F ("FAHR").
Always confirm by pushing once at [PROG].
P109
READ OUT ON DISPLAY
Curr (0) = current (4 - 20 mA)
Unit (1) = pressure unit (See conversion table)
PErC (2) = percentages (0 - 100%)
TEnP (3) = temperature (C of F)
hECt (4) = hectoliter (only in combination with P111)
Cb n (5) = Cubic meter (only in combination with P111)
Ltr (6) = Liters (only in combination with P111)
As standard the transmitter is delivered with read out in mA (0). To change this,
follow the next steps:
1. Push [PROG] until "100" is shown on the display.
2. Push 9 times at [] / SPAN till "109" appears on the display.
3. Confirm with [PROG].
4. Push once at [].
5. Push [PROG] to confirm this.
The transmitter will now read mH2O (mWC).
The pressure unit can be changed with the conversion table in "P104".
1 = mH2O (=mWK), 3 = bar, 5 = PSI, 11 = inch WK.
Also the read out can be 0 - 100%. In this case select "P109", option PErC (2).

Instruction Manual Series 2000-SAN-3A Klay Instruments B.V.
H/EN/2000-SAN-3A/05-2021/25
Page 19
SIMULATION OF CURRENT (4-20 mA)
The transmitter can be used as a simulator of a current between 4 - 20 mA.
This can be done in P110 with the push buttons [] and [].
The user can perform a current simulation (Curr) or a pressure simulation (Unit).
Current-simulation (Curr)
To perform a current-simulation follow the next steps:
1. Push [PROG] until "100" is shown on the display.
2. Push 10 times at [] / SPAN till "110" appears on the display.
3. Confirm with [PROG].
4. The display will readout 'Curr'
5. Confirm with [PROG].
6. The display shows '4.00'. Push [PROG] and the output changes to 4.00 mA.
7. By pushing [] / SPAN or [] / ZERO, you can change the value on the display.
The output value will change as soon as the [] / SPAN OR [] / ZERO button
is released.
8. Pressing the [PROG]-button again will exit the simulation.
Pressure-simulation (Unit)
To perform a pressure-simulation follow the next steps:
1. Push [PROG] until "100" is shown on the display.
2. Push 10 times at [] / SPAN till "110" appears on the display.
3. Confirm with [PROG].
4. The display will readout 'Curr'
5. Press [] / SPAN once
6. The display will readout 'Unit'.
7. Confirm with [PROG].
8. The display shows a pressure value. Push [PROG] and the output changes to
a mA-output corresponding with the range entered in menu P101 and P102.
9. By pushing [] / SPAN or [] / ZERO, you can change the value on the display.
The output value will change as soon as the [] / SPAN OR [] / ZERO button
is released.
10. Pressing the [PROG]-button again will exit the simulation.
Note: The values that can be entered using the pressure-simulation are related to
the adjustments in menu P101 and P102. These values are also the
minimum and maximum values.
For HART-transmitters: this menu will not work when the device is
operating in multi-drop mode.
LINEARIZATION
nLin (0) = no Linearisation
hCil (1) = cylindrical tank (horizontal)
ConU (2) = tank with bottom cone
SPHE (3) = tank with spherical bottom
As standard the transmitter is delivered without Linearisation nLin (0). However, for a
horizontal tank or a tank with a bottom cone, a Linearisation can be applied to achieve
the current signal (mA) is equal to the level in the tank. All values must be programmed
in meters.
P111
P110

Instruction Manual Series 2000-SAN-3A Klay Instruments B.V.
H/EN/2000-SAN-3A/05-2021/25
Page 20
Linearization horizontal tank (Cylindrical)
1. Push [PROG] until "100" is shown on the display.
2. Push 11 x at [] / SPAN till "111" appears. (Confirm with [PROG])
3. Push [] once. (Confirm with [PROG])
4. Enter the height (H1) of the tank in meters. (Confirm with [PROG])
5. Enter the same height (H2) of the tank in meters. (Confirm with [PROG])
6. Enter the length (L) of the tank. For a "ball" or cone shaped tank, take the
cylindrical
length plus the length of 1 "ball" cone. (Confirm with [PROG])
7. Enter H3 in meters if the transmitter is installed like in the left picture. Enter 0m
when the transmitter is installed like in the right picture.
8. Enter the percentage of the actual "full" level (for example 80%).
(Confirm with [PROG]).
Linearization horizontal tank (Elliptic)
1. Push [PROG] until "100" is shown on the display.
2. Push 11 x at [] / SPAN till "111" appears. (Confirm with [PROG])
3. Push [] once. (Confirm with [PROG])
4. Enter the height (H1) of the tank in meters. (Confirm with [PROG])
5. Enter the height (H2) of the tank in meters. (Confirm with [PROG])
6. Enter the length (L) of the tank. For a "ball" or cone shaped tank, take the
cylindrical length plus the length of 1 "ball" cone. (Confirm with [PROG])
7. Enter H3 in meters if the transmitter is installed like in the left picture. Enter 0m
when the transmitter is installed like the right picture.
8. Enter the percentage of the actual "full" level (for example 80%).
(Confirm with [PROG]).
If the height (H) of the tank is 1 meter and the maximum level in the tank is 0,8 meter the percentage (point
8) must be set at 80%. The calibration at P102 must be adjusted at: 1 meter (if specific gravity equals 1).
Cylindrical horizontal tank Cylindrical tank with cone-shaped ends
Other manuals for 2000-SAN Series
2
Table of contents
Other KLAY-INSTRUMENTS Transmitter manuals

KLAY-INSTRUMENTS
KLAY-INSTRUMENTS DP-4000 Series User manual

KLAY-INSTRUMENTS
KLAY-INSTRUMENTS 2000-VALVE-RANGE Series User manual

KLAY-INSTRUMENTS
KLAY-INSTRUMENTS DP-4000 Series User manual

KLAY-INSTRUMENTS
KLAY-INSTRUMENTS 8000 Series User guide

KLAY-INSTRUMENTS
KLAY-INSTRUMENTS PROFIBUS PA 4000 Series User manual

KLAY-INSTRUMENTS
KLAY-INSTRUMENTS PERAMIC User manual

KLAY-INSTRUMENTS
KLAY-INSTRUMENTS 2000-SAN Series User manual

KLAY-INSTRUMENTS
KLAY-INSTRUMENTS 2000-SAN Series User guide

KLAY-INSTRUMENTS
KLAY-INSTRUMENTS 8000-SAN Series User manual

KLAY-INSTRUMENTS
KLAY-INSTRUMENTS TT4000 Series User manual