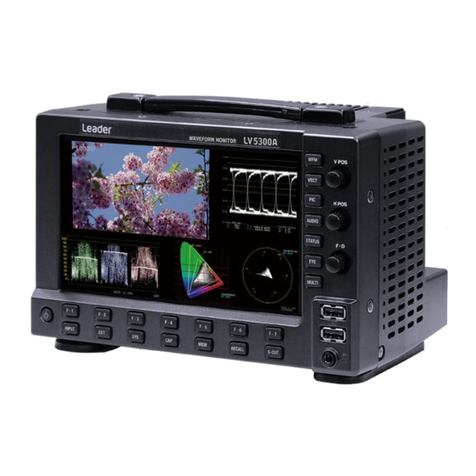
Leader LV 7770 User manual

LV 7770 MULTI RASTERIZER
LV 7770 OP70 16CH DIGITAL AUDIO ADAPTER
LV 5770SER03A TRI SYNC / COMPOSITE
LV 5770SER08 SDI INPUT
LV 5770SER09(A) SDI INPUT / EYE
LV 5770SER42 ANALOG AUDIO
INSTRUCTION MANUAL

TABLE OF CONTENTS
GENERAL SAFETY SUMMARY ......................................................................................... I
1. INTRODUCTION ........................................................................................................ 1
1.1 Scope of Warranty .................................................................................................................. 1
1.2 Operating Precautions ............................................................................................................ 1
1.2.1 Maximum Allowable Input Voltage ................................................................................... 1
1.2.2 About Standby Mode ....................................................................................................... 2
1.2.3 Mechanical Shock............................................................................................................ 2
1.2.4 Electrostatic Damage....................................................................................................... 2
1.2.5 Rack Mounting................................................................................................................. 2
1.2.6 Warming Up..................................................................................................................... 2
1.2.7 Backup Battery ................................................................................................................ 3
1.3 About Trademarks and Licenses ............................................................................................ 3
1.4 Differences between the LV 5770SER09A and LV 5770SER09 ............................................. 3
1.5 About Terminology Used in this Manual.................................................................................. 4
2. SPECIFICATIONS...................................................................................................... 5
2.1 General ................................................................................................................................... 5
2.2 Features.................................................................................................................................. 5
2.3 Specifications.......................................................................................................................... 9
2.3.1 SDI Video Signal Formats and Standards (LV 5770SER08 and LV 5770SER09A) ......... 9
2.3.2 Embedded Audio Playback Format (LV 5770SER08 and LV 5770SER09A) ................. 12
2.3.3 Analog Composite Signal Formats and Standards (LV 5770SER03A) .......................... 12
2.3.4 SDI I/O Connectors (LV 5770SER08 and LV 5770SER09A) ......................................... 12
2.3.5 Analog Video I/O Connectors (LV 5770SER03A) .......................................................... 13
2.3.6 External Sync Signal Input Connectors (LV 5770SER03A, LV 5770SER08, and LV
5770SER09A)................................................................................................................................ 13
2.3.7 Audio I/O Connectors (LV 5770SER42 and LV 7770 OP70).......................................... 14
2.3.8 Video Output Connectors............................................................................................... 15
2.3.9 Control Connectors........................................................................................................ 15
2.3.10 Screen Capture.............................................................................................................. 16
2.3.11 Frame Capture (LV 5770SER08 and LV 5770SER09A) ................................................ 16
2.3.12 Presets .......................................................................................................................... 17
2.3.13 Main Display Features ................................................................................................... 17
2.3.14 SDI Signal Video Waveform Display (LV 5770SER08 and LV 5770SER09A) ............... 17
2.3.15 Analog Composite Signal Video Waveform Display (LV 5770SER03A) ........................ 19
2.3.16 SDI Signal Vector Waveform Display (LV 5770SER08 and LV 5770SER09A) .............. 20
2.3.17 Analog Composite Signal Vector Waveform Display (LV 5770SER03A) ....................... 20
2.3.18 SDI Signal 5-Bar Display (LV 5770SER08 and LV 5770SER09A)................................. 21
2.3.19 SDI Signal Picture Display (LV 5770SER08 and LV 5770SER09A) .............................. 21
2.3.20 Analog Composite Signal Picture Display (LV 5770SER03A)........................................ 23
2.3.21 SDI Signal 3D-Assist Display (LV 5770SER08 and LV 5770SER09A) .......................... 23
2.3.22 Digital Audio Display ...................................................................................................... 24
2.3.23 Analog Audio Display (LV 5770SER42) ......................................................................... 27

2.3.24 SDI Signal Status Display (LV 5770SER08 and LV 5770SER09A)................................ 27
2.3.25 Analog Composite Signal Status Display (LV 5770SER03A)......................................... 29
2.3.26 Event Log ...................................................................................................................... 29
2.3.27 SDI Analysis Features (LV 5770SER08 and LV 5770SER09A) ..................................... 30
2.3.28 SDI Ancillary Data List Display (LV 5770SER08 and LV 5770SER09A) ........................ 31
2.3.29 Lip Sync Measurement (LV 5770SER08 and LV 5770SER09A).................................... 31
2.3.30 SDI Closed Caption Packet Display (LV 5770SER08 and LV 5770SER09A) ................ 32
2.3.31 Eye Pattern Display (LV 5770SER09A) ......................................................................... 33
2.3.32 Jitter Display (LV 5770SER09A) .................................................................................... 34
2.3.33 Eye Pattern and Jitter Detection (LV 5770SER09A) ...................................................... 35
2.3.34 Time Display Feature..................................................................................................... 35
2.3.35 Alarm Output Feature .................................................................................................... 36
2.3.36 Front Panel .................................................................................................................... 36
2.3.37 General Specifications ................................................................................................... 36
3. PANEL DESCRIPTION............................................................................................. 37
3.1 Front Panel ........................................................................................................................... 37
3.2 Rear Panel............................................................................................................................ 39
4. BEFORE YOU BEGIN MEASURING ....................................................................... 41
4.1 Cover/Inlet Stopper ............................................................................................................... 41
4.1.1 Attaching the Cover/Inlet Stopper .................................................................................. 41
4.1.2 Removing the Cover/Inlet Stopper ................................................................................. 41
4.2 Connecting to a Display ........................................................................................................ 42
4.3 Turning the Instrument On and Off ....................................................................................... 42
4.4 Optional Units ....................................................................................................................... 42
4.5 Signal I/O .............................................................................................................................. 43
4.5.1 SDI Signal Input (LV 5770SER08 and LV 5770SER09A) .............................................. 43
4.5.2 SDI Signal Output (LV 5770SER08 and LV 5770SER09A)............................................ 44
4.5.3 Picture Monitor Output (LV 5770SER08 and LV 5770SER09A) .................................... 44
4.5.4 External Sync Signal Input (LV 5770SER03A, LV 5770SER08, and LV 5770SER09A). 45
4.5.5 Composite Signal I/O (LV 5770SER03A)....................................................................... 48
4.5.6 Digital Audio Signal I/O .................................................................................................. 48
4.5.7 Analog Audio Signal I/O (LV 5770SER42) ..................................................................... 49
4.6 General Display Explanation................................................................................................. 51
4.7 Panel Operation Basics ........................................................................................................ 52
4.7.1 Displaying the Function Menu ....................................................................................... 52
4.7.2 Function Menu Operations ............................................................................................ 53
4.7.3 Tab Menu Operations .................................................................................................... 53
4.7.4 Enabling and Releasing the Key Lock ........................................................................... 54
4.7.5 Operating the Shortcut Key ........................................................................................... 55
5. BASIC OPERATING PROCEDURES....................................................................... 56
5.1 Selecting the Display Format ................................................................................................ 57
5.2 Selecting the Display Area .................................................................................................... 58
5.3 Selecting the Input Signal ..................................................................................................... 58

5.4 Selecting the Input Channel.................................................................................................. 59
5.5 Selecting the Display Mode .................................................................................................. 59
6. DETAILED MEASUREMENT EXAMPLES ............................................................... 61
6.1 SDI Signal Measurement ...................................................................................................... 61
6.2 SDI Signal Eye Pattern Measurement .................................................................................. 62
6.3 Composite Signal Measurement ........................................................................................... 62
6.4 Embedded Audio Signal Measurement................................................................................. 63
6.5 External Digital Audio Signal Measurement .......................................................................... 64
6.6 Analog Audio Signal Measurement ....................................................................................... 65
6.7 Embedded Audio Signal Output............................................................................................ 66
6.8 Analog Audio Signal Output .................................................................................................. 67
7. SYSTEM SETTINGS ................................................................................................ 68
7.1 I/O Settings ........................................................................................................................... 68
7.1.1 Configuring SDI Input Settings (LV 5770SER08 and LV 5770SER09A) ........................ 68
7.1.2 Rear Panel Settings....................................................................................................... 71
7.2 Configuring the LV 7770 ....................................................................................................... 74
7.2.1 General Settings ............................................................................................................ 74
7.2.2 Configuring Ethernet Settings ........................................................................................ 76
7.2.3 Remote Control Settings................................................................................................ 78
7.2.4 Setting the Date and Time ............................................................................................. 79
7.3 Displaying System Information ............................................................................................. 80
7.4 Setting the Shortcut Key ....................................................................................................... 80
7.5 Configuring License Settings ................................................................................................ 81
7.6 Selecting the Aspect Ratio .................................................................................................... 81
7.7 Initializing Settings ................................................................................................................ 82
8. CAPTURE FEATURE ............................................................................................... 83
8.1 Screen Capture..................................................................................................................... 84
8.1.1 Taking a Screen Capture of the Display......................................................................... 84
8.1.2 Displaying Screen Capture Data.................................................................................... 84
8.1.3 Saving to a USB Memory Device................................................................................... 85
8.1.4 Displaying Screen Capture Data Saved to a USB Memory Device ............................... 86
8.1.5 Deleting Screen Capture Data Saved to a USB Memory Device................................... 87
8.2 Frame Capture (LV 5770SER08 and LV 5770SER09A) ....................................................... 88
8.2.1 Capturing Frame Data ................................................................................................... 88
8.2.2 Displaying Frame Capture Data..................................................................................... 90
8.2.3 Saving to a USB Memory Device................................................................................... 90
8.2.4 Displaying Frame Capture Data Saved to a USB Memory Device ................................ 92
8.2.5 Deleting Frame Capture Data Saved to a USB Memory Device
.................................... 93
9. PRESET FEATURE.................................................................................................. 94
9.1 Registering Presets............................................................................................................... 94
9.2 Loading Presets.................................................................................................................... 96

9.3 Deleting Presets.................................................................................................................... 96
9.4 Copying All Presets............................................................................................................... 97
9.4.1 Copying All Presets from the LV 7770 to a USB Memory Device .................................. 97
9.4.2 Copying All Presets from a USB Memory Device to the LV 7770 .................................. 98
10. REMOTE CONTROL................................................................................................ 99
11. ETHERNET REMOTE CONTROL ......................................................................... 104
11.1 TELNET .............................................................................................................................. 104
11.1.1 Procedure .................................................................................................................... 104
11.1.2 How to Enter Commands............................................................................................. 105
11.1.3 TELNET Commands.................................................................................................... 106
11.2 FTP ..................................................................................................................................... 129
11.2.1 Procedure .................................................................................................................... 129
11.2.2 How to Enter Commands............................................................................................. 130
11.2.3 FTP Commands........................................................................................................... 131
11.3 SNMP ................................................................................................................................. 132
11.3.1 SMI Definitions............................................................................................................. 132
11.3.2 Procedure .................................................................................................................... 132
11.3.3 Standard MIB ............................................................................................................... 134
11.3.4 Enterprise MIB ............................................................................................................. 139
11.3.5 Extended TRAP (Variable Binding List) ....................................................................... 179
11.4 HTTP Server Feature.......................................................................................................... 181
11.4.1 Operating Environment................................................................................................ 181
11.4.2 Precautions.................................................................................................................. 181
11.4.3 Procedure .................................................................................................................... 181
11.5 SNTP Client Function ......................................................................................................... 185
11.5.1 Procedure .................................................................................................................... 185
11.5.2 Time Adjustment Value ................................................................................................ 186
12. MENU TREES ........................................................................................................ 187
12.1 System Menu...................................................................................................................... 187
12.2 Capture Menu ..................................................................................................................... 190
12.3 Preset Registration Menu ................................................................................................... 191
12.4 Preset Load Menu .............................................................................................................. 192
13. CHANGE HISTORY OF THE SOFTWARE ............................................................ 193

I
GENERAL SAFETY SUMMARY
■Read This before Using the Instrument
This instrument should only be used by persons with sufficient knowledge of electronics who
thoroughly understand the contents of this manual.
This instrument is not designed or manufactured for households or ordinary consumers.
If unqualified personnel are to use the instrument, be sure the instrument is handled under the
supervision of qualified personnel (those who have electrical knowledge). This is to prevent the
possibility of personal injury or damage to the instrument.
■Note about Reading This Manual
The contents of this manual contain specialized terminology and may be difficult to understand. If
you have any questions about the contents of this manual, please contact your local LEADER
agent.
■Symbols and Terms
The following symbols and terms are used in this instruction manual and on the instrument to
indicate important warnings and notes.
<Symbol>
This symbol appears in this instruction manual and on the instrument to indicate an area
where improper handling could result in personal injury, damage to the instrument, or
malfunction of the instrument or devices connected to it.
When you encounter this symbol on the instrument, be sure to refer to the information in
this instruction manual that corresponds to the area that the symbol marks.
<Term>
Ignoring the precautions that this term indicates could lead to death or serious injury.
<Term>
Ignoring the precautions that this term indicates could lead to personal injury or damage
to the instrument.

II
GENERAL SAFETY SUMMARY
Read the warnings and information below thoroughly to avoid death, personal injury, and damage and
deterioration of the instrument.
■Warnings Concerning the Case and Panels
Do not remove the instrument's case or panels for any reason. Touching the internal components
of the instrument could lead to fire or electric shock.
Also, do not allow foreign materials, such as liquids, combustible matter, and metal, to enter the
instrument. Turning the instrument on when such materials are inside it could lead to fire, electric
shock, damage to the instrument, or some other accident.
■Installation Environment
•Operating Temperature Range
Use this instrument in a 0 to 40 °C environment. Using the instrument with its vents blocked or
in a high temperature environment could lead to fire.
Drastic changes in temperature, such as might be caused by moving the instrument between
two rooms with different temperatures, can damage the instrument by causing condensation to
form within it. If there is a possibility that the instrument has condensation within it, wait for
approximately 30 minutes before turning on the power.
•Operating Humidity Range
Use this instrument in an environment whose relative humidity is 85 % or less where there is
no threat of condensation forming.
Also, do not operate this instrument with wet hands. Doing so could lead to electric shock or
fire.
•Do Not Operate in an Explosive Atmosphere
Using this instrument in an environment where flammable gasses, explosive gasses, or steam
is emitted or stored could lead to an explosion or fire. Do not use the instrument in such an
environment.
•Do Not Insert Foreign Materials
If foreign materials, such as metal, flammable objects, or liquid are allowed into the instrument
(through the vents for example), fire, electric shock, damage to the instrument, or some other
accident may result.
■If You Notice Something Wrong during Operation
If you notice smoke, fire, a strange smell, or something else that is wrong with the instrument
while you are operating it, stop operation immediately. Failing to do so could lead to fire.Turn off
the power switch, and remove the power cord from the outlet. After making sure that fire has not
spread anywhere, contact your local LEADER agent.

III
GENERAL SAFETY SUMMARY
■Warnings Concerning the Power Source
Do not use a power source with a voltage other than the rated power source voltage for the
instrument. Doing so could lead to fire.
Confirm the voltage of the power source before you connect the power cord to it.
Only use a power source whose frequency is 50/60 Hz.
Use a power cord that is appropriate for the voltage of the power source. Also, use a power cord
that meets the safety standards of the country that you are using it in.
Using a power cord that does not meet the standards could lead to fire. If the power cord is
damaged, stop using it, and contact your local LEADER agent. Using a damaged power cord
could lead to electrical shock or fire.
When removing the plug from the power outlet, do not pull on the cord. Pull from the plug.
■Warnings Concerning Grounding
The instrument has a ground terminal to protect the user and the instrument from electric shock.
Ensure that the instrument is properly grounded for safe operation.
■Warnings Concerning the Panel
Do not apply a strong shock to the panel, cut it with sharp metal, or damage it in any similar
manner.
■Cautions Concerning the Input and Output Connectors
To avoid damaging the instrument, only apply signals to the input connectors that conform to the
specifications in this instruction manual. Do not short or apply external voltage to the output
connectors. Doing so could damage the instrument.
■Cautions Concerning the Ethernet Port
When you are connecting the instrument to the communication provider's equipment, connect to
the Ethernet port through a hub that is authorized for use in the country that you are using the
instrument in.

IV
GENERAL SAFETY SUMMARY
■Calibration and Repairs
This instrument has been carefully examined at the factory to ensure that its performance is in
accordance with the standards. However, because of factors such as parts wearing out over time,
the performance of the instrument may degrade. To ensure stable performance, we recommend
that you have the instrument calibrated regularly. Also, if the instrument malfunctions, repairs are
necessary. For repairs and calibration, contact your local LEADER agent.
■Routine Maintenance
When you clean the instrument, remove the power plug from the outlet.
Do not use thinner or benzene when you clean the instrument's case, panels, or knobs. Doing so
could lead to paint chipping and the corrosion of plastic components. To clean the case, panels,
and knobs, use a soft cloth with mild detergent, and wipe gently. While cleaning, make sure that
foreign materials, such as water and detergent, do not enter the instrument. If liquid or a metal
object enters into the instrument, fire or electric shock may result.
■About the European WEEE Directive
This instrument and its accessories are subject to the European WEEE Directive.
Follow the applicable regulations of your country or region when discarding this instrument or its
accessories. Follow the EU Battery Directive when discarding the batteries that you removed from
this instrument.
(WEEE stands for Waste Electrical and Electronic Equipment.)
Follow the warnings and precautions that have been listed in this section to use the instrument
correctly and safely. Precautions are also contained in various other sections of this instruction manual.
To use the instrument correctly, be sure to follow those precautions as well.
If you have any questions or comments about this instruction manual, please contact your local
LEADER agent.

1. INTRODUCTION
1
1. INTRODUCTION
Thank you for purchasing this LEADER instrument. To use this instrument safely, read this
instruction manual thoroughly, and make sure that you know how to use the instrument
properly.
If some point about the operation of this instrument is still unclear after you have read this
instruction manual, refer to the contact information on the back cover of the manual to contact
LEADER, or contact your local LEADER agent.
After you have finished reading this manual, keep it in a convenient place so that you can refer
to it when necessary.
1.1 Scope of Warranty
This LEADER instrument has been manufactured under the strictest quality control
guidelines.
LEADER shall not be obligated to furnish the following free services during the warranty
period.
1. Repair of malfunction or damages resulting from fire, natural calamity, or improper
voltage applied by the user.
2. Repair of an instrument that has been improperly repaired, adjusted, or modified by
personnel other than a factory-trained LEADER representative.
3. Repair of malfunctions or damages resulting from improper use.
4. Repair of malfunctions caused by devices other than this instrument.
5. Repair of malfunctions or damages without the presentation of a proof of purchase or
receipt bill for the instrument.
1.2 Operating Precautions
1.2.1 Maximum Allowable Input Voltage
The maximum signal voltage that can be applied to the input connectors is indicated below.
Do not apply excessive voltage to the connectors. Doing so may damage the device or
lead to injury.
Table 1-1 Maximum allowable input voltage
Input Connector Maximum Allowable Input Voltage
LV 7770 REMOTE 0 to +5 V
LV 7770 EXT REF ±5 V (DC + peak AC)
LV 7770
LV 7770 OP70
DIGITAL AUDIO IN ±5 V (DC + peak AC)
LV 5770SER03A TRI SYNC/COMPOSITE INPUT ±5 V (DC + peak AC)
LV 5770SER08
LV 5770SER09
SDI INPUT ±2 V (DC + peak AC)
LV 5770SER09A SDI INPUT 0 to +12V (DC)
±1V (AC)
LV 5770SER42 ANALOG AUDIO +24 dBu

1. INTRODUCTION
2
1.2.2 About Standby Mode
Even if you press the power switch to turn off this instrument, the instrument remains in
standby mode as long as the power cord is connected to the outlet. In standby mode, some
of the internal circuits operate and may generate heat. Unless necessary, keep the power
cord disconnected from the outlet.
1.2.3 Mechanical Shock
This instrument contains sensitive components, so it may be damaged if it is dropped or
otherwise exposed to a strong shock.
1.2.4 Electrostatic Damage
Electronic components can be damaged by static discharge. Static electricity can build up
in the core wire of a coaxial cable. Before connecting a coaxial cable to the instrument,
short the core wire of the cable with the external conductor.
1.2.5 Rack Mounting
This instrument can be mounted on an EIA 19-inch rack.
If you are mounting this instrument on a rack, be sure to provide additional support for the
instrument. If you only use the flanges on the front panel to mount the instrument, the
instrument case may be deformed, or the instrument may fall.
Before mounting, remove the four feet from the bottom of the instrument.
You can remove the feet by pressing the tab and pulling the feet out.
1.2.6 Warming Up
To ensure more accurate measurements, turn on the instrument approximately 30 minutes
before you intend to use it to allow its internal temperature to stabilize.

1. INTRODUCTION
3
1.2.7 Backup Battery
This instrument has a last-memory feature. When you turn the power on, the instrument
starts with the panel settings that were in use the last time that it was turned off. If the
backup battery is out of power, the message “The last memory feature is disabled.” will be
displayed, and this feature will no longer work.
To continually use the last-memory feature, we recommend that you replace the backup
battery with a new one every five years after you purchase the instrument. You cannot
replace the backup battery yourself. Contact your local LEADER agent.
1.3 About Trademarks and Licenses
•The company and product names in this document are trademarks or registered
trademarks of their respective holders.
•The MD5 algorithm, which is used by this instrument, was developed by RSA Security Inc.
in the United States. This algorithm is available on a license-free and patent-free basis.
1.4 Differences between the LV 5770SER09A and LV 5770SER09
The LV 5770SER09A has the following additional features that are not available on the LV
5770SER09.
• Equivalent cable length measurement
• DC offset measurement
This manual explains the LV 5770SER09A. Note that if you are using the LV 5770SER09,
some of the information in this manual will not apply.

1. INTRODUCTION
4
1.5 About Terminology Used in this Manual
●Single Input Mode
This refers to the mode in which the SIM key is off. Press the A and B keys to switch
between measuring the signal that is being applied to SDI INPUT A and the signal that is
being applied to SDI INPUT B, respectively.
●Simul Mode
This refers to the mode in which the SIM key is on. The signals that are being applied to
SDI INPUT A and SDI INPUT B are measured simultaneously.
●1-Screen Display
This refers to the mode in which the MULTI key is off. Only the area that you select by
pressing keys 1 to 4 is displayed.
●Multi-Screen Display (2-screen multi display and 4-screen multi display)
This refers to the mode in which the MULTI key is on. You can set the number of screens
that are displayed (two or four) in the system settings.
On the 2-screen multi display, you can display areas 1 and 2 or areas 3 and 4.
On the 4-screen multi display, you can display areas 1 to 4.
●About the Input Format
With some exceptions, the input formats are written in this manual as shown below.
Table 1-2 Input format
Name Description
HD HD-SDI
SD SD-SDI
HD dual link HD-SDI dual link
3G-A 3G-SDI level A
3G-B 3G-SDI level B
3G-B (2map) 3G-SDI level B 2mapping
3G General term representing 3G-A, 3G-B, and 3G-B (2map)
●Underline (_)
Underlined options indicate the default values.

2. SPECIFICATIONS
5
2. SPECIFICATIONS
2.1 General
The LV 7770 is a rasterizer that supports 3G-SDI, HD dual link, HD-SDI, and SD-SDI signals.
It has a variety of features, including simultaneous monitoring of two SDI input signals, frame
capturing, lip sync measurement, and ANC data analysis.
A variety of optional units are available, and installing combinations of these units in the
instrument enables the various features.
LV 5770SER03A (TRI SYNC/COMPOSITE): Tri-level sync and composite input
LV 5770SER08 (SDI INPUT): SDI input (*1)
LV 5770SER09A (SDI INPUT/EYE): SDI input with eye pattern display
feature (*1)
LV 5770SER42 (ANALOG AUDIO): Analog audio I/O (*2)
LV 7770 OP70 (16CH DIGITAL AUDIO ADAPTER):16CH DIGITAL AUDIO I/O (*2)
*1 The LV 5770SER08 and LV 5770SER09A cannot be installed in the instrument at the same time.
*2 The LV 5770SER42 and LV 7770 OP70 cannot be installed in the instrument at the same time.
* In addition to the above, a Dolby option can be installed that enables the measurement of Dolby E and
Dolby Digital signals.
2.2 Features
●3G-SDI Compatible 2-Channel Simultaneous Display (LV 5770SER08 and LV
5770SER09A)
The LV 7770 is equipped with a pair of SDI input connectors that support 3G-SDI, HD
dual link, HD-SDI, and SD-SDI signals. The two input signals can be displayed
simultaneously. Even when one of the input signals is not being displayed, the LV 7770
still monitors the undisplayed signal for errors. In addition, the LV 7770 is equipped with
SDI output connectors that can generate serial reclocked SDI signals from the input SDI
signals. The A/B output connector generates the reclocked signal of the SDI signal
applied to channel A or channel B. The output that is generated from this connector is
switched between the two channels whenever an input key (A or B) is pressed.
●Rich Assortment of Display Features
Not only does the LV 7770 have essential displays for video signal quality monitoring,
such as a video signal waveform display and a vector display, it also has a rich
assortment of other display features such as a picture display, 5-bar display, and status
display. (LV 5770SER03A, LV 5770SER08, and LV 5770SER09A)
The audio display includes a loudness display feature that is based on ITU standards. In
addition, a loudness chart, level meters of each channel, and peak values can be
displayed simultaneously. Simultaneous loudness measurement of two audio sources is
also possible.

2. SPECIFICATIONS
6
●Wide Variety of Display Formats (LV 5770SER08 and LV 5770SER09A)
In the video signal waveform display, vector display, and picture display, the LV 7770 can
display up to two input SDI signals on top of each other or side by side. This makes it
suitable for adjusting the gain and black balance values of two video signals. In the video
signal waveform and vector displays, the LV 7770 can make different input channels
easier to see by displaying them using different colors.
●Extremely Flexible Display Layouts
The 1-screen display feature can be used to show each of the different displays on a
single screen, or the 4-screen multi display feature can be used to divide the screen into
four areas with a different display shown in each area. The video signal waveform display,
picture display, audio level meter display, and histogram display can be shown as a
thumbnail display on the 1-screen display.
●Capture Feature
A screen capture feature that captures the screen as still images, a frame capture
feature that captures single frames of SDI signals, and an error capture feature that
automatically detects and captures error frames are available.
Not only can captured data be displayed by the LV 7770, but it can also be compared
with an input signal or saved to a USB memory device. It is easy to view the saved data
on a PC.
●XGA Resolution DVI-I Output
The measurement display has XGA resolution (an effective resolution of 1024 × 768) and
can be output from the DVI-I connector, which supports single-link TMDS. The aspect
ratio can be switched between 4:3, 16:9, and 16:10. (The display must have a resolution
conversion feature.)
●Picture Monitor Output (LV 5770SER08 and LV 5770SER09A)
The input SDI signal can be generated as an 8-bit signal. Regardless of the SDI input
signal, the output format can be set to YCBCR4:2:2, YCBCR4:4:4, or RGB 4:4:4.
●3D Assist Display (LV 5770SER08 and LV 5770SER09A)
3D video signals can be evaluated by applying the video signal for the left eye to channel
A and the video signal for the right eye to channel B. The available picture display
formats are anaglyph, convergence, overlay, wipe, checker, and flicker.
●CINELITE (LV 5770SER08 and LV 5770SER09A)
You can use the cursor to select any 3 points and display their luminance information
using f-Stop numbers, percentage values, or level values. You can choose to analyze a
single pixel or a small area by setting the size of the measured area to 1 pixel or to the
average value for 9 or 81 pixels.
Furthermore, the CINELITE Advanced feature makes it possible to synchronize
measurements with the video signal waveform display and vector display.

2. SPECIFICATIONS
7
●CINEZONE (LV 5770SER08 and LV 5770SER09A)
You can display the luminance levels in the picture with different colors. This allows you
to quickly determine the overall luminance distribution in the picture, and it makes it easy
to spot overexposure, underexposure, and different luminance levels in dark areas.
●SDI Signal Data Analysis Feature (LV 5770SER08 and LV 5770SER09A)
On the status display, SDI signal transmission errors and various errors related to the
embedded audio signal and ancillary data can be detected. In addition, the LV 7770 has
event log, data dump, and external sync signal and SDI signal phase difference display
features for analyzing SDI signals. Ancillary data is displayed along with the embedded
line numbers and numbers of the corresponding standards in a list. This makes it
possible to display detailed analyses.
●Timecode Display (LV 5770SER08 and LV 5770SER09A)
The LTC and VITC that are embedded in an SDI signal and the D-VITC that is embedded
in an SD-SDI signal can be displayed. The timecode can also be used for time stamps in
the event log.
●Superimposing of English Closed Captions (LV 5770SER08 and LV 5770SER09A)
The English closed captions (EIA-608, EIA-708, or VBI) that are embedded in an SDI
signal can be superimposed over the image on the picture screen.
●External Control Connectors
The LV 7770 has two external control connectors: an Ethernet port and a remote control
connector.
By connecting the Ethernet interface to a PC, you can control the LV 7770 remotely over
TELNET, transfer files over FTP, control the LV 7770 remotely and detect errors over
SNMP, and control the LV 7770 over HTTP. You can also connect to the separately-sold
LV 7770-01 (REMOTECONTROLLER). (You cannot use TELNET and the LV 7770-01 at
the same time.)
The remote control connector can be used to load presets, switch the input signal, and
transmit errors.
●Eye Pattern Display (LV 5770SER09A)
When the eye pattern display option is installed in the LV 7770, the LV 7770 can display
the eye pattern waveforms and jitter waveforms of 3G-SDI, HD dual link, HD-SDI, and
SD-SDI signals. (Channel A or B, whichever is selected, is displayed.)
An eye pattern's amplitude, rise time, fall time, DC offset, timing jitter, current jitter, rising
edge overshoot, and falling edge overshoot can be measured automatically.

2. SPECIFICATIONS
8
●Digital Audio I/O
An external digital audio signal can be displayed in addition to the embedded audio. The
eight I/O channels of the four connectors can be switched between input and output.
Therefore, the LV 7770 can also be used to extract and transmit the embedded audio's
digital audio. Also, when the 16-channel digital audio I/O option (LV 7770 OP70) is
installed in the LV 7770, the number of I/O connectors can be expanded to 8 connectors
with 16 channels.
(To measure embedded audio, the LV 7770 must have the LV 5770SER08 or LV
5770SER09A installed.)
●Analog Audio I/O (LV 5770SER42)
The addition of the analog audio I/O option enables the LV 7770 to display analog audio.
In addition, the option is equipped with output pins, which can be used to generate the
analog audio that corresponds to the audio signal displayed on the screen. The
functionality of the option can be switched between input and output through settings.
●Dolby Option
The addition of the Dolby option enables the LV 7770 to decode and display the Dolby E
or Dolby Digital signals that are compressed in embedded audio or digital audio signals.
●Analog Composite Input (LV 5770SER03A)
The addition of the analog composite input option enables the LV 7770 to display the
video signal waveforms of NTSC, PAL, and HD tri-level sync signals, display vectors
(NTSC and PAL only), measure SCH (NTSC and PAL only), and measure phase
differences against external signals.
(For phase difference measurement, an external sync signal that is synchronized and of
the same format as the input signal is necessary.)
●Remote Controller (LV 7770-01; sold separately)
Because the remote controller panel is the same as the LV 7770 panel, you can think of it
as an extension of the LV 7770 panel when you use it to remotely control the LV 7770.
(You cannot use TELNET while you are using the LV 7770-01.)

2. SPECIFICATIONS
9
2.3 Specifications
2.3.1 SDI Video Signal Formats and Standards (LV 5770SER08 and LV 5770SER09A)
Bit Rate
3G-SDI 2.970 Gbps or 2.970/1.001 Gbps
HD-SDI 1.485 Gbps or 1.485/1.001 Gbps
SD-SDI 270 Mbps
Table 2-1 SD-SDI video signal formats and standards
Color System Quantization Scanning Frame (Field) Rates Compliant Standard
YCBCR4:2:2 10 bits 525i 59.94 SMPTE ST 259
625i 50
Table 2-2 HD-SDI video signal formats and standards
Color System Quantization Scanning Frame (Field) Rates Compliant Standard
YCBCR4:2:2 10 bits 1080i 60/59.94/50 SMPTE ST 274
SMPTE ST 292
1080p 30/29.97/25/24/23.98
1080PsF 30/29.97/25/24/23.98
720p 60/59.94/50/30/29.97/25/24/23.98 SMPTE ST 296
SMPTE ST 292
Table 2-3 HD dual link video signal formats and standards
Color System Quantization Scanning Frame (Field) Rates Compliant Standard
YCBCR4:2:2 10 bits 1080p 60/59.94/50 SMPTE ST 372
(1920 × 1080)
12 bits 1080p 30/29.97/25/24/23.98
1080PsF 30/29.97/25/24/23.98
1080i 60/59.94/50
YCBCR4:4:4 10 bits 1080p 30/29.97/25/24/23.98
1080PsF 30/29.97/25/24/23.98
1080i 60/59.94/50
12 bits 1080p 30/29.97/25/24/23.98
1080PsF 30/29.97/25/24/23.98
1080i 60/59.94/50
RGB 4:4:4 10 bits 1080p 30/29.97/25/24/23.98
1080PsF 30/29.97/25/24/23.98
1080i 60/59.94/50
12 bits 1080p 30/29.97/25/24/23.98
1080PsF 30/29.97/25/24/23.98
1080i 60/59.94/50
1080p 24/23.98 (2048 × 1080)
1080PsF 24/23.98
* When these signals are displayed, phase differences of up to 100 clocks (approx. 1.4 μs) between
links A and B are automatically corrected.
1080p/60, 1080p/59.94, and 1080p/50 signals can not be used in external sync mode.

2. SPECIFICATIONS
10
Table 2-4 3G-SDI level A video signal formats and standards
Color System Quantization Scanning Frame (Field) Rates Compliant Standard
YCBCR4:2:2 10 bits 1080p 60/59.94/50 SMPTE ST 424
SMPTE ST 425
12 bits 1080p 30/29.97/25/24/23.98
1080PsF 30/29.97/25/24/23.98
1080i 60/59.94/50
YCBCR4:4:4 10 bits 1080p 30/29.97/25/24/23.98
1080PsF 30/29.97/25/24/23.98
1080i 60/59.94/50
720p 60/59.94/50/30/29.97/25/24/23.98
12 bits 1080p 30/29.97/25/24/23.98
1080PsF 30/29.97/25/24/23.98
1080i 60/59.94/50
RGB 4:4:4 10 bits 1080p 30/29.97/25/24/23.98
1080PsF 30/29.97/25/24/23.98
1080i 60/59.94/50
720p 60/59.94/50/30/29.97/25/24/23.98
12 bits 1080p 30/29.97/25/24/23.98
1080PsF 30/29.97/25/24/23.98
1080i 60/59.94/50
1080p 24/23.98 (2048×1080)
1080PsF 24/23.98
* 720p/30, 720p/29.97, 720p/25, and 720p/24 signals can not be used in external sync mode.
In addition, 2H display on the video signal waveform display is not possible for 1080p/60,
1080p/59.94, and 1080p/50 signals.

2. SPECIFICATIONS
11
Table 2-5 3G-SDI level B video signal formats and standards
Color System Quantization Scanning Frame (Field) Rates Compliant Standard
YCBCR4:2:2 10 bits 1080p 60/59.94/50 SMPTE ST 424
SMPTE ST 425
12 bits 1080p 30/29.97/25/24/23.98
1080PsF 30/29.97/25/24/23.98
1080i 60/59.94/50
YCBCR4:4:4 10 bits 1080p 30/29.97/25/24/23.98
1080PsF 30/29.97/25/24/23.98
1080i 60/59.94/50
12 bits 1080p 30/29.97/25/24/23.98
1080PsF 30/29.97/25/24/23.98
1080i 60/59.94/50
RGB 4:4:4 10 bits 1080p 30/29.97/25/24/23.98
1080PsF 30/29.97/25/24/23.98
1080i 60/59.94/50
12 bits 1080p 30/29.97/25/24/23.98
1080PsF 30/29.97/25/24/23.98
1080i 60/59.94/50
1080p 24/23.98 (2048×1080)
1080PsF 24/23.98
* 2H display on the video signal waveform display is not possible for 1080p/60, 1080p/59.94, and
1080p/50 signals.
Table 2-6 3G-SDI level B (2map) video signal formats and standards
Color System Quantization Scanning Frame (Field) Rates Compliant Standard
YCBCR4:2:2 10 bits 1080i 60/59.94/50 SMPTE ST 424
SMPTE ST 425
1080p 30/29.97/25/24/23.98
1080PsF 30/29.97/25/24/23.98
720p 60/59.94/50/30/29.97/25/24/23.98
* 720p/30, 720p/29.97, 720p/25, 720p/24, and 720p/23.98 signals can not be used in external sync
mode.
Ancillary Data Standard SMPTE ST 291
Format Setting Automatic and manual
Automatic
3G-SDI and HD Dual Link The LV 7770 detects the format information within the
payload ID (SMPTE ST 352) and automatically sets the
format.
HD-SDI and SD-SDI The LV 7770 determines the format from the input
signal's synchronization information and automatically
sets the format.
Manual The video signal format is set manually.
Other manuals for LV 7770
1
This manual suits for next models
5
Table of contents
Other Leader Measuring Instrument manuals

Leader
Leader LT 4446 User manual

Leader
Leader LF5 User manual

Leader
Leader LV5300 User manual

Leader
Leader LV 7800 User manual

Leader
Leader LV5300 Installation guide

Leader
Leader LV5300 User manual

Leader
Leader Search User manual

Leader
Leader LE 8682 User manual

Leader
Leader LV 7380 User manual

Leader
Leader D11.06.010 User manual