manuals.online logo
Brands
  1. Home
  2. •
  3. Brands
  4. •
  5. Leica
  6. •
  7. Laboratory Equipment
  8. •
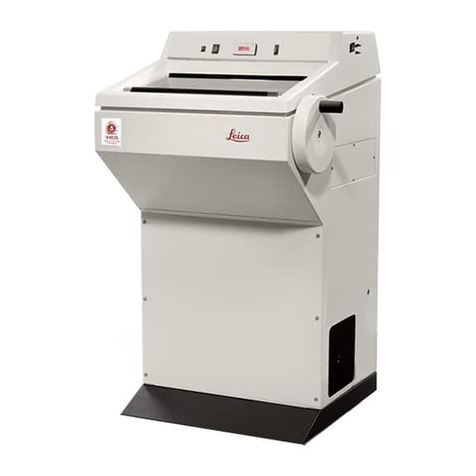
  9. Leica CM3050 S User manual

Leica CM3050 S User manual

Service Manual
Leica CM3050 S
Cryostat
Revision Record
VERSION VERSION NEW PAGES AMENDMENT DETAIL
DATE NUMBER
December 2000 1.00 First Version
Produced by:
Leica Microsystems Nussloch GmbH
Postfach 1120
Heidelberger Str. 17 19
D 69222 Nussloch
Phone : (06224) 143 0
Facsimile : (06224) 143 199
©Leica Microsystems Nussloch GmbH
Service Documentation
Leica CM3050 S
Cryostat
Version 1.0
Service Manual / Leica CM3050 S Page 4Version 1.0 12/00
© Leica Microsystems
Inhaltsverzeichnis
Kapitel 1 Einleitung
Kapitel 2 Mec anik
Kapitel 3 Elektronik
Kapitel 4 Kü ltec nik
Kapitel 5 Ersatzteile
Kapitel 6 Sonstiges
Table of contents
C apter 1 Introduction
C apter 2 Mec anics
C apter 3 Electronic
C apter 4 Cooling System
C apter 5 Spare Parts
C apter 6 Ot er
Chapter 1
Service Manual / Leica CM3050 S Page 1Version 1.0 12/00
© Leica Microsystems
Introduction
Kapitel 1
Einleitung
Version 1.0
Chapter 1
Introduction
Version 1.0
Chapter 1
Service Manual / Leica CM3050 S Page 2Version 1.0 12/00
© Leica Microsystems
Introduction
Inhaltsverzeichnis
1.1 Allgemeine nformationen ......................4
1.1.1 Dokumentation..............................4
1.1.2 Bestimmungsgemäße
Verwendung ..................................5
1.1.3 Bestellen von Ersatzteilen ..........6
1.1.4 Garantie und Service ...................7
1.2. Sicherheitshinweise ................................8
1.2.1 Gefahr .............................................8
1.2.2 Qualifiziertes Personal ................9
1.2.3 Symbole und ihre Bedeutung .....9
1.2.4 Haftung .........................................10
1.2.5 Gefahrenhinweise ......................11
1.2.6 Geräte - Typ .................................11
1.2.7 Transport und Aufstellung.........11
1.3 Gerätespeziefische nformationen......12
1.3.1 Allgemeine
Sicherheitshinweise ..................12
1.3.2 Eingebaute
Sicherheitssysteme....................12
1.3.3 Handradverriegelung.................13
1.3.4 Zentrieren des Handradgriffs ...14
1.3.5 Not-Aus-Funktion .......................14
1.3.6 Fingerschutz ................................15
1.3.7 Transport ......................................15
1.3.8 Standortbedingungen ................15
1.3.9 Elektrischer Anschluß ...............16
1.3.10 Umgang mit Messern ................16
1.3.11 Fingerschutz/
Handradverriegelung.................16
1.3.12 Motorisches Schneiden ............17
1.3.13 Abtauung / Gefrorenes
Probematerial..............................17
1.3.14 Kalte Geräteteile .........................17
1.3.15 nfektiöses/
radioaktives Material.................18
1.3.16 Desinfektion und Reinigung......18
1.3.17 Ausbau/Einbau des Mikrotoms 19
1.3.18 Fehlermeldung
‘Trockne Mikrotom’ ....................19
Table of contents
1.1 General nformation .................................4
1.1.1 Dokumentation..............................4
1.1.2 Specified use and application....5
1.1.3 Ordering Spare Parts ...................6
1.1.4 Warranty and Service..................7
1.2 Saftey instructions ...................................8
1.2.1 Danger ............................................8
1.2.2 Qualified Personnel......................9
1.2.3 Symbols used in the text
and their meanings ......................9
1.2.4 Liability .........................................10
1.2.5 nstructions..................................11
1.2.6 nstrument type...........................11
1.2.7 Transport and installation .........11
1.3 nstrument-specific information ..........12
1.3.1 nformation on instrument
design and safe handling ..........12
1.3.2 ntegrated safety devices .........12
1.3.3 Locking the handwheel .............13
1.3.4 Centering the handwheel grip..14
1.3.5 Emergency stop function ..........14
1.3.6 Knife guard ..................................15
1.3.7 Transport ......................................15
1.3.8 Site requirements .......................15
1.3.9 Electrical connections...............16
1.3.10 Handling microtome
knives/blades. .............................16
1.3.11 Knife guard/handwheel lock ....16
1.3.12 Motorized sectioning .................17
1.3.13 Defrosting/Handling frozen
tissue ............................................17
1.3.14 Frozen parts of the instrument .....
and frozen accessories .............17
1.3.15 nfectious/
radioactive material ...................18
1.3.16 Disinfection and cleaning .........18
1.3.17 Removing/reinstalling the .............
microtome ....................................19
1.3.18 Display message
‘Dry microtome’...........................19
Chapter 1
Service Manual / Leica CM3050 S Page 3Version 1.0 12/00
© Leica Microsystems
Introduction
Inhaltsverzeichnis
1.3.19 Wartung........................................20
1.3.20 Standortbedingungen ................20
1.3.21 Allgemeines.................................20
1.3.22 Elektrische Anschlüsse .............20
1.3.23 Auspacken und Aufstellen........21
1.3.24 Wiederverpacken.......................21
1.3.25 Standardlieferumfang................21
1.3.26 Montage des Handrades ..........23
1.3.27 Einsetzen des Zubehörs ............23
1.3.28 Der Fußschalter ..........................24
1.3.29 Vor dem Einschalten ..................25
1.3.30 Gerätegesamtübersicht ............28
1.3.31 Technische Daten.......................32
Table of contents
1.3.19 Maintenance ...............................20
1.3.20 Site requirements .......................20
1.3.21 General site requirements ........20
1.3.22 Electrical connections...............20
1.3.23 Unpacking and installation .......21
1.3.24 Repacking ....................................21
1.3.25 Standard delivery .......................21
1.3.26 nstalling the handwheel...........23
1.3.27 nserting the accessories .........23
1.1.28 The footswitch ............................24
1.3.29 Prior to switching on the ...............
instrument ....................................25
1.3.30 Overview ......................................26
1.3.31 Technical Data ............................30
Chapter 1
Service Manual / Leica CM3050 S Page 4Version 1.0 12/00
© Leica Microsystems
Introduction
1.1 Allgemeine Informationen
1.1.1 Dokumentation
Die in der vorliegenden Dokumentation enthaltenen
nformationen, Zahlenangaben, Hinweise und
Werturteile stellen den uns nach gründlicher Re-
cherche bekannt gewordenen derzeitigen Stand
der Wissenschaft und Technik dar. Wir sind nicht
verpflichtet, das vorliegende Handbuch in kontinu-
ierlichen Zeitabständen neuen technischen Ent-
wicklungen anzupassen und Nachlieferungen, Up-
dates usw. dieses Handbuchs an unsere Kunden
nachzureichen.
Für fehlerhafte Angaben, Skizzen, technische Abbil-
dungen usw., die in diesem Handbuch enthalten
sind, ist unsere Haftung im Rahmen der Zulässigkeit
nach den jeweils einschlägigen nationalen Rechts-
ordnungen ausgeschlossen. nsbesondere besteht
keinerlei Haftung für Vermögensschäden oder son-
stige Folgeschäden im Zusammenhang mit der Be-
folgung von Angaben oder sonstigen nformationen
in diesem Handbuch.
Angaben, Skizzen, Abbildungen und sonstige nfor-
mationen inhaltlicher wie technischer Art in der
vorliegenden Bedienungsanleitung gelten nicht als
zugesicherte Eigenschaften unserer Produkte. n-
soweit sind allein die vertraglichen Bestimmungen
zwischen uns und unseren Kunden maßgeblich.
Leica behält sich das Recht vor, Änderungen der
technischen Spezifikation sowie des Produktions-
prozesses ohne vorherige Ankündigung vorzuneh-
men. Nur auf diese Weise ist ein kontinuierlicher
technischer wie produktionstechnischer Verbesse-
rungsprozeß möglich.
Die vorliegende Dokumentation ist urheberrechtlich
geschützt. Alle Urheberrechte liegen bei der Leica
Microsystems Nussloch GmbH.
Vervielfältigungen von Text und Abbildungen (auch
von Teilen hiervon) durch Druck, Fotokopie, Micro-
film, Web Cam oder andere Verfahren – einschließ-
lich sämtlicher elektronischer Systeme und Medien
– ist nur mit ausdrücklicher vorheriger schriftlicher
Genehmigung von Leica Microsystems Nussloch
GmbH gestattet.
Die Seriennummer sowie das Herstellungsjahr ent-
nehmen Sie bitte dem Typenschild an der Rückseite
des Geräts.
ãÿ
Leica Microsystems Nussloch GmbH
1.1 General Information
1.1.1 Dokumentation
The information, numerical data, notes and value
judgments contained in this manual represent the
current state of scientific knowledge and state-of-
the-art technology as we understand it following
thorough investigation in this field. We are under no
obligation to update the present manual periodically
and on an ongoing basis according to the latest
technical developments, nor to provide our
customers with additional copies, updates etc. of
this manual.
For erroneous statements, drawings, technical
illustrations etc. contained in this manual we
exclude liability as far as permissible according to
the national legal system applicable in each
individual case. n particular, no liability whatsoever
is accepted for any financial loss or consequential
damage caused by or related to compliance with
statements or other information in this manual.
Statements, drawings, illustrations and other
information as regards contents or technical details
of the present manual are not to be considered as
warranted characteristics of our products. These
are determined only by the contract provisions
agreed between ourselves and our customers.
Leica reserves the right to change technical
specifications as well as manufacturing processes
without prior notice. Only in this way is it possible to
continuously improve the technology and
manufacturing techniques used in our products.
This document is protected under copyright laws.
Any copyrights of this document are retained by
Leica Microsystems Nussloch GmbH.
Any reproduction of text and illustrations (or of any
parts thereof) by means of print, photocopy,
microfiche, web cam or other methods – including
any electronic systems and media – requires
express prior permission in writing by Leica
Microsystems Nussloch GmbH.
For the instrument serial number and year of
manufacture, please refer to the name plate at the
back of the instrument.
ã
Leica Microsystems Nussloch GmbH
Chapter 1
Service Manual / Leica CM3050 S Page 5Version 1.0 12/00
© Leica Microsystems
Introduction
1.1.2 pecified use and application
The Leica CM3050 S is a powerful cryostat for
routine as well as research applications in biology,
medicine and industry.
The instrument has been designed for rapid freezing
and sectioning of tissue samples.
The instrument has not been designed for
unattended storage of tissue material.
The instrument may only be operated within the
scope of its designated use as described above and
as per the instructions given in this manual.
Any other use of the instrument is considered
improper.
1.1.2 BestimmungsgemäßeVerwendung
Der Leica CM3050 S ist ein leistungsfähiger Kryostat
für Routine- und Forschungsanwendungen in der
Biologie, Medizin und ndustrie.
Das Gerät dient dazu, Probenmaterial schnell zu ge-
frieren und zu schneiden.
Das Gerät ist nicht zur unbeaufsichtigten Lagerung
von Probenmaterial ausgelegt.
Das Gerät darf nur seiner oben beschriebenen Be-
stimmung gemäß und nach den Vorgaben in der
vorliegenden Gebrauchsanweisung betrieben wer-
den.
Jeder andere Gebrauch des Gerätes stellt eine un-
zulässige Betriebsweise dar.
Chapter 1
Service Manual / Leica CM3050 S Page 6Version 1.0 12/00
© Leica Microsystems
Introduction
1.1.3 Ordering pare Parts
To order replacement parts or modules, specify the
following information for each part ordered:
1. Product model and serial number.
2. Leica Part number.
3. Part description.
4. Quantity required.
pare parts can be obtained from your local Leica
office or from:
Leica Microsystems Nussloch GmbH
Postfach 1120
Heidelberger Str. 17-19
D-69222 Nussloch
Germany
Technical ervice - Hotline:
There are two service hotlines for customer service
and requests.
nformation can be given regarding spare parts,
possibilities for repair, service documentation,
adjustment and alignment requests etc.
(: ++ 6224 143 219 for electronical requests
(: ++ 6224 143 219 for mechanical requests
Fax:++ 6224 143 219 for electrical and
mechanical requests
The agencies are obliged to send complete failure
statistics (monthly) to Nussloch for the first year
after instruments have been launched onto the
market. The results and necessary amendments can
be included immediately in the production.
1.1.3 Bestellen von Ersatzteilen
Zum Bestellen von Einzelersatzteilen oder Ersatz-
teilkomponenten, sind für jede(s) bestellte Teil /
Komponente die folgenden Daten anzugeben:
1. Gerätebezeichnung sowie Seriennummer.
2. Leica-Teilenummer
3. Teilebeschreibung
4. Gewünschte Teileanzahl
Ersatzteile können bestellt werden bei Ihrer
Leica-Vertretung vor Ort oder bei:
Leica Microsystems Nussloch GmbH
Postfach 1120
Heidelberger Str. 17-19
D-69222 Nussloch
Germany
Hotline des Technischen ervice:
Zwei Hotline-Nummern für eilige Serviceanfragen
stehen zu hrer Verfügung.
Folgende nformationen können über diese Num-
mern erfragt werden:
Erstzteilinformation, Reparaturmöglichkeiten, Ser-
vice-Manuals, eilige Fragen zur Justierung einzel-
ner Teile, etc.
(: ++ 6224 143 219 Anfragen zu Elektronik
(: ++ 6224 143 219 Anfragen zur Mechanik
Fax: ++ 6224 143 219 Anfragen zu Elektronik,
Kühltechnik, Mechanik
Die Serviceorganisationen sind gegenüber Leica
Microsystems Nussloch GmbH verpflichtet, je-

weils während des ersten Jahrs nach einer Geräte-
neueinführung monatlich vollständige Fehlerstatisti-
ken an die Serviceorganisation in Nussloch weiter-
zuleiten. Dies geschieht, damit notwendige Verbes-
serungen, die sich aus der Auswertung dieser Stati-
stiken ergeben, unmittelbar in die Produktion ein-
fließen können.
Chapter 1
Service Manual / Leica CM3050 S Page 7Version 1.0 12/00
© Leica Microsystems
Introduction
1.1.41.1.4
1.1.41.1.4
1.1.4 Garantie und erviceGarantie und ervice
Garantie und erviceGarantie und ervice
Garantie und ervice
Leica Microsystems Nussloch GmbH steht dafür
ein, daß das gelieferte Produkt einer umfassenden
Qualitätskontrolle nach unseren strengen hausinter-
nen Prüfungsmaßstäben unterzogen wurde, um zu
gewährleisten, daß die technische Spezifikation
eingehalten ist.
Die Gewährleistung richtet sich nach dem nhalt
des abgeschlossenen Vertrages. Ergänzend gelten
die Garantiebedingungen hrer zuständigen Leica-
Vertriebsgesellschaft.
Reparaturen am Gerät sowie der Austausch von
Teilen dürfen nur durch von Leica autorisierte Ser-
vice-Techniker ausgeführt werden. Geschieht dies
nicht, erlöschen Gewährleistungs- und Garantiean-
sprüche.
Bei jedem Eingriff in das Gerät, bei Modifikationen
oder beim Betrieb in Kombination mit Nicht-Leica-
Komponenten, die nicht ausdrücklich von Leica
autorisiert sind, muß die zuständige Leica-Vertre-
tung oder der Hersteller in Nussloch konsultiert
werden.
Ersatz- und Zubehörteile, die nicht von Leica gelie-
fert wurden, gelten in keinem Falle als von Leica ge-
prüft und freigegeben.
Der Einbau oder die Verwendung solcher Produkte
kann daher konstruktiv vorgegebene Eigenschaften
des Geräts negativ verändern.
Für Schäden, die durch die Verwendung von Nicht-
Originalteilen oder Nicht-Originalzubehör entstan-
den sind, ist die Haftung durch Leica aus-
geschlossen.
Gewährleistungs- und Garantieansprüche können
nur geltend gemacht werden, wenn das Gerät sei-
nem bestimmungsgemäßen Gebrauch entspre-
chend und unter Einhaltung der in der vorliegenden
Bedienungsanleitung gegebenen Hinweise betrie-
ben wurde.
Bei unsachgemäßer Handhabung oder Fehlbedie-
nung des Geräts erlöschen Gewährleistungs- und
Garantieansprüche. Für daraus entstandene Schä-
den übernehmen wir keine Haftung.
1.1.4 WW
WW
Warranty and ervicearranty and ervice
arranty and ervicearranty and ervice
arranty and ervice
Leica Microsystems Nussloch GmbH guarantees
that the delivered product has been subjected to a
comprehensive quality control procedure based on
our strict in-house testing standards in order to
ensure that the product complies with its technical
specification.
The warranty conditions depend on the contents of
the individual contract concluded, supplemented
by the warranty conditions of your local Leica sales
agency.
Any repairs and/or exchange of parts of the product
must be carried out by authorized Leica technical
service engineers. Otherwise, any warranty
becomes invalid and warranty claims can no longer
be made.
The local Leica representative or the manufacturer
in Nussloch must be consulted prior to any handling
of or changes to the instrument beyond the scope of
this instruction manual as well as prior to any
modifications or any use of the instrument in
combination with non-Leica components not
expressly authorized by Leica.
Spare parts and accessories not supplied by Leica
can under no circumstances be considered as
inspected and/or approved by Leica.
Therefore, installation or use of any such parts may
impair the technical design features and thus
properties of the instrument.
Leica assumes no liability whatsoever for any
damage caused by the use of non-original spare
parts or non-original accessories.
The warranty is only valid and warranty claims can
only be made as long as the instrument has been
operated according to its designated use and
according to the instructions given in this manual.
mproper use of the product and/or faulty operation
invalidate the warranty and any claims based
thereon, and likewise Leica will not assume liability
for any consequential damage.
Chapter 1
Service Manual / Leica CM3050 S Page 8Version 1.0 12/00
© Leica Microsystems
Introduction
1.2. icherheitshinweise
1.2.1 Gefahr
Beim Betrieb dieses Gerätes stehen zwangsläufig
bestimmte Geräteteile unter gefährlicher Spannung,
die zu schweren Körperverletzungen oder zum Tod
führen kann. Die folgenden Vorsichtsmaßnahmen
müssen unbedingt befolgt werden, um die Gefahr
für das Leben bzw. Veletzungsgefahr zu verringern.
1. Nur qualifiziertem Personal (siehe nächste Sei-
te), das mit diesem Gerät und den mitgelieferten
nformationen vertraut ist, ist die Störungssu-
che, Störungsbeseitigung oder Reparatur dieses
Gerätes gestattet.
2. Die Aufstellung des Gerätes muß in Überein-
stimmung mit den Sicherheitsvorschriften (z.B.
D N, VDE, UL) sowie allen anderen relevanten
staatlichen oder örtlichen Vorschriften erfolgen.
Es muß für eine ordnungsgemäße Erdung, Lei-
terdimensionierung und entsprechenden Kurz-
schlußschutz gesorgt sein, um die Betriebssi-
cherheit zu gewährleisten.
3. Während des normalen Betriebes sind alle Ab-
deckungen anzubringen und geschlossen zu
halten.
4. Vor der Durchführung von Sichtprüfungen und
Wartungsarbeiten sicherstellen, daß die Wech-
selstromversorgung abgeschaltet und verriegelt
ist. Das Gerät steht vor dem Abschalten der
Wechselstromversorgung unter gefährlicher
Spannung.
5. Wenn Messungen bei eingeschalteter Stromver-
sorgung durchgeführt werden müssen, keines-
falls die elektrischen Anschlußstellen berühren.
Die Kunststoffabdeckung am Netzteil muß vor-
handen sein. Allen Schmuck von Handgelenken
und Fingern abnehmen. Sicherstellen, daß die
Prüfmittel in gutem, betriebssicherem Zustand
sind.
6. Bei Arbeiten am eingeschalteten Gerät auf ei-
nem isolierten Untergrund stehen, also sicher-
stellen, daß keine Erdung vorliegt.
7. Diese Liste stellt keine vollständige Aufzählung
aller für den sicheren Betrieb des Gerätes erfor-
derlichen Maßnahmen dar. Sollten Sie weitere
nformationen benötigen oder sollten spezielle
Probleme auftreten, wenden Sie sich bitte an
die örtliche Leica-Niederlassung.
1.2 aftey instructions
1.2.1 Danger
While this instrument is in operation, certain com-
ponents of the unit are inevitably live, carrying a
current which can cause severe injuries or death. t
is essential to use the precautions mentioned be-
low, in order to reduce the risk of death and/or inju-
ry.
1. Only qualified personnel (see following page),
who are familiar with both the instrument and
the instructions supplied together with the in-
strument, may search the instrument for faults
and trouble-shoot and/or repair the instrument.
2. nstallation of the instrument must be carried
out in compliance with the applicable safety re-
gulations (e.g. D N, VDE, UL) as well as with any
other pertinent national or local rules. Adequate
grounding, dimensioning of conductors and cor-
responding short-circuit protection must be pro-
vided, in order to ensure operational safety.
3. During normal operation, all covers have to be
installed and must remain closed.
4. Prior to doing visual inspections and/or mainte-
nance work, make sure that the AC power supp-
ly is cut off.
Danger! - prior to cutting off the AC power supp-
ly, the instrument is live!
5. f certain measurings have to be done with the
current supply on, never touch the electrical
connections! The plastic cover at the power
supply unit must be installed. Remove all jewelry
from your wrists and fingers. Make sure the test
devices are in good, operationally safe working
order.
6. When working on a live instrument, stand on in-
sulated ground, i.e. make sure that there is no
grounding.
7. This list does not necessarily contain all measu-
res that may be neccesary for safe operation of
the instrument. f you need further information
or if specific problems occur, please contact
your local Leica office.
Chapter 1
Service Manual / Leica CM3050 S Page 9Version 1.0 12/00
© Leica Microsystems
Introduction
1.2.2 Qualifiziertes Personal
im Sinne dieser Service-Anleitung sind Personen,
die mit Aufstellung, Montage, nbetriebsetzung und
Betrieb des Produktes vertraut sind und über die ih-
rer Tätigkeit entsprechenden Qualifikationen verfü-
gen. Dies sind z.B. :
• Ausbildung oder Unterweisung bzw. Berechti-
gung, Stromkreise und Geräte/Systeme gemäß
den Standards der Sicherheitstechnik ein- und
auszuschalten, zu erden und zu kennzeichnen.
• Ausbildung oder Unterweisung gemäß den
Standards der Sicherheitstechnik in Pflege und
Gebrauch angemessener Sicherheitstechnik.
1.2.3 ymbole und ihre Bedeutung
Warnhinweise
sind mit einem Warndrei-
eck gekennzeichnet.
Hinweise,
d.h. wichtige Informationen für den An-
wender sind mit einem gekennzeichnet.
Ziffern in Klammern beziehen sich erläu-
ternd auf Positionsnummern in Abbildun-
gen, bzw. auf Abbildungen selbst.
1.2.2 Qualified Personnel
as defined in this service manual, are persons who
are familiar with installation, maintenance, repair
and operation of the product Leica DSC 1, and who
have received adequate training in order to carry
out their responsibilities. Adequate training is e.g.:
• Professional training, or receiving specific in-
structions from a professional, or being licensed
to connect / disconnect, ground and label elec-
tric circuits and instruments / systems accor-
ding to all applicable safety regulations.
• Professional training, or receiving specific in-
structions from a professional on how to use /
maintain applicable safety regulations, the trai-
ning itself being carried out according to all ap-
plicable safety regulations.
1.2.3 ymbols used in the text and their
meanings
Warnings
are marked by a warning triangle
Notes,
i.e. important information for the user,
are marked by an information sign
Figures in brackets refer to item
numbers in drawings / illustrations or to
the drawings / illustrations themselves.
(5)
(Fig. 5)
(5)
(Fig. 5)
Chapter 1
Service Manual / Leica CM3050 S Page 10Version 1.0 12/00
© Leica Microsystems
Introduction
1.2.4 Liability
This document is strictly for the use of qualified
service engineers with the requisite technical skills.
Only persons who have successfully completed the
appropriate service training provided by Leica Mi-
crosystems GmbH, Nussloch and are in the employ
of a company in the Leica Group or of an agency,
distributor, or service workshop duly authorized by
Leica Microsystems GmbH, Nussloch have the
status of qualified service engineer.
Leica Microsystems GmbH, Nussloch accepts no
liability whatever for direct or indirect damage that
may occur due to the unauthorized or improper use
or interpretation of this document by any person
who is not a qualified service engineer in accor-
dance with the above definition.
Service technicians have the following obligations:
• To understand and follow the safety information
and instructions on the product and in the
user manual.
• To be familiar with local regulations relating to
industrial and non-industrial accident preven-
tion in the knowledge that these regulations are
up to date.
• To inform Leica immediately in writing if the
equipment becomes unsafe.
1.2.4 Haftung
Dieses Dokument richtet sich ausschließlich an
qualifizierte Servicetechniker und Servicetechniker-
innen, welche über die notwendigen Fachkenntnis-
se verfügen.
Qualifizierte Servicetechniker und Servicetechnik-
erinnen sind solche, die den entsprechenden Ser-
vicekurs bei Leica Microsystems GmbH, Nussloch
erfolgreich besucht und der Leica Gruppe oder bei
von Leica Microsystems GmbH, Nussloch autori-
sierten Vertretung oder Servicewerkstätten tätig
sind.
Wird dieses Dokument von nicht qualifizierten Ser-
vicetechnikern und Servicetechnikerinnen verwen-
det, so lehnt Leica Microsystems GmbH, Nussloch
jegliche Haftung ab für direkte und indirekte Schä-
den, die durch nicht fachgemäße Anwendung und/
oder nterpretation dieses Dokumentes entstehen.
Für die Servicetechniker und Servicetechnikerinnen
gelten folgende Pflichten:
• Sie verstehen und befolgen die Sicherheitsinfor-
mationen und die nstruktionen auf dem Produkt
sowie in der Betriebsanleitung.
• Sie kennen die ortsüblichen gesetzlichen, be-
trieblichen und außerbetrieblichen Unfallverhü-
tungsvorschriften im Wissen, daß sich diese auf
dem aktuellesten Stand befinden.
• Sie benachrichtigen Leica schriftlich, sobald an
der Ausrüstung Sicherheitsmängel auftreten.
Chapter 1
Service Manual / Leica CM3050 S Page 11Version 1.0 12/00
© Leica Microsystems
Introduction
1.2.5 Gefahrenhinweise
Um eine einwandfreie Funktion des Gerätes zu ge-
währleisten, sind folgende Hinweise und Warnver-
merke zu beachten :
• Die Schutzeinrichtungen an Gerät und Zubehör
dürfen weder entfernt noch verändert werden.
• Das Gerät darf nur durch von Leica autorisierte
Service-Techniker geöffnet und repariert bzw.
gewartet werden.
1.2.6 Geräte - Typ
Alle Angaben in diesem Service-Manual gelten nur
für den Geräte-Typ, der auf dem Titelblatt angege-
ben ist. Ein Typenschild mit der Serien-Nr. ist an der
Rückseite des Gerätes befestigt.
1.2.7 Transport und Aufstellung
• Das Gerät darf nicht betrieben werden in Räumen, in
denen Explosionsgefahr besteht!
• Keine direkte Sonneneinstrahlung auf das Gerät
(Fenster)!
• Gerät nicht über einem Heizkörper aufstellen!
• Das Gerät waagerecht auf dem Labortisch aufstel-
len!
• Zum Hochheben bzw. Tragen des Gerätes sind 2
Personen erforderlich!
• Vor nbetriebnahme des Gerätes den Spannungs-
wähler entsprechend der Spannung am Aufstel-
lungsort einstellen!
• Den Abflußschlauch mit Gefälle installieren!
• Zum Schutz des Anwenders vor Lösemitteldämpfen
das Gerät auf jeden Fall entweder mit Aktivkohlefilter
oder mit Abluftschlauch betreiben!
1.2.5 Instructions
To ensure trouble-free operation of the instrument
at all times, the following instructions and warnings
should be observed:
• The protective devices on the instrument and its
accessories must not be removed or modified.
• Only service engineers authorized by Leica may
access, service and repair the internal compo-
nents of the instrument.
1.2.6 Instrument type
All information in this service manual applies only to
the instrument type indicated on the title page.
A nameplate with the serial number is fixed on the
back of the instrument.
1.2.7 Transport and installation
• Do not operate the instrument in rooms where risk of
explosion exists!
• Do not expose the instrument to direct sunlight (win-
dows)!
• Do not install the instrument above a heater!
• nstall the instrument on an even laboratory bench
which must be absolutely level!
• Two people are needed to lift / carry the instrument!
• Before connecting the instrument to mains, make
sure the correct voltage setting, matching the nomi-
nal voltage at the site of installation, has been selec-
ted!
• Upon installing the drain hose make sure there is a
gradient from the drain outlet to the waste pipe.
• To protect the user from hazardous solvent fumes,
make sure to operate the instrument either with the
activated carbon filter or the exhaust air hose!
Chapter 1
Service Manual / Leica CM3050 S Page 12Version 1.0 12/00
© Leica Microsystems
Introduction
1.3 Gerätespezifische Informationen
1.3.1 Information on instrument design
and safe handling
This instrument has been built and tested in accor-
dance with the following safety regulations on
electrical measuring, control, regulating and
laboratory devices:
• D N EN 292
• D N EN 61010-1
• EN 50082-1
• EN 55011
• EC 1000-4
as well as according to the international quality
standard
• D N SO 9001
n order to maintain this condition and to ensure
safe operation, the operator must observe the in-
structions and warnings contained in this instruc-
tion manual.
1.3.2 Integrated safety devices
The instrument is equipped with the following safety
devices:
• Handwheel lock
• Handwheel grip centering
• Emergency stop function
(instruments with sectioning motor only)
• Knife holder equipped with knife guard
The safety devices installed by the manufactu-rer of
the instrument only constitute the basis of accident
prevention.
Mainly responsible for accident-free operation is
above all the institution which owns the instrument
and, in addition, the designated personnel who
operate, service or repair the instrument.
1.3 Gerätespeziefische Informationen
1.3.1 Allgemeine icherheitshinweise
Dieses Gerät ist gemäß den Sicherheitsbestim-
mungen für elektrische Meß-, Steuer-, Regel- und
Laborgeräte
• D N EN 292,
• D N EN 61010-1,
• EN 50082-1,
• EN 55011
• EC 1000-4
sowie gemäß der Qualitätsnorm
• D N SO 9001
gebaut und geprüft.
Um diesen Zustand zu erhalten und einen gefahr-
losen Betrieb sicherzustellen, muß der Anwender
die Hinweise und Warnvermerke beachten, die in
dieser Gebrauchsanweisung enthalten sind.
1.3.2 Eingebaute icherheitssysteme
Das Gerät ist mit den folgenden Sicherheitsein-
richtungen ausgestattet :
• Handradverriegelung
• Zentrieren des Handradgriffs
• Not-Aus-Funktion
(nur bei Geräten mit Schneidemotor)
• Fingerschutz am Messerhalter
Die Sicherheitseinrichtungen, die vom Hersteller an
dem Gerät angebracht wurden, sind nur die Grund-
lage des Unfallschutzes.
Die Hauptverantwortung für einen unfallfreien
Arbeitsablauf tragen vor allem der Unternehmer,
der das Gerät betreibt und zusätzlich die von ihm
benannten Personen, die das Gerät bedienen,
warten oder reparieren.
Chapter 1
Service Manual / Leica CM3050 S Page 13Version 1.0 12/00
© Leica Microsystems
Introduction
1.3.3 Locking the handwheel
Always cover the cutting edge with the
knife guard and lock the handwheel:
• Prior to doing any work on knife
and / or specimen.
• Prior to exchanging specimens.
• During work breaks.
The handwheel can be locked in 2 positions:
- with the grip in the uppermost position (left),
- with the grip in the lowest position (right).
Locking
- Rotate handwheel, until grip (1) is in upper or
lower position.
- To lock, press pin (2) to the right into position
(2b). The upper locking position for pin (2) is
marked by a black dot (4).
Instruments with sectioning motor
The sectioning motor is now blocked.
All instruments
The message ‘LOCKED’ in the display of control
panel 1 indicates that the handwheel has been
locked:
Unlocking
- To unlock, push locking pin (2) to the left into
position (2a).
- Display indication ‘LOCKED’ disappears.
CT- 3 0 °C OT - 35 °C
LOCK ED
1.3.3 Handradverriegelung
Vor jeder Manipulation an Messer und
Objekt, vor jedem Objektwechsel und
während der Arbeitspausen:
• Handrad verriegeln!
• chneide mit Fingerschutz
abdecken!
Das Handrad läßt sich in 2 Positionen verriegeln:
- mit dem Griff nach oben (Abb. links)
- mit dem Griff nach unten (Abb. rechts)
Verriegeln
- Handrad drehen, bis Griff (1) oben bzw. unten
steht.
- Zum Verriegeln Blockierstift (2) nach rechts in
Position (2b) drücken.
Die Verriegelungsposition für den Blockierstift (2)
ist oben durch einen schwarzen Punkt (4)
markiert.
Geräte mit chneidemotor
Der Schneidemotor ist nun blockiert.
Alle Gerätevarianten
Die Handradverriegelung wird im Display des
Bedienfeldes 1 durch das Wort ‘SPERRE’ angezeigt:
Entriegeln
- Zum Entriegeln den Blockerstift (2) nach links in
Position (2a) drücken.
- Die Anzeige ‘SPERRE’ im Display erlischt.
2
2
CT- 3 0 °C OT - 35 °C
LOCK ED
Chapter 1
Service Manual / Leica CM3050 S Page 14Version 1.0 12/00
© Leica Microsystems
Introduction
Instruments with sectioning motor
The sectioning motor can now be activated again.
1.3.4 Centering the handwheel grip
During motorized sectioning, for safety
reasons always center the handwheel
grip!
- To center grip (1), pull outwards and pivot into
center of handwheel.
- When released, the grip locks into position.
1.3.5 Emergency stop function
The emergency stop is activated via the red
emergency stop button in control panel 2 or via the
footswitch
Control panel 2
Footswitch
Activating the emergency stop function
- Press emergency stop button or step on
footswitch forcefully.
STOP (red) lights up.
As soon as the emergency stop function is
activated, the sectioning motor stops.
Geräte mit chneidemotor
Der Schneidemotor kann nun wieder in Gang
gesetzt werden.
1.3.4 Zentrieren des Handradgriffs
Beim Arbeiten im motorischen
chneidebetrieb:
• Handradgriff aus icherheitsgründen
zentrieren!
- Zum Zentrieren Griff (1) leicht nach außen ziehen
und ins Zentrum des Handrads schwenken.
- Beim Loslassen rastet der Griff ein.
1.3.5 Not-Aus-Funktion
Die Not-Aus-Funktion wird mit dem roten Not-Aus-
Schalter am Bedienfeld 2 oder dem Fußschalter
aktiviert.
Bedienfeld 2
Fußschalter
Aktivieren
- Not-Aus-Schalter drücken bzw. Fußschalter fest
durchdrücken.
STOP (rot) leuchtet.
Der Schneidemotor stoppt unmittelbar nach
Aktivierung der Not-Aus-Funktion.
Chapter 1
Service Manual / Leica CM3050 S Page 15Version 1.0 12/00
© Leica Microsystems
Introduction
Deactivating the emergency stop
- To deactivate, rotate emergency stop button in
direction of arrow.
If the emergency stop function has been
activated by the footswitch, unlocking is
not necessary (func-tion is unlocked as
soon as the footswitch is released).
1.3.6 Knife guard
All knife holders are equipped with a knife guard
(see separate instruction manuals on knife holders).
Always cover the cutting edge with the
knife guard:
• Prior to doing any work on knife
and/ or specimen.
• Prior to exchanging specimens.
• During work breaks.
1.3.7 Transport
- To avoid severe damage to the instrument by
running it while the compressor oil is displaced
from its regular position:
-Do not tilt the instrument, only transport in an
upright position.
- After transport, wait at least 4 hours before
turning the instrument on.
The compressor oil may have been displaced
during transport and must settle to its original
positin before switchingthe instrument on.
Otherwise, the instrument may be severely
damaged.
1.3.8 ite requirements
- Do not operate the instrument in rooms with
explosion hazard.
- To ensure proper instrument function maintain a
minimum distance of 10 cm between walls and/
or furniture and all sides of the instrument!
Entriegeln
- Zum Deaktivieren den Not-Aus-Schalter in
Pfeilrichtung drehen.
Nach Aktivieren der Not-Aus-Funktion
über den Fußschalter ist kein Entriegeln
erforderlich.
1.3.6 Fingerschutz
Alle Messerhalter sind mit einem Fingerschutz
versehen (siehe separate Gebrauchsanweisungen
für Messerhalter).
chneide mit Fingerschutz
abdecken:
• vor jeder Manipulation an Messer-
halter oder Objekt
• vor jedem Objektwechsel
• in Arbeitspausen
1.3.7 Transport
- Zur Vermeidung schwerer Schäden am Gerät
durch Betrieb bei verlagertem Verdichteröl:
- Gerät beim Transport nicht kippen, nur stehend
transportieren.
- Nach einem Transport eine Mindestwartezeit
von 4 Stunden vor nbetriebnahme des Gerätes
einhalten!
Das beim Transport verlagerte Verdichteröl muß
vor nbetriebnahme in seine Normalposition
zurückfließen. Andernfalls können schwere
Schäden am Gerät entstehen.
1.3.8 tandortbedingungen
- Das Gerät nicht in explosionsgefährdeten
Räumen aufstellen bzw. betreiben!
- Zur Gewährleistung einer einwandfreien
Funktion:
- An allen Seiten einen Mindestabstand von 10 cm
zwischen dem Gerät und Wänden/
Einrichtungsgegenständen einhalten!
Chapter 1
Service Manual / Leica CM3050 S Page 16Version 1.0 12/00
© Leica Microsystems
Introduction
1.3.9 Electrical connections
- Do not use extension cords for connecting the
instrument to mains.
Fire hazard!
nstrument malfunctions caused by voltage drop.
- During the start-up phase of the compressor, the
nominal voltage must not drop below the values
specified in chapter 1.3.31 ‘Technical data’!
The compressor needs a start-up current at
between 25 and 35 A .
- Ensure uniform current supply according to
specifications. Electrical power supply deviating
from specifications damages the instrument.
- Therefore, arrange for the electrical installa-
tions on site to be checked by a trained
professional and make sure any necessary
upgrades are installed!
- Have the circuit protected by a fuse of its own!
- Do not connect any other consumers to the
same circuit.
- Prior to connecting the instrument to mains,
make sure the electrical power supply in your
laboratory corresponds to the values
indicated on the instrument nameplate
(located at the rear of the instrument)!
1.3.10 Handling microtome knives/blades.
Microtome knives and disposable
blades have extremely sharp cutting
edges and can cause serious injuries.
- Handle knives / blades with utmost care.
- Never leave any knives / blades in unprotected
places!
- Never place a knife, no matter where, with the
cutting edge facing upwards.
- Never try to catch a falling knife.
- Always insert the specimen before inserting the
knife.
1.3.11 Knife guard/handwheel lock
Always cover the cutting edge with the knife
guard andlock the handwheel:
- Prior to doing any work on knife and / or
specimen.
- Prior to exchanging specimens.
- During work breaks.
1.3.9 Elektrischer Anschluß
- Keine Verlängerungsleitung zum Anschluß an
das Stromnetz benutzen.
Brandgefahr!
Funktionsstörungen am Gerät durch Spannungs-
abfall!
- Beim Anlaufen der Kälteanlage die nötige
Mindest-Nennspannung nicht unterschreiten!
Benötigter Verdichter-Anlaufstrom:
25 bis 35 A; (s. Kap. 1.3.31 ‘Technische Daten’)
- Spezifikationsgerechte, gleichbleibende Strom-
versorgung gewährleisten.Nicht spezifikations-
gerechte Stromversorgung führt zu Schäden am
Gerät.
- Daher Elektroinstallation vor Ort durch einen
Fachmann überprüfen und ggfs. überarbeiten
lassen!
- Stromkreis separat absichern!
- Keine weiteren Verbraucher an den Strom-
kreis anschließen.
- Vor dem Anschließen des Gerätes an das
Stromnetz prüfen, ob die elektrischen
Anschlußwerte hres Labors mit den Angaben
auf dem Typenschild des Gerätes
übereinstimmen!
1.3.10 Umgang mit Messern
Mikrotommesser/Einwegklingen haben
extrem scharfe chneiden und können
schwere Verletzungen verursachen.
- Messer vorsichtig handhaben!
- Messer bzw. ausgebaute Messerhalter mit
eingesetztem Messer nicht offen liegen
lassen!
- Messer nie mit der Schneide nach oben ab-
stellen!
- Niemals versuchen, fallende Messer aufzu-
fangen!
- Stets zuerst das Objekt und danach das
Messer einspannen!
1.3.11 Fingerschutz/Handradverriegelung
Den Fingerschutz über die Schneide legen sowie
das Handrad verriegeln:
- Vor jeder Manipulation an Messer und/oder
Objekt
- Vor jedem Objektwechsel
- Während der Arbeitspausen

Other manuals for CM3050 S

3

Other Leica Laboratory Equipment manuals

Leica Flexacam C3 User manual

Leica

Leica Flexacam C3 User manual

Leica RM2125RTS Manual

Leica

Leica RM2125RTS Manual

Leica EG1130 User manual

Leica

Leica EG1130 User manual

Leica RM2235 User manual

Leica

Leica RM2235 User manual

Leica BLK3D User manual

Leica

Leica BLK3D User manual

Leica HistoCore AUTOCUT User manual

Leica

Leica HistoCore AUTOCUT User manual

Leica RM2125RTS User manual

Leica

Leica RM2125RTS User manual

Leica FL400 User manual

Leica

Leica FL400 User manual

Leica CV5030 User manual

Leica

Leica CV5030 User manual

Leica AutoStainerXL User manual

Leica

Leica AutoStainerXL User manual

Leica BLK360 User manual

Leica

Leica BLK360 User manual

Leica L5 FL User manual

Leica

Leica L5 FL User manual

Leica HistoCore Arcadia H User manual

Leica

Leica HistoCore Arcadia H User manual

Leica Envisu C Series Instructions for use

Leica

Leica Envisu C Series Instructions for use

Leica HistoCore Arcadia C User manual

Leica

Leica HistoCore Arcadia C User manual

Leica CV5030 User manual

Leica

Leica CV5030 User manual

Leica Aperio GT 450 User manual

Leica

Leica Aperio GT 450 User manual

Leica AutoStainerXL User manual

Leica

Leica AutoStainerXL User manual

Leica Ivesta 3 Series User manual

Leica

Leica Ivesta 3 Series User manual

Leica Flexacam i5 User manual

Leica

Leica Flexacam i5 User manual

Leica RM2245 User manual

Leica

Leica RM2245 User manual

Leica DFC500 Quick start guide

Leica

Leica DFC500 Quick start guide

Leica HI1210 User manual

Leica

Leica HI1210 User manual

Leica vzM50111 User manual

Leica

Leica vzM50111 User manual

Popular Laboratory Equipment manuals by other brands

Leica BIOSYSTEMS SM2010 R Instructions for use

Leica BIOSYSTEMS

Leica BIOSYSTEMS SM2010 R Instructions for use

cytiva Biacore 8K operating instructions

cytiva

cytiva Biacore 8K operating instructions

J-KEM Scientific Gemini-230 manual

J-KEM Scientific

J-KEM Scientific Gemini-230 manual

Veolia ELGA PURELAB Option-S 7-US Operator's manual

Veolia

Veolia ELGA PURELAB Option-S 7-US Operator's manual

TESTO 875i-1 instruction manual

TESTO

TESTO 875i-1 instruction manual

ASL INTERCOM 130 instruction manual

ASL INTERCOM

ASL INTERCOM 130 instruction manual

Agilent Technologies 1260 Infinity II user manual

Agilent Technologies

Agilent Technologies 1260 Infinity II user manual

zerona SV-1010 user manual

zerona

zerona SV-1010 user manual

Oxford Instruments ANDOR Kymera 328i Series quick start guide

Oxford Instruments

Oxford Instruments ANDOR Kymera 328i Series quick start guide

CORNING Lambda EliteTouch instruction manual

CORNING

CORNING Lambda EliteTouch instruction manual

KERN PBS-A03 operating instructions

KERN

KERN PBS-A03 operating instructions

Metrohm 813 Instructions for use

Metrohm

Metrohm 813 Instructions for use

N-BIOTEK NB-T101M Operation manual

N-BIOTEK

N-BIOTEK NB-T101M Operation manual

Xylem YSI 910 COD instruction manual

Xylem

Xylem YSI 910 COD instruction manual

MRC INE-112N-GC user manual

MRC

MRC INE-112N-GC user manual

Exsys EX-60315 manual

Exsys

Exsys EX-60315 manual

Keysight U5855A user guide

Keysight

Keysight U5855A user guide

Keysight U5855A user guide

Keysight

Keysight U5855A user guide

manuals.online logo
manuals.online logoBrands
  • About & Mission
  • Contact us
  • Privacy Policy
  • Terms and Conditions

Copyright 2025 Manuals.Online. All Rights Reserved.