WARNINGS
Failure to adhere to these recommendations may result in potentialhazardsfromimproperoperation,includ-
ingpropertydamageandbodilyinjury.
• Engage Silent Hitch Pins®
Both pins MUST be securely engaged before transit. A wrench MUST be used to tighten the Hexhead
Silent Hitch Pin® at the hitch receiver location.
• Secure the GearDeck™ 17 Cargo Carrier as close to vehicle as possible
AlwayssecureGearDeck™17asclosetoyourvehicleaspossible,minimizingthedistanceofthis
structureanditsloadfromyourvehicle.Therearetwoboltholesettingsfromwhichtochoose.You
mayalsoadjusttheWingsforupto6"ofrearinstalledclearancefromyourvehicleasneeded.See
Step10ofthisUserManualforWingadjustment.
• Verify that the Safety Cable is Secured
The Safety Cable prevents the Frame from sliding off the Spine when telescoping the GearDeck™ 17
Cargo Carrier. It should always be engaged for this reason, and to prevent the cable from dragging on
the ground while in transit.
• Never move your vehicle with the GearDeck™ 17 extended in the telescoped position.
The GearDeck™ 17 must always be properly secured before transit.
• Secure the GearDeck™ 17 Latches before Transit.
Always secure the lids together before transit by pulling the draw latch over the receiver end.
1. Place the Tray over the wings of the TwinTube®
UBI and line up the holes in the tray with the
holes in the wings. Place the D-Ring Tie Downs
over the outer most set of holes on each end of
thetray.Installa1/4-20Boltanda1/4"x1-1/4"
FenderWasherineachholeinthebottomofthe
Tray through the wings. Secure each bolt to the
TwinTubeWingwitha1/4"FlatWasheranda1/4-
20NylockNut.
2. Locate the Lid with the latches on the side. Place it
on the side of the Tray nearest the vehicle. Align the
four(4)holesinthesidesoftheLidwiththeholes
intheTray.Placea1/4"x1"StainlessSteelFender
Washerovera1/4-20x1"StainlessSteelButton
Socket Head Cap Bolt and insert the bolt into the
holefromtheoutside.Threada1/4"Washerand
1/4-20NylockNutovertheboltfromtheinsideand
tightenwithanAllenWrenchand7/16"socket.
Repeatatallfour(4)locations.
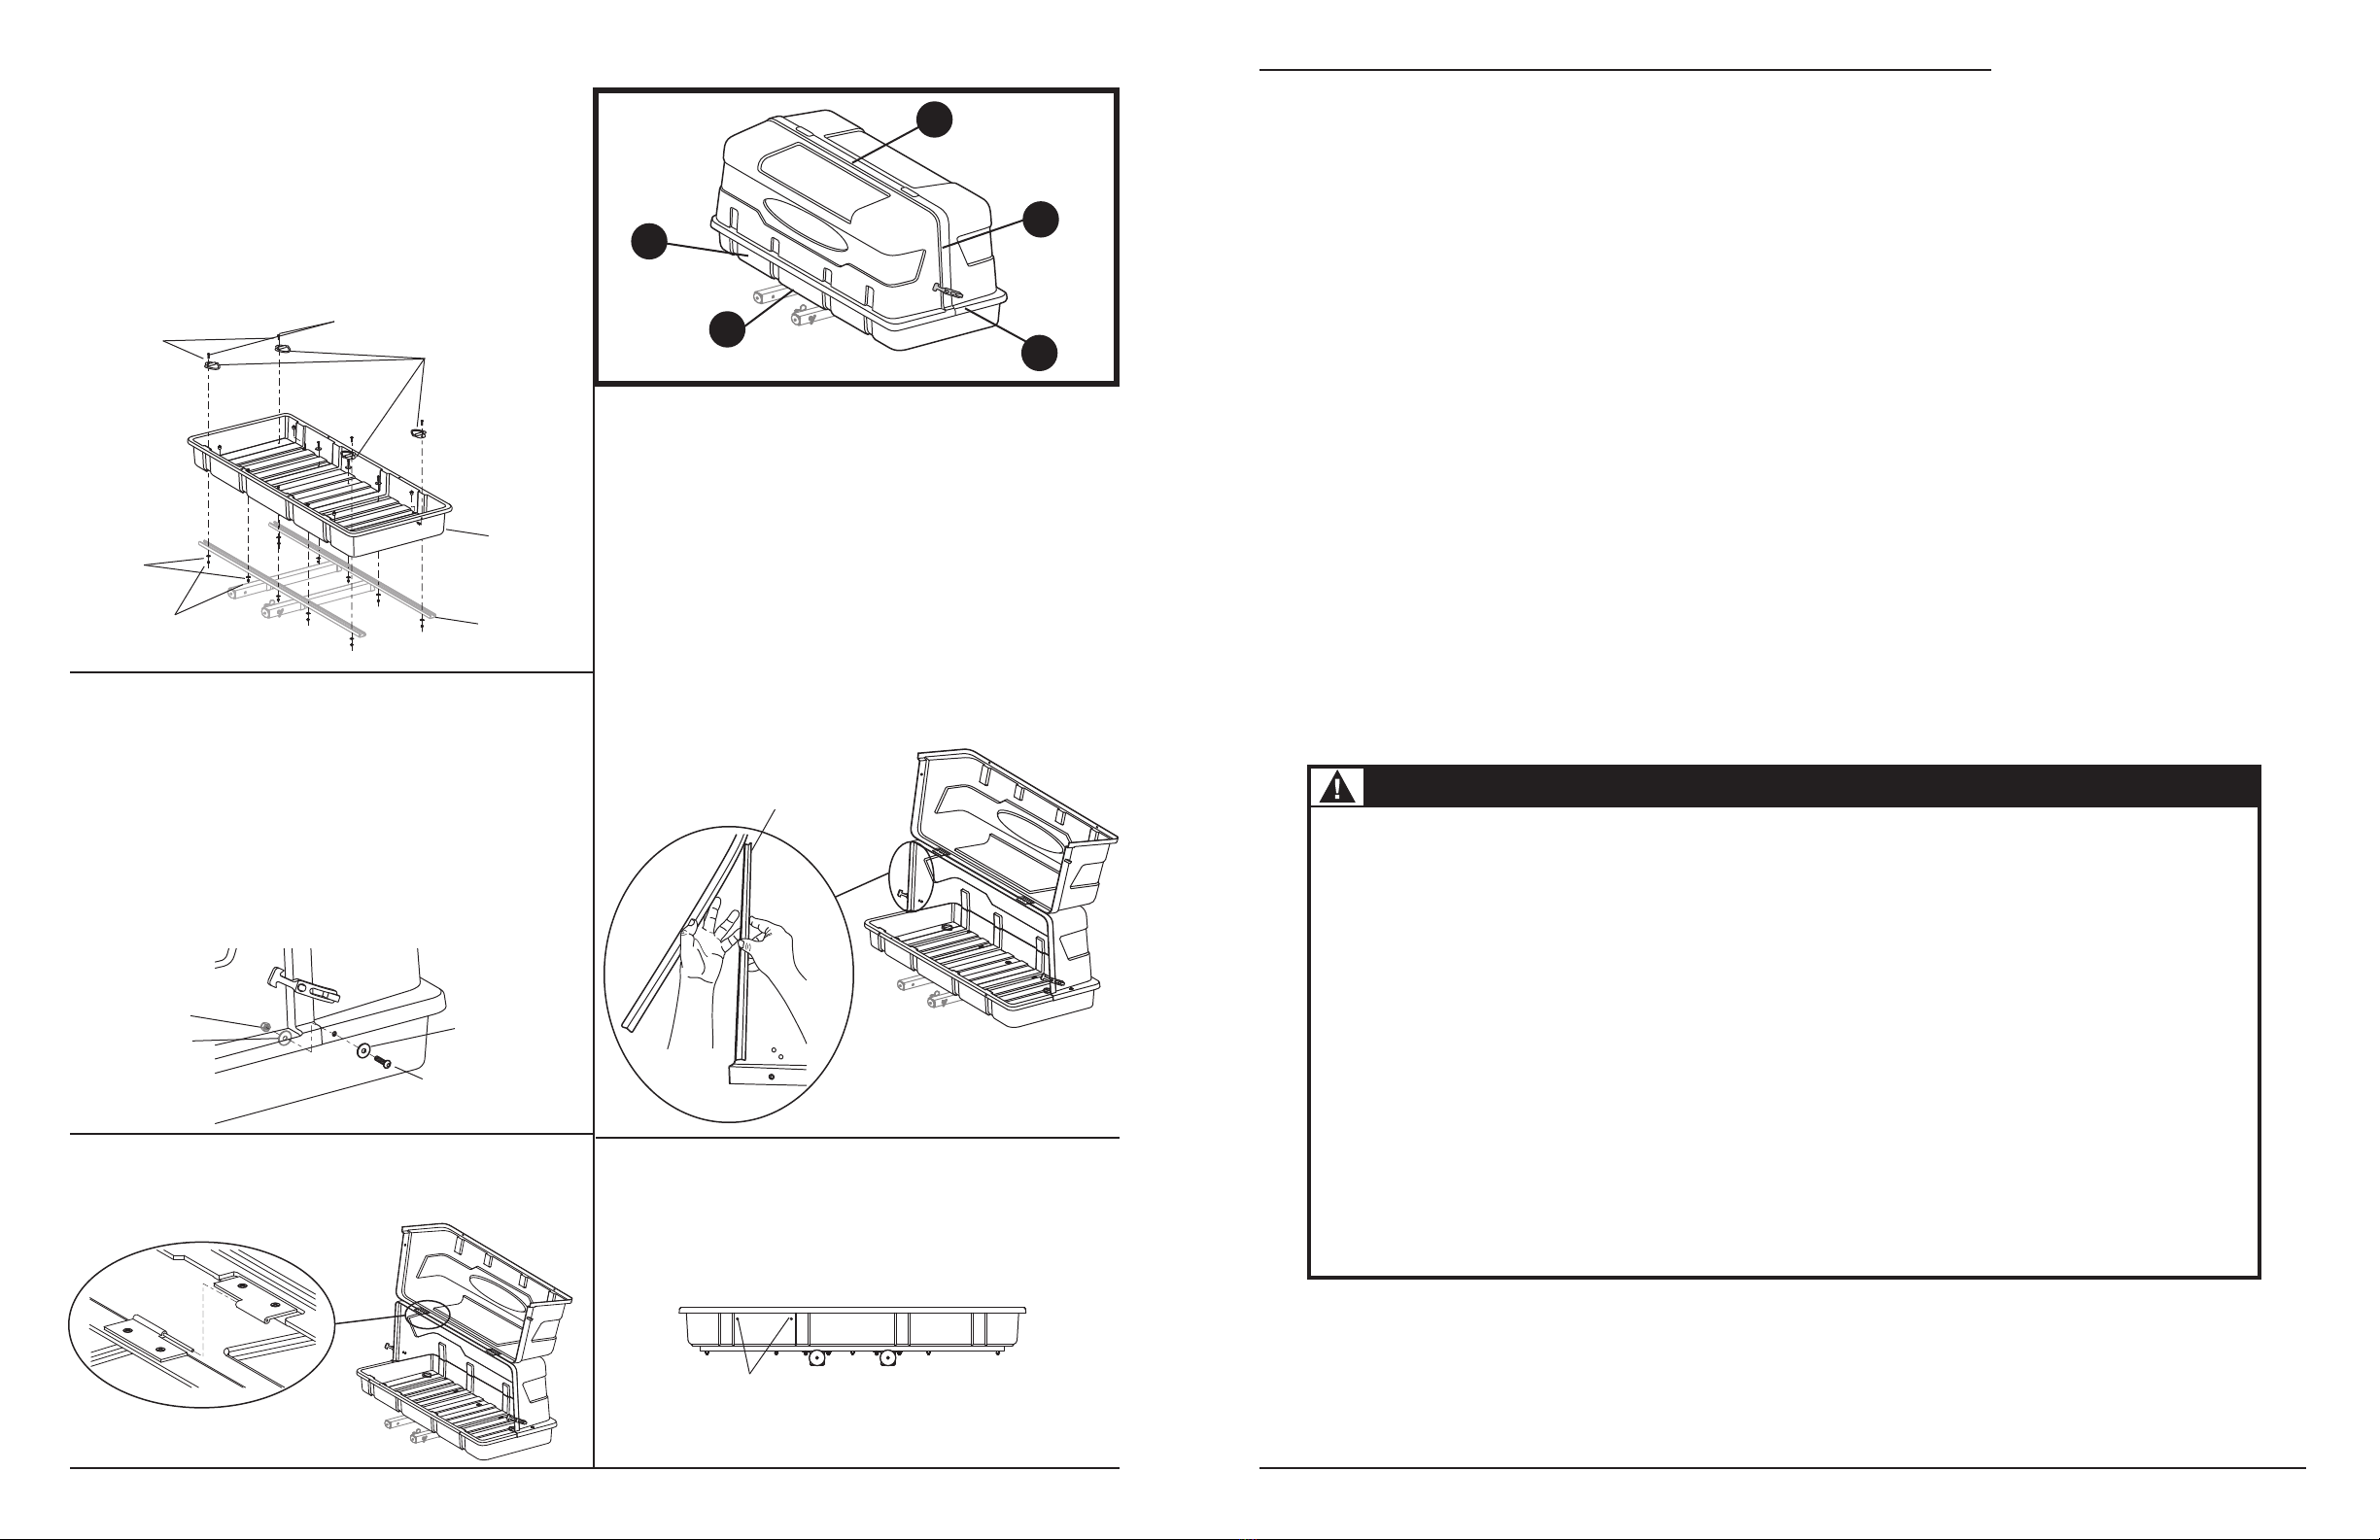
4. Locate the two Aluminum Angles in the parts kit.
Theyprovideadditionalsidewallrigidityforthexed
Lid and will be installed inside the lid between the
plastic and the heavy-duty weatherstripping.
Peel the weatherstripping away from the vertical
edge of the Lid. Place the Aluminum Angle on the
insideoftheLidushwiththebottom.Reinstall
the weatherstripping over the edge of the Lid
and the Aluminum Angle. Use a rubber mallet
to tap it into place if necessary. Crimp the lip of
the weatherstripping over the Lid and Aluminum
Angle to provide a tight grip that cannot easily be
removed.
5. If you wish to install a license plate on the
GearDeck,alocationisprovidedontheTray.We
recommendthatyouinstalltheplateonthedriver’s
side. Use the license plate as a template to drill two
holes in the tray.
1
2
3
3. Slide the hinges on the Pivoting Lid over the hinge
posts on the fixed Lid and close it.
54
D-Ring Tie Downs
Tray
TwinTube™
UBI
1/4-20Bolts
1/4"x1-14"
Fender
Washers
1/4"Flat
Washers
1/4-20Nylock
Nuts
1/4"x1"Stainless
Steel Fender
Washer
1/4-20x3/4"Stainless
Steel Button Socket
Head Cap
1/4-20Nylock
Nut (Inside)
Aluminum Angle - Place
along edge under
Weatherstripping
Drill Holes for License Plate
if desired
safe use & operaTion
Be sure to follow these guidelines to prevent possible hazards from misuse.
Vehicle and Hitch Receiver Compliance
ThisGearDeck™17CargoCarrierts2"sizehitchreceiversandisratedforaClassIItowcapabilityorhigher(ClassII,
IIIandup).Whenoperatingatowaccessory(anyiteminsertedintothehitchreceiver),youmustcomplywiththevehicle
andhitchreceiver’stowingparameters.Consultyourvehicleandhitchreceiverownermanual(s)fordetailsonyourtow
andtongueweightparameters.BesurethattheyarecompatiblewithGearDeck™17’sweightspecications.
Tongue Weight Compliance
The GearDeck™ 17 and its cargo creates a combined weight that creates direct downward pressure on the hitch receiv-
er’stongue.Thisdownwardpressureisthetongueweight.Tongueweightisoneofthetwocriticalweightratingfactors
ofyourtowrating’sclassication(ClassI,II,III,IV,V).Never exceed your vehicle and hitch receiver’s tongue weight
specication.
GearDeck™ 17 Weight and Load Parameters
TheGearDeck™17weighs72lbsunloaded.Todetermineyouravailableloadweightinaccordancewithyourvehicleand
hitchreceiver’stongueweightrating,subtractGearDeck™17’s72lbsfromyouridentiedtongueweightrating.Thedif-
ferencerepresentsyourvehicleandhitchreceiver’savailableloadweight.
TheGearDeck™17isratedforupto300lbsofcargoweightcarryingcapacity.Whentransportingcargo,placeheavy
loads in the center and lighter cargo to the outside.
Telescoping GearDeck™ 17 Cargo Carrier
To telescope the GearDeck™ 17, remove the Hand Tighten Silent Hitch Pin® from the Telescope Safety pin hole. Verify
that the Safety Cable is secured and then slide the frame to the rear.
Locking Up GearDeck™ 17
ApadlocklocationisprovidedforalockinthecenteroftheLid’slipontheside.Werecommendalockwitha1"shankhook.
1/4"Washer
(Inside)
We warrantthis product to therst consumerto befree from defect in materialand workmanship for oneyear (Pleaseretain your salesslip for yourrecords).
Any product or part thereof found to be defective within that period will be replaced without charge provided that: (1) the product was not misused; (2) no
alterations or modications were made; (3) its failure resulted from a defect in material or workmanship and not from normal wear expected in the use of
the product; (4) the product or part is delivered, freight prepaid, to Let’s Go Aero. Please contact Let’s Go Aero, toll free, at 877-464-2376 to get a return
authorization number prior to return. Manufacturers only obligation shall be to replace such products or parts proved to be defective.
Copyright©2006-2012Let’sGoAero,Inc.
Page 8 of 9 Page 9 of 9