USE & SLIDEOUT OPERATION
To register your product, visit the Let’s Go Aero website at www.LetsGoAero.com
Technical Support
For assistance with this product, please contact us:
Let’s Go Aero, Inc. 5353 N. Union Blvd. Suite 103, USA
To learn more about our products and stay informed about useful options for transporting all kinds of
gear with your carrier, be sure to visit our website: www.LetsGoAero.com
Patent and trademark protected. Patent Numbers 6,609,725; 6,945,550; 8,079,613; D717718; 8,858,141; Patents Pending
Copyright© 2021, Lets Go Aero, Inc., All rights reserved.
Vehicle and Hitch Receiver Compliance
This BlackBox Cargo Carrier ts 2" size hitch receivers and is rated for a Class III tow capability or higher.
Before using this product, consult your vehicle and hitch receiver owner manual(s) for details on your tow and
tongue weight parameters. Be sure that they are compatible with BlackBox’s weight specications. Never
exceed vehicle or hitch weight limits.
BlackBox Weight and Load Parameters
The BlackBox weighs 175 and the BlackBox PRO weighs 190 lbs unloaded. Combined weight will increase
with accessories added. To determine your available load weight in accordance with your vehicle and hitch
receiver’s tongue weight rating, subtract BlackBox’s weight from your identied tongue weight rating. The
difference represents your vehicle and hitch receiver’s available load weight.
The BlackBox PRO is rated for up to 310 lbs of cargo weight carrying capacity and the BlackBos is rate for
325lbs of cargo weight carrying capacity for a combined weight of 500 lbs each when fully weight loaded.
Load weight limit is always subordinate to the maximum load recommended by the manufacturer of the vehicle
itself and/or hitch. It is always the lower maximum recommended load that applies.
Sliding Out BlackBox Cargo Carrier & Clearance Adjustability
To telescope the BlackBox, remove the Hand Tighten Silent Hitch Pin® from the Slide Tube’s Safety pin
hole. Verify that the Safety Cable is secured and then slide the frame to the rear. When adjusting the position
of capsule clamps for added clearance needs, be sure to adhere to NO USE AREA distance of 3.5 inches
rearward from Spine’s vertical plate along the frame tubes.
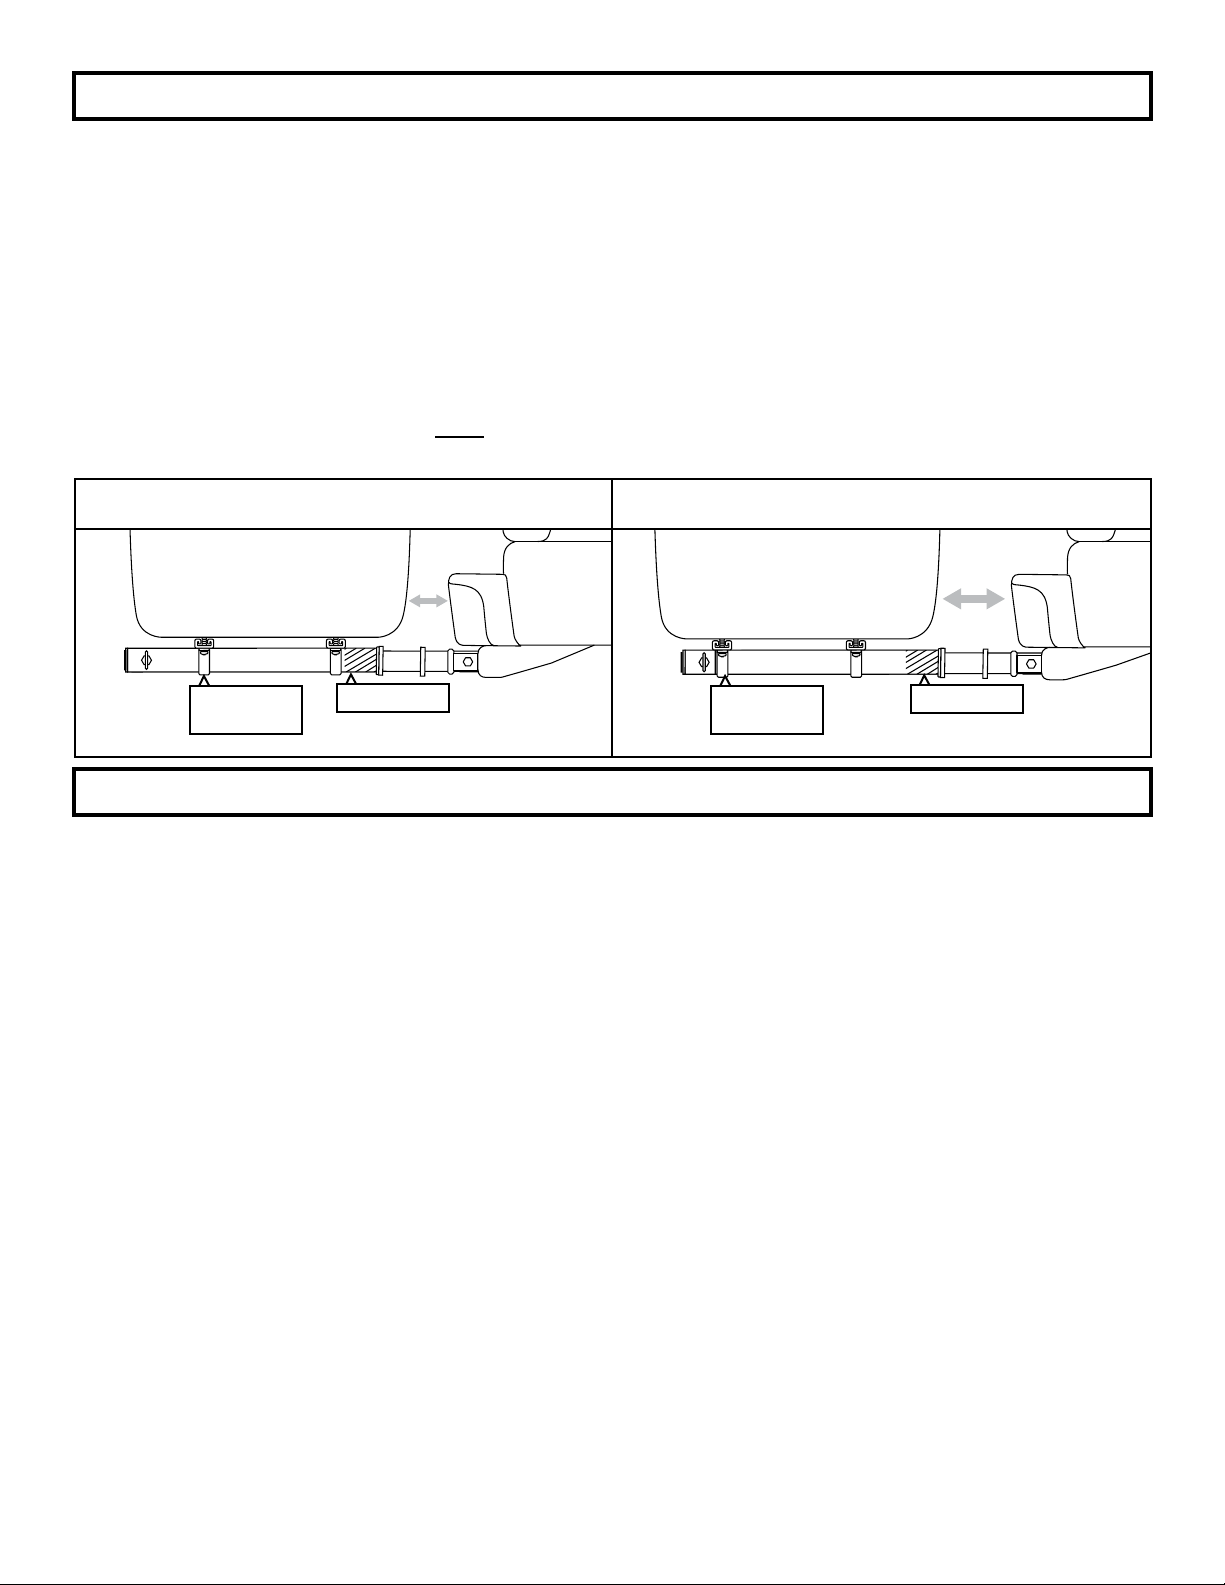
STEP 6
The Hat Brackets on the carrier are set-up in a generic factory setting. You can adjust the carriers installed and slideout
clearance by loosening the Hat Brackets and then re-tightening them to 18 ft. lbs.
LESS CLEARANCE Users wanting less clearance between the tow vehicle and carrier should position the Hat Brackets
closer to the vehicle on the Slide Tubes.
MORE CLEARANCE: Users wanting more clearance between the tow vehicle and carrier should position the Hat
Brackets further away from the vehicle on the Slide Tubes.
IMPORTANT: The Hat Brackets must be positioned forward of the Handle Silent Hitch Pin [D] location. Be sure to allow
room for the Silent Hitch Pin with Handle to turn and operate as required.
TROUBLESHOOT SLIDE: Carrier not sliding? Loosen Hat Brackets, re-align the slide-tubes to the rubber bumpers and
then re-tighten to 18 ft. lbs, Hat Brackets WILL ex towards the carrier, beware that over-tightening may cause Slide
Tubes to bind. Verify Twintube is fully waxed (STEP 3).
MIN INSTALLED CLEARANCE MAX INSTALLED CLEARANCE
WARNING
WARNING
HAT
BRACKET
HAT
BRACKET
REQUIRED TOOL: 1/2” WRENCH