manuals.online logo
Brands
  1. Home
  2. •
  3. Brands
  4. •
  5. Let's Go Aero
  6. •
  7. Automobile Accessories
  8. •
  9. Let's Go Aero GearSpace HGK819 User manual

Let's Go Aero GearSpace HGK819 User manual

Page 1 of 6
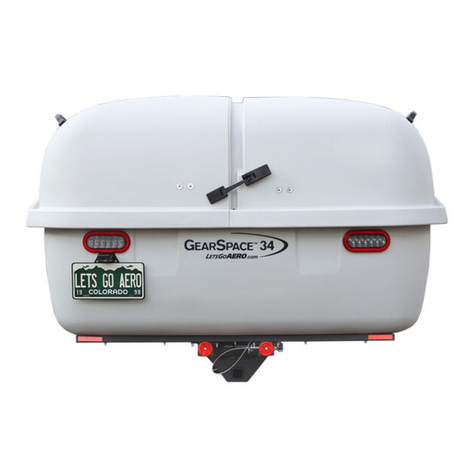
GearSpace® Cargo Carrier
Part No. HGK819 & HGK826
Installation & Safe Use Operation Highlights
For 2in Receiver Hitch with Class II Minimum Tow Rating.
Carrier weighs 125 lbs empty. 500 lbs gross weight rating; 375 lbs of cargo payload.
PRODUCT MANUAL
Revision Date: 09/20/21GearSpace-092021Rev
For More Information & Accessories, Visit our Website - www.LetsGoAero.com
For Technical Support & Product Questions Contact Us at 877-464-2376 or 719- 630-3800
Email: [email protected]
NOTICE: All Manual information is subject to change without notice. Revised editions
will be available for free download at LetsGoAero.com. Manual information is considered
factual until made obsolete by a revised version.
Follow this QR-Code or visit
LetsGoAero.com/manuals to check for an updated version
Copyright© 2021, Lets Go Aero, Inc., All rights reserved. Patent Numbers 6,409,203; 6,609,725; D717718 Patents Pending
For product updates and to register your product, visit LetsGoAero.com/registration
Page 2 of 6
TWINTUBE® SPINE ASSEMBLY AND INSTALLATION
Qty. Description
A1 TwinTube® Spine
B2 Retainer clip
C 1 5/8” Silent Hitch Pin®
D1 5/8” Silent Hitch Pin®
with Handle
E1 5/8” Lock Washer
F1 5/8” Flat Washer
G1 5/8” Plastic Bushing
H2 5/8” Spring Nut
K1 Wax
L 2 EndCap&Reectors
M2 K-Lath Tex Screw
A
F
M
G
C
DE
B
HKL
STEP 1
Remove Spring Nuts [H] from Silent Hitch
Pins and install two Spring Nuts into the
TwinTube Spine [A] as shown
The TwinTube [A] shank end
contains two mounting holes.
Use the second hole in from
the end. If more clearance
is needed, you may use the
rstholeinfromtheend.
A
H
H
H
AH
A
1ST HOLE
2ND HOLE
STEP 2
Slide the TwinTube [A] shank
into the receiver with the 5 inch
rise positioned above the hitch
as shown. Align the mounting
hole with Spring Nut [H] and the
receiver hitch.
Insert the Silent Hitch Pin [C] with
a 5/8in Lock Washer [E] & 5/8in
Flat Washer [F] into the receiver hole and thread
through the Spring Nut [H].Tightenrmlywith
wrench and secure with Retainer Clip [B].
REQUIRED TOOL: 7/8” WRENCH
B
E
A
H
C
F
Hitch Receiver
A
THIS END INTO
VEHICLE
HITCH RECEIVER
POSITION WITH
RISE AS SHOWN
Page 3 of 6
STEP 4
HAT BRACKETS
GearSpace Carrier
A
L
M
D
G
H
B
STEP 3
Rub all four sides of the TwinTube [A] Spine with Wax Block
[K].
K
A
InstalltheReectorEndCaps[L] over both ends of each
Slide Tube [M] and secure with one (1) #10 K-Lath Tex Screw
[M] each.
TIP:ReectorEndCapsareatightt.
Insert the Silent Hitch Pin with Handle and Plastic Bushing [D, G] through the end
with Spring Nut [H]installedinSTEP1,engagethreads,tightenrmlyandsecurewith
Retainer Clip [B].
NOTE: The Silent Hitch Pin with Handle [D] controls the slide-out function of the
platform. Once installation is complete, it may be removed in order to slide the carrier
rearward for rear hatch access when vehicle is stationary.
Page 4 of 6
STEP 5
Never operate the carrier’s slide-out function without the Safety Cable [R] fully secured. Failure to follow proper
procedures may result in bodily injury and property damage.
WARNING:
Attach the carabiner to the Safety Cable. From
underneath the carrier, connect the carabiner end of
the Safety Cable to the “1st Position” hole in the frame
of the TwinTube [A].
NOTE: The Safety Cable can be secured in two
positions.SecuretheSafetyCabletotherstposition.
For maximum installed clearance needs, the second
position may be used.
A
2ND POSITION
1ST POSITION
STEP 6
The Hat Brackets on the carrier are set-up in a generic factory setting. You can adjust the carriers installed and slideout
clearance by loosening the Hat Brackets and then re-tightening them to 18 ft. lbs.
LESS CLEARANCE Users wanting less clearance between the tow vehicle and carrier should position the Hat Brackets
closer to the vehicle on the Slide Tubes.
MORE CLEARANCE: Users wanting more clearance between the tow vehicle and carrier should position the Hat
Brackets further away from the vehicle on the Slide Tubes.
IMPORTANT: The Hat Brackets must be positioned forward of the Handle Silent Hitch Pin [D] location. Be sure to allow
room for the Silent Hitch Pin with Handle to turn and operate as required.
TROUBLESHOOT SLIDE: Carrier not sliding? Loosen Hat Brackets, re-align the slide-tubes to the rubber bumpers and
then re-tighten to 18 ft. lbs, Hat Brackets WILLextowardsthecarrier,bewarethatover-tighteningmaycauseSlide
Tubes to bind. Verify Twintube is fully waxed (STEP 3).
DO NOT ALLOW HAT BRACKETS TO OVERLAP THE 3.5” WARNING LABEL LOCATED ON
ON THE SLIDE TUBE. Failure to do so will permit over-extension of the safety cable allowing the
capsule to slide off and cause damage or personal injury.
WARNING:
MIN INSTALLED CLEARANCE MAX INSTALLED CLEARANCE
WARNING
WARNING
HAT
BRACKET
HAT
BRACKET
SAFETY CABLE
REQUIRED TOOL: 1/2” WRENCH
Page 5 of 6
Lighting
Connect the 4-at wire plug to vehicle trailer lighting.
Check running lights, brake lights, and turn signals
before operation. Check the wire harness for good
connections and for possible fraying or wearing of
insulation if a light signal is not functioning. Check lights
before each use.
Locking Up GearSpace
Two locking pins are included for locking the GearSpace
capsule. Insert the Locking Pin through the bottom of the
carrier
TIP:AstheLockingPinisatightt,itisrecommendedtoinsertthepinthroughthebottom
of the carrier and then close the lids, one at a time, over the Pins.
Always lock capsule for transit with a minimum of one lock (the second lock hole facing the
vehicle’s rear is optional).
Vehicle and Hitch Receiver Compliance
ThisCarrierts2"sizehitchreceiversandisratedforaClassIItowcapabilityorhigher.
Before using this product, consult your vehicle and hitch receiver owner manual(s) for
details on your tow and tongue weight parameters. Be sure that they are compatible with
carrier’sweightspecications.Neverexceedvehicleorhitchweightlimits.
Carrier Weight and Load Parameters
The GearSpace weighs 125 lbs unloaded. To determine your available load weight
in accordance with your vehicle and hitch receiver’s tongue weight rating, subtract
GearSpace’s125lbsfromyouridentiedtongueweightrating.Thedifferencerepresents
your vehicle and hitch receiver’s available load weight.
The GearSpace is rated for up to 375 lbs of cargo weight carrying capacity for a
combined weight of 500 lbs when fully weight loaded.
Load weight limit is always subordinate to the maximum load recommended by
the manufacturer of the vehicle itself and/or hitch. It is always the lower maximum
recommended load that applies.
Sliding Out Carrier & Clearance Adjustability
To telescope the GearSpace, remove the Silent Hitch Pin® with Handle from the Slide Tube pin hole. Verify that the
Safety Cable is secured and then slide the frame to the rear. When adjusting the position of capsule clamps for added
clearance needs, be sure to adhere to NO USE AREA distance of 3.5 inches rearward from Spine’s vertical plate along
the frame tubes.
Alwayscheckandconrmallboltsandconnectionsaretight,RubberLatchesarefullysecuredandonelockisinstalledbefore
transit. Failure to follow proper installation and equipment checks before transit may result in damage to carrier, damage to
property, bodily injury or death.
WARNING:
Carvehicleexhaustcancauseahazard.Asaprecaution,positioncarrierclearofexhaust.
CAUTION:
HANDLE
Operating GearSpace Lids
IMPORTANT! ALWAYS use handles located on top of
each lid when opening and closing lids. Failure to do so
causes lids to slam from weight force and unnecessary
wear and tear.
Page 6 of 6
If a Let’s Go Aero cargo carrier is found to have a defect in workmanship or material within a 3-year period of
the purchase date of the original purchaser, Let’s Go Aero will repair or replace the defect free of charge. This
warranty terminates if a purchaser transfers the product to any other person.
The warranty does not cover damage or wear which occurs as a result of day to day use or general wear and
tear. No warranty is given for defects caused by normal wear and tear, cosmetic rust, scratches, accidents,
unlawfulvehicleoperation,ormodicationof,oranytypesofrepairof,aloadcarriersystemotherthanthose
authorizedbyLet’sGoAero.
No warranty is given for defects resulting from conditions beyond Let’s Go Aero’s control including, but not
limited to, misuse, overloading, or failure to assemble, mount or use the product in accordance with Let’s Go
Aero’s written instructions or guidelines included with the product or made available to the purchaser.
Subject to the limitations and exclusions described in this warranty, Let’s Go Aero will remedy defects in ma-
terials or workmanship by repairing or replacing any parts diagnosed to be at issue without charge for parts or
labor.
In the event that a product is defective, the purchaser should contact the Let’s Go Aero dealer from whom the
product was purchased. If the dealer is not able to correct the defect, the purchaser should contact Let’s Go
Aero in writing to [email protected] or by phone at 877-464-237 or 719-630-3800. In the event that a
product needs to be returned to Let’s Go Aero, a Let’s Go Aero technician will provide the purchaser with the
appropriate mailing address and any additional instructions. Proof of purchase in the form of an original pur-
chase invoice or receipt, and a detailed description of the defect must be provided. Please note that a Return
MerchandiseAuthorization(RMA)fromLet’sGoAeroisrequiredforanyreturns.
DISCLAIMER OF LIABILITY REPAIR OR REPLACEMENT OF A DEFECTIVE PRODUCT OR THE ISSUANCE
OF A REFUND OR CREDIT (AS DETERMINED BY LET’S GO AERO) IS A PURCHASER’S EXCLUSIVE
REMEDY UNDER THIS WARRANTY. DAMAGE TO A PURCHASER’S VEHICLE, CARGO AND/OR TO ANY
OTHER PERSON OR PROPERTY IS EXCLUDED.
THIS WARRANTY IS EXPRESSLY MADE IN LIEU OF ANY AND ALL OTHER WARRANTIES, EXPRESS OR
IMPLIED, INCLUDING THE WARRANTIES OF MERCHANTABILITY AND FITNESS FOR A PARTICULAR
PURPOSE.
LET’S GO AERO’S SOLE LIABILITY TO ANY PURCHASER IS LIMITED TO THE REMEDY SET FORTH
ABOVE. IN NO EVENT WILL LET’S GO AERO BE LIABLE FOR ANY LOST PROFITS, LOST SALES, OR
FOR ANY CONSEQUENTIAL, DIRECT, INDIRECT, INCIDENTAL, SPECIAL, EXEMPLARY, OR PUNITIVE
DAMAGES OR FOR ANY OTHER DAMAGES OF ANY KIND OR NATURE.
SOME STATES DO NOT ALLOW THE EXCLUSION OR LIMITATION OF INCIDENTAL OR CONSEQUEN-
TIAL DAMAGES, SO THE ABOVE LIMITATIONS MAY NOT BE APPLICABLE. THIS WARRANTY GIVES YOU
SPECIFIC LEGAL RIGHTS, AND YOU MAY ALSO HAVE OTHER RIGHTS WHICH VARY FROM STATE TO
STATE.
3-Year Limited Warranty

This manual suits for next models

1

Other Let's Go Aero Automobile Accessories manuals
Let's Go Aero HideOut Package H01564 User manual

Let's Go Aero

Let's Go Aero HideOut Package H01564 User manual

Let's Go Aero LittleGiant Quick reference guide

Let's Go Aero

Let's Go Aero LittleGiant Quick reference guide

Let's Go Aero Half Nelson User manual

Let's Go Aero

Let's Go Aero Half Nelson User manual

Let's Go Aero B01809 User manual

Let's Go Aero

Let's Go Aero B01809 User manual

Let's Go Aero T01991 User manual

Let's Go Aero

Let's Go Aero T01991 User manual

Let's Go Aero PegBoard B01588 Installation instructions

Let's Go Aero

Let's Go Aero PegBoard B01588 Installation instructions

Let's Go Aero WingMan BVK093 User manual

Let's Go Aero

Let's Go Aero WingMan BVK093 User manual

Let's Go Aero BikeWing-2 User manual

Let's Go Aero

Let's Go Aero BikeWing-2 User manual

Let's Go Aero VME-V4 User manual

Let's Go Aero

Let's Go Aero VME-V4 User manual

Let's Go Aero Fly Rod Adapter Kit User manual

Let's Go Aero

Let's Go Aero Fly Rod Adapter Kit User manual

Let's Go Aero Full Nelson User manual

Let's Go Aero

Let's Go Aero Full Nelson User manual

Let's Go Aero BlackBox PRO Installation instructions

Let's Go Aero

Let's Go Aero BlackBox PRO Installation instructions

Let's Go Aero HexCap User manual

Let's Go Aero

Let's Go Aero HexCap User manual

Let's Go Aero BLACK BOX Owner's manual

Let's Go Aero

Let's Go Aero BLACK BOX Owner's manual

Let's Go Aero V-Lectric PRO Bicycle Carrier User manual

Let's Go Aero

Let's Go Aero V-Lectric PRO Bicycle Carrier User manual

Let's Go Aero Three-Quarter Nelson User manual

Let's Go Aero

Let's Go Aero Three-Quarter Nelson User manual

Let's Go Aero GearCage SP4 Installation instructions

Let's Go Aero

Let's Go Aero GearCage SP4 Installation instructions

Let's Go Aero GearSpace HGK819 User manual

Let's Go Aero

Let's Go Aero GearSpace HGK819 User manual

Let's Go Aero GearDeck H00604 User manual

Let's Go Aero

Let's Go Aero GearDeck H00604 User manual

Let's Go Aero HCK345 User manual

Let's Go Aero

Let's Go Aero HCK345 User manual

Let's Go Aero GearSpace User manual

Let's Go Aero

Let's Go Aero GearSpace User manual

Let's Go Aero HideOut Package H01564 User manual

Let's Go Aero

Let's Go Aero HideOut Package H01564 User manual

Let's Go Aero Fork-IT H01793 Installation instructions

Let's Go Aero

Let's Go Aero Fork-IT H01793 Installation instructions

Let's Go Aero V-Lectric B01175 User manual
Let's Go Aero

Let's Go Aero V-Lectric B01175 User manual

Popular Automobile Accessories manuals by other brands

EUFAB 17453 operating instructions

EUFAB

EUFAB 17453 operating instructions

ARM Motorsports N63 FRONT FACING UPGRADE INSTALLATION GUIDE

ARM Motorsports

ARM Motorsports N63 FRONT FACING UPGRADE INSTALLATION GUIDE

PowerFleet CELLOCATOR CR-100 manual

PowerFleet

PowerFleet CELLOCATOR CR-100 manual

Swagman 64400 manual

Swagman

Swagman 64400 manual

Audiovox XMEXT50 installation manual

Audiovox

Audiovox XMEXT50 installation manual

AVS Ventvisor installation instructions

AVS

AVS Ventvisor installation instructions

Kargo Master 4A92L installation guide

Kargo Master

Kargo Master 4A92L installation guide

Prorack K439 Fitting Instructions for Basic Carrier

Prorack

Prorack K439 Fitting Instructions for Basic Carrier

Meyer MDII installation instructions

Meyer

Meyer MDII installation instructions

Thule Rapid 1019 Fitting instructions

Thule

Thule Rapid 1019 Fitting instructions

ProClip 527923 user guide

ProClip

ProClip 527923 user guide

Whispbar K850W Fitting instructions

Whispbar

Whispbar K850W Fitting instructions

STO N SHO SNS 103 Installation procedures

STO N SHO

STO N SHO SNS 103 Installation procedures

STO N SHO SNS 353a Installation procedures

STO N SHO

STO N SHO SNS 353a Installation procedures

Timberline Binar-5B-Compact Service manual

Timberline

Timberline Binar-5B-Compact Service manual

Kenwood KPA-SD100 instruction manual

Kenwood

Kenwood KPA-SD100 instruction manual

Tessera4x4 SOT-ROLL Series installation manual

Tessera4x4

Tessera4x4 SOT-ROLL Series installation manual

Romik 2162 installation instructions

Romik

Romik 2162 installation instructions

manuals.online logo
manuals.online logoBrands
  • About & Mission
  • Contact us
  • Privacy Policy
  • Terms and Conditions

Copyright 2025 Manuals.Online. All Rights Reserved.