manuals.online logo
Brands
  1. Home
  2. •
  3. Brands
  4. •
  5. Leviton
  6. •
  7. Controllers
  8. •
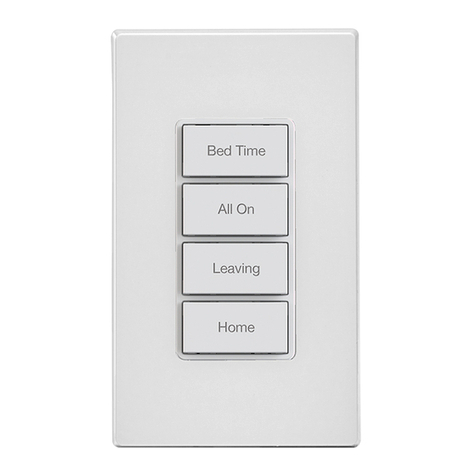
  9. Leviton vizia rf+ VRCS1 User manual

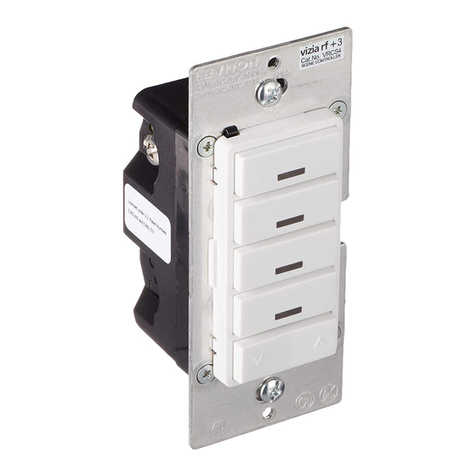
Leviton vizia rf+ VRCS1 User manual

NOTES:
• Ifusinganon-LevitonProgrammer/Remote,refertothe
Programmer/Remoteinstructionsheet.
• 1-scenecontrollersincludedintoaZ-Wave®networkmustbe
updatedafteryouhaveincludedallotherdevices.
• IfusingtheVRCPG'sInstallChecklistfeature,godirectlytoStepC.
A) IfusingaLevitonZ-Wave®Programmer/Remote,Cat.No.VRCPG,
presstheMenubuttonandscrolldowntoSystemSetup.Press
thecenterbuttontoselectSystemSetupMenu.ChooseAdvanced
Settings.PressthecenterbuttontoselectNetwork.Pressthecenter
buttonto<IncludeNode>.
B) IfusingVRCPGProgrammer/Remote,youwillbepromptedtoplace
1-scenecontrollerintoprogrammingmode.
C) ToaccessProgrammode,e
ngagetheair-gap
switchbygentlypressingthetopofthepush
paduntilthebottomliftscompletelyoutofthe
frameandaclickisheard
(refer to figure).
Wait5secondsandthenpressthepushpad
backintotheframeandholdpushpaduntil
theLEDturnsAmber.Releasethepushpad
andtheLEDshouldblinkAmber.Youarenow
inProgrammingmode.
NOTE:IftheLEDonthe1-scenecontroller
turnssolidRedwhileincluding,therehas
beenacommunicationerror.
D) Whilestandingclosetothe1-scenecontroller
(approximately2-5ft.),pressthecenter
buttonontheProgrammer/Remoteto
<Include>deviceinthenetwork.NOTE:Only
onedevicemaybeincludedatanytime.
E) TheVRCPGProgrammer/RemotewillassignaHomeID,NodeID,
andNameforthisdevice.
NOTE:ThisinformationwillbestoredintheProgrammer/Remoteto
beusedforfuturereference.
NOTE:Youmayeditthenameofthisdeviceatthistime.
F)The 1-scene controller is now installed in the network.
WARNINGS AND CAUTIONS:
• ON/OFFLEDfor2-waystatusreporting.
• Tobeinstalledand/orusedinaccordancewithappropriateelectricalcodesandregulations.
• Ifyouareunsureaboutanypartoftheseinstructions,consultaqualiedelectrician.
• ViziaRF+TMVRCS11-SceneControllerdoesnotcontroltheload,butprovidesremoteoperationwithViziaRF+TMswitches.
• Recommendedminimumwallboxdepthis2-1/2".
WARNINGS AND CAUTIONS:
•Notravelerwiresareneeded.Remotecontrolsviaradiofrequency(RF)technology.
• Cancallone(1)sceneON/OFForareaON/OFFwithadvancedProgrammer/Remote(seeVRCPG).
• Foracompleteset-up,acontrollersupportingtheadvancedZ-Wave®scenefeaturesisneeded,suchastheadvancedProgrammingRemote(VRCPG).
• Disconnectpoweratcircuitbreakerorfusewhenservicing,installingorremovingxture.
• Usethisdeviceonlywithcopperorcoppercladwire.WithaluminumwireuseonlydevicesmarkedCO/ALRorCU/AL.
1-Scene Controller/
Virtual Matching Switch Remote
Cat.No.VRCS1
120VAC,60Hz
INSTALLATION INSTRUCTIONS
DI-000-VRCS1-02B
Tools needed to install your 1-Scene Controller
Slotted/PhillipsScrewdriver ElectricalTape Pliers 
Pencil   Cutters  Ruler
Changing the color of your 1-Scene Controller:
Yourdevicemayincludecoloroptions.Tochangecoloroftheface,
proceedasfollows:
Line up tabs
and press in
sides one at a
time to attach
Push in
side at tab
to release
INSTALLING YOUR 1-SCENE CONTROLLER
NOTE:UsecheckboxeswhenStepsarecompleted.
/./&&
/./&&
/./&&
/./&&
/./&&
/./&&
/./&&/./&&
/./&&
/./&&
/./&&
/./&&
WARNING: TO AVOID FIRE, SHOCK OR DEATH; TURN
OFF POWER atcircuitbreakerorfuseandtestthatpowerisoff
beforewiring!
Step 1
Step 3 Preparing and connecting wires:
This1-scenecontrollercanbewiredusingsidewireterminal
screwsorthroughbackwireopenings.Chooseappropriatewire
strippingspecicationsaccordingly.
• Makesurethattheendsofthewiresfromthewallboxare
straight (cut if necessary).
5/8"
(1.6 cm) Strip Gage
(measure bare
wire here)
Cut
(if necessary)
Side Wire Connection
Sidewireterminalsaccept#14
AWGsolid wire copper only.
Back Wire (either hole may be used)
Backwireopeningsuse#14-12AWG
solid wire copper only.
WIRING 1-SCENE CONTROLLER:
Connect wires per WIRING DIAGRAM as follows:
• GreenorbarecopperwireinwallboxtoGreenterminalscrew.
• LineHotwallboxwiretoterminalscrewmarked"BK".
• LineNeutralwallboxwiretoterminalscrewmarked"WH".
• Proceed to Step 5.
• Positionallwirestoprovideroomin
outletwallboxfordevice.
• Ensurethattheword“TOP”isfacingup
ondevicestrap.
• Partiallyscrewinmountingscrewsin
wallboxmountingholes.
NOTE:Dresswires
withabendas
shownindiagram
inordertorelieve
stresswhen
mountingdevice.
• Restorepoweratcircuitbreakerorfuse.
• LEDshouldturnON.
If LED does not turn ON, refer to the
TROUBLESHOOTING section.
Testing your 1-Scene Controller prior to
mounting in wall box:
Step 5
Gently press top
of push pad
Wiring Application:
Hot (Black)
Neutral (White)
Line
120VAC, 60Hz
BKWH
Green
Ground
1-Scene Controller
Step 4
2
3
1
2
1.Line(Hot)
2.Neutral
3.Ground

Identifying your wiring application (most common):
NOTE:Ifthewiringinyourwallboxdoesnotresemblethis
conguration,consultaqualiedelectrician.
Step 2
INTRODUCTION
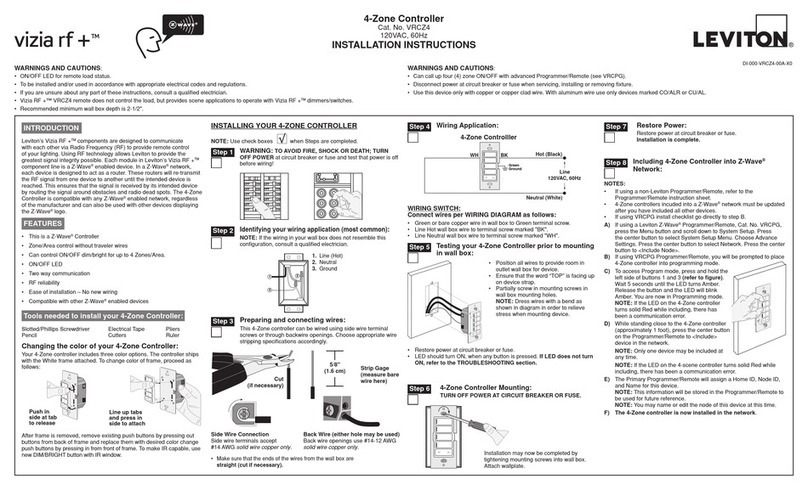
Leviton’sViziaRF+TMcomponentsaredesignedtocommunicate
witheachotherviaRadioFrequency(RF)toprovideremotecontrol
ofyourlighting.UsingRFtechnologyallowsLevitontoprovidethe
greatestsignalintegritypossible.EachmoduleinLeviton’sViziaRF+TM
componentlineisaZ-Wave®enableddevice.InaZ-Wave®network,
eachdeviceisdesignedtoactasarouter.Theserouterswillre-transmit
theRFsignalfromonedevicetoanotheruntiltheintendeddevice
isreached.Thisensuresthatthesignalisreceivedbyitsintended
devicebyroutingthesignalaroundobstaclesandradiodeadspots.
This1-Scenecontrollerismeanttocontrolspecialsceneenabled
Z-Wave®products.Tocontrolgroupsofdevicesthataremixedordo
notsupportscenecommandclassusetheLeviton1-ZoneController
(VRCZ1).Settingupthisdevicerequiresspecicadvancedcontroller
functionalities,yourcontrollermustbeabletoassociatedevicetogroups
andmustbeabletocontrolthescenecontrollercongurationcommands
suchastheadvancedProgrammingRemote(VRCPG).
• ThisisaZ-Wave®Controller
• 3-wayor4-waycontrolwithouttravelerwires
• Cancall1scene
• ON/OFFLED
• Twowaycommunication
• RFreliability
• Easeofinstallation–Nonewwiring
• CompatiblewithotherZ-Wave®enableddevices
FEATURES
Including 1-Scene Controller into Z-Wave®
Network:
Step 8
Restore Power:
Restorepoweratcircuitbreakerorfuse.
Installation is complete.
1-Scene Controller Mounting:
TURN OFF POWER AT CIRCUIT BREAKER OR FUSE.
Step 6
Installationmaynowbecompletedby
tighteningmountingscrewsintowallbox.
Attachwallplate.
Step 7
Device Association:
After inclusion process, you must associate the devices
to the controllers. Refer to the Primary Programmer/
Remote instruction sheet for complete details.
A) IfusingaLevitonZ-Wave®Programmer/Remote,Cat.No.VRCPG,
presstheMenubuttonandscrolldowntoSystemSetup.Press
thecenterbuttontoselectSystemSetupMenu.ChooseAdvanced
Settings.PressthecenterbuttontoselectNetwork.Scrolldownto
<ExcludeNode>andpressthecenterbutton.
B) IfusingVRCPGProgrammer/Remote,youwillbepromptedtoplace
1-scenecontrollerintoprogrammingmode.
C) ToaccessProgrammode,engagetheair-gapswitchbygently
pressingthetopofthepushpaduntilthebottomliftscompletelyout
oftheframeandaclickisheard(refer to figure).Wait5seconds
andthenpressthepushpadbackintotheframeandholdpush
paduntiltheLEDturnsAmber.ReleasethepushpadandtheLED
shouldblinkAmber.YouarenowinProgrammingmode.
NOTE:IftheLEDonthe1-scenecontrollerturnssolidRedwhile
excluding,therehasbeenacommunicationerror.
D) Whilestandingclosetothe1-scenecontroller(approximately2-5ft.),
pressthecenterbuttonto<Exclude>devicefromthenetwork.
Factory Default:
Ifyour1-scenecontrollerisnotresponding,oryouareunabletocontrol
itafteryouhavetriedtoInclude/Excludeitmultipletimes,itmaybe
necessarytoresetthe1-scenecontrollertoitsoriginalfactorysettings.
Toaccomplishthis,proceedasfollows:
• Onthe1-scenecontroller,e
ngagetheair-gap
switchbygentlypressingthetopofthepush
paduntilthebottomliftscompletelyoutofthe
frameandaclickisheard
(refer to figure).Wait
5secondsandthenpressthepushpadbackinto
theframeandholdpushpaduntilthelocatorLED
turnsAmberandthenashesRed.Releasethe
pushpad.The1-scenecontrollerisnowreset.
Oncethecontrollerisreset,itwillbenecessaryto
Re-Includeittoanetworkbeforeitcanbeused.
CAUTION:SETTINGADEVICETOAFACTORY
DEFAULTDOESNOTEXCLUDETHATDEVICE
FROMANETWORK.THEEXCLUSION
PROCEDUREMUSTSTILLBEFOLLOWEDTO
REMOVETHEDEVICEFROMTHEPRIMARY
PROGRAMMER/REMOTE'SINFORMATIONTABLE.FAILURETODO
SOMAYRESULTINSYSTEMTHATISSLOWTORESPOND,ORMAY
FAILTORESPONDTOSOMEDEVICES.
DI-000-VRCS1-02B©2009LevitonMfg.Co.,Inc.
LIMITED 5 YEAR WARRANTY AND EXCLUSIONS
LevitonwarrantstotheoriginalconsumerpurchaserandnotforthebenetofanyoneelsethatthisproductatthetimeofitssalebyLevitonisfreeofdefectsinmaterialsandworkmanshipundernormalandproperuseforveyearsfromthepurchasedate.Leviton’sonlyobligationistocorrectsuchdefectsbyrepairorreplacement,
atitsoption,ifwithinsuchveyearperiodtheproductisreturnedprepaid,withproofofpurchasedate,andadescriptionoftheproblemtoLeviton Manufacturing Co., Inc., Att: Quality Assurance Department, 201 North Service Road, Melville, New York 11747.Thiswarrantyexcludesandthereisdisclaimedliabilityforlabor
forremovalofthisproductorreinstallation.Thiswarrantyisvoidifthisproductisinstalledimproperlyorinanimproperenvironment,overloaded,misused,opened,abused,oralteredinanymanner,orisnotusedundernormaloperatingconditionsornotinaccordancewithanylabelsorinstructions.There are no other or implied
warranties of any kind, including merchantability and fitness for a particular purpose,butif any implied warranty is required bytheapplicable jurisdiction, the duration of anysuchimplied warranty, including merchantability and tness for aparticularpurpose, is limited to ve years.Leviton is not liable for incidental,
indirect, special, or consequential damages, including without limitation, damage to, or loss of use of, any equipment, lost sales or profits or delay or failure to perform this warranty obligation.Theremediesprovidedhereinaretheexclusiveremediesunderthiswarranty,whetherbasedoncontract,tortorotherwise.
Programmer/Remote
Cat. No. VRCPG
NOTE:Programmer/Remotemustbe
incloseproximityto1-scenecontroller
whenincludinginthenetwork.
Step 9 Excluding 1-Scene Controller from
Z-Wave®Network:
For additional information, contact Leviton’s
Techline at 1-800-824-3005 or visit Leviton’s
website at www.ViziaRFplus.com
ProtectedunderU.S.PatentNumber6,388,399andpatentspendingand
licensedunderU.S.PatentsNumbers5,905,442,and5,982,103
Push
Pad
LED
Scene Application:
Push Pad (Default settings)
Turn ON from OFF position:
Tap–Sceneisactivated,SceneLEDturnsON.
Turn OFF from ON position:
Tap–Sceneisnolongeractivated,SceneLED
turnsOFF.
Virtual Matching Remote Application:
Push Pad (Default settings)
Turn ON from OFF position:
Tap–LightsturnON,LEDturnsOFF.
Turn OFF from ON position:
Tap–LightsturnOFF,LEDturnsON.
OPERATION
TROUBLESHOOTING
• LocatorLEDoncontrollerdoesnotturnON
 - Circuitbreakerorfusehastripped.
 - If1-scenecontrollerispoweredupandLEDdoesnotturnON,
 checkwiring.
• Scenecontrollerdoesnotoperatelights
- Checkassociation.
 - Ensurethatcontrollerwasproperlyupdated.
 - Re-congurethecontrollerbuttontooperateusingtheAREAON/OFF
action(refertoVRCPGdocumentation).
Step 10
NOTE:Thissteprequiresacontrollerthatcancreateassociationliststo
group1.
NOTE:One(1)Z-Wave
®
devicecanbeassociatedtomultipleprogrammer/
remotes(uptove(5)programmer/remotesmaximum).
NOTE:Ifusinganon-LevitonProgrammer/Remote,refertothe
Programmer/RemoteinstructionsheetforAssociatingadevice.
Once association is complete, you can set a scene as
follows:
• Pressandholdbuttonon1-SceneControlleruntilLEDblinksGreen.
• Adjustdevicesinarea.
• Pressbuttonagainon1-SceneControllerandtheLEDwillstopblinking.
• Thescenehasnowbeenset.
Definition of Mode
LEDOption:SetstheLocatorLEDtimeoutto5secondsafteruse.
NOTE:Theswitchwillexitprogrammodeafter3minutesofinactivity.
Toenterprogrammingmodepressandholdthepushpadfor10seconds
untilthelocatorLEDbeginstoblink.UponreleasingthepushpadtheLED
Optionwillautomaticallybechanged.
ADVANCED PROGRAMMING FEATURES
LOCATOR LED
Default
First toggle
Active
Turns off 5 seconds after use
LOCATOR LED OPTION SETTING
Gently press top
of push pad
G) Afteralldevicesareincludedintothenetwork,thecontrollermust
beupdatedtoallowpropernetworkfunction.Toupdatecontroller
proceedasfollows:
 • Ifusinganon-LevitonProgrammer/Remote,refertothe
Programmer/Remoteinstructionsheetforupdatingcontroller.
 • IfusingLevitonZ-Wave®Programmer/Remote,Cat.No.VRCPG,
presstheMenubuttonandscrolldowntoSystemSetup.Press
thecenterbuttontoselectSystem
SetupMenu.Pressthecenter
buttontoselectNetwork.Press
thecenterbuttontoselectUpdate
"cntrl".Whenprompted,presspush
padonthe1-scenecontroller.
 • WaituntiltheVRCPGProgrammer/
Remoteconrmscompletion.
Updateisdone.
NOTE: IfusingtheVRCPG'sInstall
Checklistfeature,afteralldevicesare
included,gotoUpdateControllersstep.
NOTE:Ifthe1-scenecontrollerhas
beensuccessfullyIncludedinthe
networkandtheusertriestoInclude
itagainwithoutrstexcludingitfromthe
network,thecontrollerwillretain
therstnodeIDithadreceivedand
ignorethesecond.
Cat. No. VRCPG
1 ON
2 ON
3 ON
4 ON
OFF
OFF
OFF
OFF
Menu
Button
Center
Button
Including 1-Scene Controller into Z-Wave®
Network:
Step 8 cont'd
ThisdevicecomplieswithPart15oftheFCCRules.Operationissubject
tofollowingtwoconditions:(1)thisdevicemaynotcauseharmful
interference,and(2)thisdevicemustacceptanyinterferencereceived,
includinginterferencethatmaycauseundesiredoperationofthedevice.
Thisequipmenthasbeentestedandfoundtocomplywiththelimitsfor
aClassBDigitalDevice,pursuanttoPart15oftheFCCRules.These
limitsaredesignedtoprovidereasonableprotectionagainstharmful
interferenceinaresidentialinstallation.Thisequipmentgenerates,uses,
andcanradiateradiofrequencyenergyand,ifnotinstalledandusedin
accordancewiththeinstructions,maycauseharmfulinterferencetoradio
communications.However,thereisnoguaranteethatinterferencewill
notoccurinaparticularinstallation.Ifthisequipmentdoescauseharmful
interferencetoradioortelevisionreception,whichcanbedetermined
byturningtheequipmentOFFandON,theuserisencouragedtotryto
correcttheinterferencebyoneormoreofthefollowingmeasures:
• ReorientorrelocatethereceivingAntenna.
• Increasetheseparationbetweentheequipmentandthereceiver.
• Connecttheequipmentintoanoutletonacircuitdifferentfromthatto
whichthereceiverisconnected.
• Consultthedealeroranexperiencedradio/tvtechnicianforhelp.
FCC COMPLIANCE STATEMENT
AnychangesormodicationsnotexpresslyapprovedbyLeviton
ManufacturingCo.,Inc.,couldvoidtheuser'sauthoritytooperatethe
equipment.
FCC CAUTION
Step 11b Mixed group or device that does not support
scene:
NOTE: Thissteprequiresa1-ZoneControllerorZ-Wave®
ControllerthatsupportsZ-Wave®scenecontrollerconguration
commands.
AREA ON/OFF Application:
Push Button
Turn ON from OFF position:
Pressbutton–TurnsalllightsinZone/AreaON,LEDturnsON.
LEDwillblinkuntilZone/AreaisON.
Turn OFF from ON position:
Pressbutton–TurnsalllightsinZone/AreaOFF,LEDturnsOFF.
DIM/BRIGHT:
PressleftsideofDim/Brightbutton-LightsinlastactivatedZone/Areawill
dim.
PressrightsideofDim/Brightbutton-LightsinlastactivatedZone/Areawill
brighten.
NOTE:ControllerwillonlyDim/BrightdeviceslocatedwithindirectRadio
Frequencyrange.
NOTE:LEDwillbelitGreenifanyoneloadintheassociatedAreaisON.
LEDwillbeOFFwhenallloadsareturnedOFF.
Ifthereisapoweroutage,whenthepowerisrestored,thelightswillreturn
tothelastsettingbeforethepowerinterruption.
Cleaning:Cleanwithadampcloth.DO NOTusechemicalcleaners.
Scene Programming:
NOTE: Alldevicesassociatedtothebuttonsmustsupport
Z-Wave®scenecommand.Ifadeviceinthegroupdoesnot
supportthescenecommanditwillnotbecontrolled.
• Pressandholdbuttonon1-SceneControlleruntilLED
blinksGreen.
• Adjustdevicesassociatedtothebutton.
• Pressbuttonagainon1-SceneControllerandtheLEDwill
stopblinking.
• Thescenehasnowbeenset.
Step 11a
Other Leviton Controllers manuals

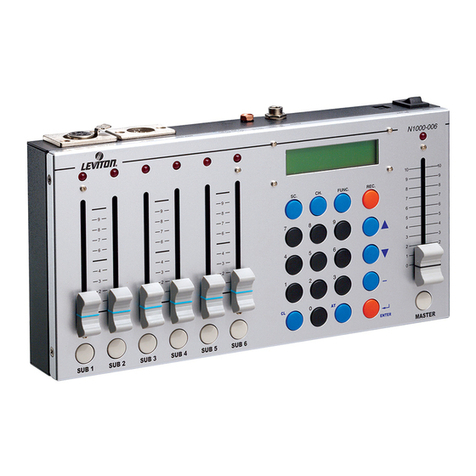
Leviton Intellect ZL07S-N00 User manual

Leviton

Leviton Intellect ZL07S-N00 User manual

Leviton INI06-10 User manual

Leviton

Leviton INI06-10 User manual

Leviton CN220 User manual

Leviton

Leviton CN220 User manual

Leviton HXC10 User manual

Leviton

Leviton HXC10 User manual

Leviton N1000-006 User manual

Leviton

Leviton N1000-006 User manual

Leviton RZCS4 User manual

Leviton

Leviton RZCS4 User manual

Leviton Lumina RF Decora DL057-D0Z User manual

Leviton

Leviton Lumina RF Decora DL057-D0Z User manual

Leviton MS602-BW User manual

Leviton

Leviton MS602-BW User manual

Leviton Decora Home Controls 16450 User manual

Leviton

Leviton Decora Home Controls 16450 User manual

Leviton DECORA ILLUMATECH IPF01-1LX User manual

Leviton

Leviton DECORA ILLUMATECH IPF01-1LX User manual

Leviton GreenMAX DRC User manual

Leviton

Leviton GreenMAX DRC User manual

Leviton Decora Smart User manual

Leviton

Leviton Decora Smart User manual

Leviton decora smart D24SF User manual

Leviton

Leviton decora smart D24SF User manual

Leviton SGVSM-00W User instructions

Leviton

Leviton SGVSM-00W User instructions

Leviton Decora Smart DW4BC User manual

Leviton

Leviton Decora Smart DW4BC User manual

Leviton FEBC User manual

Leviton

Leviton FEBC User manual

Leviton D8000 User manual

Leviton

Leviton D8000 User manual

Leviton MLC128R User manual

Leviton

Leviton MLC128R User manual

Leviton Bitwise BWBC2 User manual

Leviton

Leviton Bitwise BWBC2 User manual

Leviton miniZ mZn20-102 User manual

Leviton

Leviton miniZ mZn20-102 User manual

Leviton vizia rf+ User manual

Leviton

Leviton vizia rf+ User manual

Leviton Decora HCC2D User manual

Leviton

Leviton Decora HCC2D User manual

Leviton CN200 User manual

Leviton

Leviton CN200 User manual

Leviton CD250 User manual

Leviton

Leviton CD250 User manual

Popular Controllers manuals by other brands

COROMATIC NETYS RT quick start guide

COROMATIC

COROMATIC NETYS RT quick start guide

Mita WP3000 manual

Mita

Mita WP3000 manual

ICP DAS USA WISE-52 Series quick start

ICP DAS USA

ICP DAS USA WISE-52 Series quick start

LS XBM-DN32H installation guide

LS

LS XBM-DN32H installation guide

esera automation 11319 operating instructions

esera automation

esera automation 11319 operating instructions

National Instruments cRIO-9031 user manual

National Instruments

National Instruments cRIO-9031 user manual

L-Acoustics LA2Xi owner's manual

L-Acoustics

L-Acoustics LA2Xi owner's manual

Soyal AR727HV3 quick guide

Soyal

Soyal AR727HV3 quick guide

maxon motor EPOS 24/5 Getting started

maxon motor

maxon motor EPOS 24/5 Getting started

Ametek Magnetrol Tuffy Installation and operating manual

Ametek

Ametek Magnetrol Tuffy Installation and operating manual

Graco SERIES F Instructions-parts list

Graco

Graco SERIES F Instructions-parts list

MDT Technologies AKK UP Series operating instructions

MDT Technologies

MDT Technologies AKK UP Series operating instructions

GF PA11 instruction manual

GF

GF PA11 instruction manual

Vanair Goodall CAP-START Operation manual and parts list

Vanair

Vanair Goodall CAP-START Operation manual and parts list

Sony RM-VZ220 operating instructions

Sony

Sony RM-VZ220 operating instructions

Bug-O Systems AVC-2100 Series Instructions and parts manual

Bug-O Systems

Bug-O Systems AVC-2100 Series Instructions and parts manual

EMKO esm-4450 instruction manual

EMKO

EMKO esm-4450 instruction manual

PR Lighting NOVA PR-2013D manual

PR Lighting

PR Lighting NOVA PR-2013D manual

manuals.online logo
manuals.online logoBrands
  • About & Mission
  • Contact us
  • Privacy Policy
  • Terms and Conditions

Copyright 2025 Manuals.Online. All Rights Reserved.