COMBUSTIBLE FUEL
Nunca use gasolina ni combustible para aviones de radiocontrol. Use solo combustible para motores de
2 tiempos de radiocontrol. Recomendamos combustible LRP al 25%. Un contenido demasiado alto en
nitrometano disminuirá la vida útil de su motor.
Never use regular gasoline or airplane fuel. Use fresh 2-stroke model car fuel only! We recommend using
our line of LRP high-quality fuels (Order No. 35531: 25% 1L / Order No. 35731: 25% 3,5L). For the LRP
Nitro Engine Z.28R Sport Pullstart engine we recommend a fuel with 25% nitro. Never exceed 36% nitro.
A higher nitro content will decrease your engine‘s lifetime.
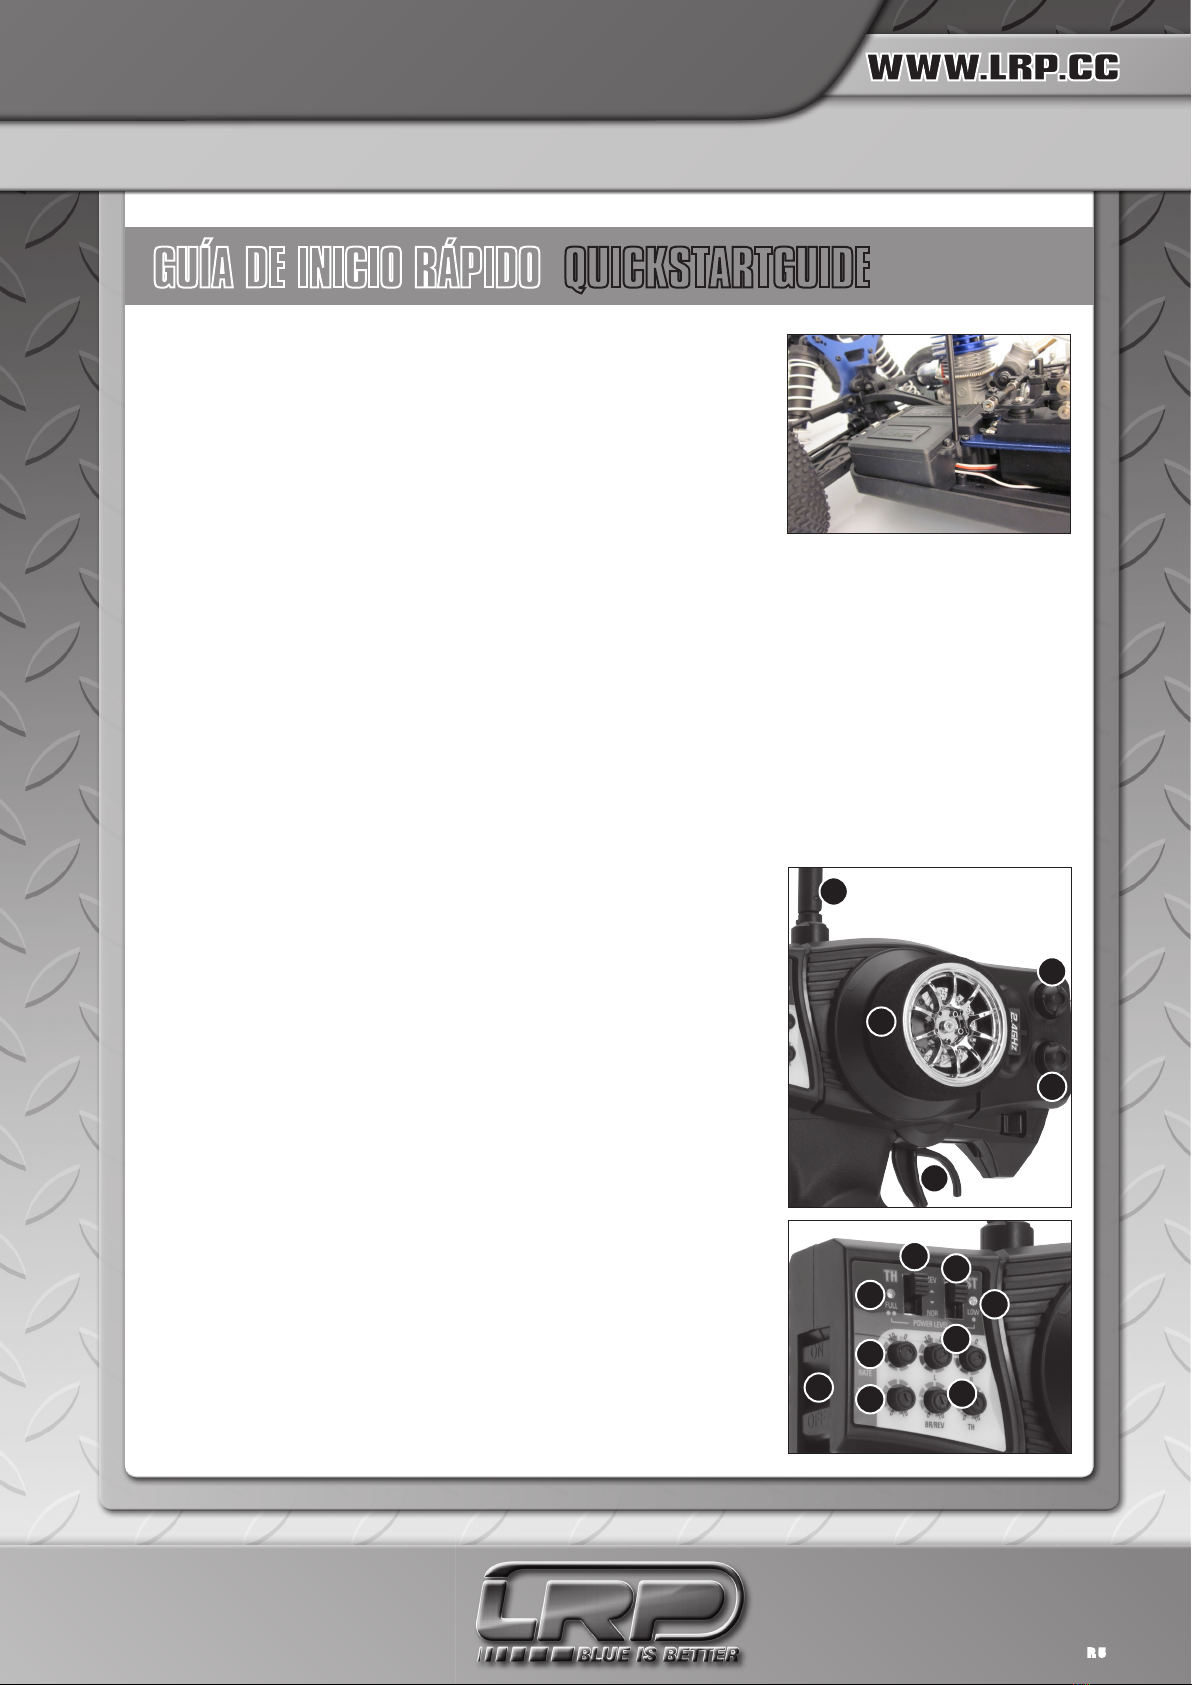
LLENADO DEL DEPÓSITO FUEL FILLING
Para el llenado del depósito use solo las herramientas recomendadas, tales como un biberón o pistola de
carga rápida de combustible. No use nunca una botella normal, podría confundirse el combustible con
bebida y causar un peligro real de muerte. Guarde el combustible siempre en su envase original y ciérrelo
después de usarlo.
Tipo: Biberón de combustible LRP 500ccm Cód. 37305.
For fueling please use only recommended tools like a fuel bottle or a fuel gun.
Never use a normal bottle, danger to confound the fuel with something to drink. MORTAL DANGER!
Keep the fuel in the original labeled can, ALWAYS. Close the can properly after use.
Recommendation: LRP 500ccm Fuel Bottle (Order No. 37305)
FILTRO DE AIRE AIR FILTER
Un buen filtro de aire es muy importante para la vida de su motor. Nunca corra sin filtro de aire,
puede ocasionarle daños irreparables en su motor. No olvide empapar el filtro con aceite para filtro
de aire antes de usar el modelo. Después de cada uso limpie cuidadosamente el filtro de aire y reem-
plácelo cuando haya usado 3 litros de combustible. Recomendamos usar nuestro filtro de LRP HI
FLOW (LR36565) y el aceite LRP AIR FLOW (LR36590).
Limpieza del filtro de aire:
Retire el filtro de aire del motor. Asegúrese de tapar el carburador para que no le entre suciedad ni
polvo. Limpie el filtro con el combustible del modelo, séquelo y vuelva a ponerle aceite (Aceite LRP
Cód. 36590) después de usar el modelo. Alternativamente puede colocar un nuevo filtro de aire, sin
olvidarse de ponerle aceite.
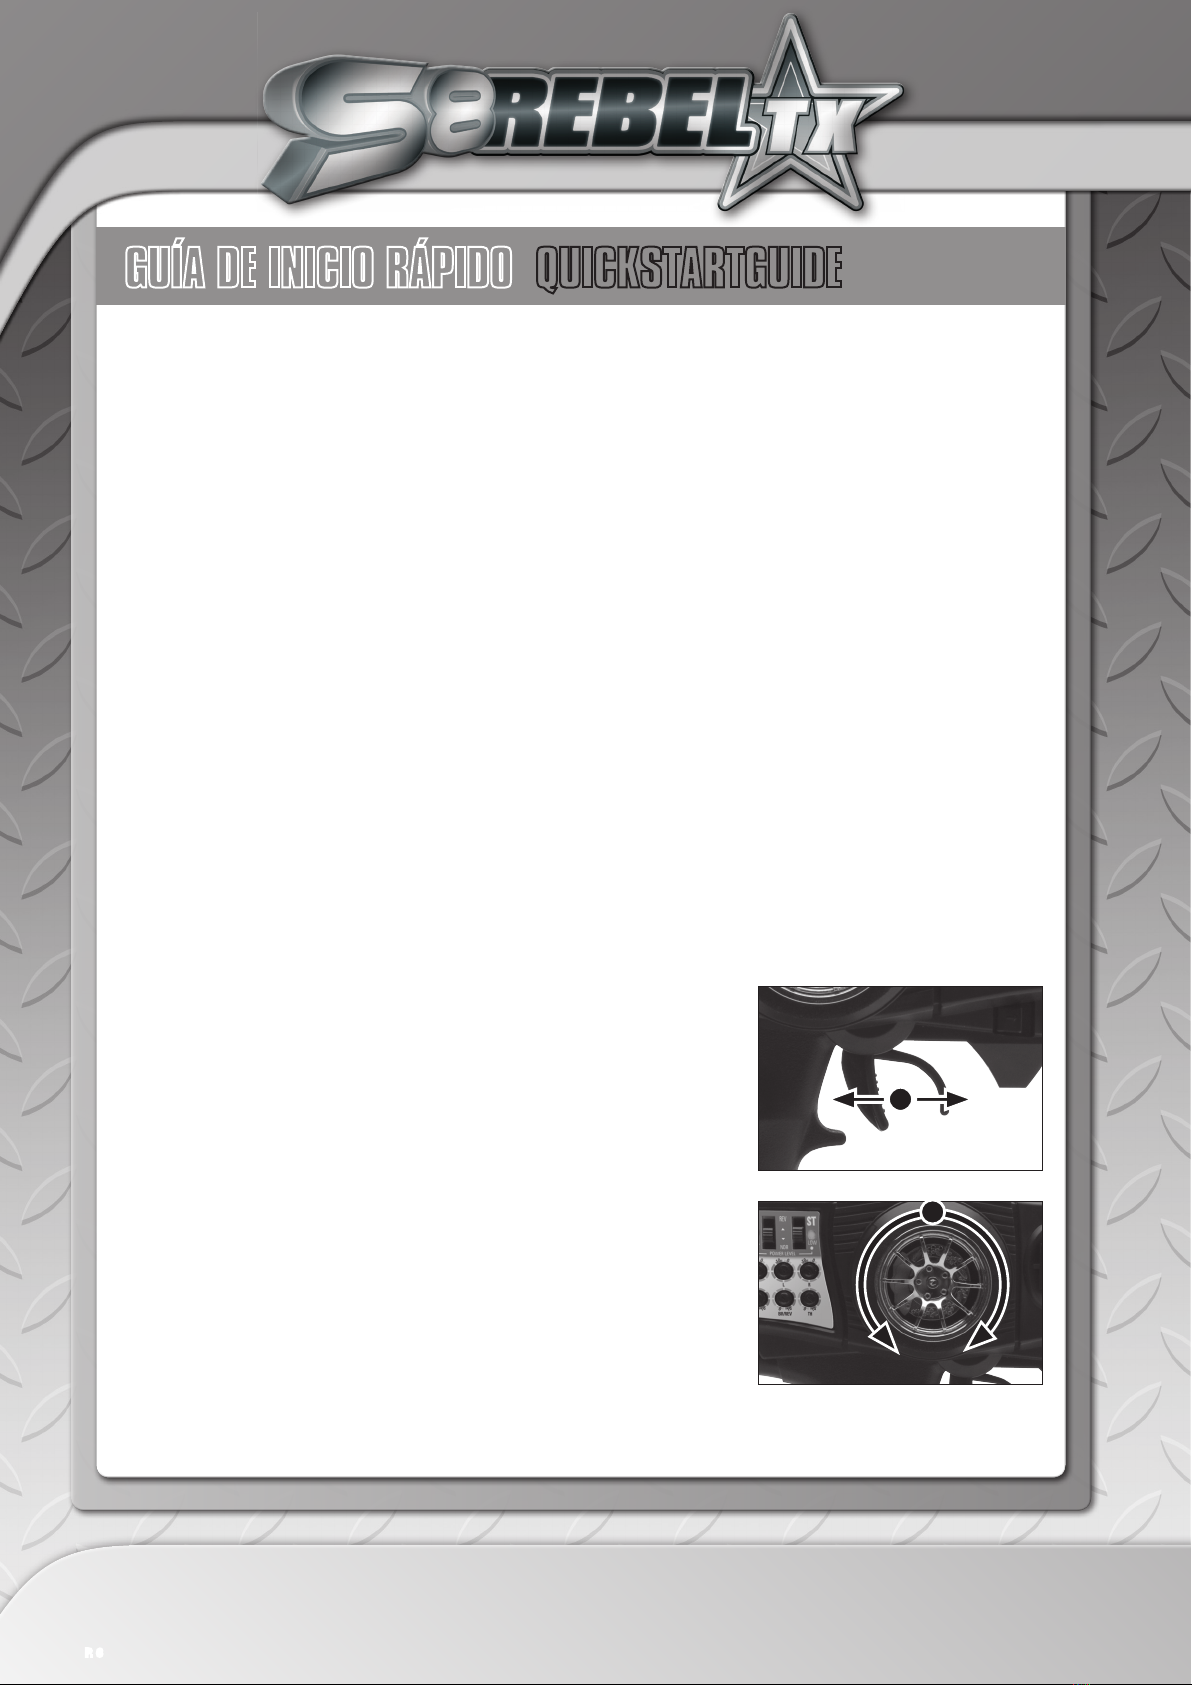
Montaje del filtro de aire:
Es muy importante montar el filtro de aire de la forma adecuada.
Si no esta bien montado, el motor puede aspirar suciedad y dañarse seriamente.
También es muy importante que el filtro este bien sujeto al carburador, para ello puede usar una
brida de plástico.
A good airfilter is very important for the life of your engine. Never run without an airfilter, result will be im-
mediate and permanent damage! Don’t forget to saturate the airfilter with a suitable airfilter oil before usage.
Carefully clean the airfilter at least after every tenth run. Replace the airfilter every 3 litres (~1 gallon) of usage.
We recommend the use of our LRP Hi-Flow 2-stage oval airfilter set (Art.Nr. 36565) together with our LRP
Hi-Flow airfilter oil Order No. 36590).
Cleaning of the oil filter
Loosening the air filter from the body. Please consider that no contaminant should come into the carburettor.
Clean the filter with nitro, dry it and imbue it with a suitable airfilter oil (LRP Art.Nr.:36590) before usage.
Alternative you can take a new air filter. Please consider that the filter is oiled. At the recommended Filter LRP
Hi-Flow 2-stage oval airfilter set please use only oil on the inner filter.
Assembly of the air filter
It is very important to mount the airfilter precisely.
If there are breaches, the engine aspires dirty air and will be destroyed.
Also it is very important, that the box of the air filter fits perfect on the carburettor and will be fixed by a cable strap
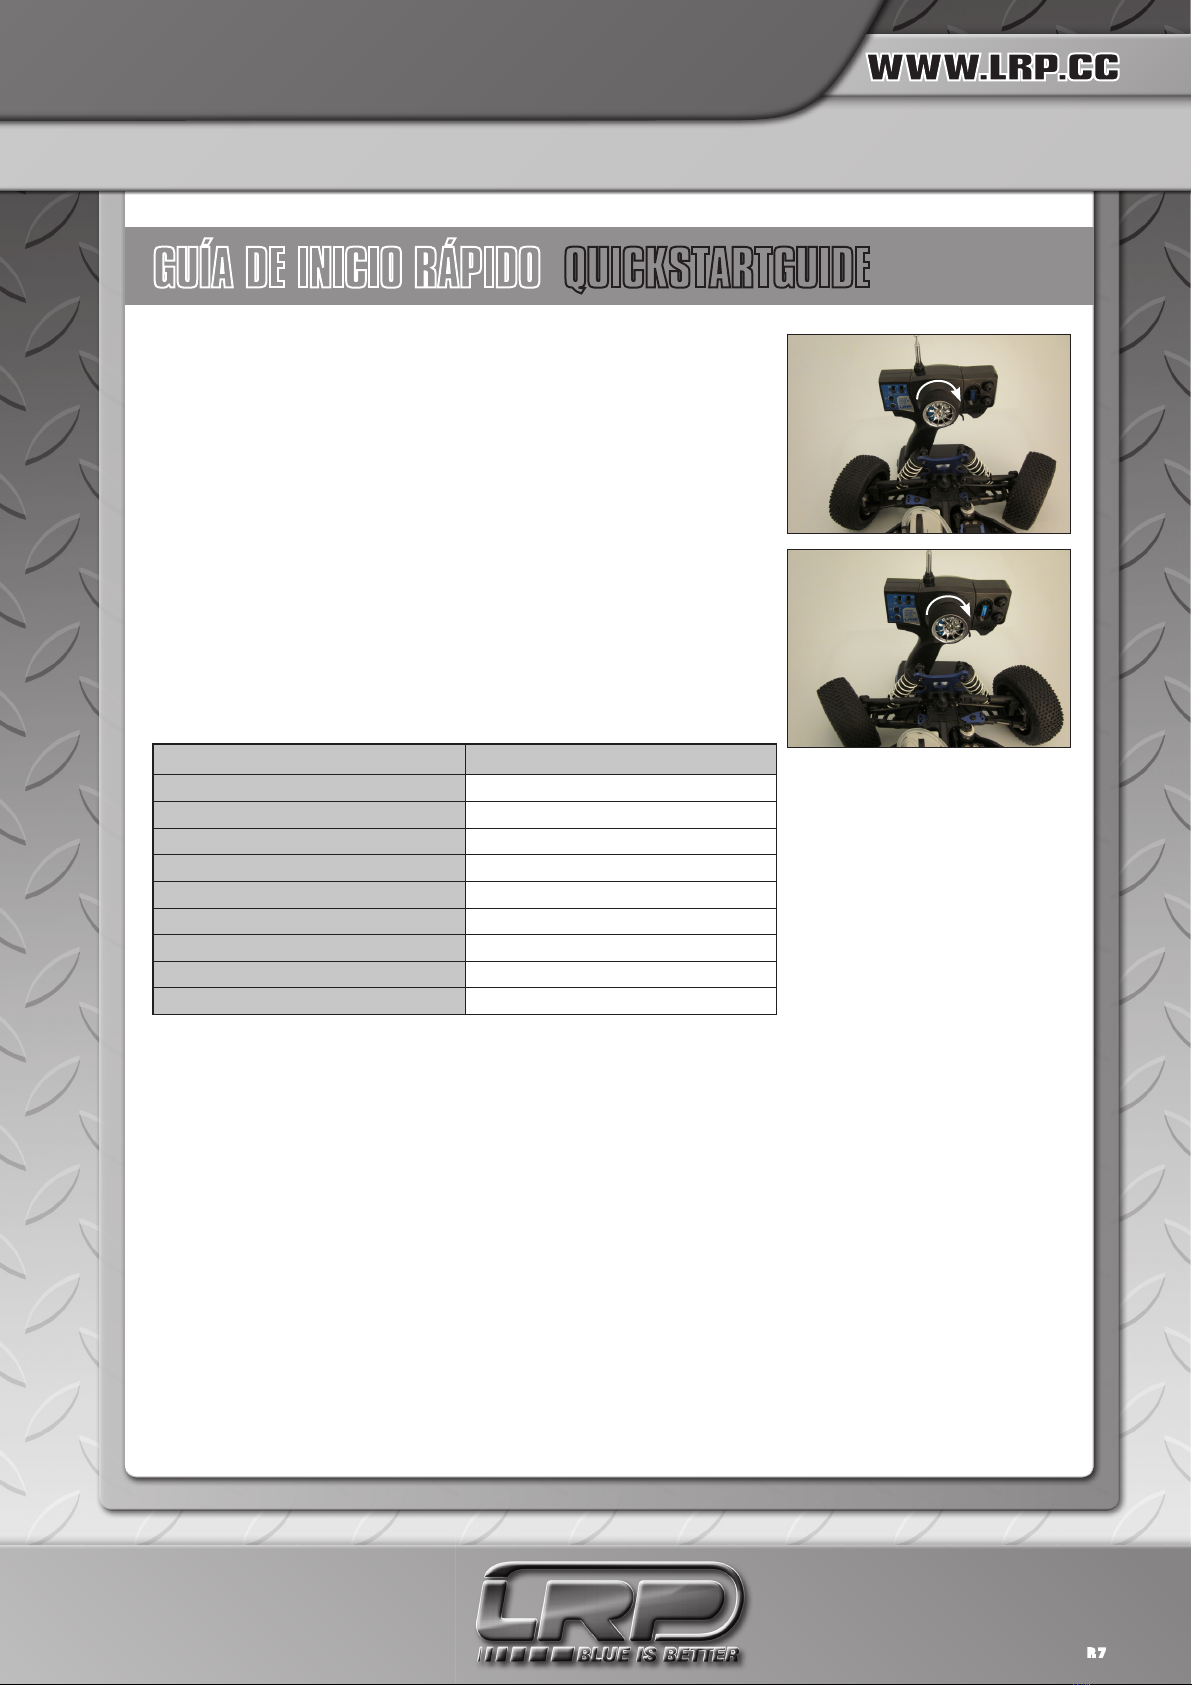
GUÍA DEL MOTOR ENGINE GUIDE
Filtro aire 21-32 oval doble
LRP XTEC High-Flow 2-Stage Oval Airfilterset
for .21-.32 engines
# 36565
P. 10