WARNING: Ensure the rotor is securely fixed to the rotor shaft. Failure to properly secure rotor could lead to personal
injury or damage to the centrifuge.
WARNING: Be sure the rotor thumbscrew is tightened before each centrifugation cycle. Failure to properly tighten
thumbscrew may lead to a bent or broken thumbscrew and damage to the tube shields, rotor, and rotor chamber.
Place the centrifuge on a sturdy, level surface. Verify that there are no loose objects or packing material in the tube
chamber. DO NOT PLUG UNIT IN.
Select a rotor and slide it down over the motor shaft, ensuring that the slot in the bottom of the rotor lines up with cross
pin on the motor shaft. The shaft should be lubricated with a fine layer of common grease every few months for easy
rotor changes.
NOTE: Make sure there is no grease on the top of the surface of the rotor to ensure the thumbscrew stays secure.
Test Tube and Microtube Rotors: After seating the rotor properly on the motor shaft cross pin, tighten the black thumb-
screw down on the rotor. Do not over-tighten.
Verify that the main power switch is in the “OFF” position and plug the AC power cord into the appropriate approved and
properly grounded AC outlet. Next, turn the main power switch on, then press the front panel POWER button. The display
should illuminate.
DO NOT INSERT TUBES AT THIS TIME: Ensure that the Rotor Select is in the correct position: LOW SPEED for test tube rotors
(1,000-5,000 rpms) or HIGH SPEED for microhematocrit and microtube rotors (12,000 rpms).
To change speeds, press and hold the ROTOR SELECT button for three seconds.
SPEED and TIME can only be adjusted when the lid is closed and locked.
To set the speed, press the SPEED button once, then use the UP/DOWN arrows to select 1,000 rpm, for an initial test run. Press
the SPEED button again to lock the speed.
To set the time, press the TIME button once to flash seconds, and use left arrow to flash minutes. Use the UP/DOWN arrows
to choose 1:00 minute for the initial test run. Press the TIME button again to lock the time.
Start the unit by pressing the START/STOP button. The unit should come up to speed with a smooth sound and little or no
vibration. If there is excessive vibration or noise, shut off the unit immediately, check the troubleshooting tips, and contact
LW Scientific if not resolved.
Spin only balanced loads. Make sure that tubes are placed opposite each other. Proper sample balancing will improve
sample separation and will extend the life of the centrifuge. Out of balance loads may damage the centrifuge.
Support your tubes: Tubes must always be supported from the bottom and never hanging by their caps. Use the large tube
sleeves for larger tubes and the small sleeve inserts for smaller tubes. Rubber tube cushions are also available from LW
Scientific for supporting short tubes in the large tube sleeves.
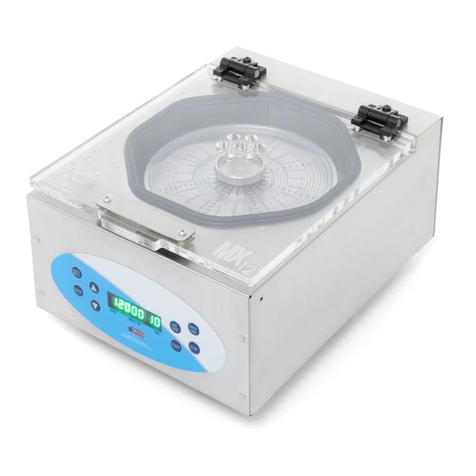
Ready for operation: Load your tubes and set time and speed. When spinning the 24 -place microhematocrit rotor, keep
the speed set at 12,000rpm for rapid and complete separations in 3 minutes.
3
4
5
6
7
8
9
Selecting and Changing Rotors
A
B
C
D
NOTE: Please ensure that the black rubber rotor gasket is
positioned around the rim of the rotor such that the capil-
lary tubes are pushing into the rubber while spinning. The
rubber gasket is not affixed to the rotor to allow for clean-
ing and re-positioning of the gasket to prolong gasket
life.
10
High speed
Pcv/microtube rotors
Low Speed
Test Tube Rotors
Rotor
select
WARNING: Spinning the 12-place test tube rotor at high speeds (above 5,000 rpm) can cause tube breakage and centri-
fuge damage and cause an over-speed error.
Microhematocrit Rotor: Place the metal cover plate onto the rotor by sliding it down over the center shaft.
WARNING: The rotor cover plate is not threaded and will not hold the rotor in place during operation.
Next, tighten the black thumbscrew down onto the rotor. Do not over-tighten.
