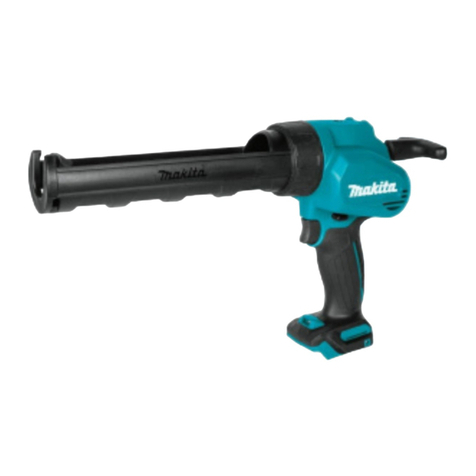
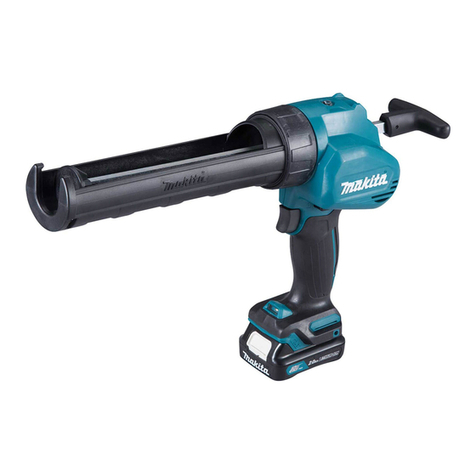
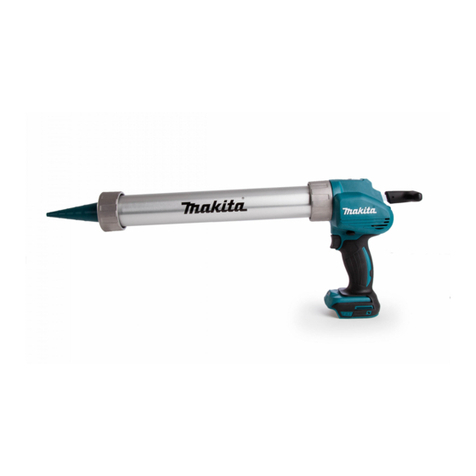
Makita CG100D User manual

INSTRUCTION MANUAL
Cordless Caulking Gun
CG100D
ENGLISH: Original instructions
Read before use.

2ENGLISH
SPECIFICATIONS
Model: CG100D
Maximum feed force 5,000 N
Feed speed 0 - 28 mm/s
Stroke 300 ml size holder 214 mm
600 ml size holder 350 mm
800 ml size holder 294 mm
Overall length 300ml size holder 404 mm
600ml size holder 538 mm
800ml size holder 480 mm
Rated voltage D.C. 10.8 V - 12 V max
Standard battery cartridge BL1015 / BL1016 / BL1020B / BL1021B / BL1040B / BL1041B
Charger DC10SA / DC10SB / DC10WC / DC10WD
Net weight 1.9 - 2.6 kg
-
Symbols
Be sure that you understand their meaning before use.
Read instruction manual.
Ni-MH
Li-ion
Only for EU countries
pack together with household waste material!
In observance of the European Directives,
and Batteries and Accumulators and Waste
Batteries and Accumulators and their imple-
mentation in accordance with national laws,
must be collected separately and returned to an
environmentally compatible recycling facility.
Intended use
Noise
-
ing to EN62841:
pA
WARNING: Wear ear protection.
Vibration
-
mined according to EN62841:
Work mode: operation without load
h2or less
2
NOTE:
measured in accordance with the standard test method
and may be used for comparing one tool with another.
NOTE:
also be used in a preliminary assessment of exposure.
WARNING:
use of the power tool can differ from the declared emission
value depending on the ways in which the tool is used.
WARNING:
Be sure to identify safety measures to pro-
tect the operator that are based on an estimation of exposure
the operating cycle such as the times when the tool is switched
EC Declaration of Conformity
For European countries only
to this instruction manual.
SAFETY WARNINGS
General power tool safety warnings
WARNING:
Read all safety warnings, instruc-
power tool. Failure to follow all instructions listed below
-
tions for future reference.

3ENGLISH
Work area safety
1. Keep work area clean and well lit. Cluttered or
dark areas invite accidents.
2. -
liquids, gases or dust. Power tools create sparks
which may ignite the dust or fumes.
3.
a power tool. Distractions can cause you to lose control.
Electrical Safety
1.
and matching outlets will reduce risk of electric shock.
2.
refrigerators.-
tric shock if your body is earthed or grounded.
3. Do not expose power tools to rain or wet con-
ditions. Water entering a power tool will increase
the risk of electric shock.
4.
Damaged or entangled cords
increase the risk of electric shock.
5.
extension cord suitable for outdoor use. Use of a cord
suitable for outdoor use reduces the risk of electric shock.
6.
-
supply. Use of an RCD reduces the risk of electric shock.
However,
users of pacemakers and other similar medical
devices should contact the maker of their device and/
or doctor for advice before operating this power tool.
Personal Safety
1.
-
ication. A moment of inattention while operating
2.
protection.
non-skid safety shoes, hard hat or hearing protection used
3.
to power source and/or battery pack, picking
Carrying power tools with
that have the switch on invites accidents.
4.
A wrench or a key left attached to a
5.
balance at all times.
of the power tool in unexpected situations.
6.
long hair can be caught in moving parts.
dust extraction and collection facilities, ensure
Use of
dust collection can reduce dust-related hazards.
8.
Do not let familiarity gained from frequent use
of tools allow you to become complacent and
ignore tool safety principles. A careless action can
9.
It is an employer's responsibility to enforce
-
-
Power tool use and care
1.
power tool for your application.
rate for which it was designed.
2.
it on and off. Any power tool that cannot be controlled
with the switch is dangerous and must be repaired.
3.
-
tools. Such preventive safety measures reduce
the risk of starting the power tool accidentally.
4.
Power
tools are dangerous in the hands of untrained users.
5.
-
Many accidents
are caused by poorly maintained power tools.
6. Properly
maintained cutting tools with sharp cutting edges
are less likely to bind and are easier to control.
performed. Use of the power tool for operations different
from those intended could result in a hazardous situation.
4ENGLISH
8.
and free from oil and grease. Slippery handles
and grasping surfaces do not allow for safe handling
and control of the tool in unexpected situations.
9.
-
ment of cloth work gloves in the moving parts may
Battery tool use and care
1.
A charger that is suitable for
when used with another battery pack.
2. -
nated battery packs. Use of any other battery
3.
Shorting the battery termi-
4.
-
-
5. -
may exhibit unpredictable behaviour resulting in
6.
-
perature above 130 °C may cause explosion.
-
tions. Charging improperly or at temperatures
1.
repair person using only identical replacement
parts.
tool is maintained.
2. Service
of battery packs should only be performed by the
manufacturer or authorized service providers.
3. -
ing accessories.
Cordless caulking gun safety
warnings
may be pinched.
3.
Always work in well ventilated area and wear proper
protections in accordance with the operation.
4.
Read and follow the manufacture's instructions on
caulking material or adhesive material before usage.
SAVE THESE INSTRUCTIONS.
WARNING:
-
-
Important safety instructions for
battery cartridge
1.
Before using battery cartridge, read all instruc-
2. Do not disassemble battery cartridge.
3.
4.
-
5.
-
-
nails, coins, etc.
Do not expose battery cartridge to water
or rain.
breakdown.
6.
8. Be careful not to drop or strike battery.
9. Do not use a damaged battery.
10.
-
ments.
For commercial transports e.g. by third parties,
-
aging and labeling must be observed.
For preparation of the item being shipped, consult-
Please also observe possibly more detailed
national regulations.
battery in such a manner that it cannot move
around in the packaging.
11. Follow your local regulations relating to dis-
posal of battery.
SAVE THESE INSTRUCTIONS.
CAUTION: Only use genuine Makita batteries.
Use of non-genuine Makita batteries, or batteries that
have been altered, may result in the battery bursting
also void the Makita warranty for the Makita tool and
charger.

5ENGLISH
Tips for maintaining maximum
battery life
1.
-
2.
3.
-
FUNCTIONAL
DESCRIPTION
CAUTION:
CAUTION:
CAUTION:
cause them to slip off your hands and result in damage to
1
2
3
1. Red indicator Button Battery cartridge
while sliding the button on the front of the cartridge.
battery cartridge with the groove in the housing and slip
it into place. Insert it all the way until it locks in place
with a little click. If you can see the red indicator on the
upper side of the button, it is not locked completely.
CAUTION:
If not,
you or someone around you.
CAUTION:
forcibly. If the cartridge does not slide in easily, it is
not being inserted correctly.
Battery protection system
extend battery life.
tool and/or battery are placed under one of the following
conditions:
an abnormally high current.
In this situation, turn the tool off and stop the application
the tool on to restart.
If the tool does not start, the battery is overheated. In
this situation, let the battery cool before turning the tool
on again.
will not operate. If you turn the tool on, the motor runs
again but stops soon. In this situation, remove and
recharge the battery.
capacity
Only for battery cartridges with the indicator
1
2
1. Indicator lamps Check button
Press the check button on the battery cartridge to indi-
light up for a few seconds.
Indicator lamps Remaining
capacity
Off
NOTE: Depending on the conditions of use and the
ambient temperature, the indication may differ slightly
from the actual capacity.

6ENGLISH
WARNING: -
A B
1
2
1. Switch trigger
the trigger-lock button is provided.
by increasing pressure on the switch trigger. Release
the switch trigger to stop.
After use, press in the trigger-lock button from B side.
1
1.
the lowest speed at 1.
NOTICE:
tool is working.
NOTICE:
of caulking material, it may not be fed at low
NOTICE:
CAUTION:
1
1. Lamp
seconds after releasing the switch trigger.
NOTICE:
NOTE: Use a dry cloth to wipe the dirt off the lens of
the lamp. Be careful not to scratch the lens of lamp, or
it may lower the illumination.
1
1. Warning lamp
If the load increases and the tool becomes overloaded,
the tool stops automatically and the warning lamp keeps
on lighting. In this case, release the switch trigger, and
remove the cause of overload, and then restart the tool.
NOTE: When the warning lamp blinks, check the
following points:

7ENGLISH
trigger is released. It releases the pressure of the caulk-
ing material and prevents dripping.
ASSEMBLY
CAUTION:
procedure in reverse.
12 3
1. Screw Plate
piston
1. Insert the rod from the rear side of the tool with its
teeth facing down.
1
1. Short rod
Attach piston A with the screw.
12 3
1. Screw Piston A Short rod
NOTICE:
procedure in reverse.
CAUTION:
follow the installation procedure in reverse.
1
1. Holder
procedure in reverse.

8ENGLISH
12 3
1. Screw Plate
12
1. Screw
Select the proper type of piston according to the caulk-
ing material container by referring to the following table.
Cartridge Piston A Piston D
Film package Piston B Piston E *
Piston C -
*. Optional accessary
piston
1. Insert the rod from the rear side of the tool with its
teeth facing down.
1
1. Long rod or black rod
NOTICE:
Attach the piston with the screw.
12 3
1. Screw Piston Long rod or black rod
procedure in reverse.
CAUTION:
1
1. Holder

9ENGLISH
OPERATION
Using cartridge
Preparing cartridge for use
1. Cut the tip of the cartridge nozzle so that the suit-
able amount of caulking material is fed.
1
1. Nozzle
the nozzle.
1
1. Nozzle
Attach the nozzle to the cartridge.
NOTICE:
cartridge may cause malfunction.
NOTICE: -
-
NOTICE:
cartridge.
1. Pull the rod handle backward slowly until it stops.
1
1. Rod handle
Insert the cartridge into the holder as shown in the
Push the rod gently until the piston touches the
bottom of cartridge.
-
dure in reverse.
NOTICE:
-
ton for cartridge.
1. Remove the holder cap from the holder, and then
pull the rod handle backward slowly until it stops.
1
2
1. Holder cap Rod handle
Insert the cartridge into the holder.

10 ENGLISH
1
1. Holder
holding the holder.
12
1. Holder cap Holder
4. Push the rod gently until the piston touches the
bottom of cartridge.
-
dure in reverse.
Preparing package for use
Cut off the tip of the package.
NOTICE: -
-
age may cause malfunction.
NOTICE:
1. Remove the holder cap, nozzle, and rubber ring
from the holder.
1423
1. Holder cap Nozzle Rubber ring 4. Holder
Pull the rod handle backward slowly until it stops.
Insert the package into the holder.
1
1. Holder
4. Attach the rubber ring, nozzle, and holder cap by
1423
1. Holder cap Nozzle Rubber ring 4. Holder
5.
Push the rod gently until the piston touches the package.
-
ber ring, and then push the rod handle forward until it stops.

11 ENGLISH
NOTICE:
1. Remove the holder cap, nozzle, and rubber ring
from the holder.
1423
1. Holder cap Nozzle Rubber ring 4. Holder
Push the rod handle all the way until it stops.
Insert the tip of the holder into the caulking material, and then
1
1. Holder
4. Attach the rubber ring, nozzle, and holder cap by
1423
1. Holder cap Nozzle Rubber ring 4. Holder
Caulking operation
Pull the trigger to feed the caulking material. Put one hand
under the holder to support the tool while operating it.
After the operation, wipe off the caulking material from the tool.
Be sure to remove the caulking material before it becomes solid.
NOTE:
At the beginning of operation, set the speed
check how much amount of caulking material is fed.
NOTE: Depending on the type and conditions of
caulking material, it may not be fed at low speed. In
NOTE: If the caulking material is not fed, check the
following points:
until it becomes soft.
type of caulking material.
MAINTENANCE
CAUTION:
attempting to perform inspection or maintenance.
NOTICE:
cracks may result.
be performed by Makita Authorized or Factory Service
Centers, always using Makita replacement parts.
OPTIONAL ACCESSORIES
CAUTION:
-
Only use accessory or attachment for its stated purpose.
If you need any assistance for more details regarding
these accessories, ask your local Makita Service Center.

NOTE: Some items in the list may be included in the
differ from country to country.
www.makita.com
Makita Europe N.V.
Makita Corporation
3-11-8, Sumiyoshi-cho,
Anjo, Aichi 446-8502 Japa
n
Jan-Baptist Vinkstraat 2,
3070 Kortenberg, Belgium
EN
Other manuals for CG100D
8
Table of contents
Other Makita Caulking Gun manuals

Makita
Makita DCG140 User manual

Makita
Makita BCG140 Manual

Makita
Makita BCG180 User manual

Makita
Makita GC01 User manual

Makita
Makita DCG140 User manual

Makita
Makita DCG140 User manual

Makita
Makita CG100D User manual

Makita
Makita BCG140 User manual

Makita
Makita DCG140 User manual

Makita
Makita DCG140 User manual