manuals.online logo
Brands
  1. Home
  2. •
  3. Brands
  4. •
  5. Metra Electronics
  6. •
  7. Automobile Accessories
  8. •
  9. Metra Electronics 107-FD1B User manual

Metra Electronics 107-FD1B User manual

Metra. The World’s Best Kits.®MetraOnline.com © COPYRIGHT 2020 METRA ELECTRONICS CORPORATION REV. 12/11/20 INST107-FD1B
INSTALLATION INSTRUCTIONS
107-FD1B
Patent Pending
Attention! Let the vehicle sit with the key
out of the ignition for a few minutes before
removing the factory radio. When testing the
aftermarket equipment, ensure that all factory
equipment is connected before cycling the
key to ignition.
KIT COMPONENTS
• A) Radio trim panel • B) Radio housing • C) Sub dash brackets • D) Radio brackets • E) Panel clips (3) • F) #8 x 1/2” Phillips screws (4)
TOOLS REQUIRED
• Panel removal tool • 9/32” socket
• Phillips screwdriver • Cutting tool
TABLE OF CONTENTS
Dash Disassembly ..................................................2
Kit Preparation .......................................................3
Kit Assembly
–ISO DDIN radio provision .....................................4
–Pioneer Modular radio provision .......................5
WIRING & ANTENNA CONNECTIONS
(sold separately)
See metra-online.com or axxessinterfaces.com
for audio and SWC interface options
Antenna Adapter: 40-EU10
A C D E
F
B
Ford Transit (excludes factory radio delete models) 2020
Visit MetraOnline.com for more detailed information about the product and up-to-date vehicle
specific applications
KIT FEATURES
• ISO DDIN radio provision*
• Painted scratch resistant matte black
* This kit is designed for an ISO DDIN radio which have an “L” shaped chassis
design, with the radio chassis at the bottom of the screen,
or Pioneer modular 6.8” radios.
† Refer to the radio manufacturer for current models
1.800.221.0932
|
MetraOnline.com
2
DASH DISASSEMBLY
(Figure A) (Figure D)
(Figure B) (Figure E)
(Figure C)
1. Unclip the trim behind the radio display,
then remove (3) 9/32” screws exposed.
(Figure A)
2. Slide the radio display up and out, then
unplug and remove. (Figure B)
3. Remove (2) screws securing the center
dash panel, then unclip, unplug, and
remove. (Figure C)
4. Remove (4) 9/32” screws securing the
radio display mount, then remove.
(Figure D)
5. Unplug the connectors from the radio
chassis. Remove (2) 9/32” screws
securing the chassis, slide out, then
remove. (Figure E)
Continue to Kit Preparation
REV. 12/11/2020 INST107-FD1B 3
(Figure B)(Figure A)
KIT PREPARATION
1. Attach the (3) included panel clips to the
radio trim panel. (Figure A)
2. Cut and remove the two lower mounting
tabs from the inside of the factory dash
panel radio opening. (Figure B)
Continue to Kit Assembly
Remove shaded areas
1.800.221.0932
|
MetraOnline.com
4
KIT ASSEMBLY
Bottom chassis radio provision
1. Secure the sub-dash brackets to the
dash using the factory screws. (Figure A)
2. Snap off the front of the radio brackets
and secure them to the radio using
screws supplied with the radio.
(Figure B, C)
3. Snap the radio housing into the factory
dash panel. (Figure D)
4. Snap the factory dash panel back
in place.
5. Locate the factory wiring harness and
antenna connector in the dash and
complete all necessary connections to
the radio. Metra recommends using
the proper mating adapter from Metra
and/or Axxess. Test the radio for proper
operation.
6. Slide the radio assembly into to the dash
and secure to the radio housing using
the (4) included Phillips screws.
(Figure E)
7. Snap the radio trim panel into the
radio housing. (Figure F)
(Figure A) (Figure D)
(Figure B) (Figure E)
(Figure C) (Figure F)
Remove shaded areas
REV. 12/11/2020 INST107-FD1B 5
Pioneer Modular DDIN radio provision
Note: For steps 2 and 3, reference the
installation manual provided with the radio
for which hardware to use. The display
screen and radio chassis use two different
types of screws.
1. Secure the sub-dash brackets to the
dash using the factory screws. (Figure A)
2. Secure the radio brackets to the radio
display using (4) screws supplied with
the radio. (Figure B)
3. Secure the radio brackets to the radio
chassis using (4) screws supplied with
the radio. (Figure C)
4. Snap the radio housing into the factory
dash panel. (Figure D)
5. Snap the factory dash panel back in
place.
6. Locate the factory wiring harness and
antenna connector in the dash and
complete all necessary connections to
the radio. Metra recommends using
the proper mating adapter from Metra
and/or Axxess. Test the radio for proper
operation.
7. Slide the radio assembly into to the dash
and secure to the radio housing using
the (4) included Phillips screws.
(Figure E)
8. Snap the radio trim panel into the
radio housing. (Figure F)
KIT ASSEMBLY
(Figure D)
(Figure B) (Figure E)
(Figure C) (Figure F)
(Figure A)
1.800.221.0932
|
MetraOnline.com
6
REV. 12/11/2020 INST107-FD1B 7
KNOWLEDGE IS POWER
Enhance your installation and fabrication skills by
enrolling in the most recognized and respected
mobile electronics school in our industry.
Log onto www.installerinstitute.com or call
800-354-6782 for more information and take steps
toward a better tomorrow.
®
Metra recommends MECP
certified technicians
Metra. The World’s Best Kits.®MetraOnline.com © COPYRIGHT 2020 METRA ELECTRONICS CORPORATION REV. 12/11/20 INST107-FD1B
INSTALLATION INSTRUCTIONS
107-FD1B
Having difficulties? We’re here to help.
Contact our Tech Support line at:
386-257-1187
Or via email at:
techsupport@metra-autosound.com
Tech Support Hours (Eastern Standard Time)
Monday - Friday: 9:00 AM - 7:00 PM
Saturday: 10:00 AM - 7:00 PM
Sunday: 10:00 AM - 4:00 PM

Other Metra Electronics Automobile Accessories manuals
Metra Electronics XIAH-FD4 User manual

Metra Electronics

Metra Electronics XIAH-FD4 User manual

Metra Electronics 99-8216 User manual

Metra Electronics

Metra Electronics 99-8216 User manual
Metra Electronics 95-7337B User manual

Metra Electronics

Metra Electronics 95-7337B User manual

Metra Electronics 99-6505 User manual

Metra Electronics

Metra Electronics 99-6505 User manual

Metra Electronics 95-8210 User manual

Metra Electronics

Metra Electronics 95-8210 User manual

Metra Electronics 99-7314 User manual

Metra Electronics

Metra Electronics 99-7314 User manual

Metra Electronics 99-5806 User manual

Metra Electronics

Metra Electronics 99-5806 User manual

Metra Electronics 99-6506 User manual

Metra Electronics

Metra Electronics 99-6506 User manual

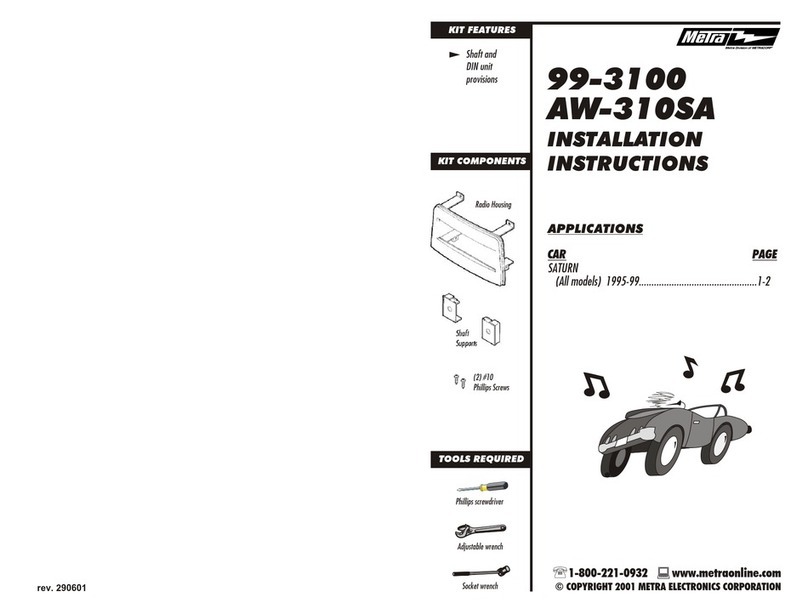
Metra Electronics 99-3100 User manual

Metra Electronics

Metra Electronics 99-3100 User manual
Metra Electronics 95-7350B User manual

Metra Electronics

Metra Electronics 95-7350B User manual

Metra Electronics 95-3314G User manual

Metra Electronics

Metra Electronics 95-3314G User manual

Metra Electronics 99-7604 User manual

Metra Electronics

Metra Electronics 99-7604 User manual

Metra Electronics 99-3106 User manual

Metra Electronics

Metra Electronics 99-3106 User manual

Metra Electronics 95-8208 User manual

Metra Electronics

Metra Electronics 95-8208 User manual

Metra Electronics 95-6534B User manual

Metra Electronics

Metra Electronics 95-6534B User manual

Metra Electronics 109-TO7 User manual

Metra Electronics

Metra Electronics 109-TO7 User manual

Metra Electronics GMRC-02 User manual

Metra Electronics

Metra Electronics GMRC-02 User manual

Metra Electronics 99-4644 User manual

Metra Electronics

Metra Electronics 99-4644 User manual

Metra Electronics 95-7418 User manual

Metra Electronics

Metra Electronics 95-7418 User manual

Metra Electronics 95-7419 User manual

Metra Electronics

Metra Electronics 95-7419 User manual

Metra Electronics MAZDA 6 2009 99-7511S User manual

Metra Electronics

Metra Electronics MAZDA 6 2009 99-7511S User manual

Metra Electronics 99-1003 User manual

Metra Electronics

Metra Electronics 99-1003 User manual

Metra Electronics 99-8205 User manual

Metra Electronics

Metra Electronics 99-8205 User manual

Metra Electronics 99-5801 User manual

Metra Electronics

Metra Electronics 99-5801 User manual

Popular Automobile Accessories manuals by other brands

Directed Directechs DB3 installation guide

Directed

Directed Directechs DB3 installation guide

Actron OBD II PocketScan Code Reader CP9125 user manual

Actron

Actron OBD II PocketScan Code Reader CP9125 user manual

Inbay 241114-51-3 installation guide

Inbay

Inbay 241114-51-3 installation guide

Brodit ProClip 853660 manual

Brodit

Brodit ProClip 853660 manual

Menabo BIKE PRO Fitting instructions

Menabo

Menabo BIKE PRO Fitting instructions

Parrot MKi9000 quick start guide

Parrot

Parrot MKi9000 quick start guide

NavLinkz RL5-MIB-STD2 manual

NavLinkz

NavLinkz RL5-MIB-STD2 manual

Painless 50340 installation instructions

Painless

Painless 50340 installation instructions

Lippert Tire Linc Installation and owner's manual

Lippert

Lippert Tire Linc Installation and owner's manual

Vintage Air 561163 manual

Vintage Air

Vintage Air 561163 manual

T-Mobile alcatel LINKZONE 2 Start guide

T-Mobile

T-Mobile alcatel LINKZONE 2 Start guide

Pioneer SDA-11DAB Operation manual

Pioneer

Pioneer SDA-11DAB Operation manual

Brink 6059 Fitting instructions

Brink

Brink 6059 Fitting instructions

ATS Water boy installation manual

ATS

ATS Water boy installation manual

BMW 65 12 0 029 843 installation instructions

BMW

BMW 65 12 0 029 843 installation instructions

Thule Kit 110 Fitting instructions

Thule

Thule Kit 110 Fitting instructions

Cruz N+ Series Assembly instructions

Cruz

Cruz N+ Series Assembly instructions

Jeneer Auto Bump instruction manual

Jeneer

Jeneer Auto Bump instruction manual

manuals.online logo
manuals.online logoBrands
  • About & Mission
  • Contact us
  • Privacy Policy
  • Terms and Conditions

Copyright 2025 Manuals.Online. All Rights Reserved.