Umbau- und Montageanweisung
M.-Nr. 11362860 7 von 35
Diese Unterlagen dürfen ohne unsere Genehmigung weder vervielfältigt noch Dritten zugänglich gemacht werden. Eigentumsrechte vorbehalten. 04.09.2019
No. Mat. no. Designation
1 Hose clip 50–70
1 Pipe 75x50
Danger due to incorrectly carried out service and repair work
WARNING
Danger due to incorrectly carried out service and repair work
There is a risk of serious damage, injury and even death if service and repair work is carried out incorrectly.
AService and repair work should only be carried out by a suitably qualified electrician with specialist training,
knowledge and experience.
AAll appropriate safety regulations must be taken into account.
AFirst read the Technical Service Documentation (TSD), then commence work.
Measures to be carried out before any service work is commenced
– Carry out appropriate safety tests on the appliance.
– Disconnect all machine utility connections in accordance with the operating instructions.
After service work has been completed, the following measures must be carried out:
– Carry out appropriate safety tests on the appliance.
– Check the appliance for correct operation.
Risk of cuts during service and maintenance work
WARNING
Components may have sharp edges.
There is a risk of cuts during service and maintenance work.
AProtective gloves should be worn.
Danger of injury due to excess physical strain
WARNING
Danger of injury due to excess physical strain.
Spinal injuries.
AThe relation of the weight of the machines to the physical strength of the technician must be taken into account.
For machine weight details, see the operating instructions.
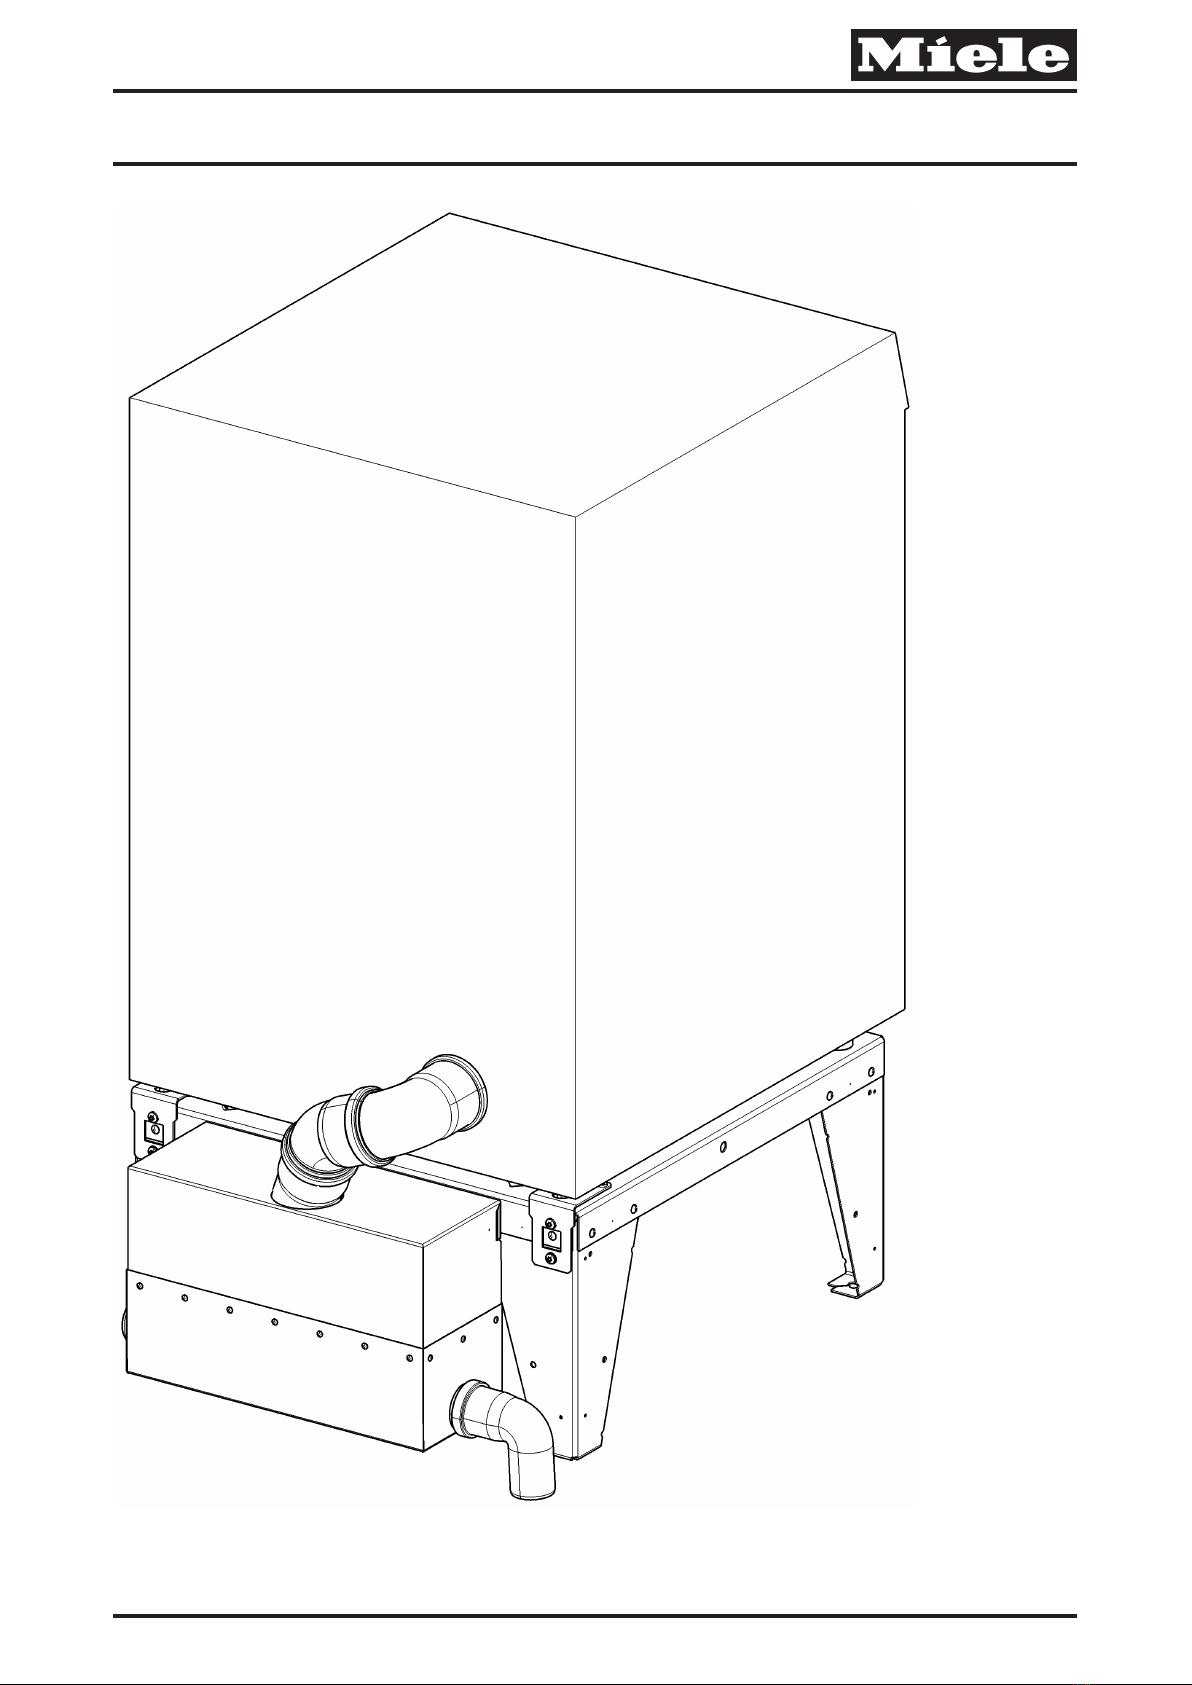
Fitting the fluff filter box
The arrow embossed on the top of the plinth points to the front.
AAssemble the connection box (1) and drawer guide (2) with 4 M6 raised-head screws (3), 4 washers (4) and 4 M6
nuts (5), see Fig.1.
The cutout (1) on the guide for the drawer is at the front, see Fig.2.
AFit the filter in the drawer. For this, the front of the filter must rest on the protrusions (1) in the drawer, see Fig.3.
ASlide the drawer into the fluff filter box guide.
AConnect the machine to the fluff filter box with the supplied pipes, see Fig.4.
AConnect the fluff filter box to the drain with a 50x87 pipe bend, see Fig.4.