manuals.online logo
Brands
  1. Home
  2. •
  3. Brands
  4. •
  5. Mocka
  6. •
  7. Indoor Furnishing
  8. •
  9. Mocka Mischa Bedside Table User manual

Mocka Mischa Bedside Table User manual

Mischa Bedside Table
Assembly Instructions
Thank you for your purchase.
Please follow the instructions below for correct assembly.
Hardware Supplied
dowel
x12
bolt
x12
screw
x4
locking
nut x12
small
screw x10
mocka.co.nz | mocka.com.au | PO BOX 6171, Maroochydore, QLD, 4558
1
A B CD E
NM
L
K
J
I
H
G
F
wedge
x4
screw
x4
long screw
x4
screw
x8
T
Wall Strap
Z
Y
XWV
slide rail
x1
slide rail
x1 safety
strap
x1
screw
x1
wall
anchor
x1
wall
screw
x1
washer
x2
slide rail
x1
slide rail
x1
small bolt
x16
O
handle
bolt x2
handle
x1
P Q R S
felt
pad x4
leg bracket
x4
Allen key
x1
long bolt
x4
WARNING: Any furniture that is not anchored to a wall has the potential to tip over in certain
circumstances, i.e. if a child attempts to climb up on the furniture or in the event of an earthquake.
Accordingly, we recommend that all furniture is anchored to a wall. We supply a free safety wall anchor
with all furniture sold and we recommend these are used to prevent your product tipping. The fixing device
provided should fit most wall types, but please note that different wall materials may require different fixing
devices from those supplied.
For quicker assembly, we recommend the
use of a power drill on a low-speed setting.
Phillips & Flathead screwdrivers
and hammer required
Mischa Bedside Table
Assembly Instructions
mocka.co.nz | mocka.com.au | PO BOX 6171, Maroochydore, QLD, 4558
2
12
Attach 1x slide rail (F) to panel [3] and secure with 3x small screws (E).
Attach 1x slide rail (G) to panel [4] and secure with 3x small screws (E).
Tighten with a screwdriver. Insert 4x bolts (C) into panel [3] and [4].
Tighten with a screwdriver.
1
3
4
C
F
G
C
Insert 4x bolts (C) into panel [1]. Tighten with a screwdriver.
C
C
G
CR
E
F
CL
E
E
E
E
E
E
E
C
C
C
C
Mischa Bedside Table
Assembly Instructions
mocka.co.nz | mocka.com.au | PO BOX 6171, Maroochydore, QLD, 4558
3
3 4
Attach panels [3] and [4] to panel [1] and secure with 4x locking nuts (D)
and 4x dowels (A). Tighten with a screwdriver.
1
3
3
4
4
5
Attach panels [3] and [4] to panel [5] and secure with
4x locking nuts (D) and 4x dowels (A). Tighten with a screwdriver.
D
D
D
D
A
A
A
A
A
D
D
A
A
A
D
Mischa Bedside Table
Assembly Instructions
mocka.co.nz | mocka.com.au | PO BOX 6171, Maroochydore, QLD, 4558
4
6
2
3
3
4
4
6
M
M
A
5
Slide panel [6] down along the grooves of the side panels to
form the back of the unit.
Attach panel [2] to the rest of the unit using 4x dowels (A).
Secure with 4x screws (M) and tighten with a screwdriver.
A
M
M
A
M
Mischa Bedside Table
Assembly Instructions
mocka.co.nz | mocka.com.au | PO BOX 6171, Maroochydore, QLD, 4558
5
7 8
2
7
7
7
8
Attach a leg bracket (Q) to each leg [7] using 2x screws (T) and 1x long
bolt (S). Tighten with a screwdriver and an Allen key (R). Attach each leg
[7] to panel [2] using 4x small bolts (J) as shown. Tighten with the Allen
key (R). Attach 4x felt pads (P) to the ends of the legs.
Insert 4x bolts (C) to panel [8].Tighten with a screwdriver.
J
J
J
J
C
C
C
C
front
back
S
Q
TT
front
R
R
P
3
7
J
J
P
P
P
P
Mischa Bedside Table
Assembly Instructions
mocka.co.nz | mocka.com.au | PO BOX 6171, Maroochydore, QLD, 4558
6
910
Attach panels [9] and [10] to panel [8] and secure with 4x locking nuts (D).
Tighten with a screwdriver.
Slide panel [11] down along the grooves of panels [9] and [10].
D
D
D
D
9
9
10
10
11
8
Mischa Bedside Table
Assembly Instructions
mocka.co.nz | mocka.com.au | PO BOX 6171, Maroochydore, QLD, 4558
7
1211
E
E
E
E
H
I
Attach panel [9], [10] and [12] as shown using 4x screws (B).
Tighten with a screwdriver.
Attach slide rail (I) and slide rail (H) to the underside of the side panels
as shown. Secure with 4x small screws (E) and tighten with a screwdriver.
B
B
B
B
9
9
12
10
10
O
N
N
Mischa Bedside Table
Assembly Instructions
mocka.co.nz | mocka.com.au | PO BOX 6171, Maroochydore, QLD, 4558
8
13 14
Attach 1x handle (O) to panel [8] secure with 2x handle bolts (N).
Tighten with a screwdriver.
Insert the assembled drawers into the corresponding compartments
as shown. Ensure the drawers slide easily along the rails.
8
Mischa Bedside Table
Assembly Instructions
mocka.co.nz | mocka.com.au | PO BOX 6171, Maroochydore, QLD, 4558
9
15 16
Attach 4x wedges (K) into the corners of the back of the unit and secure
with 4x screws (L). Tighten with a screwdriver.Attach 1x safety strap (V)
to the top of the back side of the unit as shown using 1x washer (Z) and
1x screw (W). Tighten with a screwdriver.
Once assembled lift furniture into place, do not drag. Use a drill to create
a small hole lining up with the top of the safety strap (V). Fasten to wall
using 1x washer (Z), 1x wall anchor (X) and 1x wall screw (Y). Ensure the
unit is balanced and steady before use. You’re done, enjoy!
1
6
V
Z
W
K
L
V
Z
W
K
L
K
L
K
L
K
L
X
Y
Z
wall
anchor
wall screw
strap
washer

Other Mocka Indoor Furnishing manuals

Mocka Sintra User manual

Mocka

Mocka Sintra User manual

Mocka Hamptons User manual

Mocka

Mocka Hamptons User manual
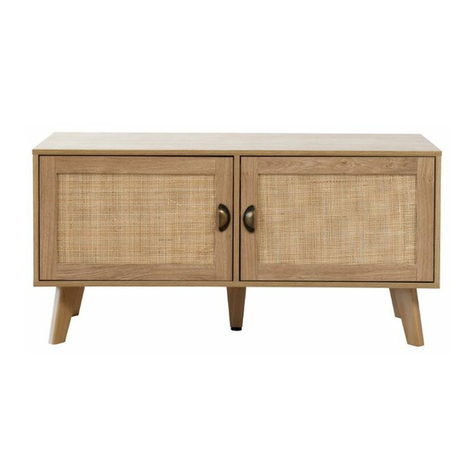
Mocka Parker Desk User manual

Mocka

Mocka Parker Desk User manual

Mocka Portia Console Table User manual

Mocka

Mocka Portia Console Table User manual

Mocka Jesse User manual

Mocka

Mocka Jesse User manual

Mocka Cove User manual

Mocka

Mocka Cove User manual

Mocka Avila User manual

Mocka

Mocka Avila User manual

Mocka Nava Bedside Table User manual

Mocka

Mocka Nava Bedside Table User manual

Mocka Jack Coffee Table User manual

Mocka

Mocka Jack Coffee Table User manual

Mocka Freestanding Coat and Hat Stand User manual

Mocka

Mocka Freestanding Coat and Hat Stand User manual

Mocka Orlando User manual

Mocka

Mocka Orlando User manual

Mocka Ashford User manual

Mocka

Mocka Ashford User manual

Mocka Sintra User manual

Mocka

Mocka Sintra User manual
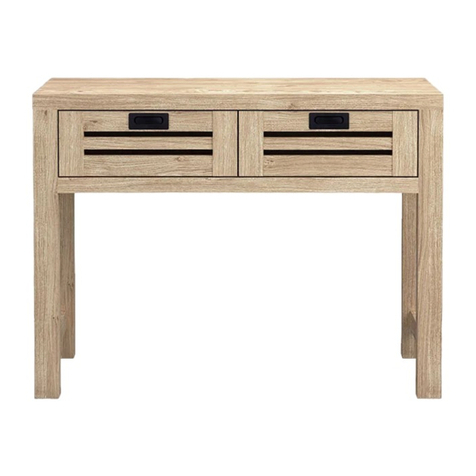
Mocka Mischa Bookcase User manual

Mocka

Mocka Mischa Bookcase User manual

Mocka Sadie User manual

Mocka

Mocka Sadie User manual

Mocka Macrame Hanging Shelf User manual

Mocka

Mocka Macrame Hanging Shelf User manual

Mocka Eden Low Shelf User manual

Mocka

Mocka Eden Low Shelf User manual

Mocka Sonata User manual

Mocka

Mocka Sonata User manual

Mocka Savannah Three Drawer User manual

Mocka

Mocka Savannah Three Drawer User manual

Mocka Peyton User manual

Mocka

Mocka Peyton User manual

Mocka Watson 8 User manual

Mocka

Mocka Watson 8 User manual

Mocka Torrance Occasional Chair User manual

Mocka

Mocka Torrance Occasional Chair User manual

Mocka Emmett Bed User manual

Mocka

Mocka Emmett Bed User manual

Mocka Hamptons User manual

Mocka

Mocka Hamptons User manual

Popular Indoor Furnishing manuals by other brands

Garage Tek GT1006E installation instructions

Garage Tek

Garage Tek GT1006E installation instructions

Trico DAY manual

Trico

Trico DAY manual

Otto 54635367 manual

Otto

Otto 54635367 manual

Enwork Concurrence VS installation instructions

Enwork

Enwork Concurrence VS installation instructions

Kimex 031-1026 installation manual

Kimex

Kimex 031-1026 installation manual

Crate&Barrel Reed manual

Crate&Barrel

Crate&Barrel Reed manual

Next MILANO 437711 Assembly instructions

Next

Next MILANO 437711 Assembly instructions

NOVUM Feria 4470430CEX Assembly instructions

NOVUM

NOVUM Feria 4470430CEX Assembly instructions

Bertini BR1407-3 instruction manual

Bertini

Bertini BR1407-3 instruction manual

Onespace Essential 50-LD01GO manual

Onespace

Onespace Essential 50-LD01GO manual

Summit Impact IM31 operating instructions

Summit

Summit Impact IM31 operating instructions

Coaster 930193 Assembly instructions

Coaster

Coaster 930193 Assembly instructions

Hillsdale Furniture BRONN 4578-827I Assembly instructions

Hillsdale Furniture

Hillsdale Furniture BRONN 4578-827I Assembly instructions

Bird-in-Hand Woodworks 076654 manual

Bird-in-Hand Woodworks

Bird-in-Hand Woodworks 076654 manual

DITALIA CD-185 Assembly manual

DITALIA

DITALIA CD-185 Assembly manual

Monarch Specialties I 4508 Assembly instructions

Monarch Specialties

Monarch Specialties I 4508 Assembly instructions

Spectrum Brands National Hardware N900-002 installation guide

Spectrum Brands

Spectrum Brands National Hardware N900-002 installation guide

Office Star Products Work Smart ECH17051 operating instructions

Office Star Products

Office Star Products Work Smart ECH17051 operating instructions

manuals.online logo
manuals.online logoBrands
  • About & Mission
  • Contact us
  • Privacy Policy
  • Terms and Conditions

Copyright 2025 Manuals.Online. All Rights Reserved.