manuals.online logo
Brands
  1. Home
  2. •
  3. Brands
  4. •
  5. Mocka
  6. •
  7. Indoor Furnishing
  8. •
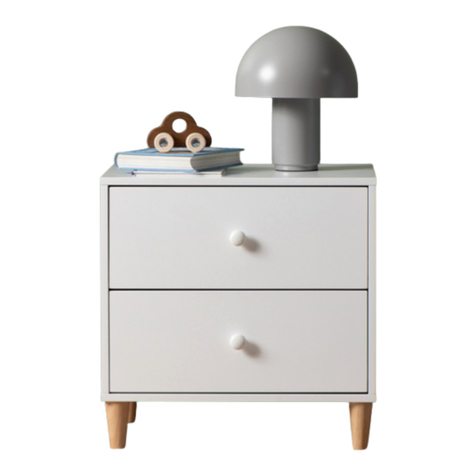
  9. Mocka Brooklyn Bedside Table User manual

Mocka Brooklyn Bedside Table User manual

Hardware Supplied
x4
B
A
x16
CD
EF G
x4
x8
x16
x8
x20
10 mm
L + R L + R
bolt
locking nut
dowel long screw
small screw
25 mm
x1
washer
Z
Wall
Screw
r/washer
screw
x1
Y
wall
anchor
x1
X
Safety
Strap
W
Wall Strap
WARNING: Any furniture that is not anchored to a wall has the
potential to tip over in certain circumstances, i.e. if a child attempts to
climb up on the furniture or in the event of an earthquake. Accordingly,
we recommend that all furniture is anchored to a wall. We supply a free
safety wall anchor with all furniture sold and we recommend these are
used to prevent your product tipping. The fixing device provided should
fit most wall types, but please note that different wall materials may
require different fixing devices from those supplied.
Phillips & Flathead screwdrivers required 1
mocka.co.nz | mocka.com.au
Brooklyn Bedside Table
Assembly Instructions
Thank you for your purchase.
Please follow the instructions below for correct assembly.
12
To begin assembly, attach 2x slide rails (F) in place on each of the
panels [1] and [2] as shown using 2x small screws (E) in each rail
bracket. Fasten all screws with a screwdriver.
Screw in bolts (A) and insert dowels (C) into holes in panels [1] and [2].
Slot together with panel [3] as shown. Place 4x locking nuts (B) into
holes in panel [3] and tighten with a screwdriver.
A
x4
C
E
x8
E
A
3
A
A
A
E
E
F
2
1
E
E
E
F
F
F
E
E
EE
EE
C
1
2
B
B
C
CC
x4
B
2
mocka.co.nz | mocka.com.au
Brooklyn Bedside Table
Assembly Instructions
12
To begin assembly, attach 2x slide rails (F) in place on each of the
panels [1] and [2] as shown using 2x small screws (E) in each rail
bracket. Fasten all screws with a screwdriver.
Screw in bolts (A) and insert dowels (C) into holes in panels [1] and [2].
Slot together with panel [3] as shown. Place 4x locking nuts (B) into
holes in panel [3] and tighten with a screwdriver.
A
x4
C
E
x8
E
A
3
A
A
A
E
F
2
1
E
E
F
F
F
E
E
E
E
C
1
2
B
B
C
CC
x4
B
34
Slide back panel [4] down into place along the grooves in side and
base panels as shown.
Screw in 4x bolts (A) and insert 4x dowels (C) into holes in top panel [5].
Slot together with the rest of the structure. Place 4x locking nuts into the
side panels and tighten with a screwdriver.
4
AC
A
CB
B
B
B
AC
A
C
5
Bx4
x4
C
A
3
mocka.co.nz | mocka.com.au
Brooklyn Bedside Table
Assembly Instructions
56
To assemble the drawers, first attach side panels [6] and [7] to back
panel [8] using 4x long screws (D) in the holes provided and tighten
with a screwdriver.
Slide the base panel [9] into place in the grooves in the side and back
panels. Screw 4x bolts (A) into the front panel [10] and attach to the side
panes using 4x locking nuts (B). Tighten with a screwdriver.
Drawers (x2) Drawers (x2)
D
x4
D
D
D
6
7
8
9
B
B
B
B
A
A
A
10
Bx4
A
x4
4
mocka.co.nz | mocka.com.au
Brooklyn Bedside Table
Assembly Instructions
5
mocka.co.nz | mocka.com.au
56
To assemble the drawers, first attach side panels [6] and [7] to back
panel [8] using 4x long screws (D) in the holes provided and tighten
with a screwdriver.
Slide the base panel [9] into place in the grooves in the side and back
panels. Screw 4x bolts (A) into the front panel [10] and attach to the side
panes using 4x locking nuts (B). Tighten with a screwdriver.
Drawers (x2) Drawers (x2)
D
x4
D
D
D
6
7
8
9
B
B
B
B
A
A
A
10
Bx4
A
x4
78
Attach 2x rail components (G) to both left and right sides of the drawer
using 4x screws (E).
Check all screws are securely fastened. Repeat Steps 5 to 8 to
assemble the second drawer.
Drawers (x2) Drawers (x2)
G
E
E
G
E
5
mocka.co.nz | mocka.com.au
Brooklyn Bedside Table
Assembly Instructions
910
Slide both completed drawers into place on the rails in the cabinet as
shown.
Ensure all drawers easily slide open and closed.
6
mocka.co.nz | mocka.com.au
Brooklyn Bedside Table
Assembly Instructions
910
Slide both completed drawers into place on the rails in the cabinet as
shown.
Ensure all drawers easily slide open and closed.
11
12
Attach safety strap (W) to the top of the back side of the unit using
screw (Y). Tighten with a screwdriver.
Once assembled lift furniture into place, do not drag. Use a drill to create
a small hole lining up with the top of the safety strap (W). Fasten to wall
using wall anchor (X), washer (Z) and a wall screw. Ensure unit is
balanced and steady before use. You’re done, enjoy!
Wall Strap
Y
W
r/washer
screw
W
X
Z
W
x1
wall
anchor
wall
screw
Washer
Strap
7
mocka.co.nz | mocka.com.au
Brooklyn Bedside Table
Assembly Instructions

Other Mocka Indoor Furnishing manuals

Mocka Edmond User manual

Mocka

Mocka Edmond User manual

Mocka Hatcher User manual

Mocka

Mocka Hatcher User manual

Mocka Asha Entertainment Unit User manual

Mocka

Mocka Asha Entertainment Unit User manual

Mocka Hudson User manual

Mocka

Mocka Hudson User manual

Mocka Vibe Puzzle Drawers User manual

Mocka

Mocka Vibe Puzzle Drawers User manual

Mocka Betti Bobbin User manual

Mocka

Mocka Betti Bobbin User manual

Mocka Milton Medium Plant Stand User manual

Mocka

Mocka Milton Medium Plant Stand User manual

Mocka Kuranda User manual

Mocka

Mocka Kuranda User manual

Mocka Zara User manual

Mocka

Mocka Zara User manual

Mocka Hudson Mini Table User manual

Mocka

Mocka Hudson Mini Table User manual

Mocka Canyon Buffet User manual

Mocka

Mocka Canyon Buffet User manual

Mocka Eliza Bedside Table User manual

Mocka

Mocka Eliza Bedside Table User manual

Mocka Zander Dining Table User manual

Mocka

Mocka Zander Dining Table User manual

Mocka Sadie User manual

Mocka

Mocka Sadie User manual

Mocka Austin Chair User manual

Mocka

Mocka Austin Chair User manual

Mocka Billy Three Drawer Basket User manual

Mocka

Mocka Billy Three Drawer Basket User manual

Mocka Eclipse User manual

Mocka

Mocka Eclipse User manual

Mocka Eight Cube User manual

Mocka

Mocka Eight Cube User manual

Mocka Kalley Coffee Table User manual

Mocka

Mocka Kalley Coffee Table User manual

Mocka Aspen Wardrobe User manual

Mocka

Mocka Aspen Wardrobe User manual

Mocka Blair User manual

Mocka

Mocka Blair User manual

Mocka Hamptons User manual

Mocka

Mocka Hamptons User manual

Mocka Hector User manual

Mocka

Mocka Hector User manual

Mocka Mischa User manual

Mocka

Mocka Mischa User manual

Popular Indoor Furnishing manuals by other brands

BDI MARGO 5201 manual

BDI

BDI MARGO 5201 manual

HOMCOM 835-219 operating instructions

HOMCOM

HOMCOM 835-219 operating instructions

Comfort Products JNFF Assembly instructions

Comfort Products

Comfort Products JNFF Assembly instructions

Benjara BM235459 Assembly instructions

Benjara

Benjara BM235459 Assembly instructions

RST CAPRI OP-ALSOF88-CAP Assembly instructions

RST

RST CAPRI OP-ALSOF88-CAP Assembly instructions

Nags Head Hammocks Classic Adirondack Chair instructions

Nags Head Hammocks

Nags Head Hammocks Classic Adirondack Chair instructions

Gima 28513 Use and maintenance book

Gima

Gima 28513 Use and maintenance book

GALA MEBLE PRESTO K2DP Assembly manual

GALA MEBLE

GALA MEBLE PRESTO K2DP Assembly manual

Germania 3255 Assembly instruction

Germania

Germania 3255 Assembly instruction

Songmics VASAGLE LBC10V1 manual

Songmics

Songmics VASAGLE LBC10V1 manual

Cooper Lighting Nimbus II Wall Series 701-IW specification

Cooper Lighting

Cooper Lighting Nimbus II Wall Series 701-IW specification

Universal Furniture Explore Home 507964 instruction sheet

Universal Furniture

Universal Furniture Explore Home 507964 instruction sheet

Bob's Discount Furniture PowerBob Elite owner's manual

Bob's Discount Furniture

Bob's Discount Furniture PowerBob Elite owner's manual

Manhattan Comfort Hampton quick start guide

Manhattan Comfort

Manhattan Comfort Hampton quick start guide

kupper 70750 Assembly instruction

kupper

kupper 70750 Assembly instruction

LDI Spaces SAFCO Task Master 5100 Assembly instructions

LDI Spaces

LDI Spaces SAFCO Task Master 5100 Assembly instructions

Bouclair 9391549 Assembly instructions

Bouclair

Bouclair 9391549 Assembly instructions

Rustic State PASSI ZIMAY128 Assembly instructions

Rustic State

Rustic State PASSI ZIMAY128 Assembly instructions

manuals.online logo
manuals.online logoBrands
  • About & Mission
  • Contact us
  • Privacy Policy
  • Terms and Conditions

Copyright 2025 Manuals.Online. All Rights Reserved.