manuals.online logo
Brands
  1. Home
  2. •
  3. Brands
  4. •
  5. Mocka
  6. •
  7. Indoor Furnishing
  8. •
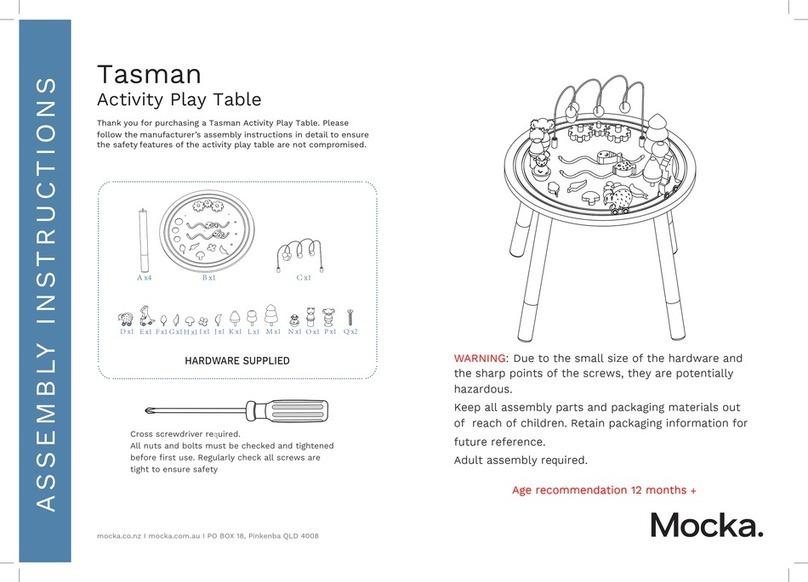
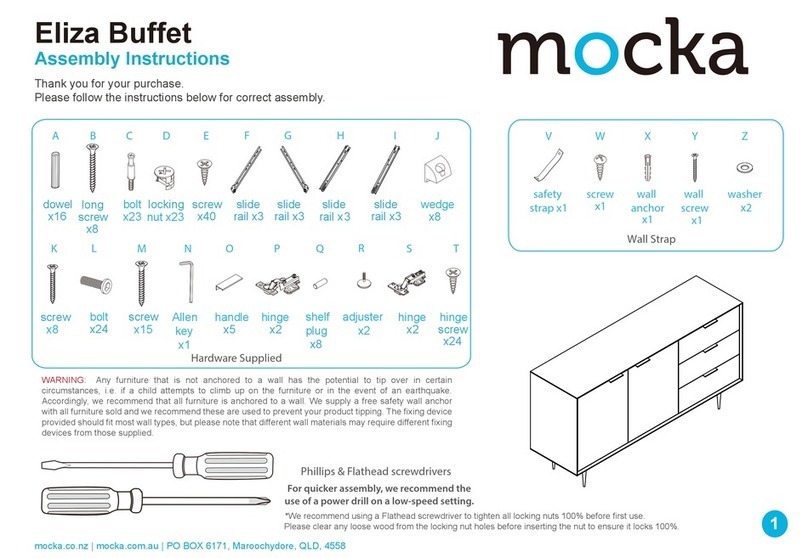
  9. Mocka Tahoe User manual

Mocka Tahoe User manual

mocka.co.nz I mocka.com.au I PO BOX 18, Pinkenba QLD 4008
ASSEMBLY I N S TRUCTION S
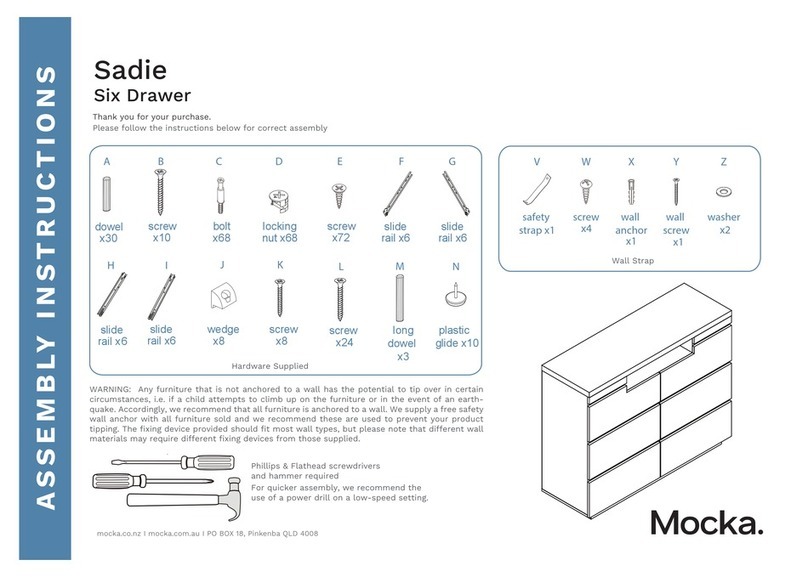
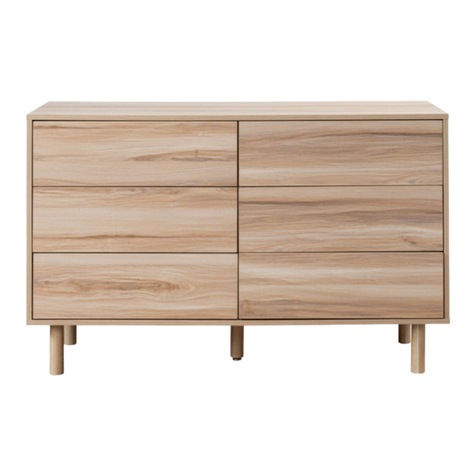
Tahoe
Six Drawer
Thank you for your purchase.
Please follow the instructions below for correct assembly
WARNING: Any furniture that is not anchored to a wall has the poten-
tial to tip over in certain circumstances, i.e. if a child attempts to climb
up on the furniture or in the event of an earthquake. Accordingly, we
recommend that all furniture is anchored to a wall. We supply a free
safety wall anchor with all furniture sold and we recommend these are
used to prevent your product tipping. The fixing device provided
should fit most wall types, but please note that dierent wall materi-
als may require dierent fixing devices from those supplied.
Phillips & Flathead screwdrivers and hammer required.
*We recommend using a Flathead screwdriver to tighten
all locking nuts 100% before first use.
A B C D E
FH I JG
dowel
Hardware Supplied
x20
bolt
x50
locking small
nut x50
long
screw x48
screw x30
x8
long screw
X
Z
Y
W
safety
x1
strap
x1
screw
long
x1
screw
wall
x1
anchor
x1
washer
L + R
x12
slide rail
L + R
x12
slide rail
2
40
x4
nu
tlong
screw x4
K
long
screw x1
shelf
plug x1
L
1
Tahoe
mocka.co.nz I mocka.com.au I PO BOX 18, Pinkenba QLD 4008
ASSEMBLY I N S TRUCTION S
2
Six Drawer
2
Insert 8 x bolt (A) into panel [5]. Tighten with a screwdriver Insert 4 x locking nut (B) into panels [1] .Attach 2 x bolt (A) into panel [1]. Attach 4 x
dowel (C) to panel [1] and secure with [5]. Attach 1 x wall strap (W) to panel [1] using
1x screw(Y). Tighten with a screwdriver.
A
Drawer x 2
5
5
5
1
A
A
A
A
YW
A
A
B
CBC
B
B
CC
Tahoe
Six Drawer
mocka.co.nz I mocka.com.au I PO BOX 18, Pinkenba QLD 4008
ASSEMBLY I N S TRUCTION S
Attach 2 x left slide rail (G) to panel [3] and secure with 4 x small screw (E).
Attach 2 x right slide rail (G) to panel [4] and secure with 4 x small screw (E).
Insert 4 x bolt (A) into panel [3] and [4]. Tighten with a screwdriver.
3 4
Attach 3 x left slide rail (G) and 2 x right slide rail (G) to panel [6] and secure
with 10 x small screw (E). Tighten with a screwdriver.
3
G
EE
4
GG
G
A
EE
A
EE
A
EE
E
E
A66
EE
EE
EE
EE
EE
E
E
mocka.co.nz I mocka.com.au I PO BOX 18, Pinkenba QLD 4008
ASSEMBLY I N S TRUCTION S
Tahoe
Six Drawer
5 6
Insert 4 x dowel (C) into panel [9]. Attach panel [9] to panels [3] and [4]
and secure with 4 x locking nuts (B). Tighten with a screwdriver.
Slide panel [6] between the grooves on panels [9] to form the back of the unit
as shown.
B3
4
B
C
C
B
CB
C
9
93
9
9
4
6
B
Tahoe
Six Drawer
mocka.co.nz I mocka.com.au I PO BOX 18, Pinkenba QLD 4008
ASSEMBLY I N S TRUCTION S
Insert 6 x bolts (A) into panel [2]. Insert 6 x dowel (C) into panel [2]. Attach
panels [3] to panel [4] and [6], [3], [4] and [6] and secure with 6 x long nuts (B).
Tighten with a screwdriver.
Insert 4 x nuts (I) into panel [8] . Attach panel [7] to panel [8] and secure
with 4 x long bolts (J). Tighten with a screwdriver.
7 8
3
4
6
2
C
C
J
J
I
I
II
J
J
8
8
7
7
I
A
A
A
A
B
B
B
B
B
B
Tahoe
Six Drawer
mocka.co.nz I mocka.com.au I PO BOX 18, Pinkenba QLD 4008
ASSEMBLY I N S TRUCTION S
Attach panels [7] and [8] to panel [2] and secure with 8 x long screws(D).
Attach 1 x long screw (K) to centre support (L) as shown.
Tighten with a screwdriver.
Attach 1 x left slide rail (G) to panel [3] and secure with 2 x small screw (E).
Attach 2 x right slide rail (G) to panel [4] and [6] secure with 4 x small screw (E).
Slide panel [10] and [11] between the grooves on panels [3],[4] and [6] to
form the back of the unit as shown. Tighten with a screwdriver.
109
3
6
4
10
11
G
E
E
E
E
GE
D
D
D
D
D
D
D
D
8
8
27
K
K
L
11
Tahoe
Six Drawer
mocka.co.nz I mocka.com.au I PO BOX 18, Pinkenba QLD 4008
ASSEMBLY I N S TRUCTION S
Insert 6 x dowel (C) into panel [1]. Attach panel [1] to panels [3] and [4],[6]
and secure with 6 x locking nuts (B). Tighten with a screwdriver.
Insert 8 x bolts (A) into panel [12] and [13] .Attach panels [14] and [15] to
panel [12] and [13]secure with 8 xlocking nuts (B).
Tighten with a screwdriver.
12
C
3
6
4
1
B
B
B
B
B
B
B
A
A
A
A
A
A
A
A
B
B
12
13
14
15
15
14
C
BB
BB
B
CC
CC
13
Tahoe
Six Drawer
mocka.co.nz I mocka.com.au I PO BOX 18, Pinkenba QLD 4008
Insert 16 x bolts (A) into panel [16] and [17] .Attach panels [14] and [15]
to panel [16] and [17]secure with 16 xlocking nuts (B).
Tighten with a screwdriver.
Insert 2 x bolts (A) into panel [12] and [13] .Slide panels [18] between the grooves
on panels [14] and [15] to form thebase of the drawer as shown. Attach panel [19]
to panel [12] and [13] and secure with 2 x locking nut (B). Tighten with a screwdriver.
14
ASSEMBLY I N S TRUCTION S
Drawer x 2
15
15
14
14
16
17
B
B
A
A
A
A
BB
B
B
B
B
A
A
A
A
A
B
A
B
14
14
15
15
18
18
19
19
13
12
15
Tahoe
Six Drawer
mocka.co.nz I mocka.com.au I PO BOX 18, Pinkenba QLD 4008
ASSEMBLY I N S TRUCTION S
Insert 24x bolts (C) into panels [35], [36] and [37]. Tighten with
a screwdriver. Attach 6x seal (O) to panel [35], [36] and [37] and
secure with 6x screw (E). Tighten with a screwdriver.
Attach panels [30] and [31] to panel [32] secure with 24x screws (Q). Tighten
with a screwdriver.
16Drawer x 6
F
18
20
F
F
F
F
14
15
19
Drawer x 2 19
18
B
A16 14
15
19
18
B
A17 14
15
Tahoe
Six Drawer
mocka.co.nz I mocka.com.au I PO BOX 18, Pinkenba QLD 4008
Attach 4 x slide rails (H) to panels [14] and [15] and secure with 8 x
small screw(E). Tighten with a screwdriver.
Attach 8 x slide rails (H) to panels [14] and [15] and secure with 16 x small screw(E).
Tighten with a screwdriver.
18
ASSEMBLY I N S TRUCTION S
17 Drawer x 2
E
H
16
14
15
E
E
H
E
H
17
14
15
E
E
H
E
E
E
E
H
H
E
H
E
H
13
12
14
15
15
14
19
Tahoe
Six Drawer
mocka.co.nz I mocka.com.au I PO BOX 18, Pinkenba QLD 4008
Insert each drawer into the unit as shown, ensuring they slide smoothly and
easily along the rails. Once assem zbled, lift furniture into place,do not drag.
Move the unit into the desired location up against a wall. Use a drill to create
a small hole lining up with the top of the 2x safety strap (W). Fasten to the wall
using 1x wall anchor (X), 1x washer (Z) and 1x long screw. Ensure the unit is
balanced and steady before use. You’re done, enjoy!
20
ASSEMBLY I N S TRUCTION S
W
X
Z
12
13
16
17
17
16

Other manuals for Tahoe

8

Other Mocka Indoor Furnishing manuals

Mocka Trestle Desk User manual

Mocka

Mocka Trestle Desk User manual

Mocka Kai User manual

Mocka

Mocka Kai User manual

Mocka Hamptons User manual

Mocka

Mocka Hamptons User manual
Mocka Addi User manual

Mocka

Mocka Addi User manual

Mocka Hamptons User manual

Mocka

Mocka Hamptons User manual
Mocka Tahoe Series User manual

Mocka

Mocka Tahoe Series User manual

Mocka Avoca User manual

Mocka

Mocka Avoca User manual

Mocka Tahoe Buffet User manual

Mocka

Mocka Tahoe Buffet User manual

Mocka Mischa Bedside Table User manual

Mocka

Mocka Mischa Bedside Table User manual

Mocka Eclipse User manual

Mocka

Mocka Eclipse User manual

Mocka Brooklyn Bedside Table User manual

Mocka

Mocka Brooklyn Bedside Table User manual

Mocka Olso Entertainment Unit User manual

Mocka

Mocka Olso Entertainment Unit User manual

Mocka Canyon User manual

Mocka

Mocka Canyon User manual

Mocka Aspiring Change User manual

Mocka

Mocka Aspiring Change User manual

Mocka Claremont Two Door Cabinet User manual

Mocka

Mocka Claremont Two Door Cabinet User manual

Mocka Torrance Occasional Chair User manual

Mocka

Mocka Torrance Occasional Chair User manual

Mocka Leon User manual

Mocka

Mocka Leon User manual

Mocka Nava Three Drawer User manual

Mocka

Mocka Nava Three Drawer User manual

Mocka Reese User manual

Mocka

Mocka Reese User manual

Mocka Jesse Bedside Table User manual

Mocka

Mocka Jesse Bedside Table User manual

Mocka Original Highchair User manual

Mocka

Mocka Original Highchair User manual

Mocka Aspen User manual

Mocka

Mocka Aspen User manual

Mocka Asha Console Table User manual

Mocka

Mocka Asha Console Table User manual

Mocka Leon Barstool User manual

Mocka

Mocka Leon Barstool User manual

Popular Indoor Furnishing manuals by other brands

Madeli B910-20H-001 Series Specication & installation guide

Madeli

Madeli B910-20H-001 Series Specication & installation guide

Forte GNTB011 Assembling Instruction

Forte

Forte GNTB011 Assembling Instruction

Jysk TULIP manual

Jysk

Jysk TULIP manual

Triarch Indoor Lighting 75360-10 Assembly instructions

Triarch

Triarch Indoor Lighting 75360-10 Assembly instructions

Adria RICO Assembly instructions

Adria

Adria RICO Assembly instructions

dreambaby Brighton L879 instructions

dreambaby

dreambaby Brighton L879 instructions

TYPE A LINEAR 142-5523-8 quick start guide

TYPE A

TYPE A LINEAR 142-5523-8 quick start guide

Robern YC2430D4P1L3 Important safety instructions

Robern

Robern YC2430D4P1L3 Important safety instructions

Furniture of America CM-AC6059 Assembly instructions

Furniture of America

Furniture of America CM-AC6059 Assembly instructions

Outsunny 84H-078V00 manual

Outsunny

Outsunny 84H-078V00 manual

Knight 57764.00 Assembly instructions

Knight

Knight 57764.00 Assembly instructions

HJH office SMART PREMIUM TOP WORK 99 Assembly instructions

HJH office

HJH office SMART PREMIUM TOP WORK 99 Assembly instructions

Dorel Asia baby relax 2-IN-1 CONVERTIBLE CRIB Instruction booklet

Dorel Asia

Dorel Asia baby relax 2-IN-1 CONVERTIBLE CRIB Instruction booklet

aspenhome I256-6052 Assembly instructions

aspenhome

aspenhome I256-6052 Assembly instructions

Okamura Nagare Instructions for use

Okamura

Okamura Nagare Instructions for use

Rocky Mountain Empire II-2T Assembly And Instructions

Rocky Mountain

Rocky Mountain Empire II-2T Assembly And Instructions

Huwil Huwilift E-Verso user manual

Huwil

Huwil Huwilift E-Verso user manual

Kvik H850 manual

Kvik

Kvik H850 manual

manuals.online logo
manuals.online logoBrands
  • About & Mission
  • Contact us
  • Privacy Policy
  • Terms and Conditions

Copyright 2025 Manuals.Online. All Rights Reserved.