manuals.online logo
Brands
  1. Home
  2. •
  3. Brands
  4. •
  5. Modena
  6. •
  7. Water Dispenser
  8. •
  9. Modena BP Series Instruction Manual

Modena BP Series Instruction Manual

!
!
!
!
!"#$%&'%$
!
!
!
!
!
!
!
"#$!%$&'!()*+,!-.+!/0!-1+,!234!
+)*2!'5+,!+6+,!%7+(!
8#!
"(9!:;<!(#+(!
!"#$%&
'''()*+,-.(/*(0+&
!
!
&
!
&
!
!
!
!
!
!
/"0123$+"4+$%5#$,-.!
zO!kÜ+!01H!06!+G_!IN8!+N^!7KI!)Ü+!:7#,!I]!Q_I7!+7-XI!:7e!7V:!0X,!Jr!03g&/!)-8!01H!IN8!:7F&!+7\&!'E!J1$!
J(&7!:7_8!'S&!+7tH!4S3!IF3
!
!
!
!
&&
!
!
!
!
|#&/!Q_I7!+7-XI!I1,!)Ü+!9#&!:7;$å$
6789)$
:$;<<=$
>$;<<=$
?$;<<=$
!"#$%"&!
"#!$%$&!
}àÑ!
}}ç!
Ñ}Ç!
~7]8!}$$^!C-X,!Q7]8!Ç$$!
!
!

O
O!
!
é&/!â?!Q5+!&K,!0X,!IRI!)F3!&K,!&78&7!IN8!I\4!&-XIO!
8{!Wè&!91&/!I7H!K&/!â?^!K&/!â?!)-VI!Ih+!:7ê&/!.!I#!78,!)F3^!QëH!+GS&!IRI!Q7]8!)F3!&K,!&78&7!IN8!0m,!
&-XIO!
www.modena.com
!
!
&
!
!
!
&
!
!
'{!é&/!â?!)-8!01H!0m&/!Q7]8!:7#,!)-VI!Jh:!I7hI!I7h&!01H!)F3!&14!01!983!)]!9B!CD&/!JUI!QëH!+7_I7!
7V:!)i!QëH!K&/!â?!&7y$!aRI!&7o&!+G(&/!+7R,!IK!)6&7!)f&/!06!+G_^!01!9í!Q7g&/!'6!QëH!G8!&/H1,O!
!
!
!
I{!k;4!Q7]8!01H!Q7H#&/!+GK&/!/,n8!)F3!&K,!01!0m&/!Q7]8!)i!)(+!)-VI!4S3!IF3!Q5+!&K,!I7hI!I7h&O!
!
!
ÇO!"\4!&-XI!)-VI!+G8&/!'6!K&/!â?^!Jr!+N!)-VI!+7,5+!Q5!C(&/!);4^!K&/!â?!)-VI!&K,!a34S&!+T!:7_8!983!+NO!
!
!
&
!
!
!
&
!
!
!
!
!
"#$!%&!'(&!)*!+,&!+-.&/!01!2345+!)6&7!$38!9#&!:7;$!<=>?@A!01!9B!CD&/!9#&!:7;$!&7-!$E+!:7F&!+GH&/!
&73!IF3!01!JK,!9K&/!7,L&!)(,!I7H!/,8!)M&7!IN8!'(&O!P7,5+!Q5!:7H&/!IRI7!01!+,S&!+,5&!+GH&/!+T&/!9#&!:7;$!J1!
9U!Q5+!7V:!+G8&/!&7*!I7H!IRI!7H(+!)E&/!/,8!)M&7!71&/!&/14!IN8!'(&O!
!
WRI7!7-X&/!CY&!&14!+GM&7!'14!&7,Z3!0[&!)Z!Q7RI!&783!0Z!I\4!&-XI!3K&/!&]&/!J(&7^!+T!IRI7!9B!CD&/^!'#H!
+GM^!IRI!+_&7!&`&/!I734S&!CD&/!Q7RI!&783!IN8!9#&!:7;$!I7H!)5&!IRI7!aB!Jb!9U!IKO!c1!&71!9#&!a3[+!+7,5+!'6!
/,8!CD&/!+7\&!+7,L&!0X,!&/-d,!Ce&/^!I7f&/!+g,!IK!/h&/!+GM&7!'14!9RI7!7-X&/!CY&!&14!$E+!IRI7!)%&!/,#&!)i!
/,f:!&/-d,!Ce&/!Cj!9B!CD&/O!
!
ki!I\4!&-XI!3K&/!&]&/!J(&7!7H(+!)E&/!'M&7!+7-d&/!+GH&/!Q7H#&/!+7d,!/,8&!C1,!+7M!Q7g&/!I7l!&/-d,!$38!$1!
Im&!&7n&/!&/-d,!$3K&!0o&!71&7!9#&!:7;$!$E+!IRI7!+K,!-3!&S&!&h$!/,n!+1,!J,L3!&14!)i!C34!+GM!+7d,!/,8&!
:7DI!0D!01!I7[+!J-V&/!IN8!9#&!:7;$O!P1,!J,L3!7-X&/!CY&!&14!)-VI!Q7345&!IRH!9B!CD&/!I7H!'[+!Qp!8,!9B!
CD&/!I\4!&-XI!3K&/!&]&/!J(&7!&14O!!
!
"7f&/!+g,!Iq&/!I3&/!I[:!C6I7!0D!I7`$!9]I!Q7RI7!71&/!I7H!&/-d,!Ce&/!<=>?@A!Iq&/!&7-!+7g&/!+,&!7r!+GV!
Q7RI!+GS&!+G8&/!st'!I7_&7!+7uI!IN8!I7f&/!+g,!+(,!)68!I7l!sssO$HCt&8OIHO,CO!v3,!Jm&/!J,S&!7L!0X,!I7f&/!+g,!
&53!'(&!I]!IRI!+7hI!$hI!Q7RI!J,S&!238&!)5&!I\4!&-XI!3K&/O!!
!
w*4!+o&!7-.&/!IRI!7H(+!)E&/!+7-d&/!&/14!IN8!'(&^!I7f&/!+g,!74!0x&/!Gy&/!IRI!9#&!:7;$!IN8!I7f&/!+g,!I]!
+7i!/,f:!_I7!+K,!)8!I7H!/,8!)M&7!'(&O!
!
&
&
&
&
&
&
&
&
&
&
&
&
&
&
!"#$%&'($&)*&+!,&'($&-.&'/$%&+01&$"#+&23$%&$4$%&56$!&78'9$:&
Tiếng Anh 01
!
!
&
!
!
!
!
!
ÑO!!"\4!&-XI!)-VI!Jh:!'S&!+GH&/!+N^!:7#,!)-VI!IK!)6&7!$E+!IRI7!I7hI!I7h&^!)R&/!+,&O!
ìS3!IF3!I\4!&-XI!:7#,!/h&!01H!:7_8!983!+N^!Q7g&/!)-VI!Gm!Gl!G8!Q7î,!Q784!I\4!&-XI^!)R&7!C[3!IRI!
KI!/h&!J,Z&!$Ü+!91&!IN8!I\4!&-XI!&7-!+7i!7,L&!+GH&/!#&7å!
!
!
!
}O!!@K,!&-XI!)]&/!I78,!01!I\4!&-XIO!
8{!@K,!K&/!â?!01H!K&/!IN8!'M&7!I7u8^!:7-%&/!:7R:!&K,!+-%&/!+U!7-%&/!:7R:!Jh:!)Ü+!K&/!á9K!{!
'{! ch:!K&/!01H!'M&7!I7u8!01!983!)]!Ih$!&h:!01H!$,L&/!'M&7!I7u8O!
I{!k-8!'M&7!I7u8!01H!01!)]&/!IB8!+N!+7[:!7%&O!
!
!
!
àO!@53!&/3ï&!&-XI!J1!J[4!+T!$R4!JxI!&-XI^!7*4!QëH!K&/!â?!G8!Q7î,!K&/!IN8!0o+!I7-8^!983!)]!&K,!K&/!â?!
01H!Jr!&-XI!9(I7!G8!IN8!$R4!JxI!&-XIO
!
!
!
!
!
!
!
!
!
&
!
&
&
&
!
!
!
!
!
!
!
!
!
!
!
!
!
!
=12!%12!! ! ! ! ! ! !!!!">?+,@!
!
!!!"!!!"#"$%&"'($$$$$$$)*!
!!!"!!+&,-$)$$$$.$/0-$12$3&4-$$ $ $ )5!
!!!"!!+&,-$5$$$$.$673$89%$$ $ $ $ $)5!
!!!"!!+&,-$:$$$$.$;<=&$>?$@A-B$ $ $ $)C!
"!!+&,-$D$$$$$$$$.$EFG$@HI-B$$$$$)J!
!!!"!!+&,-$C$$$$.$KL$=M$NO$=<=&$P?$QR$$$$$$$$$$$$$$$)S!
!!!"!!+&,-$J$$$$.$/&T-B$>M$UV$%&(4%$$ $$$$$$$$$$$)W!
!!!!!
!
!
$
$
$
!
!
!
!
!
!
!
Tiếng Anh 02
!
!
&
!
!
!
@AB!$CDEF$G?DHB!
!
'()!*(+,!!
z!
@f+!Ig&/!93[+!IN8!&-XI!
}!
@f+!0m,!&-XI!J(&7!
!
@f+!I1,!)Ü+!&-XI!&]&/!
à!
@f+!)ñ&!
Ç!
@f+!0m,!&-XI!&]&/!
Ä!
@f+!7L!+7K&/!J1$!$R+!
Ñ!
<1&!7M&7!7,i&!+76!
!
!
DEF&GHI!
z{!P7,5+!Jo:!Ig&/!93[+!)F3!G8!&-XI!
"7($!01H! !&f+!$E+!JF&!)i!I7x&!Ig&/!93[+!)F3!G8!IN8!&-XI!J1!z}ç!$c^!I7($!78,!JF&!J1!}ç!$c!
01!I7($!$E+!JF&!&n8!)i!I7x&!I75!)E!&-XI!I7#4!J,S&!+DIO!
!
{!"1,!)Ü+!&7,L+!)E!&-XI!&]&/!
"7($! !01H!&f+! $E+!JF&!)i!I1,!)Ü+! &7,L+!)E!&-XI!&]&/^!I]!Ç!$uI!&-XI!&]&/!+e4!I7x&å!Ñ}ó"^!
}}ó"^!É}ó"!01!zççó"O!@53!'(&!IF&!&-XI!'M&7!+7-d&/!+7M!)Ü+!&7,L+!)E!&]&/!.!ò!ò!ó"!!
!
Ç{!â7-%&/!:7R:!:7\&!:7K,!&-XI!&]&/!
"7($!01H! !&f+!$E+!JF&!)i!:78!&-XI!&]&/^!J-V&/!&-XI!&]&/!Gf+!G8!+7tH!$uI!I1,!)Ü+!J-V&/!
&-XI!)F3!G8!J1!zO!!
@53!Ig&/!93[+!)-VI!)Ü+!J1!I75!)E!I7#4!J,S&!+DI^!+7M!J-3!J-V&/!&-XI!9í!CT&/!J(,!983!Q7,!J[4!&/]&!+84!
G8!Q7î,! !&f+O!
!
Ñ{!â7-%&/!:7R:!:7\&!:7K,!&-XI!J(&7!
"7($!01H! !&f+!$E+!JF&!)i!I7H!G8!&-XI!&]&/^!J-V&/!&-XI!9í!Gf+!G8!+7tH!$uI!I1,!)Ü+!J-V&/!&-XI!
)F3!G8!J1!zO!!
@53!Ig&/!93[+!)-VI!)Ü+!J1!I75!)E!I7#4!J,S&!+DI^!+7M!J-3!J-V&/!&-XI!9í!CT&/!J(,!983!Q7,!J[4!&/]&!+84!
G8!Q7î,! !&f+O!
!
}{!â7-%&/!:7R:!'o+!Ig&/!+hI!)ñ&!
"7($!01H!! !&f+!$E+!JF&!)i!'o+!Ig&/!+hI!)ñ&^!01!983!)]!I7($!01H!JF&!&n8!)i!+h+O!
!
à{! |o+!7L!+7K&/!J1$!$R+ô'E!&ë&!
"7($!01H! !&f+!$E+!JF&!)i!'o+!7L!+7K&/!J1$!$R+ô'E!&ë&!01!983!)]!I7($!01H!JF&!&n8!)i!+h+O!
!
Ä{!~_I7!7H(+!Q7]8!8&!+H1&!+Gä!t$!
"7($!01H!! !01H!&f+!+GH&/!Ç!/,\4!)i!Q_I7!7H(+!Q7]8!8&!+H1&!+Gä!t$^!983!)]!I7($!01H!Ç!/,\4!JF&!
&n8!)i!0g!7,L3!Q7]8!8&!+H1&!+Gä!t$O!
!
!
!"#$%)'!;<=&$>?$@A-B$
01
03
03
07
08
08
09
!
!
&
!
!
!
!
!
!
!
;<=&>?&@AB=&C&!
z{! |#&/!),Z3!Q7,i&! }{!~784!&-XI! !
{!vm,!&-XI!J(&7!Ä{! "Å&/!01H!$R4!JxI!&-XI!
Ç{!vm,!&-XI!&]&/!É{!! "Å&/!01H!&-XI!)]&/!I78,!
Ñ{! @h:!Q784!&-XI! É{!!|%$!Ö!v8&!),L&!+T!
!
!
!
!
!"#$%"&$'($)*+$,-.$!
zO!PG-XI!Q7,!Jh:!)Ü+^!&/-d,!Ce&/!:7#,!aRI!)6&7!JH(,!&-XI!&1H^!+7tH!)]!I7x&!I7x&!/,8H!C,L&!&(:!:7e!7V:O!
O!@S&!Jh:!)Ü+!I\4!&-XI!.!&%,!I]!+7i!0o&!71&7!01!'#H!+GM!Cj!C1&/!01!8&!+H1&!á06!+G_!Q7g&/!&/7,S&/{O!
ÇO!~7g&/!Jh:!)Ü+!I\4!&-XI!01!Å!Ih$!),L&!.!&%,!I]!+7i!'6!-X+!7HÜI!;$O!
ÑO! k#$!'#H!Å!Ih$!),L&!:7#,!)-VI!&K,!)[+!I]!:7e!7V:O!
}O!@S&!'Å!93&/!+7S$!Ig&/!+hI!)i!Cj!C1&/!&/h+!),L&!.!:7_8!)F3!G8!IN8!I\4!&-XIO!
àO! W#&!:7;$!&14!R:!CD&/!I7H!IRI!Q5+!&K,!&-XI!)]&/!I78,!01!Q5+!&K,!'E!JxI!JxI!&-XI!á0m,{O!
ÄO!~7g&/!)i!K&/!â?!'6!'ä!IH&/^!)i!Q7g&/!#&7!7-.&/!)5&!Cm&/!I7#4!IN8!&-XIO!
ÉO!"\4!&-XI!+_I7!7V:!)-VI!Jh:!+GH&/!+N^!+N!IF&!:7#,!I]!+#&!&7,L+!+K+^!Jh:!)Ü+!+N!Q7g&/!I]!'#&/!)ã!&7-!
983å!
!
!
!"#$%&'%!/0-$12$3&4-$
!
!"#$%('%!673$89%$
Tiếng Anh 03
!
!
&
!
!
!
@AB!$CDEF$G?DHB!
!
'()!*(+,!!
z!
@f+!Ig&/!93[+!IN8!&-XI!
}!
@f+!0m,!&-XI!J(&7!
!
@f+!I1,!)Ü+!&-XI!&]&/!
à!
@f+!)ñ&!
Ç!
@f+!0m,!&-XI!&]&/!
Ä!
@f+!7L!+7K&/!J1$!$R+!
Ñ!
<1&!7M&7!7,i&!+76!
!
!
DEF&GHI!
z{!P7,5+!Jo:!Ig&/!93[+!)F3!G8!&-XI!
"7($!01H! !&f+!$E+!JF&!)i!I7x&!Ig&/!93[+!)F3!G8!IN8!&-XI!J1!z}ç!$c^!I7($!78,!JF&!J1!}ç!$c!
01!I7($!$E+!JF&!&n8!)i!I7x&!I75!)E!&-XI!I7#4!J,S&!+DIO!
!
{!"1,!)Ü+!&7,L+!)E!&-XI!&]&/!
"7($! !01H!&f+! $E+!JF&!)i!I1,!)Ü+! &7,L+!)E!&-XI!&]&/^!I]!Ç!$uI!&-XI!&]&/!+e4!I7x&å!Ñ}ó"^!
}}ó"^!É}ó"!01!zççó"O!@53!'(&!IF&!&-XI!'M&7!+7-d&/!+7M!)Ü+!&7,L+!)E!&]&/!.!ò!ò!ó"!!
!
Ç{!â7-%&/!:7R:!:7\&!:7K,!&-XI!&]&/!
"7($!01H! !&f+!$E+!JF&!)i!:78!&-XI!&]&/^!J-V&/!&-XI!&]&/!Gf+!G8!+7tH!$uI!I1,!)Ü+!J-V&/!
&-XI!)F3!G8!J1!zO!!
@53!Ig&/!93[+!)-VI!)Ü+!J1!I75!)E!I7#4!J,S&!+DI^!+7M!J-3!J-V&/!&-XI!9í!CT&/!J(,!983!Q7,!J[4!&/]&!+84!
G8!Q7î,! !&f+O!
!
Ñ{!â7-%&/!:7R:!:7\&!:7K,!&-XI!J(&7!
"7($!01H! !&f+!$E+!JF&!)i!I7H!G8!&-XI!&]&/^!J-V&/!&-XI!9í!Gf+!G8!+7tH!$uI!I1,!)Ü+!J-V&/!&-XI!
)F3!G8!J1!zO!!
@53!Ig&/!93[+!)-VI!)Ü+!J1!I75!)E!I7#4!J,S&!+DI^!+7M!J-3!J-V&/!&-XI!9í!CT&/!J(,!983!Q7,!J[4!&/]&!+84!
G8!Q7î,! !&f+O!
!
}{!â7-%&/!:7R:!'o+!Ig&/!+hI!)ñ&!
"7($!01H!! !&f+!$E+!JF&!)i!'o+!Ig&/!+hI!)ñ&^!01!983!)]!I7($!01H!JF&!&n8!)i!+h+O!
!
à{! |o+!7L!+7K&/!J1$!$R+ô'E!&ë&!
"7($!01H! !&f+!$E+!JF&!)i!'o+!7L!+7K&/!J1$!$R+ô'E!&ë&!01!983!)]!I7($!01H!JF&!&n8!)i!+h+O!
!
Ä{!~_I7!7H(+!Q7]8!8&!+H1&!+Gä!t$!
"7($!01H!! !01H!&f+!+GH&/!Ç!/,\4!)i!Q_I7!7H(+!Q7]8!8&!+H1&!+Gä!t$^!983!)]!I7($!01H!Ç!/,\4!JF&!
&n8!)i!0g!7,L3!Q7]8!8&!+H1&!+Gä!t$O!
!
!
!"#$%)'!;<=&$>?$@A-B$
!
!
&
!
!
!
!
I"&$JK!ki!9B!CD&/!$R4!0X,!7,L3!93[+!+K,!-3!01!QëH!C1,!+3Å,!+7x^!:7#,!J3g&!I7f!b!)5&!0,LI!'#H!+GMO!â7#,!+7RH!
:7_I7!Ih$!),L&!+G-XI!Q7,!'#H!+GMO!
zO!~7g&/!QëH!C\4!IR:!)5&!:7_I7!Ih$!),L&!J-X,!+T!Å!Ih$O!
O!"\4!&-XI!&14!&14!)*!)-VI!Q7B!+Ge&/!+G-XI!Q7,!0o&!I734i&O!!
ÇO! Wh:!a5:!J1$!9(I7!K&/!&-XI!01!'E!:7o&!J1$!&]&/!)-VI!J1$!9(I7!'.,!Qö!+73o+!0,S&!I734S&!/,8!$r,!
&`$!$E+!JF&!)i!)#$!'#H!Gy&/!$R4!C34!+GM!+M&7!+G(&/!+K+!01!QëH!C1,!+7d,!/,8&!9B!CD&/O!~7g&/!IK!+7RH!
Gd,!+7,5+!'6!)i!+GR&7!J1$!7î&/O!!
ÑO! WB!CD&/!0#,!$Z$!01!7%,!;$!)i!J1$!9(I7!'Z!$Ü+!I\4!&-XI!01!9B!CD&/!0#,!$Z$!01!Q7g!)i!J83!'Z!$Ü+O!
~7g&/!)-VI!)i!&-XI!01H!)E&/!I%O!
}O! k#$!'#H!C\4!&/3ï&!)*!)-VI!Gf+!Q7î,!&/3ï&!),L&!Q7,!JH(,!'î!&-XI!+7T8!7HÜI!Q7,!'#H!+GM!7HÜI!Q7g&/!
9B!CD&/!+7,5+!'6!+GH&/!$E+!+7d,!/,8&!C1,O!PGH&/!JfI!)]^!Q7,!&-XI!+G.!&S&!J(&7ô!Q7g&/!&]&/^!7*4!$.!08&!
a#!I7H!)5&!Q7,!Q7g&/!Im&!&-XI!+GH&/!+7,5+!'6O!
àO! @53!$1&!7M&7!7,i&!+76!7,i&!+76!',i3!+-V&/!75+!&-XI!õ ú!+7M!JfI!)]!&-XI!)*!75+O!P784!'M&7!&-XI!$X,!
&/84!Jo:!+uIO!
ÄO! ki!)#$!'#H!0,LI!9B!CD&/!'M&7!+7-d&/!J\3!C1,!IN8!I\4!&-XI^!03,!Jm&/!+7-d&/!a34S&!Q,i$!+G8!0,LI!9B!
CD&/^!&7-!9B!CD&/!'[+!+7-d&/ù!03,!Jm&/!+7g&/!'RH!I7H!PG3&/!+\$!C6I7!0D!<HCt&8O!
!
!
!
!
@53!'(&!/Ü:!9U!IK!'[+!+7-d&/!Q7,!9B!CD&/^!7*4!&/T&/!9B!CD&/^!Gf+!C\4!&/3ï&!01!Q,i$!+G8!)i!)#$!'#H!
&7n&/!),Z3!983O!@53!IF&^!03,!Jm&/!J,S&!7L!0X,!+G3&/!+\$!C6I7!0D!<HCt&8!
!
-.!*/!
012345!5(65!
78*(!9:!;<!
!
@-XI!Q7g&/!&]&/!7HÜI!
Q7g&/!J(&7!
!
•! WU!:7\&!:7K,!&-XI!&]&/!
7HÜI!J(&7!23R!&7,Z3!+GH&/!
$E+!Q7H#&/!+7d,!/,8&!&/h&O!
•!P7,5+!'6!I7-8!)-VI!Q5+!&K,!
),L&O!!
•!"7d!I7H!)5&!Q7,!&-XI!+G.!&S&!J(&7!
7HÜI!&]&/O!
•! @K,!C\4!01H!Å!Ih$!01!&7[&!IRI!Ig&/!
+hI!'E!J1$!&]&/!7HÜI!J(&7O!!
@-XI!Q7g&/!I7#4!G8!Q7î,!
0m,!
•!|M&7!I7u8!75+!&-XIO!
•!k-d&/!K&/!'6!Qû+!7HÜI!'6!
I7Ü&!'.,!+7u!/M!)]O!
•!P784!'M&7!&-XI!$X,O!
•! Ph+!Ig&/!+hI!'E!J1$!J(&7!)5&!Ñ!/,d^!
983!)]!'o+!Ig&/!+hI!+G.!J(,O!
üm!Gl!+GS&!IRI!/,R!)ã!'M&7!
&-XI!
•!|M&7!&-XI!'6!Gm!Glô!7-!7î&/!
•!P784!$X,!'M&7!&-XI^!)#$!'#H!:7#,!
Gf+!:7_I7!Ih$!C\4!&/3ï&!G8O!
P,5&/!ï&!JX&!+GH&/!23R!+GM&7!
7H(+!)E&/!
•! ch:!)Ü+!Q7g&/!I7_&7!aRI!
7HÜI!06!+G_!Jh:!)Ü+!+7,5+!'6!
Q7g&/!:7e!7V:!
•!ch:!)Ü+!+7,5+!'6!+GS&!'Z!$Ü+!'y&/!
:7ê&/!01!Å&!)6&7!
<*!Jr,!†!=>>?!
•! "#$!',5&!&7,L+!)E!&]&/!'6!
7î&/!
•!c,S&!7L!0X,!+G3&/!+\$!C6I7!0D!<HCt&8!
<*!Jr,!Ö!=>>@!
•!üm!Gl!'S&!+GH&/!
•!c,S&!7L!0X,!+G3&/!+\$!C6I7!0D!<HCt&8!
!"#$%*%"!EFG$%XY$
!"#$%+%"!KL$=M$NO$=<=&$P?$QR$
!
!
!
!
!"#$%&'%$!
!
!
!
!
!
!
"#$!%$&'!()*+,!-.+!/0!-1+,!234!
+)*2!'5+,!+6+,!%7+(!
8#!
"(9!:;<!(#+(!
!"#$%&
'''()*+,-.(/*(0+&
!
!
&
!
&
!
!
!
!
!
!
/"0123$+"4+$%5#$,-.!
zO!kÜ+!01H!06!+G_!IN8!+N^!7KI!)Ü+!:7#,!I]!Q_I7!+7-XI!:7e!7V:!0X,!Jr!03g&/!)-8!01H!IN8!:7F&!+7\&!'E!J1$!
J(&7!:7_8!'S&!+7tH!4S3!IF3!
!
!
!
&& !
!
!
!
|#&/!Q_I7!+7-XI!I1,!)Ü+!9#&!:7;$å$
6789)$
:$;<<=$
>$;<<=$
?$;<<=$
!"#$%"&!
"#!$%$&
!}àÑ!}}ç!Ñ}Ç!~7]8!}$$^!C-X,!Q7]8!Ç$$
!
!
!

O
O!
!é&/!â?!Q5+!&K,!0X,!IRI!)F3!&K,!&78&7!IN8!I\4!&-XIO!
8{!Wè&!91&/!I7H!K&/!â?^!K&/!â?!)-VI!Ih+!:7ê&/!.!I#!78,!)F3^!QëH!+GS&!IRI!Q7]8!)F3!&K,!&78&7!IN8!0m,!
&-XIO!
Tiếng Anh 04
!
!
&
!
!
!
!
ABC=D!
"#!$%$&!
cH(,!
"\4!&-XI!3K&/!+_I7!7V:!
@-XI!)F3!G8!
@]&/^!'M&7!+7-d&/!°!J(&7!
<13!9hI!
kt&!°!+7ë:!Q7g&/!/l!
"g&/!93[+!&-XI!&]&/!)F3!G8!áJ_+ô/,d{!
à!
"g&/!93[+!&-XI!J(&7!)F3!G8áJ_+ô/,d{!
!
>3&/!+_I7!'M&7!&-XI!&]&/!áJ_+{!
Q7g&/!I]!'M&7!I7u8!&-XI!á+uI!
+7d,{!
>3&/!+_I7!'M&7!&-XI!J(&7!áJ_+{!
z^z!
@7,L+!)E!&]&/!á"tJ9,39{!
}}^!É}^!zçç!
@7,L+!)E!J(&7!á"tJ9,39{!
¢zÑ!
<R4!&ë&!Q7g&/!"£"!
"]!
vo+!J,L3!'M&7!I7u8!&-XI!
P7ë:!Q7g&/!/l!
"g&/!93[+!J1$!&]&/!ás8++{!
zçç!
"g&/!93[+!$R4!&ë&!ás8++{!
zç!
k,L&!R:ôPF&!9K!
ç!v!§!!ô!}ç!w•!
~_I7!+7-XI!9#&!:7;$!
}¶}a}àçaÑ}}!
~_I7!+7-XI!7EI!Ih+!
}àça}}çaÑ}ç!
!
ß!"#$%&!'(!)*!+#,-+!./0!+#12+!34!%56!.7!+#8!+#06!9:1!;5!)#$%&!.<%!+#$%&!3=>!98!.?1!+#1@%!.#A+!BCD%&!./0!'?%!E#F;G!H(!
B1@,!+I>%&!+51!B1@,!#CJ%&!KL%!%56!.#M!B5!E#=.!#N0!O5!.7!+#8!)#$%&!)#JE!.#P%#!Q=.!OJ1!'?%!E#F;!./0!3R%G!S=.!&1=!+I4!
9CD.!&#1!+IT%!%#U%!;=6!#>V.!+I>%&!+51!B1@,!91!)W;!9CD.!BA6!+I>%&!E#X%&!+#P!%&#1@;!+#Y>!.=.!+1T,!.#,F%!B1T%!Z,0%G!"[6!
+#,\.!O5>!91],!)1@%!#>R+!9\%&!O5!;$1!+IC^%&!./0!+#12+!34!;5!.=.!&1=!+I4!.7!+#8!+#06!9:1G!!
!"#$%,%"!/&T-B$>M$UV$%&(4%$
English 10
Thank you for your trust and decision to buy MODENA product and make it a part of your modern family's
needs and lifestyle. The stylish and advanced design i n each product is an elegant combination for your daily
househol d activities.
This book contains various matters regarding water dispens er, from its method of usage, maintenance,
various professional features of the product down to its trouble -shooting. As a manufacturer of user friendly
home appliances, we thrive to simplify the descri ption in this manual to facilitate the users.
In order for this water dispens er to perform normally for an extended period of time, we highly recommend
not only the buyer to hold onto this manual, but also those who wish to operate the product optimally to
maintain its service period and quality. This manual is recomm ended for us e by anyone who operates the
water dispenser.
We also provide a customer care service for MODE NA users as well as other support information on our
official website www.modena.co.id. Please cont act us if you have ot her questions regarding t he water
dispenser.
Enjoy your daily activities, we hope that our products may provi de the best services to your family.
INSTRUCTION AND GUIDE TO USING MODENA WATER DISPENSER
!
!
&
!
!
!
&
!
!
'{!é&/!â?!)-8!01H!0m&/!Q7]8!:7#,!)-VI!Jh:!I7hI!I7h&!01H!)F3!&14!01!983!)]!9B!CD&/!JUI!QëH!+7_I7!
7V:!)i!QëH!K&/!â?!&7y$!aRI!&7o&!+G(&/!+7R,!IK!)6&7!)f&/!06!+G_^!01!9í!Q7g&/!'6!QëH!G8!&/H1,O!
!
!
!
I{!k;4!Q7]8!01H!Q7H#&/!+GK&/!/,n8!)F3!&K,!01!0m&/!Q7]8!)i!)(+!)-VI!4S3!IF3!Q5+!&K,!I7hI!I7h&O!
!
!
ÇO!"\4!&-XI!)-VI!+G8&/!'6!K&/!â?^!Jr!+N!)-VI!+7,5+!Q5!C(&/!);4^!K&/!â?!)-VI!&K,!a34S&!+T!:7_8!983!+NO!
Tiếng Anh 05
English 10
Thank you for your trust and decision to buy MODE NA product and make it a part of your modern family's
needs and lifestyle. The stylish and advanced design in each product is an elegant combination for your daily
househol d activities.
This book contains various matters regarding water dispens er, from its method of usage, maintenance,
various professional features of the product down to its trouble -shooting. As a manufacturer of user friendly
home appliances, we thrive to simplify the description in this manual to facilitate the users.
In order for this water dispens er to perform normally for an extended period of time, we highly recommend
not only the buyer to hol d onto this manual, but also those who wish to operate the product optimally to
maintain its service period and quality. This manual is recommended for us e by anyone who operates the
water dispenser.
We also provide a customer care service for MODE NA users as well as other support information on our
official website www.modena.co.id. Please cont act us if you have ot her questions regarding t he water
dispenser.
Enjoy your daily activities, we hope that our products may provi de the best services to your family.
INSTRUCTION AND GUIDE TO USING MODENA WATER DISPENSER
English 11
CONTENTS PAGE.
•Introduction 10
•Part 1 : Part names 12
•Part 2 : Installation 12
•Part 3 : How to use 15
•Part 4 : Maintenance 16
•Part 5 : Problem & Solution 17
•Part 6 : Specification 18
!
!
&
!
!
!
&
!
!
!
!
!
"#$!%&!'(&!)*!+,&!+-.&/!01!2345+!)6&7!$38!9#&!:7;$!<=>?@A!01!9B!CD&/!9#&!:7;$!&7-!$E+!:7F&!+GH&/!
&73!IF3!01!JK,!9K&/!7,L&!)(,!I7H!/,8!)M&7!IN8!'(&O!P7,5+!Q5!:7H&/!IRI7!01!+,S&!+,5&!+GH&/!+T&/!9#&!:7;$!J1!
9U!Q5+!7V:!+G8&/!&7*!I7H!IRI!7H(+!)E&/!/,8!)M&7!71&/!&/14!IN8!'(&O!
!
WRI7!7-X&/!CY&!&14!+GM&7!'14!&7,Z3!0[&!)Z!Q7RI!&783!0Z!I\4!&-XI!3K&/!&]&/!J(&7^!+T!IRI7!9B!CD&/^!'#H!
+GM^!IRI!+_&7!&`&/!I734S&!CD&/!Q7RI!&783!IN8!9#&!:7;$!I7H!)5&!IRI7!aB!Jb!9U!IKO!c1!&71!9#&!a3[+!+7,5+!'6!
/,8!CD&/!+7\&!+7,L&!0X,!&/-d,!Ce&/^!I7f&/!+g,!IK!/h&/!+GM&7!'14!9RI7!7-X&/!CY&!&14!$E+!IRI7!)%&!/,#&!)i!
/,f:!&/-d,!Ce&/!Cj!9B!CD&/O!
!
ki!I\4!&-XI!3K&/!&]&/!J(&7!7H(+!)E&/!'M&7!+7-d&/!+GH&/!Q7H#&/!+7d,!/,8&!C1,!+7M!Q7g&/!I7l!&/-d,!$38!$1!
Im&!&7n&/!&/-d,!$3K&!0o&!71&7!9#&!:7;$!$E+!IRI7!+K,!-3!&S&!&h$!/,n!+1,!J,L3!&14!)i!C34!+GM!+7d,!/,8&!
:7DI!0D!01!I7[+!J-V&/!IN8!9#&!:7;$O!P1,!J,L3!7-X&/!CY&!&14!)-VI!Q7345&!IRH!9B!CD&/!I7H!'[+!Qp!8,!9B!
CD&/!I\4!&-XI!3K&/!&]&/!J(&7!&14O!!
!
"7f&/!+g,!Iq&/!I3&/!I[:!C6I7!0D!I7`$!9]I!Q7RI7!71&/!I7H!&/-d,!Ce&/!<=>?@A!Iq&/!&7-!+7g&/!+,&!7r!+GV!
Q7RI!+GS&!+G8&/!st'!I7_&7!+7uI!IN8!I7f&/!+g,!+(,!)68!I7l!sssO$HCt&8OIHO,CO!v3,!Jm&/!J,S&!7L!0X,!I7f&/!+g,!
&53!'(&!I]!IRI!+7hI!$hI!Q7RI!J,S&!238&!)5&!I\4!&-XI!3K&/O!!
!
w*4!+o&!7-.&/!IRI!7H(+!)E&/!+7-d&/!&/14!IN8!'(&^!I7f&/!+g,!74!0x&/!Gy&/!IRI!9#&!:7;$!IN8!I7f&/!+g,!I]!
+7i!/,f:!_I7!+K,!)8!I7H!/,8!)M&7!'(&O!
!
&
&
&
&
&
&
&
&
&
&
&
&
&
&
!"#$%&'($&)*&+!,&'($&-.&'/$%&+01&$"#+&23$%&$4$%&56$!&78'9$:&
!
!
&
!
!
!
!
!
ÑO!!"\4!&-XI!)-VI!Jh:!'S&!+GH&/!+N^!:7#,!)-VI!IK!)6&7!$E+!IRI7!I7hI!I7h&^!)R&/!+,&O!
ìS3!IF3!I\4!&-XI!:7#,!/h&!01H!:7_8!983!+N^!Q7g&/!)-VI!Gm!Gl!G8!Q7î,!Q784!I\4!&-XI^!)R&7!C[3!IRI!
KI!/h&!J,Z&!$Ü+!91&!IN8!I\4!&-XI!&7-!+7i!7,L&!+GH&/!#&7å!
! !
!
}O!!@K,!&-XI!)]&/!I78,!01!I\4!&-XIO!
8{!@K,!K&/!â?!01H!K&/!IN8!'M&7!I7u8^!:7-%&/!:7R:!&K,!+-%&/!+U!7-%&/!:7R:!Jh:!)Ü+!K&/!á9K!{!
'{! ch:!K&/!01H!'M&7!I7u8!01!983!)]!Ih$!&h:!01H!$,L&/!'M&7!I7u8O!
I{!k-8!'M&7!I7u8!01H!01!)]&/!IB8!+N!+7[:!7%&O!
!
!
!
àO!@53!&/3ï&!&-XI!J1!J[4!+T!$R4!JxI!&-XI^!7*4!QëH!K&/!â?!G8!Q7î,!K&/!IN8!0o+!I7-8^!983!)]!&K,!K&/!â?!
01H!Jr!&-XI!9(I7!G8!IN8!$R4!JxI!&-XIO!
!
!
!
!
!
!
Tiếng Anh 06
English 10
Thank you for your trust and decision to buy MODE NA product and make it a part of your modern family's
needs and lifestyle. The stylish and advanced design in each product is an elegant combination for your daily
househol d activities.
This book contains various matters regarding water dispens er, from its method of usage, maintenance,
various professional features of the product down to its trouble -shooting. As a manufacturer of user friendly
home appliances, we thrive to simplify the description in this manual to facilitate the users.
In order for this water dispens er to perform normally for an extended period of time, we highly recommend
not only the buyer to hol d onto this manual, but also those who wish to operate the product optimally to
maintain its service period and quality. This manual is recomm ended for us e by anyone who operates the
water dispenser.
We also provide a customer care service for MODE NA users as well as other support information on our
official website www.modena.co.id. Please cont act us if you have ot her questions regarding t he water
dispenser.
Enjoy your daily activities, we hope that our products may provi de the best services to your family.
INSTRUCTION AND GUIDE TO USING MODENA WATER DISPENSER
English 11
CONTENTS PAGE.
•Introduction 10
•Part 1 : Part names 12
•Part 2 : Installation 12
•Part 3 : How to use 15
•Part 4 : Maintenance 16
•Part 5 : Problem & Solution 17
•Part 6 : Specification 18
English 12
Part names :
1) Cont rol panel 5) Watertray
2) Cold water tap 7) Water Purifier inlet
3) Hot water tap 8) Bottled water inlet
4) Watertray cover 8) Pump –Selenoid switch
Installation Notes
1. Prior to installation, the user m ust first ascertain w hat kind of water, according to water select the
correct intake interface.
2. Dispenser should be installed in a smooth operation, easy maintenance and securely place (not tilted
placement).
3. Prohibited dispenser and the power outl et is installed might get wet or dam p places.
4. Make sure the power outlet must be grounded pole is valid.
5. In the front end of the dispenser outlet is recommended to add a switch, convenient Cut off the power.
6. This product applies to bottled water connections and water purifier filter (tap) connection.
7. PE hoses can not be bent, so as not to affect the flow of water.
8. Built-in Dispenser installed in the cabinet, the cabinet has good heat dissipation space requirements,
installation of cabinets no backplane, according to as following :
Part 1 : Part Names
Part 2 : Installation
!
!
&
!
&
&
&
!
!
!
!
!
!
!
!
!
!
!
!
!
!
=12!%12!! ! ! ! ! ! !!!!">?+,@!
!
!!!"!!!"#"$%&"'($$$$$$$)*!
!!!"!!+&,-$)$$$$.$/0-$12$3&4-$$ $ $ )5!
!!!"!!+&,-$5$$$$.$673$89%$$ $ $ $ $)5!
!!!"!!+&,-$:$$$$.$;<=&$>?$@A-B$ $ $ $)C!
"!!+&,-$D$$$$$$$$.$EFG$@HI-B$$$$$)J!
!!!"!!+&,-$C$$$$.$KL$=M$NO$=<=&$P?$QR$$$$$$$$$$$$$$$)S!
!!!"!!+&,-$J$$$$.$/&T-B$>M$UV$%&(4%$$ $$$$$$$$$$$)W!
!!!!!
!
!
$
$
$
!
!
!
!
!
!
!
!
!
&
!
!
!
@AB!$CDEF$G?DHB!
!
'()!*(+,!!
z!
@f+!Ig&/!93[+!IN8!&-XI!
}!
@f+!0m,!&-XI!J(&7!
!
@f+!I1,!)Ü+!&-XI!&]&/!
à!
@f+!)ñ&!
Ç!
@f+!0m,!&-XI!&]&/!
Ä!
@f+!7L!+7K&/!J1$!$R+!
Ñ!
<1&!7M&7!7,i&!+76!
!
!
DEF&GHI!
z{!P7,5+!Jo:!Ig&/!93[+!)F3!G8!&-XI!
"7($!01H! !&f+!$E+!JF&!)i!I7x&!Ig&/!93[+!)F3!G8!IN8!&-XI!J1!z}ç!$c^!I7($!78,!JF&!J1!}ç!$c!
01!I7($!$E+!JF&!&n8!)i!I7x&!I75!)E!&-XI!I7#4!J,S&!+DIO!
!
{!"1,!)Ü+!&7,L+!)E!&-XI!&]&/!
"7($! !01H!&f+! $E+!JF&!)i!I1,!)Ü+! &7,L+!)E!&-XI!&]&/^!I]!Ç!$uI!&-XI!&]&/!+e4!I7x&å!Ñ}ó"^!
}}ó"^!É}ó"!01!zççó"O!@53!'(&!IF&!&-XI!'M&7!+7-d&/!+7M!)Ü+!&7,L+!)E!&]&/!.!ò!ò!ó"!!
!
Ç{!â7-%&/!:7R:!:7\&!:7K,!&-XI!&]&/!
"7($!01H! !&f+!$E+!JF&!)i!:78!&-XI!&]&/^!J-V&/!&-XI!&]&/!Gf+!G8!+7tH!$uI!I1,!)Ü+!J-V&/!
&-XI!)F3!G8!J1!zO!!
@53!Ig&/!93[+!)-VI!)Ü+!J1!I75!)E!I7#4!J,S&!+DI^!+7M!J-3!J-V&/!&-XI!9í!CT&/!J(,!983!Q7,!J[4!&/]&!+84!
G8!Q7î,! !&f+O!
!
Ñ{!â7-%&/!:7R:!:7\&!:7K,!&-XI!J(&7!
"7($!01H! !&f+!$E+!JF&!)i!I7H!G8!&-XI!&]&/^!J-V&/!&-XI!9í!Gf+!G8!+7tH!$uI!I1,!)Ü+!J-V&/!&-XI!
)F3!G8!J1!zO!!
@53!Ig&/!93[+!)-VI!)Ü+!J1!I75!)E!I7#4!J,S&!+DI^!+7M!J-3!J-V&/!&-XI!9í!CT&/!J(,!983!Q7,!J[4!&/]&!+84!
G8!Q7î,! !&f+O!
!
}{!â7-%&/!:7R:!'o+!Ig&/!+hI!)ñ&!
"7($!01H!! !&f+!$E+!JF&!)i!'o+!Ig&/!+hI!)ñ&^!01!983!)]!I7($!01H!JF&!&n8!)i!+h+O!
!
à{! |o+!7L!+7K&/!J1$!$R+ô'E!&ë&!
"7($!01H! !&f+!$E+!JF&!)i!'o+!7L!+7K&/!J1$!$R+ô'E!&ë&!01!983!)]!I7($!01H!JF&!&n8!)i!+h+O!
!
Ä{!~_I7!7H(+!Q7]8!8&!+H1&!+Gä!t$!
"7($!01H!! !01H!&f+!+GH&/!Ç!/,\4!)i!Q_I7!7H(+!Q7]8!8&!+H1&!+Gä!t$^!983!)]!I7($!01H!Ç!/,\4!JF&!
&n8!)i!0g!7,L3!Q7]8!8&!+H1&!+Gä!t$O!
!
!
!"#$%)'!;<=&$>?$@A-B$
Tiếng Anh 07
45C
English 11
CONTENTS PAGE.
•Introduction 10
•Part 1 : Part names 12
•Part 2 : Installation 12
•Part 3 : How to use 15
•Part 4 : Maintenance 16
•Part 5 : Problem & Solution 17
•Part 6 : Specification 18
English 12
Part names :
1) Cont rol panel 5) Watertray
2) Cold water tap 7) Water Purifier inlet
3) Hot water tap 8) Bottled water inlet
4) Watertray cover 8) Pump –Selenoid switch
Installation Notes
1. Prior to installation, the user m ust first ascertain w hat kind of water, according to water select the
correct intake interface.
2. Dispenser should be installed in a smooth operation, easy maintenance and securely place (not tilted
placement).
3. Prohibited dispenser and the power outl et is installed might get wet or dam p places.
4. Make sure the power outlet must be grounded pole is valid.
5. In the front end of the dispenser outlet is recommended to add a switch, convenient Cut off the power.
6. This product applies to bottled water connections and water purifier filter (tap) connection.
7. PE hoses can not be bent, so as not to affect the flow of water.
8. Built-in Dispenser installed in the cabinet, the cabinet has good heat dissipation space requirements,
installation of cabinets no backplane, according to as following :
Part 1 : Part Names
Part 2 : Installation
!
!
&
!
!
!
!
!
!
!
;<=&>?&@AB=&C&!
z{! |#&/!),Z3!Q7,i&! }{!~784!&-XI! !
{!vm,!&-XI!J(&7!Ä{! "Å&/!01H!$R4!JxI!&-XI!
Ç{!vm,!&-XI!&]&/!É{!! "Å&/!01H!&-XI!)]&/!I78,!
Ñ{! @h:!Q784!&-XI! É{!!|%$!Ö!v8&!),L&!+T!
!
!
!
!
!"#$%"&$'($)*+$,-.$!
zO!PG-XI!Q7,!Jh:!)Ü+^!&/-d,!Ce&/!:7#,!aRI!)6&7!JH(,!&-XI!&1H^!+7tH!)]!I7x&!I7x&!/,8H!C,L&!&(:!:7e!7V:O!
O!@S&!Jh:!)Ü+!I\4!&-XI!.!&%,!I]!+7i!0o&!71&7!01!'#H!+GM!Cj!C1&/!01!8&!+H1&!á06!+G_!Q7g&/!&/7,S&/{O!
ÇO!~7g&/!Jh:!)Ü+!I\4!&-XI!01!Å!Ih$!),L&!.!&%,!I]!+7i!'6!-X+!7HÜI!;$O!
ÑO! k#$!'#H!Å!Ih$!),L&!:7#,!)-VI!&K,!)[+!I]!:7e!7V:O!
}O!@S&!'Å!93&/!+7S$!Ig&/!+hI!)i!Cj!C1&/!&/h+!),L&!.!:7_8!)F3!G8!IN8!I\4!&-XIO!
àO! W#&!:7;$!&14!R:!CD&/!I7H!IRI!Q5+!&K,!&-XI!)]&/!I78,!01!Q5+!&K,!'E!JxI!JxI!&-XI!á0m,{O!
ÄO!~7g&/!)i!K&/!â?!'6!'ä!IH&/^!)i!Q7g&/!#&7!7-.&/!)5&!Cm&/!I7#4!IN8!&-XIO!
ÉO!"\4!&-XI!+_I7!7V:!)-VI!Jh:!+GH&/!+N^!+N!IF&!:7#,!I]!+#&!&7,L+!+K+^!Jh:!)Ü+!+N!Q7g&/!I]!'#&/!)ã!&7-!
983å!
!
!
!"#$%&'%!/0-$12$3&4-$
!
!"#$%('%!673$89%$
!
!
&
!
!
!
@AB!$CDEF$G?DHB!
!
'()!*(+,!!
z!
@f+!Ig&/!93[+!IN8!&-XI!
}!
@f+!0m,!&-XI!J(&7!
!
@f+!I1,!)Ü+!&-XI!&]&/!
à!
@f+!)ñ&!
Ç!
@f+!0m,!&-XI!&]&/!
Ä!
@f+!7L!+7K&/!J1$!$R+!
Ñ!
<1&!7M&7!7,i&!+76!
!
!
DEF&GHI!
z{!P7,5+!Jo:!Ig&/!93[+!)F3!G8!&-XI!
"7($!01H! !&f+!$E+!JF&!)i!I7x&!Ig&/!93[+!)F3!G8!IN8!&-XI!J1!z}ç!$c^!I7($!78,!JF&!J1!}ç!$c!
01!I7($!$E+!JF&!&n8!)i!I7x&!I75!)E!&-XI!I7#4!J,S&!+DIO!
!
{!"1,!)Ü+!&7,L+!)E!&-XI!&]&/!
"7($! !01H!&f+! $E+!JF&!)i!I1,!)Ü+! &7,L+!)E!&-XI!&]&/^!I]!Ç!$uI!&-XI!&]&/!+e4!I7x&å!Ñ}ó"^!
}}ó"^!É}ó"!01!zççó"O!@53!'(&!IF&!&-XI!'M&7!+7-d&/!+7M!)Ü+!&7,L+!)E!&]&/!.!ò!ò!ó"!!
!
Ç{!â7-%&/!:7R:!:7\&!:7K,!&-XI!&]&/!
"7($!01H! !&f+!$E+!JF&!)i!:78!&-XI!&]&/^!J-V&/!&-XI!&]&/!Gf+!G8!+7tH!$uI!I1,!)Ü+!J-V&/!
&-XI!)F3!G8!J1!zO!!
@53!Ig&/!93[+!)-VI!)Ü+!J1!I75!)E!I7#4!J,S&!+DI^!+7M!J-3!J-V&/!&-XI!9í!CT&/!J(,!983!Q7,!J[4!&/]&!+84!
G8!Q7î,! !&f+O!
!
Ñ{!â7-%&/!:7R:!:7\&!:7K,!&-XI!J(&7!
"7($!01H! !&f+!$E+!JF&!)i!I7H!G8!&-XI!&]&/^!J-V&/!&-XI!9í!Gf+!G8!+7tH!$uI!I1,!)Ü+!J-V&/!&-XI!
)F3!G8!J1!zO!!
@53!Ig&/!93[+!)-VI!)Ü+!J1!I75!)E!I7#4!J,S&!+DI^!+7M!J-3!J-V&/!&-XI!9í!CT&/!J(,!983!Q7,!J[4!&/]&!+84!
G8!Q7î,! !&f+O!
!
}{!â7-%&/!:7R:!'o+!Ig&/!+hI!)ñ&!
"7($!01H!! !&f+!$E+!JF&!)i!'o+!Ig&/!+hI!)ñ&^!01!983!)]!I7($!01H!JF&!&n8!)i!+h+O!
!
à{! |o+!7L!+7K&/!J1$!$R+ô'E!&ë&!
"7($!01H! !&f+!$E+!JF&!)i!'o+!7L!+7K&/!J1$!$R+ô'E!&ë&!01!983!)]!I7($!01H!JF&!&n8!)i!+h+O!
!
Ä{!~_I7!7H(+!Q7]8!8&!+H1&!+Gä!t$!
"7($!01H!! !01H!&f+!+GH&/!Ç!/,\4!)i!Q_I7!7H(+!Q7]8!8&!+H1&!+Gä!t$^!983!)]!I7($!01H!Ç!/,\4!JF&!
&n8!)i!0g!7,L3!Q7]8!8&!+H1&!+Gä!t$O!
!
!
!"#$%)'!;<=&$>?$@A-B$
!
!
&
!
!
!
!
I"&$JK!ki!9B!CD&/!$R4!0X,!7,L3!93[+!+K,!-3!01!QëH!C1,!+3Å,!+7x^!:7#,!J3g&!I7f!b!)5&!0,LI!'#H!+GMO!â7#,!+7RH!
:7_I7!Ih$!),L&!+G-XI!Q7,!'#H!+GMO!
zO!~7g&/!QëH!C\4!IR:!)5&!:7_I7!Ih$!),L&!J-X,!+T!Å!Ih$O!
O!"\4!&-XI!&14!&14!)*!)-VI!Q7B!+Ge&/!+G-XI!Q7,!0o&!I734i&O!!
ÇO! Wh:!a5:!J1$!9(I7!K&/!&-XI!01!'E!:7o&!J1$!&]&/!)-VI!J1$!9(I7!'.,!Qö!+73o+!0,S&!I734S&!/,8!$r,!
&`$!$E+!JF&!)i!)#$!'#H!Gy&/!$R4!C34!+GM!+M&7!+G(&/!+K+!01!QëH!C1,!+7d,!/,8&!9B!CD&/O!~7g&/!IK!+7RH!
Gd,!+7,5+!'6!)i!+GR&7!J1$!7î&/O!!
ÑO! WB!CD&/!0#,!$Z$!01!7%,!;$!)i!J1$!9(I7!'Z!$Ü+!I\4!&-XI!01!9B!CD&/!0#,!$Z$!01!Q7g!)i!J83!'Z!$Ü+O!
~7g&/!)-VI!)i!&-XI!01H!)E&/!I%O!
}O! k#$!'#H!C\4!&/3ï&!)*!)-VI!Gf+!Q7î,!&/3ï&!),L&!Q7,!JH(,!'î!&-XI!+7T8!7HÜI!Q7,!'#H!+GM!7HÜI!Q7g&/!
9B!CD&/!+7,5+!'6!+GH&/!$E+!+7d,!/,8&!C1,O!PGH&/!JfI!)]^!Q7,!&-XI!+G.!&S&!J(&7ô!Q7g&/!&]&/^!7*4!$.!08&!
a#!I7H!)5&!Q7,!Q7g&/!Im&!&-XI!+GH&/!+7,5+!'6O!
àO! @53!$1&!7M&7!7,i&!+76!7,i&!+76!',i3!+-V&/!75+!&-XI!õ ú!+7M!JfI!)]!&-XI!)*!75+O!P784!'M&7!&-XI!$X,!
&/84!Jo:!+uIO!
ÄO! ki!)#$!'#H!0,LI!9B!CD&/!'M&7!+7-d&/!J\3!C1,!IN8!I\4!&-XI^!03,!Jm&/!+7-d&/!a34S&!Q,i$!+G8!0,LI!9B!
CD&/^!&7-!9B!CD&/!'[+!+7-d&/ù!03,!Jm&/!+7g&/!'RH!I7H!PG3&/!+\$!C6I7!0D!<HCt&8O!
!
!
!
!
@53!'(&!/Ü:!9U!IK!'[+!+7-d&/!Q7,!9B!CD&/^!7*4!&/T&/!9B!CD&/^!Gf+!C\4!&/3ï&!01!Q,i$!+G8!)i!)#$!'#H!
&7n&/!),Z3!983O!@53!IF&^!03,!Jm&/!J,S&!7L!0X,!+G3&/!+\$!C6I7!0D!<HCt&8!
!
-.!*/! 012345!5(65!78*(!9:!;<!
!
@-XI!Q7g&/!&]&/!7HÜI!
Q7g&/!J(&7!
!
•! WU!:7\&!:7K,!&-XI!&]&/!
7HÜI!J(&7!23R!&7,Z3!+GH&/!
$E+!Q7H#&/!+7d,!/,8&!&/h&O!
•!P7,5+!'6!I7-8!)-VI!Q5+!&K,!
),L&O!!
•!"7d!I7H!)5&!Q7,!&-XI!+G.!&S&!J(&7!
7HÜI!&]&/O!
•! @K,!C\4!01H!Å!Ih$!01!&7[&!IRI!Ig&/!
+hI!'E!J1$!&]&/!7HÜI!J(&7O!!
@-XI!Q7g&/!I7#4!G8!Q7î,!
0m,!
•!|M&7!I7u8!75+!&-XIO!
•!k-d&/!K&/!'6!Qû+!7HÜI!'6!
I7Ü&!'.,!+7u!/M!)]O!
•!P784!'M&7!&-XI!$X,O!
•! Ph+!Ig&/!+hI!'E!J1$!J(&7!)5&!Ñ!/,d^!
983!)]!'o+!Ig&/!+hI!+G.!J(,O!
üm!Gl!+GS&!IRI!/,R!)ã!'M&7!
&-XI! •!|M&7!&-XI!'6!Gm!Glô!7-!7î&/!•
!
P784!$X,!'M&7!&-XI^!)#$!'#H!:7#,!
Gf+!:7_I7!Ih$!C\4!&/3ï&!G8O!
P,5&/!ï&!JX&!+GH&/!23R!+GM&7!
7H(+!)E&/!
•
! ch:!)Ü+!Q7g&/!I7_&7!aRI!
7HÜI!06!+G_!Jh:!)Ü+!+7,5+!'6!
Q7g&/!:7e!7V:!
•!ch:!)Ü+!+7,5+!'6!+GS&!'Z!$Ü+!'y&/!
:7ê&/!01!Å&!)6&7!
<*!Jr,!†!=>>?!•! "#$!',5&!&7,L+!)E!&]&/!'6!
7î&/!•!c,S&!7L!0X,!+G3&/!+\$!C6I7!0D!<HCt&8!
<*!Jr,!Ö!=>>@!•!üm!Gl!'S&!+GH&/!•!c,S&!7L!0X,!+G3&/!+\$!C6I7!0D!<HCt&8!
!"#$%*%"!EFG$%XY$
!"#$%+%"!KL$=M$NO$=<=&$P?$QR$
Tiếng Anh 08
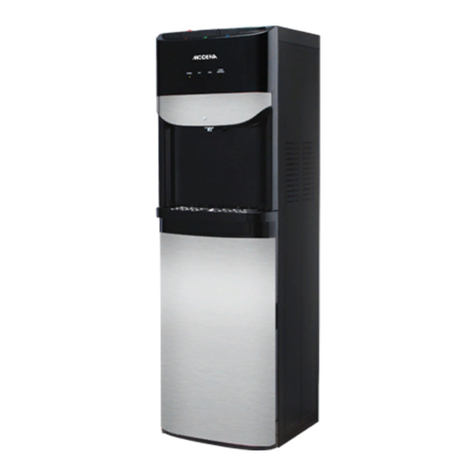
English 13
Installation method
1. Set in the cabinet position, the hole should be the appropriate size of the cooler body smoothly
embedded square hole in the side of the requi rements
Product size installation table :
M ode l W ( mm) D (mm) H (mm) Remark
BP 3435 564 550 453 The buckle 5mm, Under the buckle 3mm
2
2.
.
PE hose connected to the quick connectors of dispensers.
a) Ready for PE hos e, PE hose to be cut flat at both ends, pulled on a blue fountai n quick connector
snaps.
English 14
b) The PE hose insert snap ring, must be firmly inserted in the end, and then use the appropriate force
pulling the PE hose to confirm fixed in place, will not be pulled out.
c) Insert the snap to empty spaces between the connector and snap ring in order to achieve a firm
connection requirements.
3. The Dispenser of equipped PE hose push designed cabinets hole, PE hose piercing from the back of the
cupboard.
4. Dispenser installed in the cabinet, there must be a reliable fixation,
Requirements Dispenser mounted on the rear cabinet, leaking out of Dis penser tray, Marked the
screws attached to the floor of Dispenser, as shown the picture :
!
!
&
!
&
!
!
!
!
!
!
/"0123$+"4+$%5#$,-.!
zO!kÜ+!01H!06!+G_!IN8!+N^!7KI!)Ü+!:7#,!I]!Q_I7!+7-XI!:7e!7V:!0X,!Jr!03g&/!)-8!01H!IN8!:7F&!+7\&!'E!J1$!
J(&7!:7_8!'S&!+7tH!4S3!IF3
!
!
!
!
&&
!
!
!
!
|#&/!Q_I7!+7-XI!I1,!)Ü+!9#&!:7;$å$
6789)$
:$;<<=$
>$;<<=$
?$;<<=$
!"#$%"&!
"#!$%$&!
}àÑ!
}}ç!
Ñ}Ç!
~7]8!}$$^!C-X,!Q7]8!Ç$$!
!
!

O
O!
!
é&/!â?!Q5+!&K,!0X,!IRI!)F3!&K,!&78&7!IN8!I\4!&-XIO!
8{!Wè&!91&/!I7H!K&/!â?^!K&/!â?!)-VI!Ih+!:7ê&/!.!I#!78,!)F3^!QëH!+GS&!IRI!Q7]8!)F3!&K,!&78&7!IN8!0m,!
&-XIO!
!
!
&
!
!
!
!
ABC=D!"#!$%$&!
cH(,! "\4!&-XI!3K&/!+_I7!7V:
!
@-XI!)F3!G8!@]&/^!'M&7!+7-d&/!°!J(&7
!
<13!9hI! kt&!°!+7ë:!Q7g&/!/l
!
"g&/!93[+!&-XI!&]&/!)F3!G8!áJ_+ô/,d{! à
!
"g&/!93[+!&-XI!J(&7!)F3!G8áJ_+ô/,d{! 
!
>3&/!+_I7!'M&7!&-XI!&]&/!áJ_+{!
Q7g&/!I]!'M&7!I7u8!&-XI!á+uI!
+7d,{!
>3&/!+_I7!'M&7!&-XI!J(&7!áJ_+{!z^z
!
@7,L+!)E!&]&/!á"tJ9,39{!}}^!É}^!zçç
!
@7,L+!)E!J(&7!á"tJ9,39{!¢zÑ
!
<R4!&ë&!Q7g&/!"£"!"]
!
vo+!J,L3!'M&7!I7u8!&-XI! P7ë:!Q7g&/!/l
!
"g&/!93[+!J1$!&]&/!ás8++{!zçç
!
"g&/!93[+!$R4!&ë&!ás8++{!zç
!
k,L&!R:ôPF&!9K! ç!v!§!!ô!}ç!w•
!
~_I7!+7-XI!9#&!:7;$! }¶}a}àçaÑ}}
!
~_I7!+7-XI!7EI!Ih+! }àça}}çaÑ}ç
!
!
ß!"#$%&!'(!)*!+#,-+!./0!+#12+!34!%56!.7!+#8!+#06!9:1!;5!)#$%&!.<%!+#$%&!3=>!98!.?1!+#1@%!.#A+!BCD%&!./0!'?%!E#F;G!H(!
B1@,!+I>%&!+51!B1@,!#CJ%&!KL%!%56!.#M!B5!E#=.!#N0!O5!.7!+#8!)#$%&!)#JE!.#P%#!Q=.!OJ1!'?%!E#F;!./0!3R%G!S=.!&1=!+I4!
9CD.!&#1!+IT%!%#U%!;=6!#>V.!+I>%&!+51!B1@,!91!)W;!9CD.!BA6!+I>%&!E#X%&!+#P!%&#1@;!+#Y>!.=.!+1T,!.#,F%!B1T%!Z,0%G!"[6!
+#,\.!O5>!91],!)1@%!#>R+!9\%&!O5!;$1!+IC^%&!./0!+#12+!34!;5!.=.!&1=!+I4!.7!+#8!+#06!9:1G!!
!"#$%,%"!/&T-B$>M$UV$%&(4%$
Tiếng Anh 09
English 10
Thank you for your trust and decision to buy MODE NA product and make it a part of your modern family's
needs and lifestyle. The stylish and advanced design in each product is an elegant combination for your daily
househol d activities.
This book contains various matters regarding water dispens er, from its method of usage, maintenance,
various professional features of the product down to its trouble -shooting. As a manufacturer of user friendly
home appliances, we thrive to simplify the description in this manual to facilitate the users.
In order for this water dispens er to perform normally for an extended period of time, we highly recommend
not only the buyer to hol d onto this manual, but also those who wish to operate the product optimally to
maintain its service period and quality. This manual is recomm ended for us e by anyone who operates the
water dispenser.
We also provide a customer care service for MODE NA users as well as other support information on our
official website www.modena.co.id. Please cont act us if you have ot her questions regarding t he water
dispenser.
Enjoy your daily activities, we hope that our products may provi de the best services to your family.
INSTRUCTION AND GUIDE TO USING MODENA WATER DISPENSER
English 13
Installation method
1. Set in the cabinet position, the hole should be the appropriate size of the cooler body smoothly
embedded square hole in the side of the requi rements
Product size installation table :
M ode l W ( mm) D (mm) H (mm) Remark
BP 3435 564 550 453 The buckle 5mm, Under the buckle 3mm
2
2.
.
PE hose connected to the quick connectors of dispensers.
a) Ready for PE hos e, PE hose to be cut flat at both ends, pulled on a blue fountai n quick connector
snaps.
English 14
b) The PE hose insert snap ring, must be firmly inserted in the end, and then use the appropriate force
pulling the PE hose to confirm fixed in place, will not be pulled out.
c) Insert the snap to empty spaces between the connector and snap ring in order to achieve a firm
connection requirements.
3. The Dispenser of equipped PE hose push designed cabinets hole, PE hose piercing from the back of the
cupboard.
4. Dispenser installed in the cabinet, there must be a reliable fixation,
Requirements Dispenser mounted on the rear cabinet, leaking out of Dis penser tray, Marked the
screws attached to the floor of Dispenser, as shown the picture :
English 15
5. The bottled water and dispenser connections.
a) Connect PE hose to the pipe for gallon, the connection method is same as install hose me thod
(no. 2)
b) Insert the pipe to the gallon and then plug the cover to mouth of gallon.
c) Insert the gallon and close the lower cabinet door.
6. If the water source is from water purifier, pull out PE hose from the pipe for gallon, then connect the PE
hose to the clean water outl et of water purifier.
CONTROL PANEL
Remark:
1 Water capacity button 5 Cold water tap button
2 Hot water setting button 6 Light button
3 Hot water tap button 7 Cooling system button
4 Display screen
Part 3 : How to use
!
!
&
!
!
'{!é&/!â?!)-8!01H!0m&/!Q7]8!:7#,!)-VI!Jh:!I7hI!I7h&!01H!)F3!&14!01!983!)]!9B!CD&/!JUI!QëH!+7_I7!
7V:!)i!QëH!K&/!â?!&7y$!aRI!&7o&!+G(&/!+7R,!IK!)6&7!)f&/!06!+G_^!01!9í!Q7g&/!'6!QëH!G8!&/H1,O!
!
!
!
I{!k;4!Q7]8!01H!Q7H#&/!+GK&/!/,n8!)F3!&K,!01!0m&/!Q7]8!)i!)(+!)-VI!4S3!IF3!Q5+!&K,!I7hI!I7h&O!
!
!
ÇO!"\4!&-XI!)-VI!+G8&/!'6!K&/!â?^!Jr!+N!)-VI!+7,5+!Q5!C(&/!);4^!K&/!â?!)-VI!&K,!a34S&!+T!:7_8!983!+NO!
English 10
Thank you for your trust and decision to buy MODE NA product and make it a part of your modern family's
needs and lifestyle. The stylish and advanced design in each product is an elegant combination for your daily
househol d activities.
This book contains various matters regarding water dispens er, from its method of usage, maintenance,
various professional features of the product down to its trouble -shooting. As a manufacturer of user friendly
home appliances, we thrive to simplify the description in this manual to facilitate the users.
In order for this water dispens er to perform normally for an extended period of time, we highly recommend
not only the buyer to hol d onto this manual, but also those who wish to operate the product optimally to
maintain its service period and quality. This manual is recommended for us e by anyone who operates the
water dispenser.
We also provide a customer care service for MODE NA users as well as other support information on our
official website www.modena.co.id. Please cont act us if you have ot her questions regarding t he water
dispenser.
Enjoy your daily activities, we hope that our products may provi de the best services to your family.
INSTRUCTION AND GUIDE TO USING MODENA WATER DISPENSER
English 11
CONTENTS PAGE.
•Introduction 10
•Part 1 : Part names 12
•Part 2 : Installation 12
•Part 3 : How to use 15
•Part 4 : Maintenance 16
•Part 5 : Problem & Solution 17
•Part 6 : Specification 18
English 14
b) The PE hose insert snap ring, must be firmly inserted in the end, and then use the appropriate force
pulling the PE hose to confirm fixed in place, will not be pulled out.
c) Insert the snap to empty spaces between the connector and snap ring in order to achieve a firm
connection requirements.
3. The Dispenser of equipped PE hose push designed cabinets hole, PE hose piercing from the back of the
cupboard.
4. Dispenser installed in the cabinet, there must be a reliable fixation,
Requirements Dispenser mounted on the rear cabinet, leaking out of Dis penser tray, Marked the
screws attached to the floor of Dispenser, as shown the picture :
English 15
5. The bottled water and dispenser connections.
a) Connect PE hose to the pipe for gallon, the connection method is same as install hose me thod
(no. 2)
b) Insert the pipe to the gallon and then plug the cover to mouth of gallon.
c) Insert the gallon and close the lower cabinet door.
6. If the water source is from water purifier, pull out PE hose from the pipe for gallon, then connect the PE
hose to the clean water outl et of water purifier.
CONTROL PANEL
Remark:
1 Water capacity button 5 Cold water tap button
2 Hot water setting button 6 Light button
3 Hot water tap button 7 Cooling system button
4 Display screen
Part 3 : How to use
English 16
Getting Started
1) Water outlet capacity setting
Touch button once for 150 m L wat er output capacity, touch agai n for 250 mL capacity and touch
once again for continuously water flow.
2) Hot water temperature setting
3) Hot water dispense met hod
Touch button once to dispense hot water, the hot water capacity will drop out according to the
water outlet capacity setting as number 1.
If the capacity is set as continuous flow, then water flow will stop after pull out the finger from
button.
4) Cold water dispense method
Touch button once to come out hot water, the water capacity will drop out according to the wat er
outlet capacity setting as number 1.
If the capacity is set continuous flow, then water flow will stop after pull out the finger from
button.
5) Ligth switch on met hod
Touch button once to switch on the light, and then touch once again to switch of the light.
6) Cooling system/Compressor swtich on
Touch button once to switch on the compressor/Cooling system, and then touc h once agai n to
switch of the compressor/Cooling system.
7) Child lock acti vation
Touch button 3 seconds to activate the child lock, and then touch 3 seconds again to inacti ve
the child lock.
Note: To play the machi ne for optimum performance and prol ong its life, should always pay attention to
maintenance. Must unplug the power plug before maintenance.
1. Do not pull on the cable to the wine's power plug from the outlet.
2. This dispenser has been disinfected prior to shipping.
3. Arrange for clean the water tube and heating element to be cleaned by expert technician once a year
to ensure that the mac hine maintains good condition and to extend usage. Do not attempt to
disassemble the m achine in order to avoid damage to the machi ne.
4. Use soft and slightly wet cloth to clean the surface of dispenser, and use soft and dry cloth to wipe the
surface. Do not let water into the engine.
Part 4 : Maintenance
Touch button once to set the hot water temperature,there are 3 hot water options:55°C,85°C and
100°C.If you need a normal water then set the hot temperature on__°C.
!
!
&
!
!
!
!
!
ÑO!!"\4!&-XI!)-VI!Jh:!'S&!+GH&/!+N^!:7#,!)-VI!IK!)6&7!$E+!IRI7!I7hI!I7h&^!)R&/!+,&O!
ìS3!IF3!I\4!&-XI!:7#,!/h&!01H!:7_8!983!+N^!Q7g&/!)-VI!Gm!Gl!G8!Q7î,!Q784!I\4!&-XI^!)R&7!C[3!IRI!
KI!/h&!J,Z&!$Ü+!91&!IN8!I\4!&-XI!&7-!+7i!7,L&!+GH&/!#&7å!
!
!
!
}O!!@K,!&-XI!)]&/!I78,!01!I\4!&-XIO!
8{!@K,!K&/!â?!01H!K&/!IN8!'M&7!I7u8^!:7-%&/!:7R:!&K,!+-%&/!+U!7-%&/!:7R:!Jh:!)Ü+!K&/!á9K!{!
'{! ch:!K&/!01H!'M&7!I7u8!01!983!)]!Ih$!&h:!01H!$,L&/!'M&7!I7u8O!
I{!k-8!'M&7!I7u8!01H!01!)]&/!IB8!+N!+7[:!7%&O!
!
!
!
àO!@53!&/3ï&!&-XI!J1!J[4!+T!$R4!JxI!&-XI^!7*4!QëH!K&/!â?!G8!Q7î,!K&/!IN8!0o+!I7-8^!983!)]!&K,!K&/!â?!
01H!Jr!&-XI!9(I7!G8!IN8!$R4!JxI!&-XIO
!
!
!
!
!
!
!
English 10
Thank you for your trust and decision to buy MODE NA product and make it a part of your modern family's
needs and lifestyle. The stylish and advanced design in each product is an elegant combination for your daily
househol d activities.
This book contains various matters regarding water dispens er, from its method of usage, maintenance,
various professional features of the product down to its trouble -shooting. As a manufacturer of user friendly
home appliances, we thrive to simplify the description in this manual to facilitate the users.
In order for this water dispens er to perform normally for an extended period of time, we highly recommend
not only the buyer to hol d onto this manual, but also those who wish to operate the product optimally to
maintain its service period and quality. This manual is recomm ended for us e by anyone who operates the
water dispenser.
We also provide a customer care service for MODE NA users as well as other support information on our
official website www.modena.co.id. Please cont act us if you have ot her questions regarding t he water
dispenser.
Enjoy your daily activities, we hope that our products may provi de the best services to your family.
INSTRUCTION AND GUIDE TO USING MODENA WATER DISPENSER
English 11
CONTENTS PAGE.
•Introduction 10
•Part 1 : Part names 12
•Part 2 : Installation 12
•Part 3 : How to use 15
•Part 4 : Maintenance 16
•Part 5 : Problem & Solution 17
•Part 6 : Specification 18
English 12
Part names :
1) Cont rol panel 5) Watertray
2) Cold water tap 7) Water Purifier inlet
3) Hot water tap 8) Bottled water inlet
4) Watertray cover 8) Pump –Selenoid switch
Installation Notes
1. Prior to installation, the user m ust first ascertain w hat kind of water, according to water select the
correct intake interface.
2. Dispenser should be installed in a smooth operation, easy maintenance and securely place (not tilted
placement).
3. Prohibited dispenser and the power outl et is installed might get wet or dam p places.
4. Make sure the power outlet must be grounded pole is valid.
5. In the front end of the dispenser outlet is recommended to add a switch, convenient Cut off the power.
6. This product applies to bottled water connections and water purifier filter (tap) connection.
7. PE hoses can not be bent, so as not to affect the flow of water.
8. Built-in Dispenser installed in the cabinet, the cabinet has good heat dissipation space requirements,
installation of cabinets no backplane, according to as following :
Part 1 : Part Names
Part 2 : Installation
English 15
5. The bottled water and dispenser connections.
a) Connect PE hose to the pipe for gallon, the connection method is same as install hose me thod
(no. 2)
b) Insert the pipe to the gallon and then plug the cover to mouth of gallon.
c) Insert the gallon and close the lower cabinet door.
6. If the water source is from water purifier, pull out PE hose from the pipe for gallon, then connect the PE
hose to the clean water outl et of water purifier.
CONTROL PANEL
Remark:
1 Water capacity button 5 Cold water tap button
2 Hot water setting button 6 Light button
3 Hot water tap button 7 Cooling system button
4 Display screen
Part 3 : How to use
English 16
Getting Started
1) Water outlet capacity setting
Touch button once for 150 m L wat er output capacity, touch agai n for 250 mL capacity and touch
once again for continuously water flow.
2) Hot water temperature setting
3) Hot water dispense met hod
Touch button once to dispense hot water, the hot water capacity will drop out according to the
water outlet capacity setting as number 1.
If the capacity is set as continuous flow, then water flow will stop after pull out the finger from
button.
4) Cold water dispense method
Touch button once to come out hot water, the water capacity will drop out according to the wat er
outlet capacity setting as number 1.
If the capacity is set continuous flow, then water flow will stop after pull out the finger from
button.
5) Ligth switch on met hod
Touch button once to switch on the light, and then touch once again to switch of the light.
6) Cooling system/Compressor swtich on
Touch button once to switch on the compressor/Cooling system, and then touc h once agai n to
switch of the compressor/Cooling system.
7) Child lock acti vation
Touch button 3 seconds to activate the child lock, and then touch 3 seconds again to inacti ve
the child lock.
Note: To play the machi ne for optimum performance and prol ong its life, should always pay attention to
maintenance. Must unplug the power plug before maintenance.
1. Do not pull on the cable to the wine's power plug from the outlet.
2. This dispenser has been disinfected prior to shipping.
3. Arrange for clean the water tube and heating element to be cleaned by expert technician once a year
to ensure that the mac hine maintains good condition and to extend usage. Do not attempt to
disassemble the m achine in order to avoid damage to the machi ne.
4. Use soft and slightly wet cloth to clean the surface of dispenser, and use soft and dry cloth to wipe the
surface. Do not let water into the engine.
Part 4 : Maintenance
Touch button once to set the hot water temperature,there are 3 hot water options:55°C,85°C and
100°C.If you need a normal water then set the hot temperature on__°C.
English 17
5. Make sure the power cord is unplugged from the power source when the discard excess water or
when maintenance or not use the unit for a long time. Meanwhile, when the hot wat er to be cold/not
hot, open the drain valve until there is no water in the unit.
6. If the display screen shows “” water empty ikon, it is the wat er already em pty. Ch ange the bottle
water with a new one imm ediat ely.
7. In order to ensure the longterm normal use of water dis penser, please regularly check the user, such
as abnormal use; please notify the Modena Se rvice Cent er.
If you happen anomaly in use, please stop using and unpl ug the power cord, and check to make sure the
following. If necessary, please contact Modena servic e center
Problem Ca u se Solution
Water is not hot or not cold
Excessive dispensation of
hot water or cold water in a
short period of time.
Unit is not yet connected to
electricity.
Wait until the water becom es cold or
hot.
Connect the cord to the outlet and
press the heater and cooler switches.
Water is not being
dispensed out of the tap
Water gallon is empty.
The pipe is stuck or block
something.
Replace the water gallon with a new
one.
Turn off the switch cooling to 4 hours,
then turn the switch back.
Leak on the water gallon
support
Water gallon is leaking /
damaged
Replace water gallon with a new one,
make sure the power cord is
unplugged.
Loud noise during operation Improper installation or
placement of unit
Install unit on even and stable
surface
Error code - Err 1 Hot temperat ure sensor is
broken Contact Modena service center
Error code –Err 2 Internal leakage Cont act Modena service center
Part 5 : Problem & Solution
!
!
&
!
!
!
@AB!$CDEF$G?DHB!
!
'()!*(+,!!
z!
@f+!Ig&/!93[+!IN8!&-XI!
}!
@f+!0m,!&-XI!J(&7!
!
@f+!I1,!)Ü+!&-XI!&]&/!
à!
@f+!)ñ&!
Ç!
@f+!0m,!&-XI!&]&/!
Ä!
@f+!7L!+7K&/!J1$!$R+!
Ñ!
<1&!7M&7!7,i&!+76!
!
!
DEF&GHI!
z{!P7,5+!Jo:!Ig&/!93[+!)F3!G8!&-XI!
"7($!01H! !&f+!$E+!JF&!)i!I7x&!Ig&/!93[+!)F3!G8!IN8!&-XI!J1!z}ç!$c^!I7($!78,!JF&!J1!}ç!$c!
01!I7($!$E+!JF&!&n8!)i!I7x&!I75!)E!&-XI!I7#4!J,S&!+DIO!
!
{!"1,!)Ü+!&7,L+!)E!&-XI!&]&/!
"7($! !01H!&f+! $E+!JF&!)i!I1,!)Ü+! &7,L+!)E!&-XI!&]&/^!I]!Ç!$uI!&-XI!&]&/!+e4!I7x&å!Ñ}ó"^!
}}ó"^!É}ó"!01!zççó"O!@53!'(&!IF&!&-XI!'M&7!+7-d&/!+7M!)Ü+!&7,L+!)E!&]&/!.!ò!ò!ó"!!
!
Ç{!â7-%&/!:7R:!:7\&!:7K,!&-XI!&]&/!
"7($!01H! !&f+!$E+!JF&!)i!:78!&-XI!&]&/^!J-V&/!&-XI!&]&/!Gf+!G8!+7tH!$uI!I1,!)Ü+!J-V&/!
&-XI!)F3!G8!J1!zO!!
@53!Ig&/!93[+!)-VI!)Ü+!J1!I75!)E!I7#4!J,S&!+DI^!+7M!J-3!J-V&/!&-XI!9í!CT&/!J(,!983!Q7,!J[4!&/]&!+84!
G8!Q7î,! !&f+O!
!
Ñ{!â7-%&/!:7R:!:7\&!:7K,!&-XI!J(&7!
"7($!01H! !&f+!$E+!JF&!)i!I7H!G8!&-XI!&]&/^!J-V&/!&-XI!9í!Gf+!G8!+7tH!$uI!I1,!)Ü+!J-V&/!&-XI!
)F3!G8!J1!zO!!
@53!Ig&/!93[+!)-VI!)Ü+!J1!I75!)E!I7#4!J,S&!+DI^!+7M!J-3!J-V&/!&-XI!9í!CT&/!J(,!983!Q7,!J[4!&/]&!+84!
G8!Q7î,! !&f+O!
!
}{!â7-%&/!:7R:!'o+!Ig&/!+hI!)ñ&!
"7($!01H!! !&f+!$E+!JF&!)i!'o+!Ig&/!+hI!)ñ&^!01!983!)]!I7($!01H!JF&!&n8!)i!+h+O!
!
à{! |o+!7L!+7K&/!J1$!$R+ô'E!&ë&!
"7($!01H! !&f+!$E+!JF&!)i!'o+!7L!+7K&/!J1$!$R+ô'E!&ë&!01!983!)]!I7($!01H!JF&!&n8!)i!+h+O!
!
Ä{!~_I7!7H(+!Q7]8!8&!+H1&!+Gä!t$!
"7($!01H!! !01H!&f+!+GH&/!Ç!/,\4!)i!Q_I7!7H(+!Q7]8!8&!+H1&!+Gä!t$^!983!)]!I7($!01H!Ç!/,\4!JF&!
&n8!)i!0g!7,L3!Q7]8!8&!+H1&!+Gä!t$O!
!
!
!"#$%)'!;<=&$>?$@A-B$
English 11
CONTENTS PAGE.
•Introduction 10
•Part 1 : Part names 12
•Part 2 : Installation 12
•Part 3 : How to use 15
•Part 4 : Maintenance 16
•Part 5 : Problem & Solution 17
•Part 6 : Specification 18
English 12
Part names :
1) Cont rol panel 5) Watertray
2) Cold water tap 7) Water Purifier inlet
3) Hot water tap 8) Bottled water inlet
4) Watertray cover 8) Pump –Selenoid switch
Installation Notes
1. Prior to installation, the user m ust first ascertain w hat kind of water, according to water select the
correct intake interface.
2. Dispenser should be installed in a smooth operation, easy maintenance and securely place (not tilted
placement).
3. Prohibited dispenser and the power outl et is installed might get wet or dam p places.
4. Make sure the power outlet must be grounded pole is valid.
5. In the front end of the dispenser outlet is recommended to add a switch, convenient Cut off the power.
6. This product applies to bottled water connections and water purifier filter (tap) connection.
7. PE hoses can not be bent, so as not to affect the flow of water.
8. Built-in Dispenser installed in the cabinet, the cabinet has good heat dissipation space requirements,
installation of cabinets no backplane, according to as following :
Part 1 : Part Names
Part 2 : Installation
English 16
Getting Started
1) Water outlet capacity setting
Touch button once for 150 m L wat er output capacity, touch agai n for 250 mL capacity and touch
once again for continuously water flow.
2) Hot water temperature setting
3) Hot water dispense met hod
Touch button once to dispense hot water, the hot water capacity will drop out according to the
water outlet capacity setting as number 1.
If the capacity is set as continuous flow, then water flow will stop after pull out the finger from
button.
4) Cold water dispense method
Touch button once to come out hot water, the water capacity will drop out according to the wat er
outlet capacity setting as number 1.
If the capacity is set continuous flow, then water flow will stop after pull out the finger from
button.
5) Ligth switch on met hod
Touch button once to switch on the light, and then touch once again to switch of the light.
6) Cooling system/Compressor swtich on
Touch button once to switch on the compressor/Cooling system, and then touc h once agai n to
switch of the compressor/Cooling system.
7) Child lock acti vation
Touch button 3 seconds to activate the child lock, and then touch 3 seconds again to inacti ve
the child lock.
Note: To play the machi ne for optimum performance and prol ong its life, should always pay attention to
maintenance. Must unplug the power plug before maintenance.
1. Do not pull on the cable to the wine's power plug from the outlet.
2. This dispenser has been disinfected prior to shipping.
3. Arrange for clean the water tube and heating element to be cleaned by expert technician once a year
to ensure that the mac hine maintains good condition and to extend usage. Do not attempt to
disassemble the m achine in order to avoid damage to the machi ne.
4. Use soft and slightly wet cloth to clean the surface of dispenser, and use soft and dry cloth to wipe the
surface. Do not let water into the engine.
Part 4 : Maintenance
Touch button once to set the hot water temperature,there are 3 hot water options:55°C,85°C and
100°C.If you need a normal water then set the hot temperature on__°C.
English 17
5. Make sure the power cord is unplugged from the power source when the discard excess water or
when maintenance or not use the unit for a long time. Meanwhile, when the hot wat er to be cold/not
hot, open the drain valve until there is no water in the unit.
6. If the display screen shows “” water empty ikon, it is the wat er already em pty. Ch ange the bottle
water with a new one imm ediat ely.
7. In order to ensure the longterm normal use of water dis penser, please regularly check the user, such
as abnormal use; please notify the Modena Se rvice Cent er.
If you happen anomaly in use, please stop using and unpl ug the power cord, and check to make sure the
following. If necessary, please contact Modena servic e center
Problem Ca u se Solution
Water is not hot or not cold
Excessive dispensation of
hot water or cold water in a
short period of time.
Unit is not yet connected to
electricity.
Wait until the water becom es cold or
hot.
Connect the cord to the outlet and
press the heater and cooler switches.
Water is not being
dispensed out of the tap
Water gallon is empty.
The pipe is stuck or block
something.
Replace the water gallon with a new
one.
Turn off the switch cooling to 4 hours,
then turn the switch back.
Leak on the water gallon
support
Water gallon is leaking /
damaged
Replace water gallon with a new one,
make sure the power cord is
unplugged.
Loud noise during operation Improper installation or
placement of unit
Install unit on even and stable
surface
Error code - Err 1 Hot temperat ure sensor is
broken Contact Modena service center
Error code –Err 2 Internal leakage Cont act Modena service center
Part 5 : Problem & Solution
!
!
&
!
!
!
@AB!$CDEF$G?DHB!
!
'()!*(+,!!
z!
@f+!Ig&/!93[+!IN8!&-XI!
}!
@f+!0m,!&-XI!J(&7!
!
@f+!I1,!)Ü+!&-XI!&]&/!
à!
@f+!)ñ&!
Ç!
@f+!0m,!&-XI!&]&/!
Ä!
@f+!7L!+7K&/!J1$!$R+!
Ñ!
<1&!7M&7!7,i&!+76!
!
!
DEF&GHI!
z{!P7,5+!Jo:!Ig&/!93[+!)F3!G8!&-XI!
"7($!01H! !&f+!$E+!JF&!)i!I7x&!Ig&/!93[+!)F3!G8!IN8!&-XI!J1!z}ç!$c^!I7($!78,!JF&!J1!}ç!$c!
01!I7($!$E+!JF&!&n8!)i!I7x&!I75!)E!&-XI!I7#4!J,S&!+DIO!
!
{!"1,!)Ü+!&7,L+!)E!&-XI!&]&/!
"7($! !01H!&f+! $E+!JF&!)i!I1,!)Ü+! &7,L+!)E!&-XI!&]&/^!I]!Ç!$uI!&-XI!&]&/!+e4!I7x&å!Ñ}ó"^!
}}ó"^!É}ó"!01!zççó"O!@53!'(&!IF&!&-XI!'M&7!+7-d&/!+7M!)Ü+!&7,L+!)E!&]&/!.!ò!ò!ó"!!
!
Ç{!â7-%&/!:7R:!:7\&!:7K,!&-XI!&]&/!
"7($!01H! !&f+!$E+!JF&!)i!:78!&-XI!&]&/^!J-V&/!&-XI!&]&/!Gf+!G8!+7tH!$uI!I1,!)Ü+!J-V&/!
&-XI!)F3!G8!J1!zO!!
@53!Ig&/!93[+!)-VI!)Ü+!J1!I75!)E!I7#4!J,S&!+DI^!+7M!J-3!J-V&/!&-XI!9í!CT&/!J(,!983!Q7,!J[4!&/]&!+84!
G8!Q7î,! !&f+O!
!
Ñ{!â7-%&/!:7R:!:7\&!:7K,!&-XI!J(&7!
"7($!01H! !&f+!$E+!JF&!)i!I7H!G8!&-XI!&]&/^!J-V&/!&-XI!9í!Gf+!G8!+7tH!$uI!I1,!)Ü+!J-V&/!&-XI!
)F3!G8!J1!zO!!
@53!Ig&/!93[+!)-VI!)Ü+!J1!I75!)E!I7#4!J,S&!+DI^!+7M!J-3!J-V&/!&-XI!9í!CT&/!J(,!983!Q7,!J[4!&/]&!+84!
G8!Q7î,! !&f+O!
!
}{!â7-%&/!:7R:!'o+!Ig&/!+hI!)ñ&!
"7($!01H!! !&f+!$E+!JF&!)i!'o+!Ig&/!+hI!)ñ&^!01!983!)]!I7($!01H!JF&!&n8!)i!+h+O!
!
à{! |o+!7L!+7K&/!J1$!$R+ô'E!&ë&!
"7($!01H! !&f+!$E+!JF&!)i!'o+!7L!+7K&/!J1$!$R+ô'E!&ë&!01!983!)]!I7($!01H!JF&!&n8!)i!+h+O!
!
Ä{!~_I7!7H(+!Q7]8!8&!+H1&!+Gä!t$!
"7($!01H!! !01H!&f+!+GH&/!Ç!/,\4!)i!Q_I7!7H(+!Q7]8!8&!+H1&!+Gä!t$^!983!)]!I7($!01H!Ç!/,\4!JF&!
&n8!)i!0g!7,L3!Q7]8!8&!+H1&!+Gä!t$O!
!
!
!"#$%)'!;<=&$>?$@A-B$
!
!
&
!
!
!
!
I"&$JK!ki!9B!CD&/!$R4!0X,!7,L3!93[+!+K,!-3!01!QëH!C1,!+3Å,!+7x^!:7#,!J3g&!I7f!b!)5&!0,LI!'#H!+GMO!â7#,!+7RH!
:7_I7!Ih$!),L&!+G-XI!Q7,!'#H!+GMO!
zO!~7g&/!QëH!C\4!IR:!)5&!:7_I7!Ih$!),L&!J-X,!+T!Å!Ih$O!
O!"\4!&-XI!&14!&14!)*!)-VI!Q7B!+Ge&/!+G-XI!Q7,!0o&!I734i&O!!
ÇO! Wh:!a5:!J1$!9(I7!K&/!&-XI!01!'E!:7o&!J1$!&]&/!)-VI!J1$!9(I7!'.,!Qö!+73o+!0,S&!I734S&!/,8!$r,!
&`$!$E+!JF&!)i!)#$!'#H!Gy&/!$R4!C34!+GM!+M&7!+G(&/!+K+!01!QëH!C1,!+7d,!/,8&!9B!CD&/O!~7g&/!IK!+7RH!
Gd,!+7,5+!'6!)i!+GR&7!J1$!7î&/O!!
ÑO! WB!CD&/!0#,!$Z$!01!7%,!;$!)i!J1$!9(I7!'Z!$Ü+!I\4!&-XI!01!9B!CD&/!0#,!$Z$!01!Q7g!)i!J83!'Z!$Ü+O!
~7g&/!)-VI!)i!&-XI!01H!)E&/!I%O!
}O! k#$!'#H!C\4!&/3ï&!)*!)-VI!Gf+!Q7î,!&/3ï&!),L&!Q7,!JH(,!'î!&-XI!+7T8!7HÜI!Q7,!'#H!+GM!7HÜI!Q7g&/!
9B!CD&/!+7,5+!'6!+GH&/!$E+!+7d,!/,8&!C1,O!PGH&/!JfI!)]^!Q7,!&-XI!+G.!&S&!J(&7ô!Q7g&/!&]&/^!7*4!$.!08&!
a#!I7H!)5&!Q7,!Q7g&/!Im&!&-XI!+GH&/!+7,5+!'6O!
àO! @53!$1&!7M&7!7,i&!+76!7,i&!+76!',i3!+-V&/!75+!&-XI!õ ú!+7M!JfI!)]!&-XI!)*!75+O!P784!'M&7!&-XI!$X,!
&/84!Jo:!+uIO!
ÄO! ki!)#$!'#H!0,LI!9B!CD&/!'M&7!+7-d&/!J\3!C1,!IN8!I\4!&-XI^!03,!Jm&/!+7-d&/!a34S&!Q,i$!+G8!0,LI!9B!
CD&/^!&7-!9B!CD&/!'[+!+7-d&/ù!03,!Jm&/!+7g&/!'RH!I7H!PG3&/!+\$!C6I7!0D!<HCt&8O!
!
!
!
!
@53!'(&!/Ü:!9U!IK!'[+!+7-d&/!Q7,!9B!CD&/^!7*4!&/T&/!9B!CD&/^!Gf+!C\4!&/3ï&!01!Q,i$!+G8!)i!)#$!'#H!
&7n&/!),Z3!983O!@53!IF&^!03,!Jm&/!J,S&!7L!0X,!+G3&/!+\$!C6I7!0D!<HCt&8!
!
-.!*/!
012345!5(65!
78*(!9:!;<!
!
@-XI!Q7g&/!&]&/!7HÜI!
Q7g&/!J(&7!
!
•! WU!:7\&!:7K,!&-XI!&]&/!
7HÜI!J(&7!23R!&7,Z3!+GH&/!
$E+!Q7H#&/!+7d,!/,8&!&/h&O!
•!P7,5+!'6!I7-8!)-VI!Q5+!&K,!
),L&O!!
•!"7d!I7H!)5&!Q7,!&-XI!+G.!&S&!J(&7!
7HÜI!&]&/O!
•! @K,!C\4!01H!Å!Ih$!01!&7[&!IRI!Ig&/!
+hI!'E!J1$!&]&/!7HÜI!J(&7O!!
@-XI!Q7g&/!I7#4!G8!Q7î,!
0m,!
•!|M&7!I7u8!75+!&-XIO!
•!k-d&/!K&/!'6!Qû+!7HÜI!'6!
I7Ü&!'.,!+7u!/M!)]O!
•!P784!'M&7!&-XI!$X,O!
•! Ph+!Ig&/!+hI!'E!J1$!J(&7!)5&!Ñ!/,d^!
983!)]!'o+!Ig&/!+hI!+G.!J(,O!
üm!Gl!+GS&!IRI!/,R!)ã!'M&7!
&-XI!
•!|M&7!&-XI!'6!Gm!Glô!7-!7î&/!
•!P784!$X,!'M&7!&-XI^!)#$!'#H!:7#,!
Gf+!:7_I7!Ih$!C\4!&/3ï&!G8O!
P,5&/!ï&!JX&!+GH&/!23R!+GM&7!
7H(+!)E&/!
•! ch:!)Ü+!Q7g&/!I7_&7!aRI!
7HÜI!06!+G_!Jh:!)Ü+!+7,5+!'6!
Q7g&/!:7e!7V:!
•!ch:!)Ü+!+7,5+!'6!+GS&!'Z!$Ü+!'y&/!
:7ê&/!01!Å&!)6&7!
<*!Jr,!†!=>>?!
•! "#$!',5&!&7,L+!)E!&]&/!'6!
7î&/!
•!c,S&!7L!0X,!+G3&/!+\$!C6I7!0D!<HCt&8!
<*!Jr,!Ö!=>>@!
•!üm!Gl!'S&!+GH&/!
•!c,S&!7L!0X,!+G3&/!+\$!C6I7!0D!<HCt&8!
!"#$%*%"!EFG$%XY$
!"#$%+%"!KL$=M$NO$=<=&$P?$QR$
English 13
Installation method
1. Set in the cabinet position, the hole should be the appropriate size of the cooler body smoothly
embedded square hole in the side of the requi rements
Product size installation table :
M ode l W ( mm) D (mm) H (mm) Remark
BP 3435 564 550 453 The buckle 5mm, Under the buckle 3mm
2
2.
.
PE hose connected to the quick connectors of dispensers.
a) Ready for PE hos e, PE hose to be cut flat at both ends, pulled on a blue fountai n quick connector
snaps.
English 14
b) The PE hose insert snap ring, must be firmly inserted in the end, and then use the appropriate force
pulling the PE hose to confirm fixed in place, will not be pulled out.
c) Insert the snap to empty spaces between the connector and snap ring in order to achieve a firm
connection requirements.
3. The Dispenser of equipped PE hose push designed cabinets hole, PE hose piercing from the back of the
cupboard.
4. Dispenser installed in the cabinet, there must be a reliable fixation,
Requirements Dispenser mounted on the rear cabinet, leaking out of Dis penser tray, Marked the
screws attached to the floor of Dispenser, as shown the picture :
English 18
MOD EL BP 3435
Ty p e Built-in water dispenser
Water output
Color Black & Stainless
Hot water output (liter/hour) 26
Cold water output(liter/ hour) 2
Hot water tank capacity (liter) without water tank (instant)
Cold water tank capacity (liter) 1.1
Hot temperat ure (Celsius)
Cold tem perature (Celsius) ≤14
Free-CFC com pressor Yes
Water tank material Stainless Steel
Heating power (watt) 2100
Compressor power (watt) 120
Voltage / Frequency 220 V ~ / 50 Hz
Product dimension 595x560x455
Cut-out dimension 560x550x450
* Specifications of this appliance may change without notice to improve the quality of the product. Figures in this
manual are schematic and may not match your product exactly. Values stated on the machine labels or in the
documentation accompanying it are obtained in laboratory in accordance with the relevant standards. Depending on
operational and environmental conditions of the appliance, values may vary.
Part 6 : Specification
Hot,Normal & Cold
55,85,100
!
!
&
!
!
!
!
ABC=D!
"#!$%$&!
cH(,!
"\4!&-XI!3K&/!+_I7!7V:!
@-XI!)F3!G8!
@]&/^!'M&7!+7-d&/!°!J(&7!
<13!9hI!
kt&!°!+7ë:!Q7g&/!/l!
"g&/!93[+!&-XI!&]&/!)F3!G8!áJ_+ô/,d{!
à!
"g&/!93[+!&-XI!J(&7!)F3!G8áJ_+ô/,d{!
!
>3&/!+_I7!'M&7!&-XI!&]&/!áJ_+{!
Q7g&/!I]!'M&7!I7u8!&-XI!á+uI!
+7d,{!
>3&/!+_I7!'M&7!&-XI!J(&7!áJ_+{!
z^z!
@7,L+!)E!&]&/!á"tJ9,39{!
}}^!É}^!zçç!
@7,L+!)E!J(&7!á"tJ9,39{!
¢zÑ!
<R4!&ë&!Q7g&/!"£"!
"]!
vo+!J,L3!'M&7!I7u8!&-XI!
P7ë:!Q7g&/!/l!
"g&/!93[+!J1$!&]&/!ás8++{!
zçç!
"g&/!93[+!$R4!&ë&!ás8++{!
zç!
k,L&!R:ôPF&!9K!
ç!v!§!!ô!}ç!w•!
~_I7!+7-XI!9#&!:7;$!
}¶}a}àçaÑ}}!
~_I7!+7-XI!7EI!Ih+!
}àça}}çaÑ}ç!
!
ß!"#$%&!'(!)*!+#,-+!./0!+#12+!34!%56!.7!+#8!+#06!9:1!;5!)#$%&!.<%!+#$%&!3=>!98!.?1!+#1@%!.#A+!BCD%&!./0!'?%!E#F;G!H(!
B1@,!+I>%&!+51!B1@,!#CJ%&!KL%!%56!.#M!B5!E#=.!#N0!O5!.7!+#8!)#$%&!)#JE!.#P%#!Q=.!OJ1!'?%!E#F;!./0!3R%G!S=.!&1=!+I4!
9CD.!&#1!+IT%!%#U%!;=6!#>V.!+I>%&!+51!B1@,!91!)W;!9CD.!BA6!+I>%&!E#X%&!+#P!%&#1@;!+#Y>!.=.!+1T,!.#,F%!B1T%!Z,0%G!"[6!
+#,\.!O5>!91],!)1@%!#>R+!9\%&!O5!;$1!+IC^%&!./0!+#12+!34!;5!.=.!&1=!+I4!.7!+#8!+#06!9:1G!!
!"#$%,%"!/&T-B$>M$UV$%&(4%$
English 10
Thank you for your trust and decision to buy MODE NA product and make it a part of your modern family's
needs and lifestyle. The stylish and advanced design in each product is an elegant combination for your daily
househol d activities.
This book contains various matters regarding water dispens er, from its method of usage, maintenance,
various professional features of the product down to its trouble -shooting. As a manufacturer of user friendly
home appliances, we thrive to simplify the description in this manual to facilitate the users.
In order for this water dispens er to perform normally for an extended period of time, we highly recommend
not only the buyer to hol d onto this manual, but also those who wish to operate the product optimally to
maintain its service period and quality. This manual is recomm ended for us e by anyone who operates the
water dispenser.
We also provide a customer care service for MODE NA users as well as other support information on our
official website www.modena.co.id. Please cont act us if you have ot her questions regarding t he water
dispenser.
Enjoy your daily activities, we hope that our products may provi de the best services to your family.
INSTRUCTION AND GUIDE TO USING MODENA WATER DISPENSER
English 13
Installation method
1. Set in the cabinet position, the hole should be the appropriate size of the cooler body smoothly
embedded square hole in the side of the requi rements
Product size installation table :
M ode l W ( mm) D (mm) H (mm) Remark
BP 3435 564 550 453 The buckle 5mm, Under the buckle 3mm
2
2.
.
PE hose connected to the quick connectors of dispensers.
a) Ready for PE hos e, PE hose to be cut flat at both ends, pulled on a blue fountai n quick connector
snaps.
English 14
b) The PE hose insert snap ring, must be firmly inserted in the end, and then use the appropriate force
pulling the PE hose to confirm fixed in place, will not be pulled out.
c) Insert the snap to empty spaces between the connector and snap ring in order to achieve a firm
connection requirements.
3. The Dispenser of equipped PE hose push designed cabinets hole, PE hose piercing from the back of the
cupboard.
4. Dispenser installed in the cabinet, there must be a reliable fixation,
Requirements Dispenser mounted on the rear cabinet, leaking out of Dis penser tray, Marked the
screws attached to the floor of Dispenser, as shown the picture :
English 15
5. The bottled water and dispenser connections.
a) Connect PE hose to the pipe for gallon, the connection method is same as install hose me thod
(no. 2)
b) Insert the pipe to the gallon and then plug the cover to mouth of gallon.
c) Insert the gallon and close the lower cabinet door.
6. If the water source is from water purifier, pull out PE hose from the pipe for gallon, then connect the PE
hose to the clean water outl et of water purifier.
CONTROL PANEL
Remark:
1 Water capacity button 5 Cold water tap button
2 Hot water setting button 6 Light button
3 Hot water tap button 7 Cooling system button
4 Display screen
Part 3 : How to use
English 18
MOD EL BP 3435
Ty p e Built-in water dispenser
Water output
Color Black & Stainless
Hot water output (liter/hour) 26
Cold water output(liter/ hour) 2
Hot water tank capacity (liter) without water tank (instant)
Cold water tank capacity (liter) 1.1
Hot temperat ure (Celsius)
Cold tem perature (Celsius) ≤14
Free-CFC com pressor Yes
Water tank material Stainless Steel
Heating power (watt) 2100
Compressor power (watt) 120
Voltage / Frequency 220 V ~ / 50 Hz
Product dimension 595x560x455
Cut-out dimension 560x550x450
* Specifications of this appliance may change without notice to improve the quality of the product. Figures in this
manual are schematic and may not match your product exactly. Values stated on the machine labels or in the
documentation accompanying it are obtained in laboratory in accordance with the relevant standards. Depending on
operational and environmental conditions of the appliance, values may vary.
Part 6 : Specification
Hot,Normal & Cold
55,85,100
English 10
Thank you for your trust and decision to buy MODE NA product and make it a part of your modern family's
needs and lifestyle. The stylish and advanced design in each product is an elegant combination for your daily
househol d activities.
This book contains various matters regarding water dispens er, from its method of usage, maintenance,
various professional features of the product down to its trouble -shooting. As a manufacturer of user friendly
home appliances, we thrive to simplify the description in this manual to facilitate the users.
In order for this water dispens er to perform normally for an extended period of time, we highly recommend
not only the buyer to hol d onto this manual, but also those who wish to operate the product optimally to
maintain its service period and quality. This manual is recommended for us e by anyone who operates the
water dispenser.
We also provide a customer care service for MODE NA users as well as other support information on our
official website www.modena.co.id. Please cont act us if you have ot her questions regarding t he water
dispenser.
Enjoy your daily activities, we hope that our products may provi de the best services to your family.
INSTRUCTION AND GUIDE TO USING MODENA WATER DISPENSER
English 11
CONTENTS PAGE.
•Introduction 10
•Part 1 : Part names 12
•Part 2 : Installation 12
•Part 3 : How to use 15
•Part 4 : Maintenance 16
•Part 5 : Problem & Solution 17
•Part 6 : Specification 18
English 14
b) The PE hose insert snap ring, must be firmly inserted in the end, and then use the appropriate force
pulling the PE hose to confirm fixed in place, will not be pulled out.
c) Insert the snap to empty spaces between the connector and snap ring in order to achieve a firm
connection requirements.
3. The Dispenser of equipped PE hose push designed cabinets hole, PE hose piercing from the back of the
cupboard.
4. Dispenser installed in the cabinet, there must be a reliable fixation,
Requirements Dispenser mounted on the rear cabinet, leaking out of Dis penser tray, Marked the
screws attached to the floor of Dispenser, as shown the picture :
English 15
5. The bottled water and dispenser connections.
a) Connect PE hose to the pipe for gallon, the connection method is same as install hose me thod
(no. 2)
b) Insert the pipe to the gallon and then plug the cover to mouth of gallon.
c) Insert the gallon and close the lower cabinet door.
6. If the water source is from water purifier, pull out PE hose from the pipe for gallon, then connect the PE
hose to the clean water outl et of water purifier.
CONTROL PANEL
Remark:
1 Water capacity button 5 Cold water tap button
2 Hot water setting button 6 Light button
3 Hot water tap button 7 Cooling system button
4 Display screen
Part 3 : How to use
English 16
Getting Started
1) Water outlet capacity setting
Touch button once for 150 m L wat er output capacity, touch agai n for 250 mL capacity and touch
once again for continuously water flow.
2) Hot water temperature setting
3) Hot water dispense met hod
Touch button once to dispense hot water, the hot water capacity will drop out according to the
water outlet capacity setting as number 1.
If the capacity is set as continuous flow, then water flow will stop after pull out the finger from
button.
4) Cold water dispense method
Touch button once to come out hot water, the water capacity will drop out according to the wat er
outlet capacity setting as number 1.
If the capacity is set continuous flow, then water flow will stop after pull out the finger from
button.
5) Ligth switch on met hod
Touch button once to switch on the light, and then touch once again to switch of the light.
6) Cooling system/Compressor swtich on
Touch button once to switch on the compressor/Cooling system, and then touc h once agai n to
switch of the compressor/Cooling system.
7) Child lock acti vation
Touch button 3 seconds to activate the child lock, and then touch 3 seconds again to inacti ve
the child lock.
Note: To play the machi ne for optimum performance and prol ong its life, should always pay attention to
maintenance. Must unplug the power plug before maintenance.
1. Do not pull on the cable to the wine's power plug from the outlet.
2. This dispenser has been disinfected prior to shipping.
3. Arrange for clean the water tube and heating element to be cleaned by expert technician once a year
to ensure that the mac hine maintains good condition and to extend usage. Do not attempt to
disassemble the m achine in order to avoid damage to the machi ne.
4. Use soft and slightly wet cloth to clean the surface of dispenser, and use soft and dry cloth to wipe the
surface. Do not let water into the engine.
Part 4 : Maintenance
Touch button once to set the hot water temperature,there are 3 hot water options:55°C,85°C and
100°C.If you need a normal water then set the hot temperature on__°C.
English 10
Thank you for your trust and decision to buy MODE NA product and make it a part of your modern family's
needs and lifestyle. The stylish and advanced design in each product is an elegant combination for your daily
househol d activities.
This book contains various matters regarding water dispens er, from its method of usage, maintenance,
various professional features of the product down to its trouble -shooting. As a manufacturer of user friendly
home appliances, we thrive to simplify the description in this manual to facilitate the users.
In order for this water dispens er to perform normally for an extended period of time, we highly recommend
not only the buyer to hol d onto this manual, but also those who wish to operate the product optimally to
maintain its service period and quality. This manual is recomm ended for us e by anyone who operates the
water dispenser.
We also provide a customer care service for MODE NA users as well as other support information on our
official website www.modena.co.id. Please cont act us if you have ot her questions regarding t he water
dispenser.
Enjoy your daily activities, we hope that our products may provi de the best services to your family.
INSTRUCTION AND GUIDE TO USING MODENA WATER DISPENSER
English 11
CONTENTS PAGE.
•Introduction 10
•Part 1 : Part names 12
•Part 2 : Installation 12
•Part 3 : How to use 15
•Part 4 : Maintenance 16
•Part 5 : Problem & Solution 17
•Part 6 : Specification 18
English 12
Part names :
1) Cont rol panel 5) Watertray
2) Cold water tap 7) Water Purifier inlet
3) Hot water tap 8) Bottled water inlet
4) Watertray cover 8) Pump –Selenoid switch
Installation Notes
1. Prior to installation, the user m ust first ascertain w hat kind of water, according to water select the
correct intake interface.
2. Dispenser should be installed in a smooth operation, easy maintenance and securely place (not tilted
placement).
3. Prohibited dispenser and the power outl et is installed might get wet or dam p places.
4. Make sure the power outlet must be grounded pole is valid.
5. In the front end of the dispenser outlet is recommended to add a switch, convenient Cut off the power.
6. This product applies to bottled water connections and water purifier filter (tap) connection.
7. PE hoses can not be bent, so as not to affect the flow of water.
8. Built-in Dispenser installed in the cabinet, the cabinet has good heat dissipation space requirements,
installation of cabinets no backplane, according to as following :
Part 1 : Part Names
Part 2 : Installation
English 15
5. The bottled water and dispenser connections.
a) Connect PE hose to the pipe for gallon, the connection method is same as install hose me thod
(no. 2)
b) Insert the pipe to the gallon and then plug the cover to mouth of gallon.
c) Insert the gallon and close the lower cabinet door.
6. If the water source is from water purifier, pull out PE hose from the pipe for gallon, then connect the PE
hose to the clean water outl et of water purifier.
CONTROL PANEL
Remark:
1 Water capacity button 5 Cold water tap button
2 Hot water setting button 6 Light button
3 Hot water tap button 7 Cooling system button
4 Display screen
Part 3 : How to use
English 16
Getting Started
1) Water outlet capacity setting
Touch button once for 150 m L wat er output capacity, touch agai n for 250 mL capacity and touch
once again for continuously water flow.
2) Hot water temperature setting
3) Hot water dispense met hod
Touch button once to dispense hot water, the hot water capacity will drop out according to the
water outlet capacity setting as number 1.
If the capacity is set as continuous flow, then water flow will stop after pull out the finger from
button.
4) Cold water dispense method
Touch button once to come out hot water, the water capacity will drop out according to the wat er
outlet capacity setting as number 1.
If the capacity is set continuous flow, then water flow will stop after pull out the finger from
button.
5) Ligth switch on met hod
Touch button once to switch on the light, and then touch once again to switch of the light.
6) Cooling system/Compressor swtich on
Touch button once to switch on the compressor/Cooling system, and then touc h once agai n to
switch of the compressor/Cooling system.
7) Child lock acti vation
Touch button 3 seconds to activate the child lock, and then touch 3 seconds again to inacti ve
the child lock.
Note: To play the machi ne for optimum performance and prol ong its life, should always pay attention to
maintenance. Must unplug the power plug before maintenance.
1. Do not pull on the cable to the wine's power plug from the outlet.
2. This dispenser has been disinfected prior to shipping.
3. Arrange for clean the water tube and heating element to be cleaned by expert technician once a year
to ensure that the mac hine maintains good condition and to extend usage. Do not attempt to
disassemble the m achine in order to avoid damage to the machi ne.
4. Use soft and slightly wet cloth to clean the surface of dispenser, and use soft and dry cloth to wipe the
surface. Do not let water into the engine.
Part 4 : Maintenance
Touch button once to set the hot water temperature,there are 3 hot water options:55°C,85°C and
100°C.If you need a normal water then set the hot temperature on__°C.
English 17
5. Make sure the power cord is unplugged from the power source when the discard excess water or
when maintenance or not use the unit for a long time. Meanwhile, when the hot wat er to be cold/not
hot, open the drain valve until there is no water in the unit.
6. If the display screen shows “” water empty ikon, it is the wat er already em pty. Ch ange the bottle
water with a new one imm ediat ely.
7. In order to ensure the longterm normal use of water dis penser, please regularly check the user, such
as abnormal use; please notify the Modena Se rvice Cent er.
If you happen anomaly in use, please stop using and unpl ug the power cord, and check to make sure the
following. If necessary, please contact Modena servic e center
Problem Ca u se Solution
Water is not hot or not cold
Excessive dispensation of
hot water or cold water in a
short period of time.
Unit is not yet connected to
electricity.
Wait until the water becom es cold or
hot.
Connect the cord to the outlet and
press the heater and cooler switches.
Water is not being
dispensed out of the tap
Water gallon is empty.
The pipe is stuck or block
something.
Replace the water gallon with a new
one.
Turn off the switch cooling to 4 hours,
then turn the switch back.
Leak on the water gallon
support
Water gallon is leaking /
damaged
Replace water gallon with a new one,
make sure the power cord is
unplugged.
Loud noise during operation Improper installation or
placement of unit
Install unit on even and stable
surface
Error code - Err 1 Hot temperat ure sensor is
broken Contact Modena service center
Error code –Err 2 Internal leakage Cont act Modena service center
Part 5 : Problem & Solution
English 11
CONTENTS PAGE.
•Introduction 10
•Part 1 : Part names 12
•Part 2 : Installation 12
•Part 3 : How to use 15
•Part 4 : Maintenance 16
•Part 5 : Problem & Solution 17
•Part 6 : Specification 18
English 12
Part names :
1) Cont rol panel 5) Watertray
2) Cold water tap 7) Water Purifier inlet
3) Hot water tap 8) Bottled water inlet
4) Watertray cover 8) Pump –Selenoid switch
Installation Notes
1. Prior to installation, the user m ust first ascertain w hat kind of water, according to water select the
correct intake interface.
2. Dispenser should be installed in a smooth operation, easy maintenance and securely place (not tilted
placement).
3. Prohibited dispenser and the power outl et is installed might get wet or dam p places.
4. Make sure the power outlet must be grounded pole is valid.
5. In the front end of the dispenser outlet is recommended to add a switch, convenient Cut off the power.
6. This product applies to bottled water connections and water purifier filter (tap) connection.
7. PE hoses can not be bent, so as not to affect the flow of water.
8. Built-in Dispenser installed in the cabinet, the cabinet has good heat dissipation space requirements,
installation of cabinets no backplane, according to as following :
Part 1 : Part Names
Part 2 : Installation
English 16
Getting Started
1) Water outlet capacity setting
Touch button once for 150 m L wat er output capacity, touch agai n for 250 mL capacity and touch
once again for continuously water flow.
2) Hot water temperature setting
3) Hot water dispense met hod
Touch button once to dispense hot water, the hot water capacity will drop out according to the
water outlet capacity setting as number 1.
If the capacity is set as continuous flow, then water flow will stop after pull out the finger from
button.
4) Cold water dispense method
Touch button once to come out hot water, the water capacity will drop out according to the wat er
outlet capacity setting as number 1.
If the capacity is set continuous flow, then water flow will stop after pull out the finger from
button.
5) Ligth switch on met hod
Touch button once to switch on the light, and then touch once again to switch of the light.
6) Cooling system/Compressor swtich on
Touch button once to switch on the compressor/Cooling system, and then touc h once agai n to
switch of the compressor/Cooling system.
7) Child lock acti vation
Touch button 3 seconds to activate the child lock, and then touch 3 seconds again to inacti ve
the child lock.
Note: To play the machi ne for optimum performance and prol ong its life, should always pay attention to
maintenance. Must unplug the power plug before maintenance.
1. Do not pull on the cable to the wine's power plug from the outlet.
2. This dispenser has been disinfected prior to shipping.
3. Arrange for clean the water tube and heating element to be cleaned by expert technician once a year
to ensure that the mac hine maintains good condition and to extend usage. Do not attempt to
disassemble the m achine in order to avoid damage to the machi ne.
4. Use soft and slightly wet cloth to clean the surface of dispenser, and use soft and dry cloth to wipe the
surface. Do not let water into the engine.
Part 4 : Maintenance
Touch button once to set the hot water temperature,there are 3 hot water options:55°C,85°C and
100°C.If you need a normal water then set the hot temperature on__°C.
English 17
5. Make sure the power cord is unplugged from the power source when the discard excess water or
when maintenance or not use the unit for a long time. Meanwhile, when the hot wat er to be cold/not
hot, open the drain valve until there is no water in the unit.
6. If the display screen shows “” water empty ikon, it is the wat er already em pty. Ch ange the bottle
water with a new one imm ediat ely.
7. In order to ensure the longterm normal use of water dis penser, please regularly check the user, such
as abnormal use; please notify the Modena Se rvice Cent er.
If you happen anomaly in use, please stop using and unpl ug the power cord, and check to make sure the
following. If necessary, please contact Modena servic e center
Problem Ca u se Solution
Water is not hot or not cold
Excessive dispensation of
hot water or cold water in a
short period of time.
Unit is not yet connected to
electricity.
Wait until the water becom es cold or
hot.
Connect the cord to the outlet and
press the heater and cooler switches.
Water is not being
dispensed out of the tap
Water gallon is empty.
The pipe is stuck or block
something.
Replace the water gallon with a new
one.
Turn off the switch cooling to 4 hours,
then turn the switch back.
Leak on the water gallon
support
Water gallon is leaking /
damaged
Replace water gallon with a new one,
make sure the power cord is
unplugged.
Loud noise during operation Improper installation or
placement of unit
Install unit on even and stable
surface
Error code - Err 1 Hot temperat ure sensor is
broken Contact Modena service center
Error code –Err 2 Internal leakage Cont act Modena service center
Part 5 : Problem & Solution

This manual suits for next models

1

Other Modena Water Dispenser manuals

Modena DD Series User manual

Modena

Modena DD Series User manual

Modena Doppio Series Owner's manual

Modena

Modena Doppio Series Owner's manual

Modena Grziano Series User manual

Modena

Modena Grziano Series User manual

Modena DD Series User manual

Modena

Modena DD Series User manual

Modena Argento Series User manual

Modena

Modena Argento Series User manual

Modena Sottile Series Owner's manual

Modena

Modena Sottile Series Owner's manual

Modena Salutare Series Owner's manual

Modena

Modena Salutare Series Owner's manual

Modena DD 32 DD 16 User manual

Modena

Modena DD 32 DD 16 User manual

Modena Vicino Series Owner's manual

Modena

Modena Vicino Series Owner's manual

Modena Spigliato Series Owner's manual

Modena

Modena Spigliato Series Owner's manual

Modena DD 7106 L Owner's manual

Modena

Modena DD 7106 L Owner's manual

Modena DD Series User manual

Modena

Modena DD Series User manual

Modena DD Series User manual

Modena

Modena DD Series User manual

Modena Salutare Series Owner's manual

Modena

Modena Salutare Series Owner's manual

Modena DD Series User manual

Modena

Modena DD Series User manual

Modena Copertina Series Owner's manual

Modena

Modena Copertina Series Owner's manual

Modena Grafici Series Owner's manual

Modena

Modena Grafici Series Owner's manual

Modena Pietro Series Owner's manual

Modena

Modena Pietro Series Owner's manual

Popular Water Dispenser manuals by other brands

Olympia Water Systems OROS-50 Installation instructions & owner's manual

Olympia Water Systems

Olympia Water Systems OROS-50 Installation instructions & owner's manual

Haws 1025 Installation, operation & maintenance instructions

Haws

Haws 1025 Installation, operation & maintenance instructions

IBC Water AS1375-940 Installation & operating instructions

IBC Water

IBC Water AS1375-940 Installation & operating instructions

AquaMedix CleanSpray 1690 instructions

AquaMedix

AquaMedix CleanSpray 1690 instructions

Crystal Mountain Blizzard quick start guide

Crystal Mountain

Crystal Mountain Blizzard quick start guide

BWT AQA drink Magnesium Mineralizer II operating manual

BWT

BWT AQA drink Magnesium Mineralizer II operating manual

Avanti WDHC770I0W instruction manual

Avanti

Avanti WDHC770I0W instruction manual

RKIN ONLISOFT PRO manual

RKIN

RKIN ONLISOFT PRO manual

WaterLogic WL900 quick start guide

WaterLogic

WaterLogic WL900 quick start guide

Black & Decker 900142 user manual

Black & Decker

Black & Decker 900142 user manual

Elkay EMASM Installation and use manual

Elkay

Elkay EMASM Installation and use manual

FND KLR-28LA manual

FND

FND KLR-28LA manual

Follett C/E25CT400A/W-S Installation, operation and service manual

Follett

Follett C/E25CT400A/W-S Installation, operation and service manual

Whirlpool WHES40 Performance data sheet

Whirlpool

Whirlpool WHES40 Performance data sheet

VEVOR 10707 Installation & maintenance instructions

VEVOR

VEVOR 10707 Installation & maintenance instructions

Greenway Home Products GWD5570WBC Use & care guide

Greenway Home Products

Greenway Home Products GWD5570WBC Use & care guide

Kenmore ULTRASOFT 625.38817 owner's manual

Kenmore

Kenmore ULTRASOFT 625.38817 owner's manual

Soleus Air MW-55 user manual

Soleus Air

Soleus Air MW-55 user manual

manuals.online logo
manuals.online logoBrands
  • About & Mission
  • Contact us
  • Privacy Policy
  • Terms and Conditions

Copyright 2025 Manuals.Online. All Rights Reserved.