manuals.online logo
Brands
  1. Home
  2. •
  3. Brands
  4. •
  5. Monacor
  6. •
  7. Lighting Equipment
  8. •
  9. Monacor img Stage Line STROBE-190 User manual

Monacor img Stage Line STROBE-190 User manual

Stroboskop
Bitte lesen Sie diese Bedienungsanleitung vor dem
Betrieb gründlich durch und heben Sie sie für ein
späteres Nachlesen auf.
1 Einsatzmöglichkeiten
Dieses Stroboskop ist für eine effektvolle Beleuch-
tung auf der Bühne, in der Diskothek, im Partykeller
oder in einem Schaufenster geeignet. Die Blitzfre-
quenz lässt sich zwischen ca. 1 und 20 Blitzen pro
Sekunde einstellen.
2 Hinweise für den sicheren Gebrauch
Das Gerät entspricht allen erforderlichen Richtlinien
der EU und ist deshalb mit gekennzeichnet.
Beachten Sie auch unbedingt die folgenden Punkte:
GDas Gerät ist nur zur Verwendung im Innenbe-
reich geeignet. Schützen Sie es vor Tropf- und
Spritzwasser, hoher Luftfeuchtigkeit und Hitze
(zulässiger Einsatztemperaturbereich 0 – 40 °C).
GStellen Sie keine mit Flüssigkeit gefüllten Gefäße,
z. B. Trinkgläser, auf das Gerät.
GDie in dem Gerät entstehende Wärme muss durch
Luftzirkulation abgegeben werden. Decken Sie
darum die Lüftungsschlitze des Gehäuses nicht ab.
GNehmen Sie das Gerät nicht in Betrieb bzw. zie-
hen Sie sofort den Netzstecker aus der Steck-
dose, wenn:
WARNUNG Das Gerät wird mit lebensgefähr-
licher Netzspannung (230 V~) ver-
sorgt. Nehmen Sie deshalb niemals
selbst Eingriffe am Gerät vor und
stecken Sie nichts durch die Lüf-
tungsöffnungen! Es besteht die Ge-
fahr eines elektrischen Schlages.
1. sichtbare Schäden am Gerät oder an der Netz-
anschlussleitung vorhanden sind,
2. nach einem Sturz oder Ähnlichem der Ver-
dacht auf einen Defekt besteht,
3. Funktionsstörungen auftreten.
Geben Sie das Gerät in jedem Fall zur Reparatur
in eine Fachwerkstatt.
GEine beschädigte Netzanschlussleitung darf nur
durch eine Fachwerkstatt ersetzt werden.
GZiehen Sie den Netzstecker nie an der Zuleitung
aus der Steckdose, fassen Sie immer am Stecker
an.
GVerwenden Sie zum Reinigen nur ein trockenes,
weiches Tuch, niemals Wasser oder Chemikalien.
GWird das Gerät zweckentfremdet, falsch bedient
oder nicht fachgerecht repariert, kann keine Haf-
tung für daraus resultierende Sach- oder Perso-
nenschäden und keine Garantie für das Gerät
übernommen werden.
3 Inbetriebnahme
1) Das Stroboskop mit dem Montagebügel an
geeigneter Stelle festschrauben. Für eine bes-
sere Handhabung zuerst den Montagebügel
abschrauben.
GBeachten Sie, dass eine hohe Blitzfrequenz bei
fotosensiblen Menschen und Epileptikern epi-
leptische Anfälle auslösen kann!
GUm Augenschäden zu vermeiden, schauen Sie
nie direkt in die Lichtquelle.
Soll das Gerät endgültig aus dem Betrieb
genommen werden, übergeben Sie es zur
umweltgerechten Entsorgung einem örtli-
chen Recyclingbetrieb.
Stroboscope
Please read these operating instructions carefully
prior to operating the unit and keep them for later
use.
1 Applications
This stroboscope is suitable for an effective illumi-
nation on stage, in the discothèque, for private par-
ties or in a shop window. The flash rate can be ad-
justed between approx. 1 and 20 flashes per second.
2 Safety Notes
This unit corresponds to all required directives of the
EU and is therefore marked with .
The following points must be observed:
GThe unit is suitable for indoor use only. Protect it
against dripping water and splash water, high air
humidity, and heat (admissible ambient tempera-
ture range 0 – 40 °C).
GDo not place any vessel filled with liquid on the
unit, e. g. a drinking glass.
GThe heat generated in the unit has to be dissipat-
ed by air circulation. Therefore, the air vents of the
housing must not be covered.
GDo not take the unit into operation or immediately
take the mains plug out of the mains socket if:
1. there is visible damage at the unit or mains
cable,
2. a defect might have occurred after a drop or
similar accident,
WARNING The unit is supplied with hazardous
mains voltage (230 V~). Leave ser-
vicing to skilled personnel only and
never insert anything through the air
vents; you will risk an electric shock!
3. there are malfunctions.
The unit must in any case be repaired by author-
ized, skilled personnel.
GA damaged mains cable must be replaced by
skilled personnel only.
GNever pull the mains cable for disconnecting the
mains plug from the mains socket, always seize
the plug.
GFor cleaning only use a dry, soft cloth, by no
means chemicals or water.
GIf the unit is used for purposes other than orig-
inally intended, if it is not correctly operated, or not
repaired in an expert way, no guarantee claims for
the unit or liability for any resulting personal
damage or material damage will be accepted.
GImportant for U.K. Customers!
The wires in this mains lead are coloured in ac-
cordance with the following code:
blue = neutral
brown = live
As the colours of the wires in the mains lead of
this appliance may not correspond with the col-
oured markings identifying the terminals in your
plug, proceed as follows:
1. The wire which is coloured blue must be con-
nected to the terminal in the plug which is
marked with the letter N or coloured black.
2. The wire which is coloured brown must be
connected to the terminal which is marked with
the letter L or coloured red.
If the unit is to be put out of operation de-
finitively, take it to a local recycling plant
for a disposal which is not harmful to the
environment.
3 Setting into Operation
1) Screw the stroboscope with the mounting
bracket at a suitable place. For better handling
first screw off the mounting bracket.
2) Prior to setting the stroboscope into operation,
the SPEED control on the rear side of the unit
should be set to SLOW (left stop). With the con-
trol in this position, the stroboscope will not flash.
3) Connect the mains plug to a mains socket
(230 V~/50 Hz). Thus, the stroboscope is switched
on. For a more convenient operation, it is recom-
mended to connect the unit to a mains socket
which is switched on and off via a light switch.
4) Advance the SPEED control in a clockwise di-
rection; from a certain control position, the unit
will start flashing. The further the control is ad-
vanced, the higher the flash rate will be.
5) To switch off the unit, disconnect the mains plug
from the socket or switch off the corresponding
light switch of the socket.
4 Specifications
Flash rate: . . . . . . . 20 Hz max.
Lamp: . . . . . . . . . . . 20 W Xenon flash lamp
Power supply: . . . . 230 V~/50 Hz/20 VA
Dimensions: . . . . . . 100 ×52 ×140 mm
Weight: . . . . . . . . . 310 g
Subject to technical modification.
GPlease note that fast changes in lighting, e. g.
flashing light, may trigger epileptic seizures with
photosensitive persons or persons with epilepsy!
GTo prevent eye damage, never look directly into
the light source.
STROBE-190
Best.-Nr. 38.3520
wwwwww..iimmggssttaaggeelliinnee..ccoomm
GB
D A CH 2) Vor der Inbetriebnahme sollte der Regler SPEED
auf der Geräterückseite bis zum Linksanschlag
auf SLOW gedreht werden. Das Gerät blitzt bei
dieser Reglerstellung nicht.
3) Den Netzstecker in eine Steckdose stecken
(230 V~/50 Hz). Damit ist das Stroboskop einge-
schaltet. Um einen besseren Bedienkomfort zu
erhalten, ist es empfehlenswert, das Gerät an
eine Steckdose anzuschließen, die sich über
einen Lichtschalter ein- und ausschalten lässt.
4) Den Regler SPEED im Uhrzeigersinn aufdrehen:
ab einer bestimmten Reglerposition beginnt das
Gerät zu blitzen. Je weiter der Regler aufgedreht
wird, desto häufiger blitzt das Gerät.
5) Zum Ausschalten den Netzstecker aus der
Steckdose ziehen bzw. den zugehörigen Licht-
schalter der Steckdose ausschalten.
4 Technische Daten
Blitzfrequenz: . . . . . max. 20 Hz
Leuchtmittel: . . . . . Xenon-Blitzlampe 20 W
Stromversorgung: . 230 V~/50 Hz/20 VA
Abmessungen: . . . . 100 ×52 ×140 mm
Gewicht: . . . . . . . . . 310 g
Änderungen vorbehalten.
®
MONACOR INTERNATIONAL GmbH & Co. KG
•
Zum Falsch 36
•
28307 Bremen
•
Germany
Copyright
©
by MONACOR INTERNATIONAL. All rights reserved. A-0838.99.02.04.2011
Stroboscope
Veuillez lire la présente notice avec attention avant
le fonctionnement et conservez-la pour pouvoir
vous y reporter ultérieurement.
1 Possibilités dʼutilisation
Ce stroboscope est particulièrement bien adapté à
un éclairage sur scène, en discothèque, dans des
soirées privées ou pour celui dʼune vitrine. La fré-
quence des éclairs se règle entre 1 et 20 éclairs env.
par seconde.
2 Conseils dʼutilisation
Lʼappareil répond à toutes les directives nécessaires
de lʼUnion Européenne et porte donc le symbole .
Respectez scrupuleusement les points suivants :
GLʼappareil nʼest conçu que pour une utilisation en
intérieur. Protégez-le de tout type de projections
dʼeau, des éclaboussures, dʼune humidité élevée
et de la chaleur (plage de température de fonc-
tionnement autorisée : 0 – 40 °C).
GEn aucun cas, vous ne devez poser pas dʼobjet
contenant du liquide ou un verre sur lʼappareil.
GLa chaleur dégagée dans lʼappareil doit être éva-
cuée par une circulation dʼair correcte ; nʼobturez
jamais les ouïes de ventilation du boîtier.
GNe faites pas fonctionner lʼappareil et débran-
chez-le immédiatement dans les cas suivants :
AVERTISSEMENT Lʼappareil est alimenté par une
tension dangereuse 230 V~.
Ne touchez jamais lʼintérieur
de lʼappareil et ne faites rien
tomber dans les ouïes de ven-
tilation ! Risque de décharge
électrique.
1. Lʼappareil ou le cordon secteur présente des
dommages visibles.
2. Après une chute ou accident similaire, vous
avez un doute sur lʼétat de lʼappareil.
3. Des défaillances apparaissent.
Dans tous les cas, les dommages doivent être
réparés par un technicien spécialisé.
GTout cordon secteur endommagé ne doit être
remplacé que par un technicien qualifié.
GNe débranchez jamais lʼappareil en tirant sur le
cordon secteur ; retirez toujours le cordon secteur
en tirant la fiche.
GPour nettoyer lʼappareil, utilisez uniquement un
chiffon sec et doux, en aucun cas de produits chi-
miques ou dʼeau.
GNous déclinons toute responsabilité en cas de
dommages corporels ou matériels résultants si
lʼappareil est utilisé dans un but autre que celui
pour lequel il a été conçu, sʼil nʼest pas correcte-
ment utilisé, sʼil nʼest pas réparé par une per-
sonne habilitée ; de même, la garantie devien-
drait caduque.
3 Mise en service
GGardez présent à lʼesprit quʼune fréquence éle-
vée des éclairs peut causer des crises dʼépilep-
sie sur les personnes photosensibles ou épilep-
tiques !
GNe regardez jamais directement la source de lu-
mière pour éviter tout dommage sur les yeux.
Lorsque lʼappareil est définitivement retiré
du service, vous devez le déposer dans
une usine de recyclage adaptée pour con-
tribuer à son élimination non polluante.
1) Fixez le stroboscope à lʼendroit souhaité avec
lʼétrier de montage. Nous vous conseillons, pour
un meilleur maniement, de dévisser tout dʼabord
lʼétrier, de fixer lʼappareil puis de revisser lʼétrier.
2) Avant la mise en fonction, tournez le réglage
SPEED, situé sur la face arrière de lʼappareil, jus-
quʼà la butée gauche sur SLOW. Dans cette posi-
tion du réglage, lʼappareil nʼémet pas dʼéclairs.
3) Reliez la prise au secteur 230 V~/50 Hz. Le stro-
boscope est alors allumé. Pour un meilleur con-
fort dʼutilisation, il est recommandé de relier lʼap-
pareil à une prise secteur pouvant être allumée
et éteinte via un interrupteur.
4) Tournez le réglage SPEED dans le sens des
aiguilles dʼune montre : à partir dʼune position
donnée du réglage, lʼappareil commence à
émettre des éclairs. Plus le réglage est tourné,
plus la fréquence dʼémission est importante.
5) Pour éteindre lʼappareil, débranchez le cordon
secteur ou éteignez lʼinterrupteur correspondant
de la prise secteur.
4 Caractéristiques techniques
Fréquence
des éclairs : . . . . . . 20 Hz max.
Lampe : . . . . . . . . . lampe xénon 20 W
Alimentation : . . . . . 230 V~/50 Hz/20 VA
Dimensions : . . . . . 100 ×52 ×140 mm
Poids : . . . . . . . . . . 310 g
Tout droit de modification réservé.
Stroboscopio
Vi preghiamo di leggere attentamente le presenti
istruzioni prima della messa in funzione e di con-
servarle per un uso futuro.
1 Possibilità dʼimpiego
Il presente stroboscopio è adatto per lʼilluminazione
ad effetto sul palcoscenico, in discoteca ma anche
per il party privato. La frequenza dei lampi può
essere impostata fra 1 e 20 lampi al secondo.
2 Avvertenze di sicurezza
Questʼapparecchio è conforme a tutte le direttive
richieste dellʼUE e pertanto porta la sigla .
Si devono osservare assolutamente i seguenti punti:
GLo strumento è previsto solo per lʼuso allʼinterno
di locali. Proteggerlo dallʼacqua gocciolante e
dagli spruzzi dʼacqua, da alta umidità dellʼaria e
dal calore (temperatura dʼimpiego ammessa fra
0 e 40 °C).
GNon depositare sullʼapparecchio dei contenitori
riempiti di liquidi, p. es. bicchieri.
GDev'essere garantita la libera circolazione dell'a-
ria per dissipare il calore che viene prodotto all'in-
terno dell'apparecchio. Non coprire in nessun
modo le fessure di aerazione.
GNon mettere in funzione l'apparecchio o staccare
subito la spina rete se:
AVVERTIMENTO Lʼapparecchio funziona con
pericolosa tensione di rete
(230 V~). Non intervenire mai
al suo interno e non inserire
niente nelle fessure di aera-
zione! Esiste il pericolo di una
scarica elettrica.
1. l'apparecchio o il cavo rete presentano dei
danni visibili,
2. dopo una caduta o dopo eventi simili sussiste
il sospetto di un difetto,
3. l'apparecchio non funziona correttamente.
Per la riparazione rivolgersi sempre ad una offi-
cina competente.
GIl cavo rete, se danneggiato, deve essere sosti-
tuito solo da un laboratorio autorizzato.
GStaccare il cavo rete afferrando la spina, senza
tirare il cavo.
GPer la pulizia usare solo un panno morbido,
asciutto; non impiegare in nessun caso prodotti
chimici o acqua.
GNel caso dʼuso improprio, dʼimpiego scorretto o di
riparazione non a regola dʼarte non si assume
nessuna responsabilità per eventuali danni a per-
sone o a cose e cessa ogni diritto di garanzia.
3 Messa in funzione
1) Avvitare lo stroboscopio in un punto adatto ser-
vendosi della staffa di montaggio. Per lavorare
meglio conviene svitare prima la staffa.
2) Prima della messa in funzione, il regolatore
SPEED sul retro dovrebbe essere girato a sini-
GTenete presente che unʼalta frequenza dei lampi
può provocare attacchi dʼepilessia presso per-
sone fotosensibili o epilettici!
GNon guardare direttamente nella sorgente di
luce per escludere possibili danni agli occhi.
Se si desidera eliminare lʼapparecchio
definitivamente, consegnarlo per lo smal-
timento ad unʼistituzione locale per il
riciclaggio.
stra fino allʼarresto in posizione SLOW. Con que-
sta impostazione non ci sono lampi.
3) Inserire la spina nella presa di rete (230 V~/
50 Hz). Lo stroboscopio è così acceso. Per mag-
giore comodità conviene collegare lo strumento
con una presa comandata da un interruttore.
4) Aprire il regolatore SPEED in senso orario: da
una determinata posizione del regolatore, lʼap-
parecchio comincia a lampeggiare. Più si apre il
regolatore, più aumenta la frequenza dei lampi
5) Per spegnere lo strumento staccare la spina
dalla presa di rete oppure azionare lʼinterruttore.
4 Dati tecnici
Frequenza lampi: . . 20 Hz max.
Alimentazione: . . . . 230 V~/50 Hz/20 VA
Lampadina: . . . . . . lampada flash allo xeno 20 W
Dimensioni: . . . . . . 100 ×52 ×140 mm
Peso: . . . . . . . . . . . 310 g
Con riserva di modifiche tecniche.
STROBE-190
Best.-Nr. 38.3520
wwwwww..iimmggssttaaggeelliinnee..ccoomm
I
F B CH
®
MONACOR INTERNATIONAL GmbH & Co. KG
•
Zum Falsch 36
•
28307 Bremen
•
Germany
Copyright
©
by MONACOR INTERNATIONAL. All rights reserved. A-0838.99.02.04.2011

This manual suits for next models

1

Other Monacor Lighting Equipment manuals

Monacor CU-4BOOST User manual

Monacor

Monacor CU-4BOOST User manual

Monacor AL-16/ RT User manual

Monacor

Monacor AL-16/ RT User manual

Monacor img Stage Line LE-150 User manual

Monacor

Monacor img Stage Line LE-150 User manual

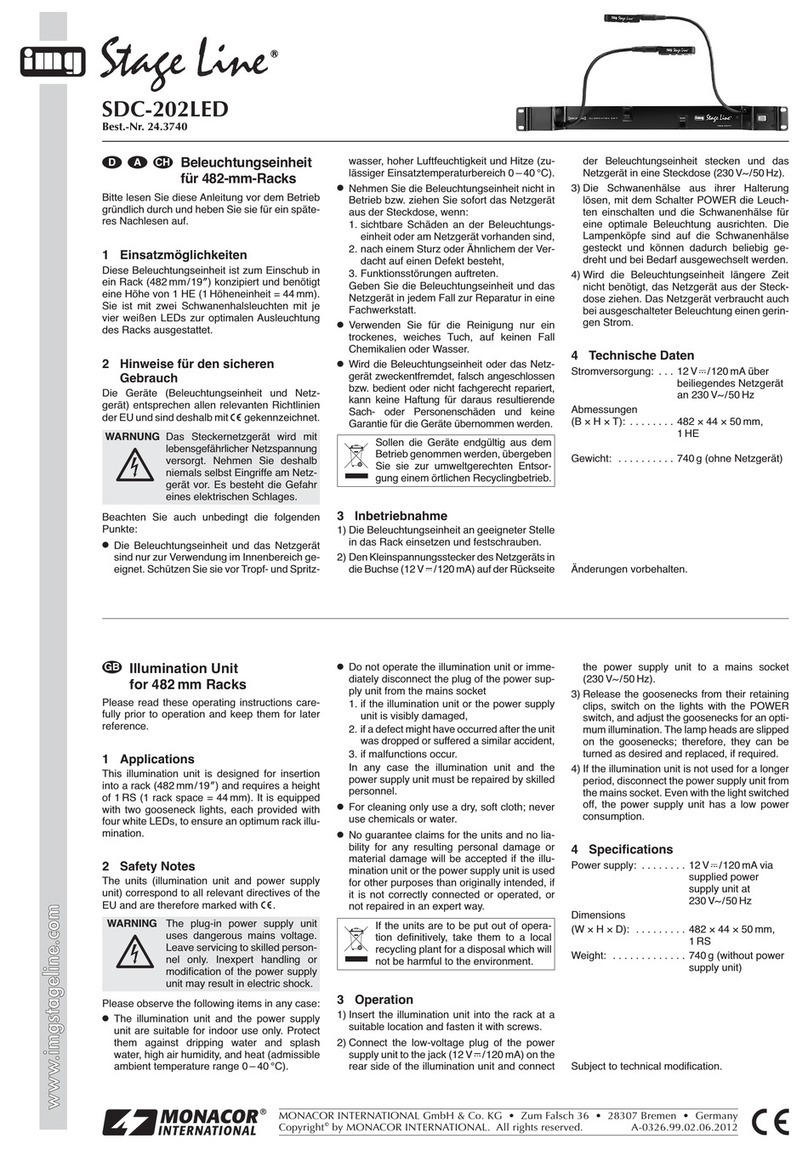
Monacor img Stage Line SDC-202LED User manual

Monacor

Monacor img Stage Line SDC-202LED User manual

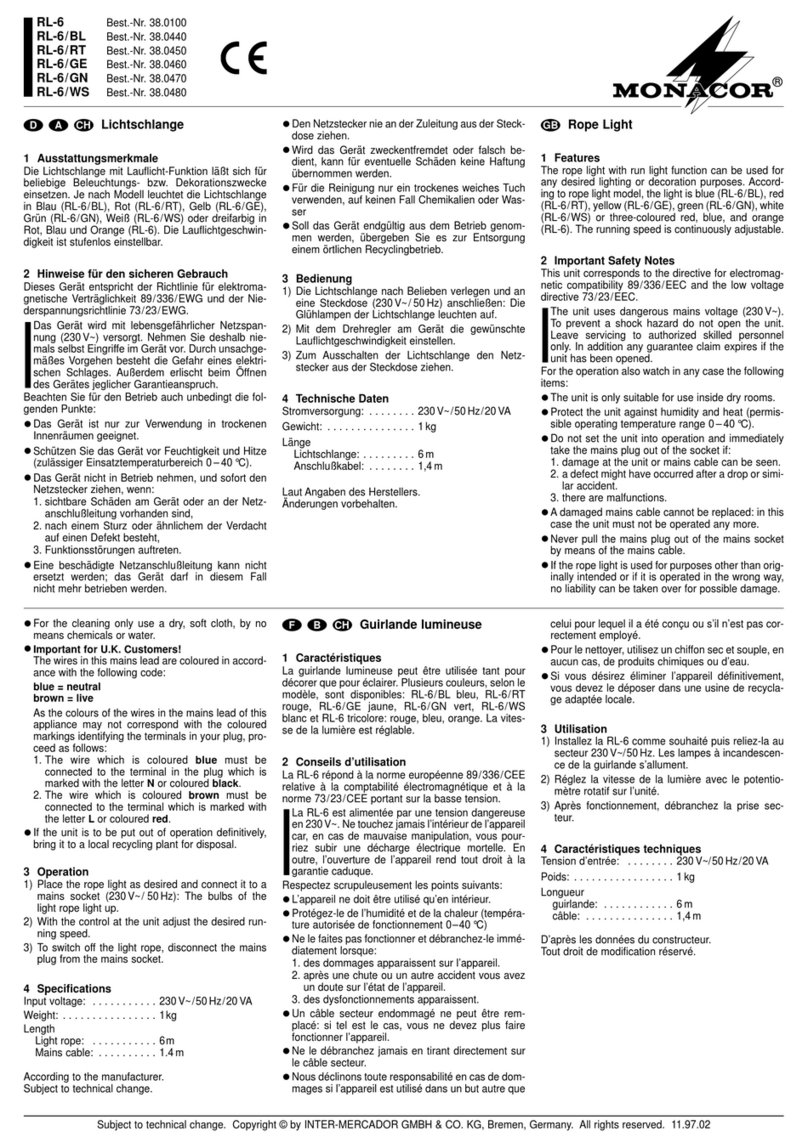
Monacor RL-6 User manual

Monacor

Monacor RL-6 User manual

Monacor DREAMLIGHT User manual

Monacor

Monacor DREAMLIGHT User manual

Monacor img Stage Line SDC-200 User manual

Monacor

Monacor img Stage Line SDC-200 User manual

Monacor THEATER-100 User manual

Monacor

Monacor THEATER-100 User manual

Monacor LO-16 User manual

Monacor

Monacor LO-16 User manual

Monacor LEDW-270 Series User manual

Monacor

Monacor LEDW-270 Series User manual

Monacor EDL-65TW User manual

Monacor

Monacor EDL-65TW User manual

Monacor img Stage Line LE-114 User manual

Monacor

Monacor img Stage Line LE-114 User manual

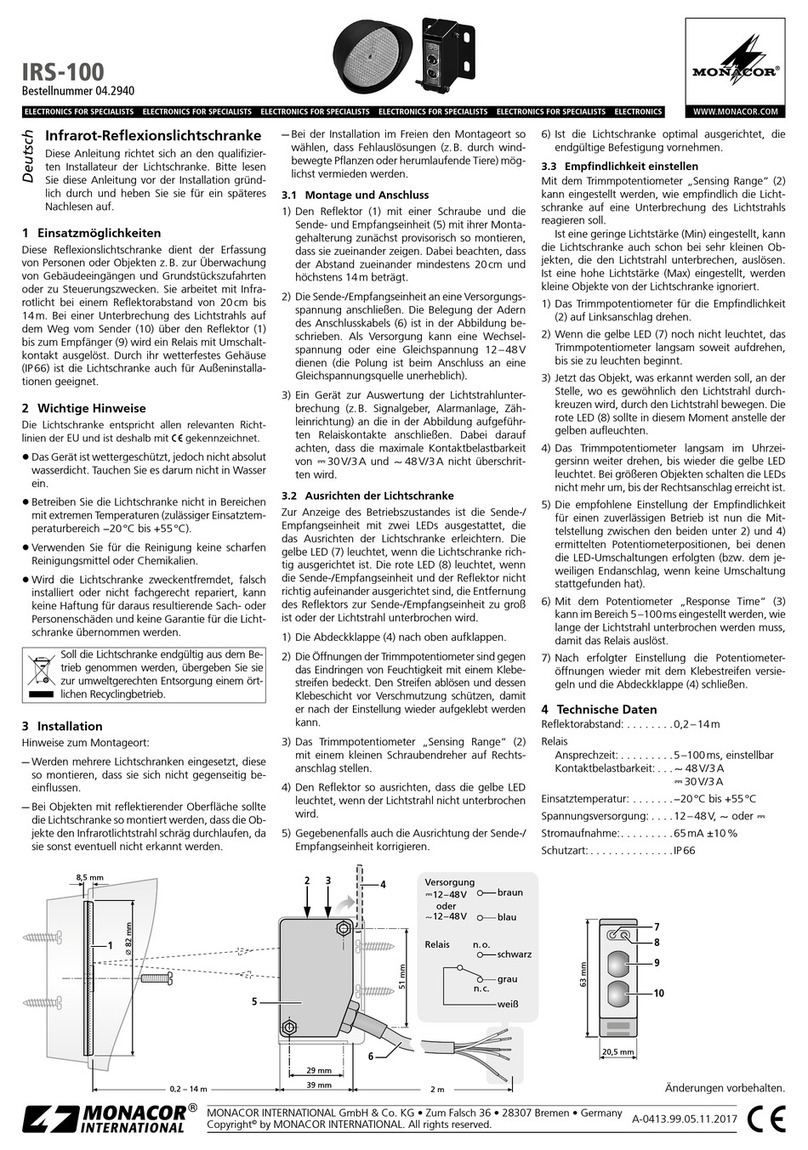
Monacor IRS-100 User manual

Monacor

Monacor IRS-100 User manual

Monacor BAL-230 User manual

Monacor

Monacor BAL-230 User manual

Popular Lighting Equipment manuals by other brands

Seamaid 500699 quick guide

Seamaid

Seamaid 500699 quick guide

Cooper Lighting LZR102 Specification sheet

Cooper Lighting

Cooper Lighting LZR102 Specification sheet

lap 213PP manual

lap

lap 213PP manual

Vistosi DIADEMA PT 18 manual

Vistosi

Vistosi DIADEMA PT 18 manual

ADJ ENCORE FR50Z user manual

ADJ

ADJ ENCORE FR50Z user manual

Dr. Mach Quintaflex R96 Directions for use

Dr. Mach

Dr. Mach Quintaflex R96 Directions for use

STERNO HOME GL33600 instructions

STERNO HOME

STERNO HOME GL33600 instructions

GE LED 500 LIGHTS quick start guide

GE

GE LED 500 LIGHTS quick start guide

TOPPOINT LT91028 quick start guide

TOPPOINT

TOPPOINT LT91028 quick start guide

ProLights Z390LED user manual

ProLights

ProLights Z390LED user manual

Signal Mate 3NMMHDKW owner's manual

Signal Mate

Signal Mate 3NMMHDKW owner's manual

Dialog WLC-4150-C Field guide

Dialog

Dialog WLC-4150-C Field guide

Oase Water Jet Lightning operating instructions

Oase

Oase Water Jet Lightning operating instructions

ONFORU CTB48RGBU product manual

ONFORU

ONFORU CTB48RGBU product manual

Wetelux 84 54 33 instruction manual

Wetelux

Wetelux 84 54 33 instruction manual

ADJ 1227000010 User instructions

ADJ

ADJ 1227000010 User instructions

COMPLED Solutions GmbH HashCropter user manual

COMPLED Solutions GmbH

COMPLED Solutions GmbH HashCropter user manual

DTS XR5 SPOT user manual

DTS

DTS XR5 SPOT user manual

manuals.online logo
manuals.online logoBrands
  • About & Mission
  • Contact us
  • Privacy Policy
  • Terms and Conditions

Copyright 2025 Manuals.Online. All Rights Reserved.