manuals.online logo
Brands
  1. Home
  2. •
  3. Brands
  4. •
  5. Monacor
  6. •
  7. Lighting Equipment
  8. •
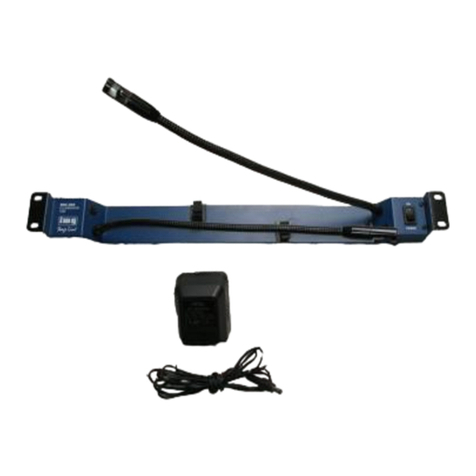
  9. Monacor img Stage Line SDC-202LED User manual

Monacor img Stage Line SDC-202LED User manual

Beleuchtungseinheit
für 482-mm-Racks
Bitte lesen Sie diese Anleitung vor dem Betrieb
gründlich durch und heben Sie sie für ein späte-
res Nachlesen auf.
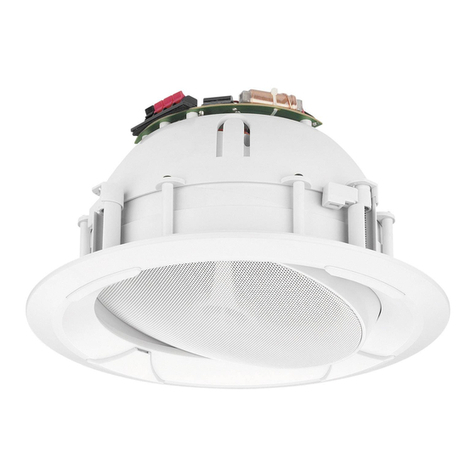
1 Einsatzmöglichkeiten
Diese Beleuchtungseinheit ist zum Einschub in
ein Rack (482 mm/19″) konzipiert und benötigt
eine Höhe von 1 HE (1 Höheneinheit = 44 mm).
Sie ist mit zwei Schwanenhalsleuchten mit je
vier weißen LEDs zur optimalen Ausleuchtung
des Racks ausgestattet.
2 Hinweise für den sicheren
Gebrauch
Die Geräte (Beleuchtungseinheit und Netz-
gerät) entsprechen allen relevanten Richtlinien
der EU und sind deshalb mit gekennzeichnet.
Beachten Sie auch unbedingt die folgenden
Punkte:
GDie Beleuchtungseinheit und das Netzgerät
sind nur zur Verwendung im Innenbereich ge-
eignet. Schützen Sie sie vor Tropf- und Spritz-
WARNUNG Das Steckernetzgerät wird mit
lebensgefährlicher Netzspannung
versorgt. Nehmen Sie deshalb
niemals selbst Eingriffe am Netz-
gerät vor. Es besteht die Gefahr
eines elektrischen Schlages.
wasser, hoher Luftfeuchtigkeit und Hitze (zu-
lässiger Einsatztemperaturbereich 0 – 40 °C).
GNehmen Sie die Beleuchtungseinheit nicht in
Betrieb bzw. ziehen Sie sofort das Netzgerät
aus der Steckdose, wenn:
1. sichtbare Schäden an der Beleuchtungs-
einheit oder am Netzgerät vorhanden sind,
2. nach einem Sturz oder Ähnlichem der Ver-
dacht auf einen Defekt besteht,
3. Funktionsstörungen auftreten.
Geben Sie die Beleuchtungseinheit und das
Netzgerät in jedem Fall zur Reparatur in eine
Fachwerkstatt.
GVerwenden Sie für die Reinigung nur ein
trockenes, weiches Tuch, auf keinen Fall
Chemikalien oder Wasser.
GWird die Beleuchtungseinheit oder das Netz-
gerät zweckentfremdet, falsch angeschlossen
bzw. bedient oder nicht fachgerecht repariert,
kann keine Haftung für daraus resultierende
Sach- oder Personenschäden und keine
Garantie für die Geräte übernommen werden.
3 Inbetriebnahme
1) Die Beleuchtungseinheit an geeigneter Stelle
in das Rack einsetzen und festschrauben.
2) Den Kleinspannungsstecker des Netzgeräts in
die Buchse (12 V /120 mA) auf der Rückseite
Sollen die Geräte endgültig aus dem
Betrieb genommen werden, übergeben
Sie sie zur umweltgerechten Entsor-
gung einem örtlichen Recyclingbetrieb.
der Beleuchtungseinheit stecken und das
Netzgerät in eine Steckdose (230 V~/50 Hz).
3) Die Schwanenhälse aus ihrer Halterung
lösen, mit dem Schalter POWER die Leuch-
ten einschalten und die Schwanenhälse für
eine optimale Beleuchtung ausrichten. Die
Lampenköpfe sind auf die Schwanenhälse
gesteckt und können dadurch beliebig ge-
dreht und bei Bedarf ausgewechselt werden.
4) Wird die Beleuchtungseinheit längere Zeit
nicht benötigt, das Netzgerät aus der Steck-
dose ziehen. Das Netzgerät verbraucht auch
bei ausgeschalteter Beleuchtung einen gerin-
gen Strom.
4 Technische Daten
Stromversorgung: . . . 12 V /120 mA über
beiliegendes Netzgerät
an 230 V~/50 Hz
Abmessungen
(B × H × T): . . . . . . . . 482 × 44 × 50 mm,
1HE
Gewicht: . . . . . . . . . . 740 g (ohne Netzgerät)
Änderungen vorbehalten.
Illumination Unit
for 482 mm Racks
Please read these operating instructions care-
fully prior to operation and keep them for later
reference.
1 Applications
This illumination unit is designed for insertion
into a rack (482 mm/19″) and requires a height
of 1 RS (1 rack space = 44 mm). It is equipped
with two gooseneck lights, each provided with
four white LEDs, to ensure an optimum rack illu-
mination.
2 Safety Notes
The units (illumination unit and power supply
unit) correspond to all relevant directives of the
EU and are therefore marked with .
Please observe the following items in any case:
GThe illumination unit and the power supply
unit are suitable for indoor use only. Protect
them against dripping water and splash
water, high air humidity, and heat (admissible
ambient temperature range 0 – 40 °C).
WARNING The plug-in power supply unit
uses dangerous mains voltage.
Leave servicing to skilled person-
nel only. Inexpert handling or
modification of the power supply
unit may result in electric shock.
GDo not operate the illumination unit or imme-
diately disconnect the plug of the power sup-
ply unit from the mains socket
1. if the illumination unit or the power supply
unit is visibly damaged,
2. if a defect might have occurred after the unit
was dropped or suffered a similar accident,
3. if malfunctions occur.
In any case the illumination unit and the
power supply unit must be repaired by skilled
personnel.
GFor cleaning only use a dry, soft cloth; never
use chemicals or water.
GNo guarantee claims for the units and no lia-
bility for any resulting personal damage or
material damage will be accepted if the illu-
mination unit or the power supply unit is used
for other purposes than originally intended, if
it is not correctly connected or operated, or
not repaired in an expert way.
3 Operation
1) Insert the illumination unit into the rack at a
suitable location and fasten it with screws.
2) Connect the low-voltage plug of the power
supply unit to the jack (12 V /120 mA) on the
rear side of the illumination unit and connect
If the units are to be put out of opera-
tion definitively, take them to a local
recycling plant for a disposal which will
not be harmful to the environment.
the power supply unit to a mains socket
(230 V~/50 Hz).
3) Release the goosenecks from their retaining
clips, switch on the lights with the POWER
switch, and adjust the goosenecks for an opti-
mum illumination. The lamp heads are slipped
on the goosenecks; therefore, they can be
turned as desired and replaced, if required.
4) If the illumination unit is not used for a longer
period, disconnect the power supply unit from
the mains socket. Even with the light switched
off, the power supply unit has a low power
consumption.
4 Specifications
Power supply: . . . . . . . . 12 V /120 mA via
supplied power
supply unit at
230 V~/50 Hz
Dimensions
(W × H × D): . . . . . . . . . 482 × 44 × 50 mm,
1RS
Weight: . . . . . . . . . . . . . 740 g (without power
supply unit)
Subject to technical modification.
GB
SDC-202LED
Best.-Nr. 24.3740
wwwwww..iimmggssttaaggeelliinnee..ccoomm
D A CH
®
MONACOR INTERNATIONAL GmbH & Co. KG
•
Zum Falsch 36
•
28307 Bremen
•
Germany
Copyright
©
by MONACOR INTERNATIONAL. All rights reserved. A-0326.99.02.06.2012
Centrale dʼéclairage
pour racks 482mm/19″
Veuillez lire la présente notice avec attention
avant le fonctionnement et conservez-la pour
pouvoir vous y reporter ultérieurement.
1 Possibilités dʼutilisation
Cette centrale dʼéclairage est conçue pour être
placée dans un rack (482 mm/19″) et nécessite
une hauteur de 1 U (1 unité = 44 mm). Elle est
équipée de deux lampes col de cygne avec res-
pectivement 4 LEDs blanches pour un éclairage
optimal du rack.
2 Conseils de sécurité et dʼutilisation
Les appareils (centrale dʼéclairage et bloc sec-
teur) répondent à toutes les directives néces-
saires de lʼUnion européenne et portent donc le
symbole .
Respectez scrupuleusement les points suivants :
GLa centrale dʼéclairage et le bloc secteur ne
sont conçus que pour une utilisation en inté-
rieur. Protégez-les des éclaboussures, de
tout type de projections dʼeau, dʼune humidité
AVERTISSEMENT Le bloc secteur est alimenté
par une tension secteur dan-
gereuse. Ne touchez jamais
lʼintérieur de lʼappareil, en
cas de mauvaise manipula-
tion, vous pourriez subir une
décharge électrique.
élevée et de la chaleur (température ambian-
te admissible 0 – 40 °C).
GNe faites pas fonctionner la centrale dʼéclai-
rage et débranchez le bloc secteur immédia-
tement dans les cas suivants :
1. la centrale dʼéclairage, le bloc secteur pré-
sentent des dommages visibles.
2. après une chute ou accident similaire, vous
avez un doute sur lʼétat de lʼappareil.
3. des dysfonctionnements apparaissent.
Dans tous les cas, les dommages sur la cen-
trale dʼéclairage ou le bloc secteur doivent
être réparés par un technicien spécialisé.
GPour le nettoyage, utilisez un chiffon sec et
doux, en aucun cas de produits chimiques ou
dʼeau.
GNous déclinons toute responsabilité en cas
de dommages corporels ou matériels résul-
tants si la centrale dʼéclairage ou le bloc sec-
teur est utilisé dans un but autre que celui
pour lequel il a été conçu, si les appareils ne
sont pas correctement branchés, utilisés ou
réparés par une personne habilitée ; en outre,
la garantie deviendrait caduque.
3 Fonctionnement
1) Placez la centrale dʼéclairage à un endroit
adapté dans le rack et vissez-la.
Lorsque les appareils sont définitive-
ment retirés du service, vous devez les
déposer dans une usine de recyclage
adaptée pour contribuer à leur élimina-
tion non polluante.
2) Reliez la fiche basse tension du bloc secteur
à la prise 12 V /120 mA sur la face arrière de
la centrale dʼéclairage et reliez le bloc secteur
à une prise 230 V~/50 Hz.
3) Desserrez les cols de cygne de leur support,
allumez les lampes avec lʼinterrupteur POW-
ER et orientez les cols de cygne pour un
éclairage optimal. Les têtes des lampes sont
glissées dans les cols de cygne et peuvent
ainsi être tournées à volonté et si besoin rem-
placées.
4) En cas de non utilisation prolongée de la cen-
trale dʼéclairage, débranchez le bloc secteur
de la prise secteur. Il a une faible consomma-
tion même si la centrale dʼéclairage est
éteinte.
4 Caractéristiques techniques
Alimentation : . . . . . . . . 12 V /120 mA
par bloc secteur
livré relié à
230 V~/50 Hz
Dimensions
(L × H × P) : . . . . . . . . . 482 × 44 × 50 mm,
1U
Poids : . . . . . . . . . . . . . . 740 g
(sans bloc secteur)
Tout droit de modification réservé.
Unità di illuminazione
per rack 482 mm
Vi preghiamo di leggere attentamente le pre-
senti istruzioni prima della messa in funzione e
di conservarle per un uso futuro.
1 Possibilità dʼimpiego
Questa unità di illuminazione è stata realizzata
per lʼinserimento in un rack (482 mm/19″) e
richiede unʼunità di altezza RS (1 RS = 44 mm).
È equipaggiata con due lampade a collo di
cigno, ognuna con quattro LED bianchi per unʼil-
luminazione ottimale del rack.
2 Avvertenze di sicurezza
Gli apparecchi (unità di illuminazione e alimen-
tatore) sono conformi a tutte le direttive rilevanti
dellʼUE e pertanto portano la sigla .
Si devono osservare assolutamente anche i
seguenti punti:
GLʼunità di illuminazione e lʼalimentatore sono
adatti solo per lʼuso allʼinterno di locali.
Proteggerli dallʼacqua gocciolante e dagli
spruzzi dʼacqua, da alta umidità dellʼaria e dal
AVVERTIMENTO Lʼalimentatore a spina fun-
ziona con pericolosa tensione
di rete. Non intervenire mai
personalmente al suo interno.
Esiste il pericolo di una sca-
rica elettrica.
calore (temperatura dʼimpiego ammessa fra
0 e 40 °C).
GNon mettere in funzione lʼunità e staccare
subito lʼalimentatore dalla rete se:
1. lʼunità di illuminazione o lʼalimentatore pre-
sentano dei danni visibili;
2. dopo una caduta o dopo eventi simili sus-
siste il sospetto di un difetto;
3. lʼapparecchio non funziona correttamente.
Per la riparazione dellʼunità e dellʼalimenta-
tore rivolgersi sempre ad unʼofficina compe-
tente.
GPer la pulizia usare solo un panno morbido,
asciutto; non impiegare in nessun caso pro-
dotti chimici o acqua.
GNel caso dʼuso improprio, di collegamenti
sbagliati, dʼimpiego scorretto o di riparazione
non a regola dʼarte dellʼunità di illuminazione
o dellʼalimentatore, non si assume nessuna
responsabilità per eventuali danni conse-
quenziali a persone o a cose e non si assume
nessuna garanzia per gli strumenti.
3 Messa in funzione
1) Inserire lʼunità di illuminazione in un punto
adatto del rack e avvitarla.
2) Inserire la spina di alimentazione DC dellʼali-
mentatore nella presa (12 V /120 mA) sul
Se si desidera eliminare gli apparecchi
definitivamente, consegnarli per lo
smaltimento ad unʼistituzione locale
per il riciclaggio.
retro dellʼunità e inserire lʼalimentatore in una
presa di rete (230 V~/50 Hz).
3) Staccare i colli di cigno dai loro supporti,
accendere le lampade con lʼinterruttore
POWER e girare i colli di cigno per ottenere
unʼilluminazione ottimale. Le teste con le lam-
padine sono inserite sui colli di cigno e pos-
sono essere girate a piacere o sostituite se
necessario.
4) Se lʼunità di illuminazione non serve per un
certo periodo conviene staccare lʼalimenta-
tore dalla rete in quanto segna un leggero
consumo di corrente anche se è spento.
4 Dati tecnici
Alimentazione: . . . . . . . 12V /120 mA
tramite alimentatore
in dotazione con
230V~/50 Hz
Dimensioni
(l × h × p): . . . . . . . . . . . 482 × 44 × 50 mm,
1RS
Peso: . . . . . . . . . . . . . . . 740 g (senza alimen-
tatore)
Con riserva di modifiche tecniche.
I
SDC-202LED
Best.-Nr. 24.3740
wwwwww..iimmggssttaaggeelliinnee..ccoomm
F B CH
®
MONACOR INTERNATIONAL GmbH & Co. KG
•
Zum Falsch 36
•
28307 Bremen
•
Germany
Copyright
©
by MONACOR INTERNATIONAL. All rights reserved. A-0326.99.02.06.2012
Verlichtingsmodule
voor 482 mm-racks
Lees deze bedieningshandleiding grondig door,
alvorens het apparaat in gebruik te nemen, en
bewaar ze voor latere raadpleging.
1 Toepassingen
Deze verlichtingsmodule is ontworpen voor
montage in een 19″-rack (482 mm) en vereist
een hoogte van 1 HE (1 rack-eenheid = 44 mm).
Ze is uitgerust met twee zwanenhalslampen met
elk vier witte LEDʼs voor de optimale verlichting
van het rack.
2 Veiligheidsvoorschriften
De apparaten (verlichtingsmodule en netadapter)
zijn in overeenstemming met alle relevante EU-
Richtlijnen en dragen daarom het -kenmerk.
Let eveneens op het volgende:
GDe verlichtingsmodule en de netadapter zijn
enkel geschikt voor gebruik binnenshuis. Ver-
mijd druip- en spatwater, uitzonderlijk warme
plaatsen en plaatsen met een hoge vochtig-
heid (toegestaan omgevingstemperatuurbe-
reik: 0 – 40 °C).
WAARSCHUWING De netspanning van de net-
adapter is levensgevaarlijk.
Open de netadapter niet, U
loopt het risico van een elek-
trische schok.
GSchakel de verlichtingsmodule niet in resp.
trek onmiddellijk de netadapter uit het stop-
contact, wanneer:
1. de verlichtingsmodule of de netadapter
zichtbaar beschadigd zijn,
2. er een defect zou kunnen optreden nadat
een apparaat bijvoorbeeld gevallen is,
3. een apparaat slecht functioneert.
De verlichtingsmodule en de netadapter moe-
ten in elk geval hersteld worden door een ge-
kwalificeerd vakman.
GGebruik voor de reiniging uitsluitend een
droge, zachte doek. Gebruik in geen geval
chemicaliën of water.
GIn geval van ongeoorloofd of verkeerd gebruik,
verkeerde aansluiting resp. bediening of van
herstelling door een niet-gekwalificeerd per-
soon vervalt de garantie op de apparatuur en
de verantwoordelijkheid voor hieruit resulte-
rende materiële of lichamelijke schade.
3 Ingebruikneming
1) Plaats de verlichtingsmodule op de gepaste
plaats in het rack en schroef ze vast.
2) Steek de laagspanningsstekker van de net-
adapter in de bus (12 V /120 mA) aan de
achterzijde van de verlichtingsmodule en plug
Wanneer de apparaten definitief uit
bedrijf worden genomen, bezorg ze
dan voor verwerking aan een plaatse-
lijk recyclagebedrijf.
de netadapter in een stopcontact (230 V~/
50 Hz).
3) Maak de zwanenhalzen uit hun houder los,
schakel de lampen met de POWER-schake-
laar in en richt de zwanenhalzen voor een
optimale belichting. De lampenkoppen zijn op
de zwanenhals gestoken en kunnen daarom
naar wens worden gedraaid en zo nodig wor-
den vervangen.
4) Wanneer de verlichtingsmodule langere tijd
niet gebruikt wordt, trekt u de netadapter uit
het stopcontact. De netadapter heeft een
klein vermogensverbruik zelfs bij uitgescha-
kelde verlichtingsmodule.
4 Technische gegevens
Voedingsspanning: . . . . 12 V /120 mA via
meegeleverde
netadapter op
230 V~/50 Hz
Afmetingen
(B × H × D): . . . . . . . . . . 482 × 44 × 50 mm,
1HE
Gewicht: . . . . . . . . . . . . 740 g (zonder
netadapter)
Wijzigingen voorbehouden.
Unidad de iluminación
para racks 482 mm
Lea atentamente estas instrucciones de funcio-
namiento antes de utilizar el aparato y guárde-
las para usos posteriores.
1 Aplicaciones
Esta unidad de iluminación está diseñada para
ser insertada en un rack (482 mm/19″) y nece-
sita una altura de 1 RS (1 espacio de rack =
44 mm). Está equipada con dos lámparas de
cuello de cisne, cada una con 4 LEDs blancos,
para asegurar una iluminación óptima del rack.
2 Notas de seguridad
Los aparatos (central de iluminación y alimenta-
dor) cumplen con todas las directivas relevantes
de la UE y por lo tanto están marcados con el
símbolo .
Respetar los siguientes puntos:
GLa central de iluminación y el alimentador
están concebidos para una utilización en inte-
rior. Protegerlos de todo tipo de proyecciones
ADVERTENCIA El alimentador utiliza un voltaje
peligroso. Deje el manteni-
miento en manos del personal
cualificado. El manejo inex-
perto o la modificación del ali-
mentador puede provocar una
descarga.
de aguas, de salpicaduras de agua, del calor
y de la humedad elevada (temperatura de
funcionamiento 0 – 40 °C).
GNo conectar y desconectar la central de ilu-
minación de manera inmediata, ya que:
1. aparecen desperfectos en los aparatos.
2. después de una caída..., los aparatos pre-
senten algún defecto.
3. hay un mal funcionamiento.
En todos los caso, los desperfectos deben
ser reparados por un técnico especializado.
GPara limpiar el aparato, utilizar un paño sua-
ve, y seco en ningún caso productos quími-
cos o agua.
GDeclinamos cualquier responsabilidad en ca-
so de daños materiales o corporales que pue-
dan producirse si los aparatos son utilizados
para otro fin que no sea por el que han sido
concebidos, si no están correctamente utili-
zados o reparados por una persona debida-
mente habilitada. Por estos mismos motivos
carecería de todo tipo de garantía.
3 Funcionamiento
1) Insertar la unidad de iluminación en el rack en
un lugar apropiado y atornillar los tornillos.
Si va a poner los aparatos fuera de
servicio definitivamente, llévelos a la
planta de reciclaje más cercana para
que su eliminación no sea perjudicial
para el medioambiente.
2) Conectar la toma de bajo voltaje de la unidad
de alimentación al jack (12 V /120 mA) en la
parte trasera de la unidad de iluminación y
conectar la unidad de alimentación a la toma
principal de corriente (230 V~/50 Hz).
3) Soltar los cuellos de cisne de los clips, conec-
tar las lámparas con la tecla POWER, y ajus-
tarlos para una iluminación óptima. La
cabeza de la lámpara está metida en el cue-
llo de cisne, por esta razón puede girarse
según convenga y cambiarse, si es necesa-
rio.
4) Si la unidad de iluminación no se utiliza du-
rante un largo periodo de tiempo, desconec-
tar la unidad de alimentación de la toma prin-
cipal de corriente. Incluso con la luz apagada,
la unidad de alimentación tiene un leve con-
sumo.
4 Especificaciones
Alimentación: . . . . . . . . 12 V /120 mA vía
unidad de
alimentación de
230 V~/50 Hz
Dimensiones
(B × H × P): . . . . . . . . . . 482 × 44 × 50 mm,
1RS
Peso: . . . . . . . . . . . . . . . 740 g (sin la unidad
de alimentación)
Sujeto a modificaciones técnicas.
E
SDC-202LED
Best.-Nr. 24.3740
wwwwww..iimmggssttaaggeelliinnee..ccoomm
®
MONACOR INTERNATIONAL GmbH & Co. KG
•
Zum Falsch 36
•
28307 Bremen
•
Germany
Copyright
©
by MONACOR INTERNATIONAL. All rights reserved. A-0326.99.02.06.2012
NL B
Podświetlenie dla urządzeń
rackowych
Przed rozpoczęciem użytkowania proszę do-
kładnie zapoznać się z niniejszą instrukcją i
zachować ją do wglądu.
1 Zastosowanie
Podświetlenie jest montowane w półce rackowej
(482 mm/19″) i ma wysokość 1 U (1 U = 44 mm).
Składa się z dwóch lampek, wyposażonych
każda w 4 diody LED. Lampki zamocowane ela-
stycznie na tzw. gęsich szyjach.
2 Środki ostrożności
Urządzenia (podświetlenie oraz zasilacz) speł-
niają wszystkie wymagania norm UE dlatego
zostały oznaczone symbolem .
Należy zawsze przestrzegać następujących
zasad:
GUrządzenia (podświetlenie oraz zasilacz) są
przeznaczone tylko do użytku wewnątrz po-
mieszczeń. Należy chronić przed dostaniem
UWAGA Zasilacz urządzenia pracuje na
wysokim napięciu sieciowym.
Wszelkie naprawy należy zlecić
specjaliście. Nieprawidłowa obsługa
lub wprowadzanie modyfikacji
może spowodować porażenie prą-
dem elektrycznym.
się jakiejkolwiek cieczy do środka urządzeń,
dużą wilgotnością oraz ciepłem (temperatura
otoczenia powinna wynosić od 0 – 40 °C).
GNie wolno używać oraz należy natychmiast
odłączyć urządzenie od zasilania:
1.Jeżeli widoczne są jakiekolwiek uszkodze-
nia urządzenia lub kabla zasilającego.
2.Jeżeli urządzenie upadło lub uległo podob-
nemu wypadkowi, który mógł spowodować
jego uszkodzenie.
3.Jeżeli występują nieprawidłowości w dzia-
łaniu urządzenia.
W każdym z powyższych przypadków urzą-
dzenie musi zostać poddane naprawie przez
odpowiednio wyszkolony personel.
GDo czyszczenia urządzenia zawsze używać
czystego i suchego kawałka materiału; nigdy
nie należy używać wody, ani środków che-
micznych.
GNie ponosi się odpowiedzialności za wynikłe
uszkodzenia sprzętu lub obrażenia użytko-
wnika w przypadku, gdy urządzenie jest
wykorzystywane w innych celach niż to się
przewiduje lub, jeśli jest nieodpowiednio zain-
stalowane, użytkowane lub naprawiane.
Po całkowitym zakończeniu eksploata-
cji, urządzenie należy oddać do punktu
recyklingu, aby nie zaśmiecać środo-
wiska.
3 Obsługa
1) Zamontować i przykręcić podświetlenie do
obudowy rackowej.
2) Podłączyć wtyk zasilacza do gniazda (12V /
120 mA) podświetlenia, znajdującego się z
tyłu, a następnie wtyczkę zasilacza do sieci
230 V~/50 Hz.
3) Wyjąć lampki z ich uchwytów, włączyć zasila-
nie przyciskiem POWER. Ustawić lampki w
zależności od potrzeb.
4) Jeśli podświetlenie nie będzie używane przez
dłuższy okres czasu, zaleca się odłączyć za-
silacz z sieci. Nawet przy wyłączonym pod-
świetleniu przyciskiem POWER, zasilacz bę-
dzie pobierał z sieci pewną niewielką ilość
energii.
4 Dane techniczne
Zasilanie: . . . . . . . . . . . . 12 V /120 mA
z dołączonego
zasilacza podłączo-
nego do sieci
230V~/50 Hz
Wymiary
(S × W × G): . . . . . . . . . 482 × 44 × 50 mm,
1U
Waga: . . . . . . . . . . . . . . 740 g (bez zasilacza)
Z zastrzeżeniem do możliwych zmian.
SDC-202LED
Best.-Nr. 24.3740
wwwwww..iimmggssttaaggeelliinnee..ccoomm
PL
®
MONACOR INTERNATIONAL GmbH & Co. KG
•
Zum Falsch 36
•
28307 Bremen
•
Germany
Copyright
©
by MONACOR INTERNATIONAL. All rights reserved. A-0326.99.02.06.2012

This manual suits for next models

1

Other Monacor Lighting Equipment manuals

Monacor img Stage Line LE-150 User manual

Monacor

Monacor img Stage Line LE-150 User manual

Monacor LEDW-270 Series User manual

Monacor

Monacor LEDW-270 Series User manual

Monacor img Stage Line SDC-200 User manual

Monacor

Monacor img Stage Line SDC-200 User manual

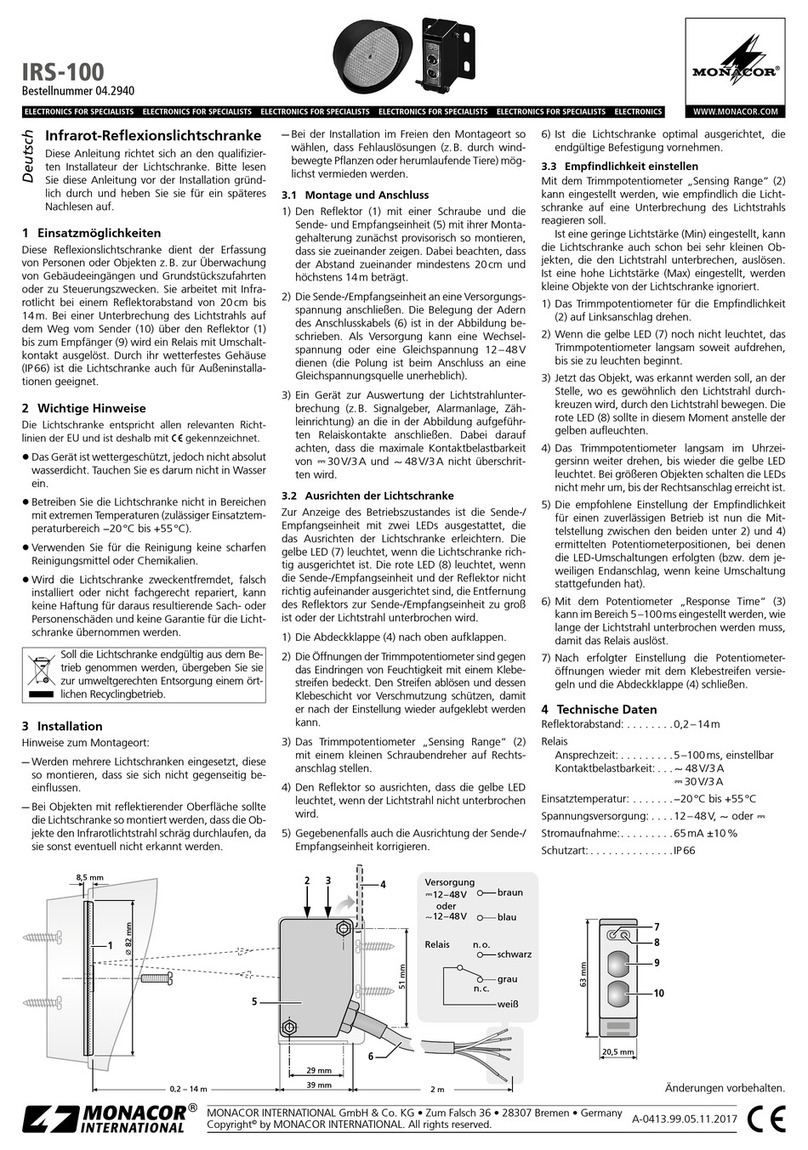
Monacor IRS-100 User manual

Monacor

Monacor IRS-100 User manual

Monacor CU-4BOOST User manual

Monacor

Monacor CU-4BOOST User manual

Monacor LO-16 User manual

Monacor

Monacor LO-16 User manual

Monacor img Stage Line STROBE-190 User manual

Monacor

Monacor img Stage Line STROBE-190 User manual

Monacor DREAMLIGHT User manual

Monacor

Monacor DREAMLIGHT User manual

Monacor AL-16/ RT User manual

Monacor

Monacor AL-16/ RT User manual

Monacor EDL-65TW User manual

Monacor

Monacor EDL-65TW User manual

Monacor RL-6 User manual

Monacor

Monacor RL-6 User manual

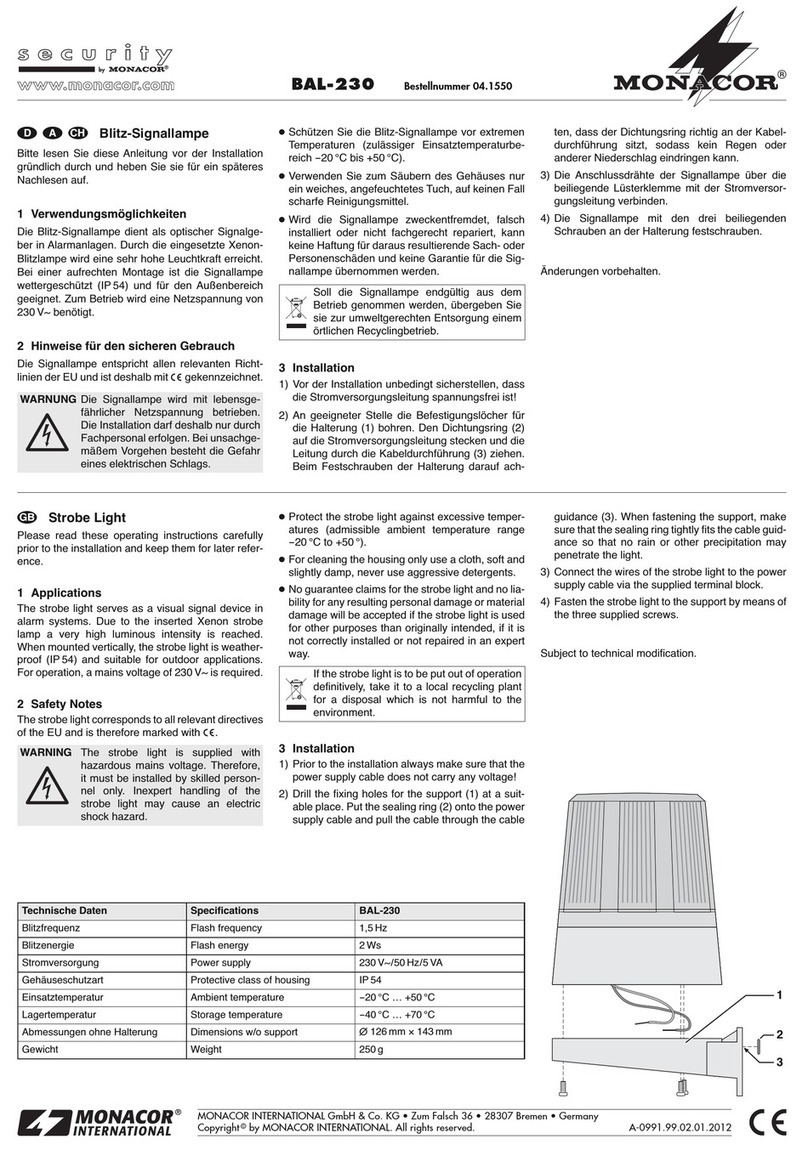
Monacor BAL-230 User manual

Monacor

Monacor BAL-230 User manual

Monacor img Stage Line LE-114 User manual

Monacor

Monacor img Stage Line LE-114 User manual

Monacor THEATER-100 User manual

Monacor

Monacor THEATER-100 User manual

Popular Lighting Equipment manuals by other brands

Be Cool BCLGD24 instruction manual

Be Cool

Be Cool BCLGD24 instruction manual

Ledj Stage Par CZ200 Dual White user manual

Ledj

Ledj Stage Par CZ200 Dual White user manual

Home Decorators Collection Ryland Balsam Fir quick start guide

Home Decorators Collection

Home Decorators Collection Ryland Balsam Fir quick start guide

Commercial Electric VICTORIA Series Use and care guide

Commercial Electric

Commercial Electric VICTORIA Series Use and care guide

ETC source four fresnel user manual

ETC

ETC source four fresnel user manual

Saxby Lighting 46393 Instruction leaflet

Saxby Lighting

Saxby Lighting 46393 Instruction leaflet

American DJ Ruby Star User instructions

American DJ

American DJ Ruby Star User instructions

ccei LIMPIDO LTE DUO user manual

ccei

ccei LIMPIDO LTE DUO user manual

PLG LINEA A 3 user manual

PLG

PLG LINEA A 3 user manual

Current Evolve GEH6083 installation guide

Current

Current Evolve GEH6083 installation guide

ArchWork ARCPOD21 user manual

ArchWork

ArchWork ARCPOD21 user manual

Wolf WL-240BF Assembly manual

Wolf

Wolf WL-240BF Assembly manual

Ledra Brands ALPHABET installation manual

Ledra Brands

Ledra Brands ALPHABET installation manual

ADB Safegate L-858 AGSF Series user manual

ADB Safegate

ADB Safegate L-858 AGSF Series user manual

BEGA 33 199 manual

BEGA

BEGA 33 199 manual

Chauvet Colorado 1-Quad Tour user manual

Chauvet

Chauvet Colorado 1-Quad Tour user manual

Viabizzuno cubo 30 installation instructions

Viabizzuno

Viabizzuno cubo 30 installation instructions

Kooduu Synergy Pro Series manual

Kooduu

Kooduu Synergy Pro Series manual

manuals.online logo
manuals.online logoBrands
  • About & Mission
  • Contact us
  • Privacy Policy
  • Terms and Conditions

Copyright 2025 Manuals.Online. All Rights Reserved.