ELECTRONICS FOR SPECIALISTS ELECTRONICS FOR SPECIALISTS ELECTRONICS FOR SPECIALISTS ELECTRONICS FOR SPECIALISTS ELECTRONICS FOR SPECIALISTS ELECTRONICS
MONACOR INTERNATIONAL GmbH & Co. KG • Zum Falsch 36 • 28307 Bremen • Germany
Copyright©by MONACOR INTERNATIONAL. All rights reserved. A-0659.99.02.07.2017
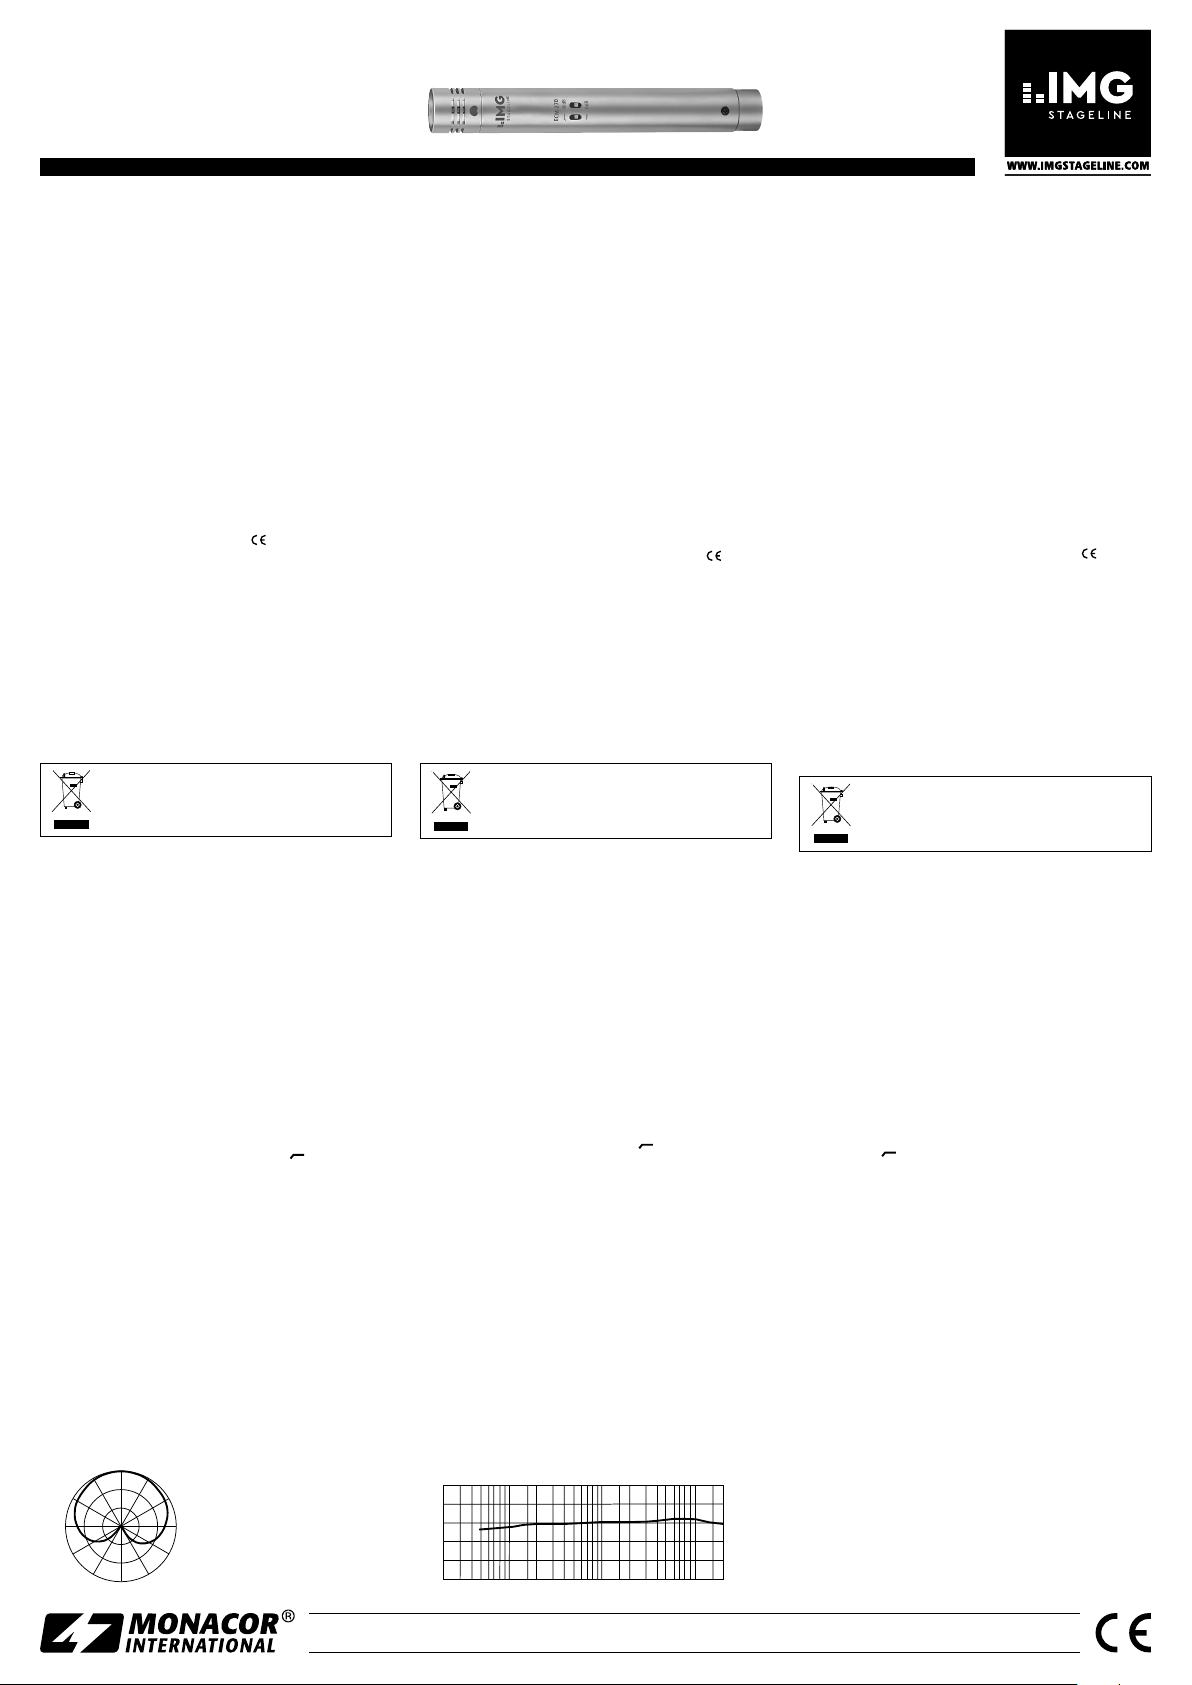
+20
+10
0
-10
-20
-30
50 100 200 500 1k 2k 5k 10k 20k(Hz)
(dB)
30°
330°
300° 60°
90°
120°
270°
240°
210°
150°
0°
ECM-270
Bestell-Nr. • Order No. 23.5140
➀ ➁
Profesjonalny mikrofon pojemnościowy
Niniejsza instrukcja przeznaczona jest dla użyt-
kowników posiadających co najmniej podsta-
wową wiedzą z zakresu technologii audio. Przed
rozpoczęciem użytkowania proszę zapoznać się
z instrukcją, a następnie zachować ją do wglądu.
1 Zastosowanie
Mikrofon ten jest przeznaczony do profesjonalnego
zastosowania studyjnego oraz estradowego, przy-
stosowany jest zarówno do zbierania dźwięku z in-
strumentów akustycznych (np. fortepianu, gitary czy
innych instrumentów strunowych), jak i do zbierania
dźwięku z góry (np. perkusji, chóru). Mikrofon wymaga
zasilania fantomowego ⎓48 V. W skład wyposażenia
mikrofonu wchodzą: stabilny futerał, antywibracyjny
wspornik mikrofonowy (krzyżak), zapasowa taśma dla
krzyżaka oraz wiatrochron/osłona mikrofonowa.
2 Bezpieczeństwo użytkowania
Mikrofon spełnia wymogi norm obowiązujących w
Unii Europejskiej, posiada więc oznaczenie .
•
Mikrofon przeznaczony jest tylko do zastosowań
wewnętrznych. Należy chronić go przez wodą, dużą
wilgotnością oraz wysokimi temperaturami. Dopusz-
czalny zakres 0–40°C.
•
Do czyszczenia urządzenia należy używać suchej,
miękkiej tkaniny. Nie wolno stosować wody ani che-
micznych środków czyszczących.
•
Producent ani dostawca nie ponoszą odpowiedzial-
ności za wynikłe szkody (uszkodzenie sprzętu lub
obrażenia użytkownika) jeśli mikrofon używano nie-
zgodnie z przeznaczeniem, nieprawidłowo zamon-
towano lub poddano nieautoryzowanej naprawie.
Po całkowitym zakończeniu eksploatacji
urządzenia należy oddać je do punktu uty-
lizacji odpadów, aby uniknąć zanieczyszcze-
nia środowiska.
3 Obsługa
1) Po przymocowaniu krzyżaka do statywu za pomocą
gwintu 15,9mm (
5⁄8”) należy założyć mikrofon, na-
stępnie nałożyć wiatrochron/osłonę mikrofonową.
Należy poluzować śrubę boczną przy krzyżaku,
ustawić mikrofon w stronę źródła sygnału, następ-
nie dokręcić śrubę.
2) Za pomocą kabla z wtykiem XLR należy podłączyć
mikrofon do wejścia mikrofonowego urządzenia
audio (np. miksera). Wejście musi być zasilane napię-
ciem fantomowym ⎓48V. Jeżeli urządzenie audio
nie dostarcza napięcia fantomowego, mikrofon na-
leży podłączyć do urządzenia audio przez zasilacz
fantomowy (np. EMA-3 z oferty IMG STAGELINE).
3) Aby wytłumić niskie częstotliwości należy włączyć
filtr górnoprzepustowy, ustawiając włącznik filtra
w pozycji .
4) Przy bardzo wysokim ciśnieniu akustycznym można
włączyć tłumienie 10dB jako zabezpieczenie przed
przeciążeniem kolejnych urządzeń: należy ustawić
włącznik tłumienia w pozycji “−10dB”.
4 Dane techniczne
System:� � � � � � � � � � � � � � � � � “back electret”/kardioida
Pasmo przenoszenia:� � � � � � � 50 – 18 000 Hz
Czułość, impedancja:� � � � � � � 5,6 mV/Pa przy 1 kHz, 200 Ω
Maks� ciśnienie akustyczne:� � 135 dB
Stosunek S/N: � � � � � � � � � � � � > 60 dB
Zasilanie: � � � � � � � � � � � � � � � fantomowe,
⎓
48V
Wymiary, waga: � � � � � � � � � �
⌀
20 mm × 150 mm, 140 g
Złącze: � � � � � � � � � � � � � � � � � XLR, symetryczne
Z zastrzeżeniem możliwości zmiany.
Micrófono condensador profesional
Estas instrucciones de funcionamiento van diri-
gidas a usuarios con conocimientos básicos en
audio. Lea atentamente estas instrucciones de
funcionamiento antes de utilizar el micrófono y
guárdelas para usos posteriores.
1 Aplicaciones
Este micrófono está diseñado para aplicaciones profe-
sionales en estudio y en directo y está indicado para
la toma de sonido cercano de instrumentos acústicos
(p.ej. piano, guitarra, instrumento de cuerda) y para la
toma de sonido overhead (p.ej. baterías, coro). Para el
funcionamiento, el micrófono necesita una alimenta-
ción phantom de ⎓48V. El micrófono se entrega con
un estuche estable, un soporte amortiguador de vibra-
ciones (araña), una cinta de recambio para la araña y
una protección anti-viento/anti-pop.
2 Notas importantes
El micrófono corresponde a todas las directivas rele-
vantes de la UE y por ello está marcado con .
•
El micrófono está adecuado sólo para utilizarlo en
interiores. Protéjalo contra goteos, salpicaduras y
humedad elevada. Rango de temperatura ambiente
admisible: 0–40°C.
•
Para limpiar el micrófono, utilice sólo un trapo seco
y suave; no utilice nunca productos químicos ni agua.
•
No podrá reclamarse garantía o responsabilidad al-
guna por cualquier daño personal o material resul-
tante si el micrófono se utiliza para otros fines dife-
rentes a los originalmente concebidos, si no se utiliza
adecuadamente o si no se repara por expertos.
Si va a poner el micrófono definitivamente
fuera de servicio, llévelo a la planta de reci-
claje más cercana para que su eliminación
no sea perjudicial para el medioambiente.
3 Funcionamiento
1) Atornille la araña a un pie con rosca de 15,9mm
(
5⁄8”) e inserte el micrófono. Coloque el protector
anti-viento/anti-pop si es necesario. Suelte el torni-
llo lateral en la araña, alinee el micrófono con la
fuente de sonido, luego vuelva a apretar el tornillo.
2) Conecte el micrófono mediante un cable con conec-
tor XLR a una entrada de micrófono del aparato
audio utilizado (p.ej. un mezclador). La entrada
debe tener una alimentación phantom de ⎓48V.
Si el aparato de audio no proporciona esa alimen-
tación phantom, conecte el micrófono al aparato
mediante un alimentador phantom (p.ej. EMA-3 de
IMG STAGELINE).
3) Para eliminar las bajas frecuencias (p.ej. sonido sub-
sónico), encienda el filtro pasa alto: ajuste el inte-
rruptor de filtro en la posición .
4) Con presiones de sonido muy altas, se puede encen-
der una atenuación de 10dB como protección contra
la sobrecarga de los aparatos subsiguientes: ajuste el
interruptor de atenuación en la posición “−10dB”.
4 Especificaciones
Sistema: � � � � � � � � � � � � � � � � back electret/cardioide
Rango de frecuencias:� � � � � � 50 – 18 000 Hz
Sensibilidad, impedancia: � � � 5,6 mV/Pa a 1 kHz, 200 Ω
Presión de sonido máx: � � � � � 135 dB
Relación señal/ruido: � � � � � � > 60 dB
Alimentación: � � � � � � � � � � � � alimentación phantom
⎓
48V
Dimensiones, peso: � � � � � � � �
⌀
20 mm × 150 mm, 140 g
Conexión: � � � � � � � � � � � � � � � XLR, simétrica
Sujeto a modificaciones técnicas.
Microfono professionale
a condensatore
Queste istruzioni sono rivolte a utenti con cono-
scenze base nella tecnica audio. Vi preghiamo di
leggerle attentamente prima dell’installazione e
di conservarle per un uso futuro.
1 Possibilità d’impiego
Questo microfono è stato realizzato per impieghi pro-
fessionali negli studi e dal vivo e si presta sia per il
prelievo da vicino del suono di strumenti acustici (p. es.
pianoforte, chitarra, archi) che per il prelievo overhead
del suono (p.es. batteria, canto di un coro). Per il fun-
zionamento richiede un’alimentazione phantom di
⎓48V. Sono in dotazione una robusta valigetta, un
supporto (spider) ammortizzante le vibrazioni, un na-
stro di ricambio per lo spider e una spugna antivento.
2 Avvertenze importanti per l’uso
Il microfono è conforme a tutte le direttive rilevanti
dell’UE e pertanto porta la sigla .
•
Usare il microfono solo all’interno di locali e proteg-
gerlo dall’acqua gocciolante e dagli spruzzi d’acqua
nonché da alta umidità dell’aria. La temperatura d’e-
sercizio ammessa è 0–40°C.
•
Per la pulizia usare solo un panno morbido, asciutto;
non impiegare in nessun caso prodotti chimici o
acqua.
•
Nel caso d’uso improprio, di collegamenti sbagliati
o di riparazione non a regola d’arte del microfono,
non si assume nessuna responsabilità per eventuali
danni consequenziali a persone o a cose e non si as-
sume nessuna garanzia per il microfono.
Se si desidera eliminare il microfono defini-
tivamente, consegnarlo per lo smaltimento
ad un’istituzione locale per il riciclaggio.
3 Messa in funzione
1) Avvitare lo spider su uno stativo con filettatura
15,9mm (5⁄8”) e spingere il microfono nello spider.
Se necessario montare la spugnetta antivento. Al-
lentare la vite laterale dello spider, orientare il mi-
crofono sulla sorgente sonora e stringere di nuovo
la vite.
2) Collegare il microfono con l’ingresso microfono
della apparecchio audio usato (p.es. di un mixer)
servendosi di un cavo con connettore XLR. L’ingresso
deve aver un’alimentazione phantom di ⎓48V. Nel
caso tale alimentazione non fosse disponibile, oc-
corre collegare il microfono con l’apparecchio audio
attraverso un alimentatore phantom (p.es. EMA-3 di
IMG STAGELINE).
3) Per sopprimere le frequenze basse (p.es. vibrazioni
da passi) si può attivare il filtro passaalto: spostare
l’interruttore del filtro in posizione .
4) Nel caso di pressioni sonore molto alte, per proteg-
gere gli apparecchi a valle dal sovrapilotaggio, si
può attivare un’attenuazione di 10dB: spostare il
relativo interruttore in posizione “−10dB”.
4 Dati tecnici
Sistema: � � � � � � � � � � � � � � � � back-elektret/cardioide
Gamma di frequenze: � � � � � � 50 – 18 000 Hz
Sensibilità, impedenza: � � � � � 5,6 mV/Pa con 1 kHz, 200 Ω
Pressione sonora max�: � � � � � 135 dB
Rapporto S/R: � � � � � � � � � � � � > 60 dB
Alimentazione: � � � � � � � � � � � alimentazione phantom
⎓
48V
Dimensioni, peso: � � � � � � � � �
⌀
20 mm × 150 mm, 140 g
Collegamento: � � � � � � � � � � � XLR, simmetrico
Con riserva di modifiche tecniche.
Italiano
Español
Polski
Risposta in frequenza
Respuesta de frecuencia
Charakterystyka częstotliwościowa
Caratteristica direzionale
Directividad
Charakterystyka kierunkowa


