manuals.online logo
Brands
  1. Home
  2. •
  3. Brands
  4. •
  5. Monacor
  6. •
  7. Microphone
  8. •
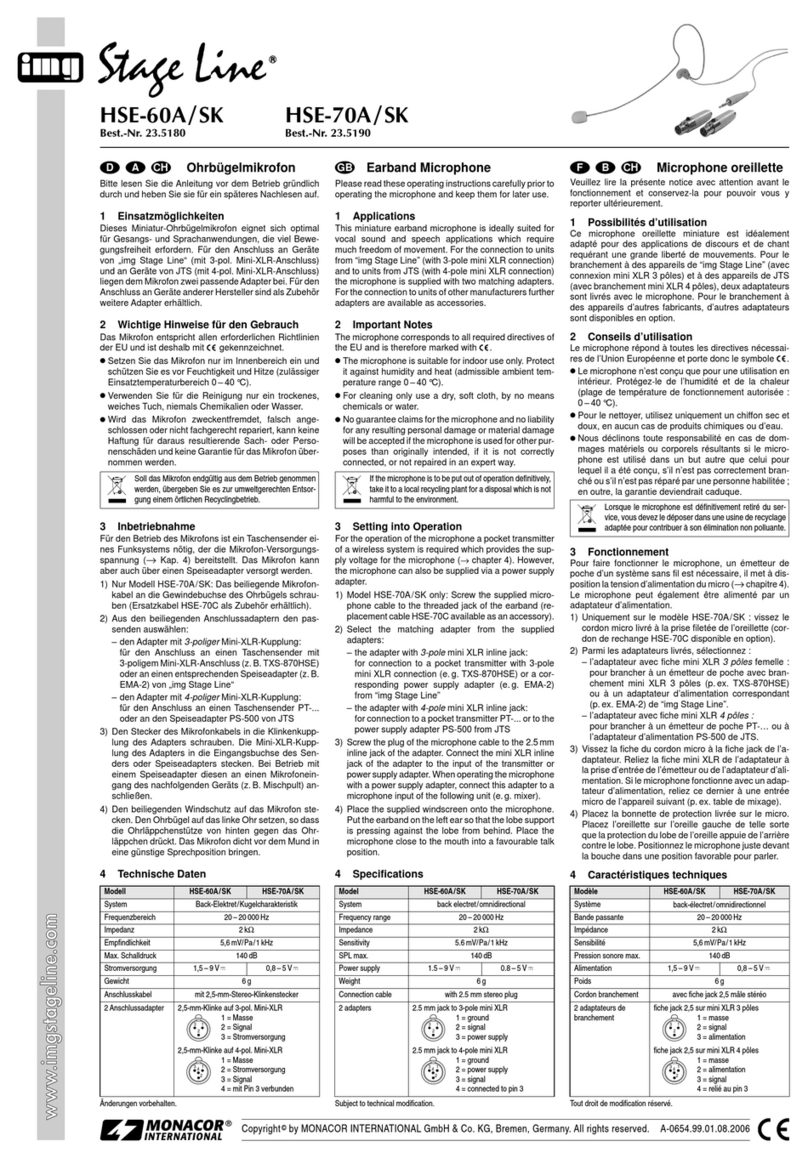
  9. Monacor ECM-500 User manual

Monacor ECM-500 User manual

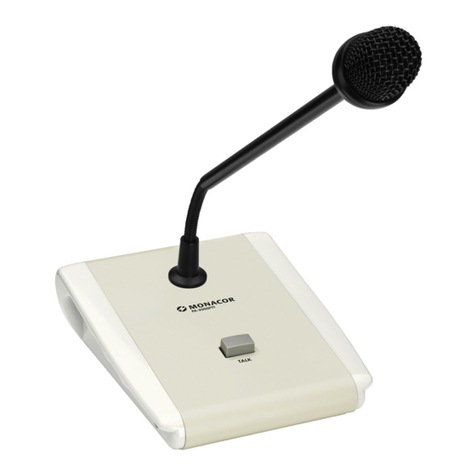
ELA-Tischmikrofon
Bitte lesen Sie diese Bedienungsanleitung vor dem Be-
trieb gründlich durch und heben Sie sie für ein späteres
Nachlesen auf.
1 Bedienelemente und Anschlüsse
1Leuchtring zur Betriebsanzeige
2Ein-/Ausschalter
3Steckbuchse für den Schwanenhals
4Entriegelungstaste für den Schwanenhals
5XLR-Ausgangsbuchse zum Anschluss an den Mikro-
foneingang eines Verstärkers oder Mischpults
2 Wichtige Hinweise für den Gebrauch
Das Mikrofon entspricht allen erforderlichen Richtlinien
der EU und ist deshalb mit gekennzeichnet.
GDas Mikrofon ist nur zur Verwendung im Innenbereich
geeignet. Schützen Sie es vor Feuchtigkeit und Hitze
(zulässiger Einsatztemperaturbereich 0 – 40 °C).
GVerwenden Sie für die Reinigung nur ein trockenes, wei-
ches Tuch, auf keinen Fall Chemikalien oder Wasser.
GWird das Mikrofon zweckentfremdet, falsch bedient
oder nicht fachgerecht repariert, kann keine Haftung für
daraus resultierende Sach- oder Personenschäden und
keine Garantie für das Mikrofon übernommen werden.
3 Einsatzmöglichkeiten
Dieses Tischmikrofon mit Schwanenhals ist speziell für
den Einsatz in ELA-Anlagen konzipiert sowie für weitere
Anwendungen, bei denen ein standfestes Tischmikrofon
für Durchsagen, Vorträge oder sonstige Sprachübertra-
gung benötigt wird.
Soll das Mikrofon endgültig aus dem Betrieb ge-
nommen werden, übergeben Sie es zur umwelt-
gerechten Entsorgung einem örtlichen Recyc-
lingbetrieb.
Werfen Sie verbrauchte Batterien nicht in den Hausmüll,
sondern geben Sie sie nur in den Sondermüll (z. B.
Sammelbehälter bei Ihrem Elektrofachhändler).
PA Desk Microphone
Please read these operating instructions carefully prior to
operating the microphone and keep them for later reference.
1 Operating Elements and Connections
1Lighting ring as operating indication
2On/off switch
3Plug-in jack for the gooseneck
4Unlocking button for the gooseneck
5XLR output jack for the connection to the microphone
input of an amplifier or mixer
2 Important Notes
The microphone corresponds to all required directives of
the EU and is therefore marked with .
GThe microphone is suitable for indoor use only. Protect
it against humidity and heat (admissible ambient tem-
perature range 0 – 40 °C).
GFor cleaning only use a dry, soft cloth, by no means
chemicals or water.
GNo guarantee claims for the microphone and no liabil-
ity for any resulting personal damage or material dam-
age will be accepted if the microphone is used for other
purposes than originally intended, if it is not correctly
operated or not repaired in an expert way.
3 Applications
This desk microphone with gooseneck has especially been
designed for applications in PA systems as well as for other
applications which require a stable desk microphone for
announcements, lectures, or other speech transmission.
If the microphone is to be put out of operation
definitively, take it to a local recycling plant for
a disposal which is not harmful to the environ-
ment.
Do not throw exhausted batteries into the household
rubbish but take them to the special waste disposal (e. g.
collective container at your electrical supply shop).
4 Inserting or Replacing of Batteries
The electret microphone requires two 1.5 V batteries of
AA size for the operation.
1)
Take off the two battery compartment covers on the bot-
tom side of the base. Remove the exhausted batteries.
2) Insert two batteries as printed in each battery compart-
ment. Close the battery compartments again.
5 Connecting of the Microphone
1) Connect the gooseneck to the jack (3) of the base so
that it locks into place. [To unlock the gooseneck, press
the unlocking button (4).]
2) Connect the XLR output jack (5) to the microphone
input of an amplifer or mixer.
6 Operation
1) For talking, switch on the microphone with the sliding
switch (2) [upper position]. The red ring (1) lights up.
2) After operation do not forget to switch off the micro-
phone, otherwise the batteries will be exhausted when
using the microphone next time.
3) If not in use for a longer time, the batteries should be
taken out. Thus, the microphone will not be damaged
in case the batteries should leak.
7 Specifications
Frequency range: . . . . . . 100 – 16 000 Hz
Sensitivity: . . . . . . . . . . . . 3.9 mV/Pa at 1 kHz
Directivity: . . . . . . . . . . . . unidirectional
Impedance: . . . . . . . . . . . 600 Ω
S/N ratio: . . . . . . . . . . . . . > 40 dB
Ambient temperature: . . . 0 – 40 °C
Power supply: . . . . . . . . . 2 × 1.5 V batteries of AA size
Dimensions
base: . . . . . . . . . . . . . . 135 × 60 × 145 mm
gooseneck length: . . . . 450 mm
Weight: . . . . . . . . . . . . . . . 1.5 kg
Subject to technical change.
ECM-500 Best.-Nr. 23.2550
2345
1
D A CH
GB
4 Batterien einsetzen oder auswechseln
Das Elektret-Mikrofon benötigt für den Betrieb zwei 1,5-V-
Batterien vom Typ Mignon (AA).
1) Auf der Unterseite des Standfußes die zwei Batteriefach-
deckel abnehmen. Verbrauchte Batterien entnehmen.
2) Zwei Batterien, wie jeweils im Batteriefach aufgedruckt,
einsetzen. Die Batteriefächer wieder schließen.
5 Mikrofon anschließen
1) Den Schwanenhals in die Buchse (3) des Standfußes
stecken, sodass er einrastet. [Zum Herausziehen des
Schwanenhalses die Entriegelungstaste (4) drücken.]
2) Die XLR-Ausgangsbuchse (5) an den Mikrofoneingang
eines Verstärkers oder Mischpults anschließen.
6 Bedienung
1) Zum Sprechen das Mikrofon mit dem Schiebeschalter
(2) einschalten (obere Position). Der rote Ring (1)
leuchtet.
2) Nach dem Gebrauch nicht vergessen, das Mikrofon
auszuschalten, sonst sind bei dem nächsten Betrieb
die Batterien verbraucht.
3) Bei längerem Nichtgebrauch sollten die Batterien
herausgenommen werden. So bleibt das Mikrofon
bei einem eventuellen Auslaufen der Batterien unbe-
schädigt.
7 Technische Daten
Frequenzbereich: . . . . . . . 100 – 16 000 Hz
Empfindlichkeit: . . . . . . . . 3,9 mV/Pa bei 1 kHz
Richtcharakteristik: . . . . . Niere
Impedanz: . . . . . . . . . . . . 600 Ω
Signal/Rauschabstand: . . > 40 dB
Einsatztemperatur: . . . . . . 0 – 40 °C
Stromversorgung: . . . . . . 2 × 1,5-V-Mignonbatterie (AA)
Abmessungen
Standfuß: . . . . . . . . . . . 135 × 60 × 145 mm
Schwanenhalslänge: . . 450 mm
Gewicht: . . . . . . . . . . . . . . 1,5 kg
Änderungen vorbehalten.
MONACOR INTERNATIONAL GmbH & Co. KG • Zum Falsch 36 • 28307 Bremen • Germany
Copyright©by MONACOR INTERNATIONAL. All rights reserved. A-1248.99.02.05.2011
®
Microphone de table
Public Address
Veuillez lire la présente notice avec attention avant le fonctionne-
ment et conservez-la pour pouvoir vous y reporter ultérieurement.
1 Eléments et branchements
1Anneau lumineux : témoin de fonctionnement
2Interrupteur Marche/Arrêt
3Prise de branchement du col de cygne
4Touche de déverrouillage du col de cygne
5Prise de sortie XLR : à brancher à lʼentrée micro dʼun
amplificateur ou dʼune table de mixage
2 Conseils importants dʼutilisation
Le microphone répond à toutes les directives nécessaires
de lʼUnion européenne et porte donc le symbole .
GLe microphone est conçu uniquement pour une utilisa-
tion en intérieur : protégez-le de lʼhumidité et de la
chaleur (température dʼutilisation admissible 0 – 40 °C).
GPour le nettoyer, utilisez un chiffon sec et doux, en
aucun cas de produits chimiques ou dʼeau.
GNous déclinons toute responsabilité en cas de dom-
mages matériels ou corporels résultants si le micro-
phone est utilisé dans un but autre que celui pour le-
quel il a été conçu, sʼil nʼest pas correctement utilisé ou
sʼil nʼest pas réparé par une personne habilitée ; en
outre, la garantie deviendrait caduque.
3 Possibilités dʼutilisation
Le ECM-500 est un microphone de table avec col de cygne,
spécialement conçu pour une utilisation dans des installa-
tions de Public Address, ainsi que pour les cas où un micro
Lorsque le microphone est définitivement retiré
du service, vous devez le déposer dans une
usine de recyclage adaptée pour contribuer à
son élimination non polluante.
Ne jetez pas directement les batteries usagées dans la
poubelle domestique, ramenez-les à un container spéci-
fique (p. ex. un collecteur chez votre revendeur).
fixe de table est nécessaire pour des annonces micro,
des conférences ou dʼautres transmissions de la parole.
4 Insertion ou remplacement des batteries
Le microphone électret requiert deux batteries 1,5 V de
type AA pour lʼopération.
1) Retirez les deux couvercles des compartiments batte-
rie situés sous le support du micro et enlevez les bat-
teries usagées.
2) Placez les deux batteries comme indiqué dans les com-
partiments batterie, puis refermez les compartiments.
5 Branchement micro
1) Placez le col de cygne dans la prise (3) du support jus-
quʼà ce quʼil sʼenclenche. [Pour retirer le col de cygne,
enfoncez la touche (4).]
2) Connectez la prise de sortie XLR (5) à lʼentrée micro
dʼun amplificateur ou dʼune table de mixage.
6 Utilisation
1) Pour parler, allumez le micro avec lʼinterrupteur (2) [po-
sition supérieure] : lʼanneau rouge (1) sʼallume.
2) Après utilisation, nʼoubliez pas dʼéteindre le micro de
manière à conserver les batteries en état pour lʼopéra-
tion prochaine.
3) En cas de non utilisation prolongée, pensez à retirer
les batteries ; on évite ainsi tout dégât sur le micro dans
le cas où les batteries couleraient.
7 Caractéristiques techniques
Bande passante : . . . . . . . 100 – 16 000 Hz
Sensibilité : . . . . . . . . . . . 3,9 mV/Pa à 1 kHz
Directivité : . . . . . . . . . . . . cardioïde
Impédance : . . . . . . . . . . . 600 Ω
Rapport signal/bruit : . . . . > 40 dB
Température dʼutilisation : 0 – 40 °C
Alimentation : . . . . . . . . . . 2 × pile 1,5 V type AA
Dimensions
support : . . . . . . . . . . . 135 × 60 × 145 mm
longueur col de cygne : 450 mm
Poids : . . . . . . . . . . . . . . . 1,5 kg
Tout droit de modification réservé.
Microfono PA da tavolo
Vi preghiamo di leggere attentamente le presenti istru-
zioni prima della messa in funzione e di conservarle per
un uso futuro.
1 Elementi di comando e collegamenti
1Anello luminoso come spia di funzionamento
2Interruttore on/off
3Presa per il collo di cigno
4Tasto sblocco per il collo di cigno
5Presa dʼuscita XLR per il collegamento con lʼingresso
micro di un amplificatore o di un mixer
2 Avvertenze importanti per lʼuso
Il microfono è conforme a tutte le direttive richieste del-
lʼUE e pertanto porta la sigla .
GLo strumento è previsto solo per lʼuso allʼinterno di lo-
cali. Proteggerlo dallʼumidità e dal calore (temperatura
dʼimpiego ammessa fra 0 e 40 °C).
GPer la pulizia usare solo un panno morbido, asciutto;
non impiegare in nessun caso prodotti chimici o acqua.
GNel caso dʼuso improprio, dʼimpiego scorretto o di ripa-
razione non a regola dʼarte del microfono, non si as-
sume nessuna responsabilità per eventuali danni con-
sequenziali a persone o a cose e non si assume nes-
suna garanzia per il microfono.
3 Possibilità dʼimpiego
Questo microfono da tavolo con collo di cigno è stato rea-
lizzato specialmente per lʼimpiego in impianti PA nonché
per altri impieghi che richiedono un microfono con piede
stabile per avvisi, conferenze ed usi simili.
Se si desidera eliminare il microfono definiti-
vamente, consegnarlo per lo smaltimento ad
unʼistituzione locale per il riciclaggio.
Non gettare le batterie scariche nei rifiuti di casa bensì
negli appositi raccoglitori.
4 Inserire o sostituire le batterie
Il microfono a elettrete richiede due batterie 1,5 V del tipo
mignon (AA).
1) Togliere i due coperchi dei vani batterie siti sul lato in-
feriore del piede. Togliere le batterie scariche.
2) Inserire due batterie secondo la sovrastampa nel vano
batterie. Richiudere i vani batterie.
5 Collegare il microfono
1) Inserire il collo di cigno nella sua presa (3) del piede
fino allo scatto. [Per sfilarlo, premere il tasto di sbloc-
co (4)].
2) Collegare la presa dʼuscita XLR (5) con lʼingresso
micro di un amplificatore o di un mixer.
6 Funzionamento
1) Per parlare, accendere il microfono con lʼinterruttore
(2) [posizione superiore]. Si accende lʼanello rosso (1).
2) Dopo lʼuso non dimenticare di spegnere il microfono
per non consumare inutilmente le batterie.
3) Nel caso di non utilizzo prolungato conviene togliere le
batterie per non danneggiare il microfono se le batterie
perdono.
7 Dati tecnici
Banda passante: . . . . . . . 100 – 16 000 Hz
Sensibilità: . . . . . . . . . . . . 3,9 mV/Pa a 1 kHz
Caratteristica: . . . . . . . . . . a cardioide
Impedenza: . . . . . . . . . . . 600 Ω
Rapporto S/R: . . . . . . . . . > 40 dB
Temperatura dʼimpiego: . . 0 – 40 °C
Alimentazione: . . . . . . . . . 2 × batterie mignon (AA)
a 1,5 V
Dimensioni
Piede: . . . . . . . . . . . . . 135 × 60 × 145 mm
Lunghezza collo
di cigno: . . . . . . . . . . . . 450 mm
Peso: . . . . . . . . . . . . . . . . 1,5 kg
Con riserva di modifiche tecniche.
ECM-500 Best.-Nr. 23.2550
2345
1
I
F B CH
MONACOR INTERNATIONAL GmbH & Co. KG • Zum Falsch 36 • 28307 Bremen • Germany
Copyright©by MONACOR INTERNATIONAL. All rights reserved. A-1248.99.02.05.2011
®

This manual suits for next models

2

Other Monacor Microphone manuals

Monacor DM-3 User manual

Monacor

Monacor DM-3 User manual

Monacor DMG-450 User manual

Monacor

Monacor DMG-450 User manual

Monacor img Stage Line ECM-302B User manual

Monacor

Monacor img Stage Line ECM-302B User manual

Monacor HM-30 User manual

Monacor

Monacor HM-30 User manual

Monacor DM-500USB User manual

Monacor

Monacor DM-500USB User manual

Monacor TXM-48 User manual

Monacor

Monacor TXM-48 User manual

Monacor HSE-90 User manual

Monacor

Monacor HSE-90 User manual

Monacor JTS ST-5000 User manual

Monacor

Monacor JTS ST-5000 User manual

Monacor HSE-86 User manual

Monacor

Monacor HSE-86 User manual

Monacor PA ECM-450 User manual

Monacor

Monacor PA ECM-450 User manual

Monacor IMG STAGELINE ECM-881L User manual

Monacor

Monacor IMG STAGELINE ECM-881L User manual

Monacor DMS-1 User manual

Monacor

Monacor DMS-1 User manual

Monacor PDM-300 User manual

Monacor

Monacor PDM-300 User manual

Monacor img Stage Line HSE-130/SK User manual

Monacor

Monacor img Stage Line HSE-130/SK User manual

Monacor IMG Stageline ECM-300D User manual

Monacor

Monacor IMG Stageline ECM-300D User manual

Monacor IMG Stageline DM-720 User manual

Monacor

Monacor IMG Stageline DM-720 User manual

Monacor IMG Stageline HSE-150A/SK User manual

Monacor

Monacor IMG Stageline HSE-150A/SK User manual

Monacor ECM-925P User manual

Monacor

Monacor ECM-925P User manual

Monacor EMG-330P User manual

Monacor

Monacor EMG-330P User manual

Monacor img Stage Line DM-1000 User manual

Monacor

Monacor img Stage Line DM-1000 User manual

Monacor JTS RU-850LTH/5 User manual

Monacor

Monacor JTS RU-850LTH/5 User manual

Monacor img Stage Line DM-101 User manual

Monacor

Monacor img Stage Line DM-101 User manual

Monacor IMG STAGELINE ECM-201 User manual

Monacor

Monacor IMG STAGELINE ECM-201 User manual

Monacor Stage Line TXS-820SX User manual

Monacor

Monacor Stage Line TXS-820SX User manual

Popular Microphone manuals by other brands

Alderon Industries Mini Power Post MPMS-0001 manual

Alderon Industries

Alderon Industries Mini Power Post MPMS-0001 manual

Comica CVM-VS07 user manual

Comica

Comica CVM-VS07 user manual

Audio Technica ATR1100x quick start guide

Audio Technica

Audio Technica ATR1100x quick start guide

Radio Shack 33-3024 owner's manual

Radio Shack

Radio Shack 33-3024 owner's manual

Audio Technica ES964 user manual

Audio Technica

Audio Technica ES964 user manual

Pure Acoustics MKV-200 User & safety precaution guide

Pure Acoustics

Pure Acoustics MKV-200 User & safety precaution guide

Biamp Tesira TCM-1 Operation manual

Biamp

Biamp Tesira TCM-1 Operation manual

Sterling PERFORMANCE Series owner's manual

Sterling

Sterling PERFORMANCE Series owner's manual

DPA 5100 user manual

DPA

DPA 5100 user manual

Cochlear CP900 Series quick guide

Cochlear

Cochlear CP900 Series quick guide

Icom IC-7000 Modification instruction

Icom

Icom IC-7000 Modification instruction

AKG CBL 410 PCC User instructions

AKG

AKG CBL 410 PCC User instructions

Aplex ARCHMI-7XX user manual

Aplex

Aplex ARCHMI-7XX user manual

Hama DM-40 operating instructions

Hama

Hama DM-40 operating instructions

Paso Sound Products RDU216 Installation manual and operating instructions

Paso Sound Products

Paso Sound Products RDU216 Installation manual and operating instructions

Synco V2 user manual

Synco

Synco V2 user manual

Audio Technica ES947 Specifications

Audio Technica

Audio Technica ES947 Specifications

Cisco Profile Series installation guide

Cisco

Cisco Profile Series installation guide

manuals.online logo
manuals.online logoBrands
  • About & Mission
  • Contact us
  • Privacy Policy
  • Terms and Conditions

Copyright 2025 Manuals.Online. All Rights Reserved.