NORMAL TELE
NORMAL TELE
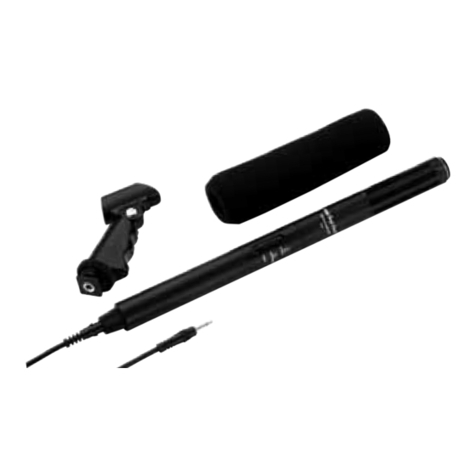
Elektret-Richtmikrofon
Einsatzmöglichkeiten
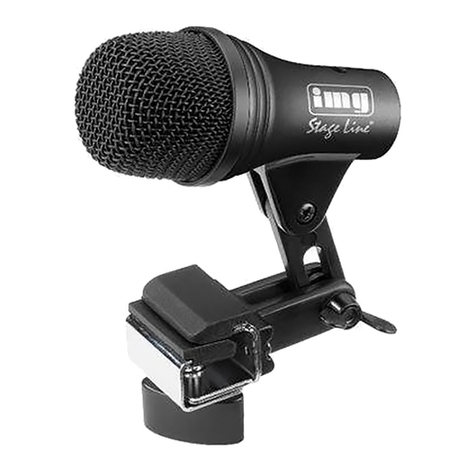
Das Elektret-Richtmikrofon ECM-950 mit umschalt-
barer Richtcharakteristik (Niere/Superniere) ist be-
sonders fürAufnahmen geeignet, bei denen wegen
störender Nebengeräusche eine starke Richtwir-
kung erforderlich ist, z.B. bei Außenaufnahmen für
Video- und Filmproduktionen.
Zum Lieferumfang gehören eine Kunststoffbox,
ein Mikrofonhalter, ein Windschutz sowie zwei
Anschlusskabel.
Hinweise für den sicheren Gebrauch
Das Mikrofon entspricht der EMV-Richtlinie für elek-
tromagnetische Verträglichkeit 89/336/EWG.
●Schützen Sie das Mikrofon vor Feuchtigkeit und
Hitze (zulässiger Einsatztemperaturbereich 0°C
bis 40°C). Das Mikrofon ist nicht wetterfest. Ach-
ten Sie deshalb beiAußenaufnahmen auf Schutz
vor Regen und sonstigem Niederschlag.
●Verwenden Sie zum Reinigen nur ein trockenes,
weichesTuch,niemalsChemikalien oderWasser.
●Wirddas Mikrofon zweckentfremdet,falsch ange-
schlossen oder nicht fachgerecht repariert, kann
keine Haftung für daraus resultierende Sach-
oder Personenschäden und keine Garantie für
das Mikrofon übernommen werden.
Directional Electret Microphone
Applications
The directional electret microphone ECM-950 with
selectable pick-up characteristic (cardioid/super-
cardioid) is ideally suited for recordings requiring a
highdirectivity due to interferingambient noise, e.g.
in case of outdoor recordings for video and film pro-
ductions.
The microphone is supplied with a plastic case,
amicrophoneholder,a windshield,and two connec-
tion cables.
Safety Notes
The microphone corresponds to the directive for
electromagnetic compatibility 89/336/EEC.
●Protectthe microphoneagainst humidityand heat
(admissible ambient temperature range 0°C to
40°C). The microphone is not weatherproof; pro-
tect it against rain or other precipitation when
making outdoor recordings.
●For cleaning only use a dry, soft cloth, by no
means chemicals or water.
●No guarantee claims for the microphone or liabil-
ity for any resulting personal damage or material
damage will be accepted if the microphone is
used for other purposes than originally intended,
if it is not correctly connected, or not repaired in
an expert way.
●Exhausted batteries do not belong in the house-
hold rubbish, always take them to a special waste
disposal(e.g. collectingcontainer atyour retailer).
●If the microphone is to be put out of operation
definitively, take it to a local recycling plant for a
disposal which is not harmful to the environment.
Setting the Microphone into Operation
1) Unscrew the screw cap at the lower end of the
microphone. Insert a 1.5V battery of size AA
according to the imprint in the battery compart-
ment.
If the microphone is not used for a longer
period (e.g. for more than a week), the battery
should be removed to prevent damage due to
battery leakage.
2) Via a 6.35mm (1/4") thread, the microphone
holder can e.g. be fastened directly to a cam-
corder. However, for screwing the microphone
onto a stand with 16mm (5/8") thread, unscrew
the thread adapter on the microphone holder.
Insert the microphone into the holder. Place
the windshield, if required.
3) Connect the microphone to the following unit via
its 3.5mm jack; either use the 50cm helix cable
(e.g. to a camcorder) or the 7.5m cable (e.g. to
a tape recorder).
Always connect the cable end with the screw
locking device to the jack on the microphone and
secure it. This will ensure that the plug is not be
pulled out during operation.
4) Use the sliding switch on the microphone to se-
lect the pick-up pattern:
NORMAL = cardioid, TELE = supercardioid
Thus, the microphone is switched on.
5) To switch off the microphone, set the sliding
switch to the lower position (OFF).
Specifications
Pick-up pattern: . . . . . . . . cardioid/supercardioid
Frequency range: . . . . . . . 50–16000Hz
Sensitivity, impedance
NORMAL (cardioid): . . 3 mV/Pa at 1kHz,
1kΩ
TELE (supercardioid): . 22mV/Pa at 1kHz,
2.3kΩ
Max. SPL: . . . . . . . . . . . . 115dB
S/N ratio: . . . . . . . . . . . . . 60dB
Power supply: . . . . . . . . . 1.5V battery of size AA
(battery not supplied)
Ambient temperature: . . . 0–40°C
Dimensions: . . . . . . . . . . . Ø 22mm x 280mm
Weight: . . . . . . . . . . . . . . . 350g
Microphone connection: . . 3.5mm jack, mono
According to the manufacturer. Subject to technical change.
GB
ECM-950
Best.-Nr. 23.3280
wwwwww..iimmggssttaaggeelliinnee..ccoomm
D A CH Dabei immer das Kabelende mit der Schraub-
sicherung in die Buchse am Mikrofon stecken
und verschrauben, um ein Herausziehen des
Steckers während des Betriebs zu verhindern.
4) Mit dem Schiebeschalter am Mikrofon die Richt-
charakteristik auswählen:
NORMAL = Niere, TELE = Superniere
Das Mikrofon ist damit eingeschaltet.
5) Zum Abschalten des Mikrofons den Schiebe-
schalter in die untere Position OFF stellen.
Technische Daten
Richtcharakteristik: . . . . . Niere/Superniere
Frequenzbereich: . . . . . . . 50–16000Hz
Empfindlichkeit, Impedanz
NORMAL (Niere): . . . . 3mV/Pa bei 1kHz,
1kΩ
TELE (Superniere): . . . 22mV/Pa bei 1kHz,
2,3kΩ
Max. Schalldruck: . . . . . . 115dB
Signal-Rausch-Abstand: . 60dB
Stromversorgung: . . . . . . 1,5-V-Batterie der
Größe Mignon (AA)
[nicht mitgeliefert]
Einsatztemperatur: . . . . . . 0–40°C
Abmessungen: . . . . . . . . . Ø 22mm x 280mm
Gewicht: . . . . . . . . . . . . . . 350g
Mikrofonanschluss: . . . . . 3,5-mm-Klinke, mono
Laut Angaben des Herstellers. Änderungen vorbehalten.
●Werfen Sie verbrauchte Batterien nicht in den
Hausmüll, sondern geben Sie sie nur in den Son-
dermüll (z.B. Sammelbehälter bei Ihrem Einzel-
händler).
●Soll das Mikrofon endgültig aus dem Betrieb ge-
nommen werden, übergeben Sie es zur umwelt-
freundlichen Entsorgung einem örtlichen Recyc-
lingbetrieb.
Inbetriebnahme
1) Die Schraubhülse am unteren Mikrofonende ab-
schrauben. Eine 1,5-V-Mignonbatterie (AA) ge-
mäß dem Aufdruck im Batteriefach einsetzen.
Wird das Mikrofon länger nicht benutzt (z.B.
länger als eine Woche), sollte die Batterie her-
ausgenommen werden, um Schäden durch ein
eventuellesAuslaufen der Batterie zu vermeiden.
2) Der Mikrofonhalter lässt sich über ein Fotoge-
winde(6,35mm/1/4"), z.B.direkt amCamcorder,
befestigen. Soll das Mikrofon dagegen auf ein
Stativ mit 16-mm-Gewinde (5/8") geschraubt
werden, den Fotogewinde-Adapter am Mikrofon-
halter abschrauben.
Das Mikrofon in den Halter stecken. Bei Be-
darf den Windschutz überziehen.
3) Das Mikrofon über seine 3,5-mm-Klinkenbuchse
an das nachfolgende Gerät anschließen, entwe-
der mit dem 50-cm-Spiralkabel (z.B. an einen
Camcorder) oder mit dem 7,5-m-Kabel (z.B. an
ein Tonbandgerät).
Copyright©by MONACOR INTERNATIONAL GmbH & Co. KG, Bremen, Germany. All rights reserved. A-0132.99.01.08.2003
®

