manuals.online logo
Brands
  1. Home
  2. •
  3. Brands
  4. •
  5. Monacor
  6. •
  7. Power Supply
  8. •
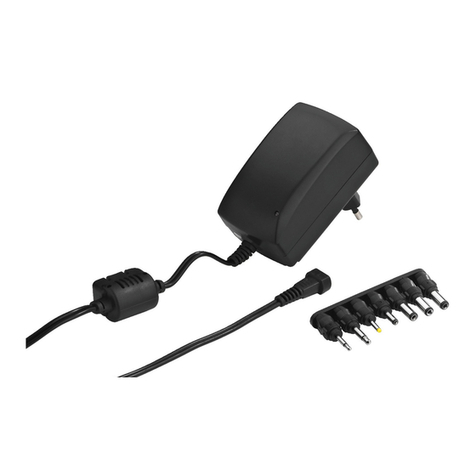
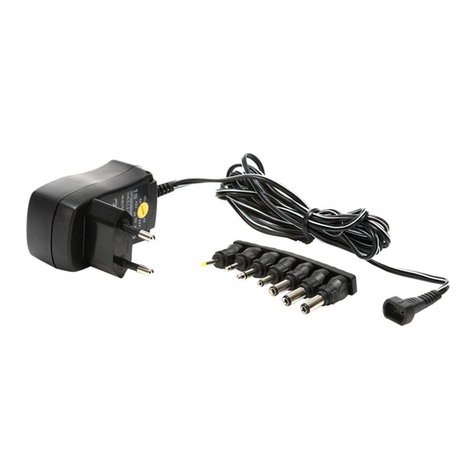
  9. Monacor PS-300XC User manual

Monacor PS-300XC User manual

aufnahme des zu speisenden Geräts darf den Ausgangs-
strom des Netzgeräts nicht überschreiten.
2) Aus den 4 Adaptersteckern den passenden Stecker für das
zu speisende Gerät auswählen und in die Kupplung des
Netzgerätkabelsstecken.Dabeiunbedingt diefürdasGerät
erforderliche Polarität beachten! Zum Bestimmen der Pola-
rität die Kupplung so drehen, dass die Pfeile von Kupplung
und Stecker aufeinander zeigen (siehe Abbildungen).
3) Das Netzgerät über den Adapterstecker an die Stromver-
sorgungsbuchse des zu speisenden Geräts anschließen.
4) Zuletzt das Netzgerät in eine Steckdose (230V~/50Hz)
stecken. Die rote LED leuchtet im Betrieb.
Auch wenn das angeschlossene Gerät ausgeschaltet ist, ver-
braucht das Netzgerät einen geringen Strom. Darum sollte es
bei längerem Nichtgebrauch vom Stromnetz getrennt werden.
4 Technische Daten
Eingangsspannung: . . 230V~/50 Hz/9VA
Ausgangsspannungen: 1,5/3/4,5/6/7,5/9/12V
Ausgangsstrom: . . . . . max. 300mA
Maße, Gewicht:. . . . . . 53x 44x 66mm, 225g
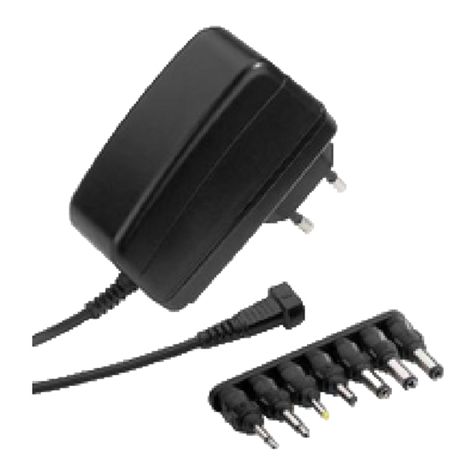
4 Adapterstecker
2 Klinkenstecker: . . . Ø 2,5mm (A) und 3,5mm (B)
2 Hohlstecker. . . . . . Ø außen/innen in mm:
5,5/2,1 (E), 5,5/2,5 (G)
Änderungen vorbehalten.
+
-
+
-
3.5 5.5X2.1
+
-
B
+
-
+
-
E
+
-
Positive pole at the tip/at the inner contact Negative pole at the tip/at the inner contact
+
-
+
-
3.5 5.5X2.1
+
-
B
+
-
+
-
E
+
-
Pôle plus à la pointe / au contact intérieur Pôle moins à la pointe / au contact intérieur
Bloc alimentation
Veuillez lire la présente notice avec attention avant le fonc-
tionnement et conservez-la pour pouvoir vous y reporter
ultérieurement.
1 Possibilités d’utilisation
Ce bloc secteur avec tension de sortie commutable sert à l’ali-
mentation courant continu d’appareils électriques basse ten-
sion (par exemple radio portative, calculatrice de poche).
2 Conseils d’utilisation et de sécurité
Cet appareil répond à toutes les directives nécessaires de
l’Union Européenne et porte donc le symbole .
●L’appareil n’est conçu que pour une utilisation en inté-
rieur. Protégez-le de tout type de projections d’eau, des écla-
boussures, d’une humidité élevée et de la chaleur (plage de
température de fonctionnement autorisée : 0–40°C).
●Pour nettoyer l’appareil, utilisez uniquement un chiffon sec
et doux, en aucun cas, de produits chimiques ou d’eau.
●Ne faites pas fonctionner le bloc alimentation ou débran-
chez-le immédiatement du secteur lorsque :
1. des dommages visibles apparaissent sur l’appareil,
2. après une chute ou un cas similaire, vous avez un doute
sur l’état de l’appareil,
AVERTISSEMENT L’appareil est alimenté par une tension
dangereuse 230V~. Ne touchez jamais
l’intérieur de l’appareil car en cas de
mauvaise manipulation, vous pouvez
subir une décharge électrique.
3. des dysfonctionnements apparaissent.
Faites toujours appel à un technicien spécialisé pour effec-
tuer les réparations.
●Nous déclinons toute responsabilité en cas de dommages
corporels ou matériels résultants si l’appareil est utilisé dans
un but autre que celui pour lequel il a été conçu, s’il n’est pas
correctement branché, s’il y a surcharge ou s’il n’est pas
réparé par une personne habilitée, de même, la garantie
deviendrait caduque.
3 Fonctionnement
1) Réglez la tension de fonctionnement pour l’appareil à ali-
menter : avec la clé livrée, tournez le sélecteur de tension
jaune sur la valeur nécessaire.
Attention ! Ne surchargez pas le bloc alimentation : la
Lorsque l’appareil est définitivement retiré du servi-
ce, vous devez le déposer dans une usine de recy-
clage adaptée pour contribuer à son élimination non
polluante.
consommation de l’appareil à alimenter ne doit pas dépas-
ser le courant de sortie du bloc alimentation.
2) Sélectionnez l’adaptateur correspondant à l’appareil à ali-
menter parmi les 4 adaptateurs livrés et branchez-le dans la
prise du cordon de l’alimentation. Respectez impérative-
ment la polarité nécessaire pour l’appareil. Pour détermi-
ner la polarité, tournez la prise de telle sorte que la flèche de
la prise et celle de la fiche se fassent face (voir dessins).
3) Reliez l’alimentation via l’adaptateur à la prise alimentation
sur l’appareil à alimenter.
4) Enfin reliez l’alimentation à une prise secteur 230V~/50 Hz.
La LED rouge brille pendant le fonctionnement.
Même lorsque l’appareil relié est éteint, le bloc alimentation a
une faible consommation. Il est recommandé de le débrancher
du secteur s’il ne doit pas être utilisé pendant une longue pé-
riode.
4 Caractéristiques techniques
Tension d’entrée : . . . . 230V~/50Hz/9VA
Tensions de sortie : . . 1,5/3/4,5/6/7,5/9/12V
Courant de sortie :. . . . 300mA max.
Dimensions, poids :. . . 53 x 44 x 66mm, 225g
4 adaptateurs
2 fiches jack : . . . . . Ø 2,5mm (A) et 3,5mm (B)
2 fiches alimentation : Ø ext./int. en mm :
5.5/2.1 (E), 5.5/2.5 (G)
Tout droit de modification réservé.
Plug-in Power Supply Unit
Please read these operating instructions carefully prior to oper-
ating the unit and keep them for later use.
1 Applications
This power supply unit with switchable output voltage serves
for direct current supply of electric low-voltage units (e.g. port-
able radio, pocket calculator).
2 Safety Notes
This unit corresponds to all required directives of the EU and is
therefore marked with .
●The unit is suitable for indoor use only. Protect it against
dripping water and splash water, high air humidity, and heat
(admissible ambient temperature range 0–40°C).
●For cleaning only use a dry, soft cloth; never use chemicals
or water.
●Do not operate the power supply unit or immediately discon-
nect the plug from the mains socket
1. if there is visible damage to the unit,
2. if a defect might have occurred after the unit was dropped
or suffered a similar accident,
WARNING The unit is supplied with hazardous mains volt-
age (230V~). Never make any modification on
the unit. Inexpert handling may cause an electric
shock hazard.
3. if malfunctions occur.
In any case the unit must be repaired by skilled personnel.
●No guarantee claims for the unit and no liability for any re-
sulting personal damage or material damage will be accept-
ed if the unit is used for other purposes than originally in-
tended, if it is not correctly connected, if it is overloaded, or
not repaired in an expert way.
3 Operation
1) Adjust the operating voltage for the unit to be supplied with
power: Use the supplied key to set the yellow voltage selec-
tor switch to the required value.
ATTENTION: Do not overload the power supply unit. The
current consumption of the unit to be supplied with power
must not exceed the output current of the power supply unit.
If the unit is to be put out of operation definitively, take
it to a local recycling plant for a disposal which is not
harmful to the environment.
2) Select the matching plug for the unit to be supplied with
power from the 4 adapter plugs supplied and connect it to
the inline jack of the cable of the power supply unit. Always
observe the polarity required for the unit! To determine the
polarity, turn the inline jack in such a way that the arrows of
inline jack and plug face each other (see figures).
3) Connect the power supply unit via the adapter plug to the
power supply jack of the unit to be supplied with power.
4) Finally connect the power supply unit to a mains socket
(230V~/50Hz). The red LED will light up during operation.
Even with the unit connected switched off, the power supply
unit has a low current consumption. Therefore, it is recom-
mended to disconnect it from the mains socket if it is not used
for a longer period.
4 Specifications
Input voltage: . . . . . . . 230V~/50Hz/9VA
Output voltages: . . . . . 1.5/3/4.5/6/7.5/9/12V
Output current: . . . . . . max. 300mA
Dimensions, weight: . . 55 x 44 x 66mm, 225g
4 adapter plugs
2 plugs: . . . . . . . . . . Ø 2.5mm (A) and 3.5mm (B)
2 hollow plugs: . . . . Ø ext./int. in mm:
5.5/2.1 (E), 5.5/2.5 (G)
Subject to technical modification.
GB
Steckernetzgerät
Bitte lesen Sie dieseAnleitung vor dem Betrieb gründlich durch
und heben Sie sie für ein späteres Nachlesen auf.
1 Einsatzmöglichkeiten
Dieses Steckernetzgerät mit umschaltbarer Ausgangsspan-
nung dient zur Gleichstromversorgung von elektrischen Klein-
spannungsgeräten (z.B. tragbares Radio, Taschenrechner).
2 Hinweise für den sicheren Gebrauch
Dieses Gerät entspricht allen erforderlichen Richtlinien der EU
und ist deshalb mit gekennzeichnet.
●Setzen Sie das Gerät nur im Innenbereich ein. Schützen Sie
es vor Tropf- und Spritzwasser, hoher Luftfeuchtigkeit und
Hitze (zulässiger Einsatztemperaturbereich 0–40°C).
●Verwenden Sie für die Reinigung nur ein trockenes, weiches
Tuch, auf keinen Fall Wasser oder Chemikalien.
●Nehmen Sie das Netzgerät nicht in Betrieb oder ziehen Sie
es sofort aus der Steckdose, wenn:
1. sichtbare Schäden am Gerät vorhanden sind,
2. nach einem Sturz oder Ähnlichem der Verdacht auf einen
WARNUNG Das Gerät wird mit lebensgefährlicher Netz-
spannung (230V~) versorgt. Nehmen Sie des-
halb niemals selbst Eingriffe am Gerät vor.
Durch unsachgemäßes Vorgehen besteht die
Gefahr eines elektrischen Schlages.
Defekt besteht,
3. Funktionsstörungen auftreten.
Geben Sie das Gerät in jedem Fall zur Reparatur in eine
Fachwerkstatt.
●Wird das Gerät zweckentfremdet, falsch angeschlossen,
überlastet oder nicht fachgerecht repariert, kann keine Haf-
tung für daraus resultierende Sach- oder Personenschäden
und keine Garantie für das Gerät übernommen werden.
3 Inbetriebnahme
1) Die Betriebsspannung für das zu speisende Gerät einstel-
len: Mit dem beiliegenden Schlüssel den gelben Span-
nungswahlschalter auf den erforderlichen Wert drehen.
ACHTUNG: Das Netzgerät nicht überlasten: Die Strom-
Soll das Gerät endgültig aus dem Betrieb genommen
werden, übergeben Sie es zur umweltgerechten Ent-
sorgung einem örtlichen Recyclingbetrieb.
®
Copyright©by MONACOR INTERNATIONAL GmbH & Co. KG, Bremen, Germany. All rights reserved. A-0443.99.01.07.2005
®
D A CH
F B CH
+
-
+
-
3.5 5.5X2.1
+
-
B
+
-
+
-
E
+
-
Pluspol an der Spitze/am Innenkontakt Minuspol an der Spitze/am Innenkontakt
PS-300XC Best.-Nr. 27.1960
ATENCION: No sobrecargue el adaptador de red. El con-
sumo de la unidad alimentada por el adaptador no debe
exceder a la corriente de salida del adaptador.
2) Seleccione la toma para la unidad que debe alimentarse
entre los 4 adaptadores y conéctela al jack en línea del
cable del adaptador. Observe siempre la polaridad que
requiere la unidad. Para determinar la polaridad, gire el jack
en línea de manera que las flechas del jack en línea y la
toma estén uno ante el otro (vea esquemas).
3) Conecte el adaptador de red con la toma al jack de ali-
mentación de la unidad que debe alimentarse.
4) Finalmente conecte el adaptador de red a la toma (230V~/
50Hz). ElLEDrojovaailuminarse durante el funcionamiento.
Incluso cuando la unidad conectada está apagada, el adapta-
dor tiene un bajo consumo de potencia. Es por esto que se
recomienda de desconectarlo de la toma si no se utiliza duran-
te un periodo de tiempo.
4 Especificaciones
Voltaje de entrada: . . . 230V~/50Hz/9VA
Voltajes de salida:. . . . 1,5/3/4,5/6/7,5/9/12V
Corriente de salida:. . . 300mA max.
Dimensiones, peso:. . . 55 x 44 x 66mm, 225g
4 adaptadores:
2 macho: . . . . . . . . . Ø 2,5mm (A) y 3,5mm (B)
2 ahuecado: . . . . Ø ext./int. in mm:
5,5/2,1 (E), 5,5/2,5 (G)
Sujeto a modificaciones técnicas.
+
-
+
-
3.5 5.5X2.1
+
-
B
+
-
+
-
E
+
-
Polo positivo a la punta/al contacto interior Polo negativo a la punta/al contacto interior
+
-
+
-
3.5 5.5X2.1
+
-
B
+
-
+
-
E
+
-
Styk dodatni na czubku/wewnętrzny Styk ujemny na czubku/wewnętrzny
+
-
+
-
3.5 5.5X2.1
+
-
B
+
-
+
-
E
+
-
Polo positivo alla punta/al contatto interno Polo negativo alla punta /al contatto interno
Alimentatore a spina
Vi preghiamo di leggere attentamente le presenti istruzioni
prima dell’uso e di conservarle per usi futuri.
1 Possibilità d’impiego
Questo alimentatore con tensione d’uscita commutabile serve
per alimentare con corrente continua apparecchi elettrici a ten-
sione bassa (p.es. radio portatili, calcolatrici tascabili).
2 Avvertenze di sicurezza
Quest’apparecchio è conforme a tutte le direttive richieste
dell’UE e pertanto porta la sigla .
●Far funzionare l’apparecchio solo all’interno di locali. Pro-
teggerlo dall’acqua gocciolante e dagli spruzzi d’acqua, da
alta umidità dell’aria e dal calore (temperatura d’impiego
ammessa fra 0 e 40 °C).
●Non mettere in funzione l’alimentatore e staccarlo subito
dalla presa di rete se:
1. l’apparecchio presenta dei danni visibili;
2. dopo una caduta o dopo eventi simili sussiste il sospetto
di un difetto;
AVVERTIMENTO L’apparecchio funziona con tensione di
rete pericolosa (230V~). Non intervenire
mai al suo interno; la manipolazione scor-
retta può provocare delle scariche perico-
lose.
3. l’apparecchio non funziona correttamente.
Per la riparazione rivolgersi sempre ad un’officina compe-
tente.
●Per la pulizia usare solo un panno morbido, asciutto, in nes-
sun caso prodotti chimici o acqua.
●Nel caso d’uso improprio, di collegamenti sbagliati, di so-
vraccarico o di riparazione non a regola d’arte dell’alimenta-
tore, non si assume nessuna responsabilità per eventuali
danni consequenziali a persone o a cose e non si assume
nessuna garanzia per l’apparecchio.
3 Messa in funzione
1) Impostare la tensione d’esercizio per l’apparecchio da ali-
mentare: posizionare il selettore giallo della tensione sul
Se si desidera eliminare l’apparecchio definitivamen-
te, consegnarlo per lo smaltimento ad un’istituzione
locale per il riciclaggio.
valore necessario servendosi della chiave in dotazione.
ATTENZIONE: Non sovraccaricare l’alimentatore: la cor-
rente assorbita dell’apparecchio da alimentare non deve
superare la corrente d’uscita dell’alimentatore.
2) Fra i 4 spinotti scegliere quello adatto per l’apparecchio da
alimentare ed inserirlo nella presa del cavo dell’alimentato-
re rispettando assolutamente la corretta polarità. Per
determinare la polarità girare la presa in modo che le frecce
di spina e presa corrispondano (vedi le illustrazioni).
3) Collegare l’alimentatore con il contatto di alimentazione
dell’apparecchio da alimentare servendosi dello spinotto.
4) Alla fine inserire l’alimentatore in una presa di rete (230V~/
50Hz). Il LED rosso è acceso durante il funzionamento.
Anche se l’apparecchio collegato è spento, l’alimentatore con-
suma un po’ di corrente. Perciò conviene staccarlo dalla presa
se non serve per un periodo prolungato.
4 Dati tecnici
Tensione d’ingresso: . . 230V~/50Hz/9VA
Tensioni d’uscita: . . . . . 1,5/3/4,5/6/7,5/9/12V
Corrente d’uscita: . . . . 300mAmax.
Dimensioni, peso: . . . . 53 x 44 x 66mm, 225g
4 connettori adattatori
2 jack: . . . . . . . . . . . Ø 2,5mm (A) e 3,5mm (B)
2 spinotti: . . . . . . . . . Ø esterno/interno mm:
5,5/2,1 (E), 5,5/2,5 (G)
Con riserva di modifiche tecniche.
< Adaptador de red
Por favor lea este manual de instrucciones detalladamente
antes de hacer funcionar la unidad y guárdelo para una uti-
lización posterior.
1 Aplicaciones
Este adaptador de red con voltaje de salida conmutable sirve
para la alimentación con tensión continua de unidades de bajo
voltaje (p.ej. radios portátiles o calculadoras de bolsillo).
2 Notas de seguridad
Esta unidad cumple con todas las normativas de la UE y es por
esto que está marcada con .
●La unidad ha estado fabricada únicamente para una utiliza-
ción en el interior. Protéjala contra proyecciones de agua y
salpicaduras, alta humedad del aire y del calor (temperatu-
ra de ambiente admisible 0–40°C).
●Para la limpieza utilice únicamente un trapo seco y suave;
nunca utilice productos químicos o agua.
●No haga funcionar la unidad o desconéctela inmediatamen-
te de la toma
1. si hay daños visibles en la unidad,
ADVERTENCIA La unidad se alimenta con una tensión
peligrosa (230V~). Nunca haga ninguna
modificación en la unidad. Una manipula-
ción inexperta puede causar una descar-
ga eléctrica.
2. si después de una caída o accidente similar, la unidad
puede presentar problemas,
3. si ocurren disfuncionamientos.
En cualquier caso la unidad debe repararse por personal
autorizado únicamente.
●La unidad carecería de todo tipo de garantía en caso de
daños personales o materiales resultantes de una utiliza-
ción de la unidad con otro fin del que le es propio, si no está
correctamente conectada, si está sobrecargada, o no ha
estado reparada por un experto.
3 Funcionamiento
1) Ajuste el voltaje de funcionamiento para la unidad que debe
alimentarse: Utilice la llave entregada para ajustar el selec-
tor de voltaje amarillo al valor que requiera.
Sila unidad está definitivamente retirada delservicio,
llévela a una planta de reciclaje próxima para contri-
buir a su eliminación no contaminante.
PS-300XC Best.-Nr. 27.1960
®
Copyright©by MONACOR INTERNATIONAL GmbH & Co. KG, Bremen, Germany. All rights reserved. A-0443.99.01.07.2005
®
Zasilacz
Prosimy o uważne przeczytanie poniższej instrukcji przed
użyciem urządzenia.
1 Zastosowanie
Zasilacz PS-300XC ma prze ączane napięcie wyjściowe i
s uży do zasilania urządzeń wymagających do pracy niskiego
napięcia zasilającego (np. przenośny radioodbiornik, kalku-
lator kieszonkowy).
2 Bezpieczeństwo użytkowania
Ponieważ urządzenie spe nia wymogi obowiązujące w Unii
Europejskiej jest oznaczone symbolem .
●Urządzenie jest przeznaczone do użytku tylko w pomie-
szczeniach. Urządzenie należy chronić przed dzia aniem
wody, wysokiej wilgotności powietrza oraz wysokiej tem-
peratury (dopuszczalna temperatura otoczenia 0 –40 °C) .
●Do czyszczenia urządzenia należy używać suchej, miękkiej
szmatki; nie należy stosować wody ani środków czysz-
czących.
●Nie należy używać urządzenia, oraz należy niezw ocznie
wyjąć wtyczkę sieciową z gniazda jeśli:
1. istnieje widoczne uszkodzenie urządzenia,
UWAGA Urządzenie jest zasilane niebezpiecznym dla ży-
cia napięciem zmiennym (230 V~). Aby uniknąć
porażenia elektrycznego nie wolno otwierać
urządzeń. Ich naprawą powinien zajmować się
tylko przeszkolony personel.
2. mog o zaistnieć uszkodzenie po upuszczeniu urządze-
nia itp.,
3. urządzenie dzia a wadliwie.
W razie wystąpienia któregoś z powyższych przypadków
urządzenie należy dostarczyć do naprawy w autoryzo-
wanym punkcie serwisowym.
●Producent ani dostawca nie ponoszą odpowiedzialności za
wynik e szkody (uszkodzenie sprzętu lub obrażenia
użytkownika) jeśli urządzenie by o używane niezgodnie z
przeznaczeniem, lub jeśli zosta o nieodpowiednio zainsta-
lowane, pod ączone, użytkowane lub poddawane nieau-
toryzowanym naprawom.
3 Obsługa
1) Należy ustawić odpowiednie napięcie zasilające: należy
ustawić żó ty prze ącznik na odpowiedniej pozycji wskazu-
Jeśli urządzenie ma zostać ostatecznie wycofane z
użycia, należy przekazać je do punktu utylizacji od-
padów aby uniknąć zanieczyszczenia środowiska.
jącej napięcie wyjściowe.
UWAGA Nie wolno dopuścić do przeciążenia zasi-
lacza. Pobór prądu przez urządzenie pod ączone do zasi-
lacza nie może przekraczać prądu wyjściowego zasilacza.
2) Należy wybrać spośród czterech końcówek (w zestawie)
odpowiednią dla zasilanego urządzenia, następnie należy
pod ączyć ją do gniazda zasilacza. Należy uważać na
odpowiednią polaryzację podłączenia! Strza ki na
gnieździe oraz na końcówce muszą być po tej samej stronie
(zob. rysunek).
3) Należy pod ączyć końcówkę zasilacza do urządzenia.
4) Należy pod ączyć zasilacz do sieci (230 V~/50 Hz). Zapali
się czerwona dioda LED.
Nawet jeśli zasilane urządzenie jest wy ączone, zasilacz
będzie pobiera z sieci nieznaczną ilość energii. Dlatego też
jeśli zasilacz nie jest użytkowany przez d uższy czas, należy
go od ączyć od sieci.
4 Dane techniczne
Napięcie wejściowe: . 230 V~/50 Hz/9 VA
Napięcie wyjściowe . . 1,5/3/4,5/6/7,5/9/12 V
Prąd wyjściowy: . . . . . 300 mA maks.
Wymiary, waga: . . . . . . 55 x 44 x 66 mm, 225 g
4 końcówki zasilacza
2 końcówki: . . . . . . . Ø2,5 mm (A) i 3,5 mm (B)
2 końcówki: . . . . . . . Øzew./wew. w mm:
5,5/2,1 (E); 5,5/2,5 (G)
Producent zastrzega sobie prawo do możliwości zmian tech-
nicznych.
E
I
PL

This manual suits for next models

1

Other Monacor Power Supply manuals

Monacor PSS-1200 User manual

Monacor

Monacor PSS-1200 User manual

Monacor PS-1540AC User manual

Monacor

Monacor PS-1540AC User manual

Monacor PA-24ESP User manual

Monacor

Monacor PA-24ESP User manual

Monacor PSS-1005USB User manual

Monacor

Monacor PSS-1005USB User manual

Monacor PS-532 User manual

Monacor

Monacor PS-532 User manual

Monacor PSS-3000E User manual

Monacor

Monacor PSS-3000E User manual

Monacor PSS-2500SV User manual

Monacor

Monacor PSS-2500SV User manual

Monacor PS-12CCD User manual

Monacor

Monacor PS-12CCD User manual

Monacor PS-1005 USB User manual

Monacor

Monacor PS-1005 USB User manual

Monacor PSS-2405USB User manual

Monacor

Monacor PSS-2405USB User manual

Monacor PS-300ST User manual

Monacor

Monacor PS-300ST User manual

Monacor AXOC-404PS User manual

Monacor

Monacor AXOC-404PS User manual

Monacor PS-120WP User manual

Monacor

Monacor PS-120WP User manual

Monacor PS-75GS User manual

Monacor

Monacor PS-75GS User manual

Monacor PSS-600E User manual

Monacor

Monacor PSS-600E User manual

Monacor PS-128A User manual

Monacor

Monacor PS-128A User manual

Monacor PSS-800 User manual

Monacor

Monacor PSS-800 User manual

Monacor PSS-600E User manual

Monacor

Monacor PSS-600E User manual

Monacor PSS-510DC User manual

Monacor

Monacor PSS-510DC User manual

Monacor PS-362 ST User manual

Monacor

Monacor PS-362 ST User manual

Monacor PS-500XC User manual

Monacor

Monacor PS-500XC User manual

Monacor IMG STAGELINE EMA-2 User manual

Monacor

Monacor IMG STAGELINE EMA-2 User manual

Monacor IMG Stageline EMA-3 User manual

Monacor

Monacor IMG Stageline EMA-3 User manual

Monacor PSS-5000 User manual

Monacor

Monacor PSS-5000 User manual

Popular Power Supply manuals by other brands

Cosel PCA Series Assembling and Installation Instructions

Cosel

Cosel PCA Series Assembling and Installation Instructions

Micro Technic Micronix PC/104 Power Supply PV-1075-CAR Installation and user manual

Micro Technic

Micro Technic Micronix PC/104 Power Supply PV-1075-CAR Installation and user manual

OCZ OCZ600SXS - MECHANICAL DRAWING Mechanical drawing

OCZ

OCZ OCZ600SXS - MECHANICAL DRAWING Mechanical drawing

Whelen Engineering Company CS240 installation guide

Whelen Engineering Company

Whelen Engineering Company CS240 installation guide

Simplex MINIPLEX 4100ES Series installation instructions

Simplex

Simplex MINIPLEX 4100ES Series installation instructions

Gira 1024 00 operating instructions

Gira

Gira 1024 00 operating instructions

Genie GPR816/12R quick start guide

Genie

Genie GPR816/12R quick start guide

Horizont FARMER AN15 operating instructions

Horizont

Horizont FARMER AN15 operating instructions

FEAS SNT140 operating instructions

FEAS

FEAS SNT140 operating instructions

comatec USV2 use instructions

comatec

comatec USV2 use instructions

Asus ROG THOR quick start guide

Asus

Asus ROG THOR quick start guide

Allen-Bradley 1606-XLPRED Reference manual

Allen-Bradley

Allen-Bradley 1606-XLPRED Reference manual

Extron electronics EPS 1210 P Specification sheet

Extron electronics

Extron electronics EPS 1210 P Specification sheet

nextys NPST721 Series instruction manual

nextys

nextys NPST721 Series instruction manual

Nortel Passport 8001PS installation guide

Nortel

Nortel Passport 8001PS installation guide

Bailey infi 90 Modular Power System II Instruction

Bailey

Bailey infi 90 Modular Power System II Instruction

GRAUPNER PRX-4A operating manual

GRAUPNER

GRAUPNER PRX-4A operating manual

Puls FPT500.241-006-104 installation manual

Puls

Puls FPT500.241-006-104 installation manual

manuals.online logo
manuals.online logoBrands
  • About & Mission
  • Contact us
  • Privacy Policy
  • Terms and Conditions

Copyright 2025 Manuals.Online. All Rights Reserved.