manuals.online logo
Brands
  1. Home
  2. •
  3. Brands
  4. •
  5. Mottura
  6. •
  7. Lock
  8. •
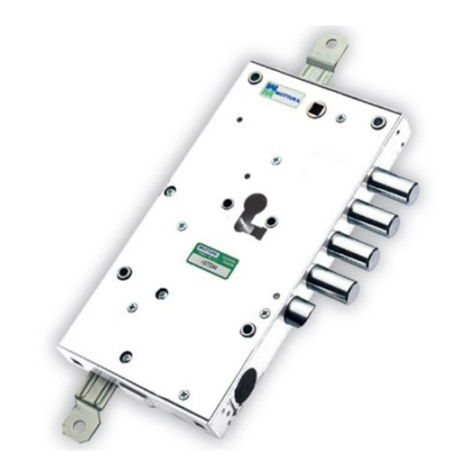
  9. Mottura 3D5 Series User manual

Mottura 3D5 Series User manual

AVVERTENZE GENERALI
Mottura Serrature di Sicurezza S.p.A. ringrazia per la ducia
accordata scegliendo questo prodotto e raccomanda di:
- leggere con la massima attenzione le istruzioni prima di
procedere all’installazione del prodotto o di eettuare
qualsiasi operazione di manutenzione sul prodotto.
- Tutte le operazioni di assemblaggio e collegamento vanno
eseguite secondo le regole della Buona Tecnica nonché
nel rispetto delle norme vigenti.
- Tali istruzioni e tutte le istruzioni di manutenzione devono
essere consegnate dall’installatore all’utilizzatore.
- Conservare queste istruzioni per future necessità e allega-
re il documento scale a convalida della garanzia.
- in caso di problemi rivolgersi esclusivamente presso il vo-
stro rivenditore.
Le caratteristiche dei prodotti riportate su queste istruzioni
possono essere soggette a variazioni da parte della Mottu-
ra Serrature di Sicurezza S.p.A., in ogni momento e senza
preavviso.
CONDIZIONI DI GARANZIA
Questo prodotto, collaudato dalla Mottura Serrature di Si-
curezza S.p.A., é garantito da ogni difetto di fabbricazione,
per la durata denita dalla normativa vigente in Italia, dalla
data d’acquisto, comprovata dal documento scale di ven-
dita. La garanzia è operativa se viene esibito al rivenditore
o al personale dell’assistenza tecnica il documento scale
della vendita che riporti gli estremi identicativi del prodot-
to. Per garanzia si intende la sostituzione o riparazione delle
parti riscontrate difettose all’origine per vizi di fabbricazio-
ne, escluse spese di trasporto da e per i centri di assistenza,
spese che restano a carico del cliente.
In caso di ripetuto guasto della stessa origine o di guasto
non riparabile, si provvederà ad insindacabile giudizio della
Mottura Serrature di Sicurezza S.p.A. alla sostituzione com-
pleta del prodotto.
La garanzia sul prodotto sostituito continuerà no alla ne
del contratto originario. Nel caso si rendesse necessario l’in-
tervento a domicilio, il cliente è tenuto a corrispondere - se
richiesto - un diritto di chiamata per le spese di trasferimen-
to del personale tecnico autorizzato.
I rischi di trasporto saranno a carico del cliente se eettuato
con invio diretto; a carico del tecnico autorizzato se il pro-
dotto viene ritirato e trasportato dal tecnico stesso.
LIMITAZIONI DI RESPONSABILITÀ
Non sono coperti da garanzia i danni derivanti da:
- negligenza, trascuratezza o uso non corrispondente alle
modalità di funzionamento di seguito illustrate
- mancata protezione del prodotto prima dell’esecuzione di
una qualsiasi operazione, che possa generare materiale di
scarto (saldature, foratura pannelli , forature struttura, etc.)
che ne impedisca il corretto funzionamento
-manutenzione eettuata in modo non conforme da quan-
to illustrato su queste istruzioni o comunque da personale
non autorizzato
- utilizzo di accessori/componenti non originali Mottura
- trasporto eettuato senza le dovute cautele e comunque
da circostanze non imputabili a difetti di fabbricazione.
Mottura Serrature di Sicurezza S.p.A. declina inoltre ogni
responsabilità per eventuali danni causati a persone o cose
derivanti dalla mancata osservanza di tutte le precauzioni
d’uso qui riportate.
GENERAL INSTRUCTIONS
Mottura Serrature di Sicurezza S.p.A. thanks you for cho-
osing this product and reminds you as follows:
- read the instructions very carefully before installing the
device or doing any maintenance work on the product.
- All assembly and connection procedures must be done
according to the Rules of Good Practice as well as in con-
formity to current law.
- The installer must give these instructions and all of the
maintenance instructions to the user.
- Keep these instructions for future use and attach the
sales receipt to validate the warranty.
- In case of problems contact authorized dealers only.
Mottura Serrature di Sicurezza S.p.A. may change the
characteristics of the products described in these in-
structions at any time and without notice.
WARRANTY TERMS
This product has been inspected by Mottura Serrature
di Sicurezza S.p.A. and is guaranteed against all manu-
facturing defects for the time specied by current Italian
law, starting on the date of purchase indicated on the
sales receipt.
The warranty is in force if the sales receipt, showing
details identifying the product, is exhibited to customer
service personnel.
The warranty covers the replacement or repair of parts
found defective at origin due to manufacturing defects.
Costs of shipping to and from service centers will be paid
by the customer.
In case of repeated malfunctions of the same type or un-
repairable defects, Mottura Serrature di Sicurezza S.p.A.
may, at its own discretion, replace the complete product.
The warranty on the replaced product will continue until
expiration of the original warranty.
If work is necessary at the customer’s home, the custo-
mer will be required to pay a charge for the costs of tran-
sfer of authorized technical personnel. Transport will be
at the customer’s risk if the product is sent by the custo-
mer and at the authorized technician’s risk if the product
is picked up and transported by the technician.
LIMITS OF LIABILITY
The warranty does not cover damage due to:
- negligence, carelessness or use in any manner not de-
scribed in these instructions
- lack of protection of the lock prior to carrying out any
work operations on the door, such as drilling or welding
(welds, panel holes, structure holes, etc.), which may ge-
nerate waste materials that will hinder the correct ope-
ration of the lock upon entering its mechanism
- maintenance performed in any manner not described
in these instructions or by unauthorized personnel
- use of non-original accessories/components Mottura
- transport without the necessary precautions
and from any circumstances that cannot be attributed
to manufacturing defects.
Mottura Serrature di Sicurezza S.p.A. declines all liability
for any damage to persons or property deriving from
failure to observe all of the precautions described herein.
GARANZIA E ISTRUZIONI D’INSTALLAZIONE
WARRANTY AND INSTALLATION INSTRUCTIONS
3D5... / 3D9...
893D...

2
99346 - 3D KEY
ISTRUZIONI DI MONTAGGIO / ASSEMBLY INSTRUCTIONS
N.B.: Per l’installazione della serratura è necessario eseguire un foro sul lato interno della porta con diametro mini-
mo 58 mm per permettere l’eventuale sostituzione del nucleo.
Fissare la serratura (NON saldare) alla struttura della porta utilizzando tutti gli appositi ssaggi: boccole (B) o attacchi
laterali (A) nella congurazione ad applicare, o la testiera nella versione ad inlare. Vericare che la serratura funzioni corretta-
mente senza attriti / frizionamenti su aste e chiavistelli sia in posizione di aperto che nella posizione di chiuso. Eventuali aste
e deviatori devono essere collegati alla serratura con gioco, in quanto la sua assenza, può provocare malfunzionamenti. Per
assicurare alla serratura un corretto funzionamento nel tempo si raccomanda di non lubricare le parti interne. I chiavistelli e
il mezzogiro possono essere lubricati usando esclusivamente lubricante Mottura (non utilizzare oli o grassi).
N.B.: To install the lock, you must rst drill a hole from the inside part of the door (58 mm diameter or larger) to allow the
replacement of the nucleus.
Install the lock (DO NOT weld it) in the door using all the supplied ttings: bushings (B) or side attachments (A) for rim locks, or
the face-plate for mortise locks. Make sure the lock works properly without friction of the rods and deadbolts when both locking
and unlocking it. Rods and diverters, if any, must be connected to the lock with a bit of tollerance, otherwise the lock might
malfunction. To ensure that the lock will work properly over time, you should not lubricate the internal parts. Lubricate the
deadbolts and the latchbolt using a Mottura lubricant only (do not use other oils or greases).
A
A
A
A
B
B
BB
Versione singola / Single version
3D.515
3D.571
3
Versione doppia / Double version
Lo spessore ridotto (25 mm) può permettere l’inserimento di una piastra di protezione al manganese con Defender®
Ø50 art. 94924N / 94925 per aumentare al massimo il livello di sicurezza anche su porte di spessore limitato.
Le serrature sono intercambiabili con gli articoli standard di spessore 30 mm (serie 52, 84 e 85) grazie alle boccole con
sporgenza mm 2,5.
The reduced thickness (25 mm) is designed to insert a manganese protection plate with Defender® Ø50 art. 94924N / 94925
to maximise security even in doors with limited thickness.
The locks are interchangeable with standard 30 mm thick items (52, 84 and 85 series) thanks to bushings with 2,5 mm projection.
3D.915 / 3D.9173D.587
4
99346 - 3D KEY
893D571DR 893D.855C
893D571GR
Versione Pomolo
Knob version
5
Concava alta
High concave
Concava bassa
Low concave
Piana
Flat
95501A0
Lato interno
con mostrina
versione
sinistra
Inside with
escutcheon
left-hand
version
Lato esterno
con mostrina
versione
sinistra
Outside with
escutcheon
left-hand
version
Lato esterno
con Defender®
versione
sinistra
Outside with
Defender®
left-hand
version
Se necessario utilizzare
spessori per
Defender®
(sp. 2,5 mm) cod. 941121
If necessary use spacers for
Defender® (2,5 mm thick) Cod. 941121
95502A0 95502B0
95504B095504A0
95501B0
95503B095503A0
95506
95603
95601 95446
95402
99108
99110
99110
99108
941121
94924N
94925
MOSTRINE / ESCUTCHEONS
95402
95502A0 95503B0
Concava alta
High concave
Concava bassa
Low concave
Se necessario utilizzare supporto boccola guida chiave
cod. 99108
e boccola guida chiave cod. 99110 (sp. 5 mm).
If necessary use key guide bushing code 99108 and 99110 (5 mm thick).
6
99346 - 3D KEY
Ext. / Out
Serratura / Lock
Int. / In
Concava alta
High concave
Concava bassa
Low concave
Piana
Flat
95502A0 95502B0
95504B095504A0 95506
95601
95446
Concava alta
High concave
Concava bassa
Low concave
95501A0 95501B0
95503B095503A0
LATO ESTERNO
OUTSIDE
LATO INTERNO
(vers. chiave-chiave)
INSIDE
(key-key version)
Distanza dal pannello della porta
alla serratura (A, B)
Distance from door panel to lock
(A, B)
Chiave / Key
mm 20
Chiave / Key
mm 30
Chiave / Key
mm 40
Chiave / Key
mm 20
Chiave / Key
mm 30
Chiave / Key
mm 40
Max mm 15
Ovale/Oval 95506 95506 95506
95503B0 95503B0 95503B0
Rettangolare/Rectangular 95601 95601 95601
95501B0 95501B0 95501B0
Tonda/Round 95446
Max mm 25
Ovale/Oval
95504B0
95506 95506
95503B0 95503B0 95503B0
Rettangolare/Rectangular
95502B0
95601 95601
95501B0 95501B0 95501B0
Tonda/Round 95446
Max mm 35
Ovale/Oval
95504A0 95504B0
95506
95503A0 95503B0 95503B0
Rettangolare/Rectangular
95502A0 95502B0
95601
95501A0 95501B0 95501B0
Tonda/Round 95446
Max mm 45
Ovale/Oval
95504A0 95504B0 95503A0 95503B0
Rettangolare/Rectangular
95502A0 95502B0 95501A0 95501B0
Tonda/Round
Max mm 55
Ovale/Oval
95504A0 95503A0
Rettangolare/Rectangular
95502A0 95501A0
Tonda/Round
N.B. Nella versione chiave-pomolo per il lato interno utilizzare esclusivamente art. 95506 - 95601.
La versione chiave-pomolo è applicabile solamente con uno spessore minimo della porta di mm 55.
N.B. In the key-knob version, for the door inside, use Art. 95506 - 95601 only.
The key-knob version can be installed only in doors with at least 55 thickness.
7
SOSTITUZIONE NUCLEO
VERSIONE CHIAVE-CHIAVE
Rimuovere
le viti A presenti sul nucleo (g. 1),
inserire la chiave e ruotare la piastra B
(g. 2),
estrarre il nucleo (g. 3), slare la chiave
recu-
perando la piastra B di tenuta nucleo
(g. 4),
riposizionare la piastra sul nuovo nucleo rimon-
tandolo seguendo la procedura inversa.
NUCLEUS REPLACEMENT
KEY-KEY VERSION
Remove the screws A (Fig. 1), insert the key and
rotate the plate B (Fig. 2). Remove the nucleus
(Fig. 3)
. Remove the key by pulling o the
nu-
cleus
securing plate B (Fig. 4). Replace the plate
on the new
nucleus
mounting it in the reverse
order.
1 2
3 4
A
A
B
B
SOSTITUZIONE NUCLEO
VERSIONE CHIAVE-POMOLO
Rimuovere la serratura dai ssaggi della por-
ta e ruotarla sul lato esterno. Svitare le viti C
per la rimozione della piastra in manganese
(g. 1), rimuovere le viti D presenti sul nucleo
(g. 2), inserire la chiave ed estrarre il nucleo
(g. 3), slare la chiave recuperando la pia-
stra E di tenuta nucleo (g. 4), riposizionare
la piastra sul nuovo nucleo, smontare il po-
molo interno, posizionare l’ingranaggio del
nucleo come in gura 5, rimontare il nucleo
e la piastra ssandoli con le viti D, posizionare
la piastra in manganese riavvitando le viti C,
rimontare la serratura sulla porta, riposiziona-
re il pomolo (g. 6), ruotare no ad innesto e
avvitare le viti.
NUCLEUS REPLACEMENT
KEY-KNOB VERSION
Remove the lock from the door xings and turn
it to the outside. Unscrew the screws C to remo-
ve the manganese plate (Fig. 1). Remove the
screw D (Fig. 2). Insert the key and remove the
nucleus (Fig. 3). Remove the key by pulling o
the nucleus securing plate E (Fig. 4).
Reposition the plate on the new nucleus, remo-
ve the internal knob, position the nucleus gear
as shown in gure 5. Reassemble the nucleus
and the plate xing them with the screws D,
position the manganese plate by tightening
the screws C. Reassemble the lock on the door,
reposition the knob (Fig. 6) and rotate until it
engages. Tighten the screws.
1 2
3
5
4
6
CD
E
D
CC
www.mottura.it
99346 - 07/18 - a_019427
REVERSIBILITÀ SCROCCO
Inserire un cacciavite nel foro presente sul coperchio e fare leva sul pernetto F (g. 1), ruotare il mezzogiro di 180° (g. 2).
LATCH REVERSIBILITY
Insert a screwdriver into the hole in the cover and push the pin F (Fig. 1), rotate the latchbolt by 180° (Fig. 2).
Le serrature doppie sono fornite in versione dipendente, per
renderle indipendenti estrarre la vite come in gura.
Double locks are supplied as dependent locks; to make them
independent, remove the screw as shown in Figure.
1 2
F
CONVERSIONE SERRATURE DIPENDENTI / INDIPENDENTI
DEPENDENT / INDEPENDENT LOCK COVERSION
92353
Chiave snodata art. 92353.
Folding key art. 92353.

This manual suits for next models

10

Other Mottura Lock manuals

Mottura Shark 96.503 User manual

Mottura

Mottura Shark 96.503 User manual

Mottura 35 Series User manual

Mottura

Mottura 35 Series User manual

Mottura 72.14ELE User manual

Mottura

Mottura 72.14ELE User manual

Mottura Gorilla Automatic 86510D/SA Quick start guide

Mottura

Mottura Gorilla Automatic 86510D/SA Quick start guide

Mottura Gorilla Automatic 86.410D/ST Quick start guide

Mottura

Mottura Gorilla Automatic 86.410D/ST Quick start guide

Mottura XMoto XMP01 Series User manual

Mottura

Mottura XMoto XMP01 Series User manual

Mottura Forza 7 37 Series User manual

Mottura

Mottura Forza 7 37 Series User manual

Mottura XFREE 49 P24 Series User manual

Mottura

Mottura XFREE 49 P24 Series User manual

Mottura CHAMPIONS User manual

Mottura

Mottura CHAMPIONS User manual

Mottura X MODE M2.0 User manual

Mottura

Mottura X MODE M2.0 User manual

Mottura 3D Key 3D100 Series User manual

Mottura

Mottura 3D Key 3D100 Series User manual

Mottura POWER 541 Instructions for use

Mottura

Mottura POWER 541 Instructions for use

Mottura ASTABLOCK 99251 User manual

Mottura

Mottura ASTABLOCK 99251 User manual

Mottura 20 Series User manual

Mottura

Mottura 20 Series User manual

Mottura ASTABLOCK 36 Series User manual

Mottura

Mottura ASTABLOCK 36 Series User manual

Mottura XNOVA Series User manual

Mottura

Mottura XNOVA Series User manual

Mottura 87 Series User manual

Mottura

Mottura 87 Series User manual

Mottura Xmode M 2.0 User manual

Mottura

Mottura Xmode M 2.0 User manual

Popular Lock manuals by other brands

Castell SALUS-S-1 user manual

Castell

Castell SALUS-S-1 user manual

Hafele dialock DT 100 installation instructions

Hafele

Hafele dialock DT 100 installation instructions

tell CL5000 Series Installation instructions and template

tell

tell CL5000 Series Installation instructions and template

Major Manufacturing HIT-45 Instructions for installation

Major Manufacturing

Major Manufacturing HIT-45 Instructions for installation

All Security Equipment FAS-HUL1200LSDM manual

All Security Equipment

All Security Equipment FAS-HUL1200LSDM manual

COMPX Stock Locks C1703 Dimensional drawing

COMPX

COMPX Stock Locks C1703 Dimensional drawing

KPP tirumio-369 manual

KPP

KPP tirumio-369 manual

rangeiot OrangeIOT RZ installation guide

rangeiot

rangeiot OrangeIOT RZ installation guide

Kaba Mas AUDITCON 2 Series manual

Kaba Mas

Kaba Mas AUDITCON 2 Series manual

XLOCK 145 instruction manual

XLOCK

XLOCK 145 instruction manual

Rosslare LK-M06L installation manual

Rosslare

Rosslare LK-M06L installation manual

FSH FES20 Series installation manual

FSH

FSH FES20 Series installation manual

EUFY T8530 quick start guide

EUFY

EUFY T8530 quick start guide

Simons Voss Technologies WaveNet LockNode SH AX manual

Simons Voss Technologies

Simons Voss Technologies WaveNet LockNode SH AX manual

Scandinavian Safe UR4020 quick start guide

Scandinavian Safe

Scandinavian Safe UR4020 quick start guide

Promet PS300/ES01 user manual

Promet

Promet PS300/ES01 user manual

Esco systeQ-S 7665 Assembly instructions

Esco

Esco systeQ-S 7665 Assembly instructions

Yolin Smart Password U-Lock user manual

Yolin

Yolin Smart Password U-Lock user manual

manuals.online logo
manuals.online logoBrands
  • About & Mission
  • Contact us
  • Privacy Policy
  • Terms and Conditions

Copyright 2025 Manuals.Online. All Rights Reserved.