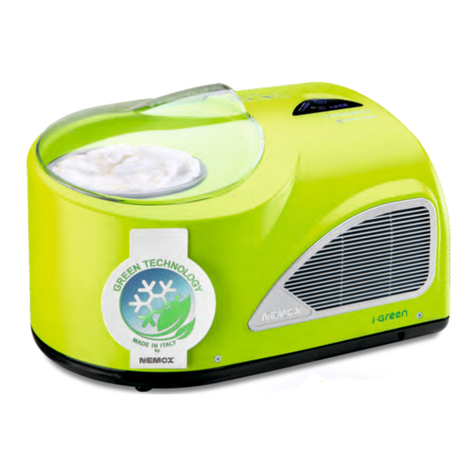
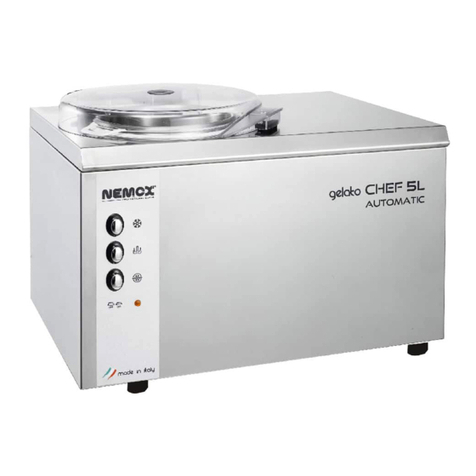
Nemox gelato 4K TOUCH User manual

EN
IT
INSTRUCTION BOOK Pag. 2
ISTRUZIONI PER L’USO Pag. 10

ENGLISH
2
UK USERS ONLY
HOW TO CONNECT THE CORD TO A U.K. PLUG: IMPOR-
TANT The wires in the mains lead are coloured in accordan-
ce with the following code:
• Green and yellow: Earth
• Blue: Neutral
• Brown: Live
Please, read the instructions given below before connecting the cord to a plug. If in doubt, plea-
se, consult a qualied electrician. As the colours of the wires in the mains lead of this appliance
may not correspond with the coloured markings identifyng the terminals in your plug, proceed
as follows: the wire that is coloured Green and Yellow must be connected to the terminal in the
plug which is marked with the letter E or the Earth symbol ( ), or coloured Green or Green and
Yellow.
The wire that is coloured Brown must be connected to the terminal which is marked with the
letter L or coloured Red. The wire that is coloured Blue must be connected to the terminal which
is marked with the letter N or coloured Black.
SAFETY POINTS FOR REWIRABLE OR MOULDED PLUG
The mains lead of this appliance may be already tted with a BS1363 13A plug.
• If your socket outlet is not suitable for the plug, then the plug must be removed (cut off if it is
a moulded on plug), the exible cord insulation should be stripped back as appropriate and a
suitable 3 pin plug tted.
• WARNING: Dispose of a plug that has been cut from the power supply cord, as such a plug is
hazardous if inserted in a live 13A socket outlet elsewhere in the house.
• Should the fuse need to be replaced an ASTA marked fuse, approved to BS 1362, of the same
rating must be used.
• Always replace the fuse cover after tting a fuse. The plug must NOT be used if the cover is
omitted or lost until a replacement is obtained. Make certain that only the correct fuse cover is
used and tted.
• For plugs with detachable fuse cover, the replacement must be the same as the colour insert
in the base of the plug.
•If the detachable fuse cover is lost a replacement may be purchased from a Service Centre.
•Information for supply may also be obtained from the plug manufacturer.
U.K.: IMPORTANT INFORMATION FOR CORRECT DISPOSAL OF THE PRODUCT IN ACCORDANCE WITH EC DIRECTIVE
2012/19/EU.
Environmental information
This product may contain substances that can be hazardous to the environment or to human health if it is not disposed of properly. We therefore provide you
with the following information to prevent releases of these substances and to improve the use of natural resources. Electrical and electronic equipments should
never be disposed of in the usual municipal waste but must be separately collected for their proper treatment. The crossed-out bin symbol, placed on the product
and in this page, remind you of the need to dispose of properly the product at the end of its life. In this way it is possible to prevent that a not specic treatment
of the substances contained in these products, or their improper use, or improper use of their parts may be hazardous to the environment or to human health.
Furthermore this helps to recover, recycle and reuse many of the materials used in these products. For this purpose the electrical and electronic equipment
producers and distributors set up proper collection and treatment systems for these products. At the end of life your product contact your distributor to have
information on the collection arrangements. When buying this new product your distributor will also inform you of the possibility to return free of charge another
end of life equipment as long as it is of equivalent type and has fullled the same functions as the supplied equipment. A disposal of the product different from
what described above will be liable to the penalties prescribed by the national provisions in the country where the product is disposed of. We also recommend
you to adopt more measures for environment protection: recycling of the internal and external packaging of the product and disposing properly used batteries
(if contained in the product). With your help it is possible to reduce the amount of natural resources used to produce electrical and electronic equipments, to
minimize the use of landlls for the disposal of the products and to improve the quality of life by preventing that potentially hazardous substances are released in
the environment
IMPORTANT SAFEGUARDS
When using electrical appliances, basic safety precautions should
always be observed, including the following: Read all instructions
carefully.
• To protect against risk of electric shock, do not put the main body
of appliance in water or any other liquid.
• This appliance has not been designed to be used by persons
(including children) with physical, sensory or mental impairments or
who are lacking in experience or knowledge, unless they have been
given the necessary supervision and prior instructions about how to
use this appliance by a person responsible for their safety. Young
children should be supervised to ensure that they do not play with
the appliance.
• Unplug from outlet when not in use, before putting on or taking off
parts, and before cleaning.
• Avoid contact with moving parts.
• Do not operate any appliance with a damaged cord or plug, or
after the appliance malfunctions, or is dropped or damaged in any
manner. Return the appliance to an authorized Service Centre for
examination, repair or electrical or mechanical adjustment.
• The use of attachments not recommended or sold by the applian-
ce manufacturer may result in re, electric shock or injury.
• Do not use outdoors.
• Do not let cord hang over edge of table or counter, or touch hot
surfaces.
SAVE THESE INSTRUCTIONS
CAUTION
• An authorized service representative should perform any servicing
other than cleaning and user maintenance. Only authorized service
personnel should do repair.
• After removing the appliance from the packaging, check it for
by
damage. If in doubt, do not use the appliance and contact an authorised service centre.
• Plastic bags, polystyrene, nails, etc. must not be left within reach of children as they are potentially dangerous.
• The appliance’s manufacturer and vendor reject any responsibility for failure to comply with the instructions provided in this user manual.
• Check that the voltage shown on the rating plate corresponds to the voltage of the mains.
• Do not use sharp utensils inside the bowl! Sharp objects will scratch and damage the inside of the bowl. A rubber spatula or metal spoon may be used, when the
appliance is in the “OFF”or “0” position.
• Never clean with scouring powders or hard implements.
• Do not place or use the appliance on hot surfaces, such as stoves, hotplates, or near open gas ames.
• Do not unplug the unit by pulling the cord.
• The appliance must be connected to an electrical system and power supply socket with a minimum capacity of 10A, equiped with an efcient earth contact. The manufacturer is
not responsible for damages to items or people in the event that the prescribed safety norms have not been respected.
• Before carrying out any maintenance or cleaning operations, make sure that the appliance has been disconnected from the electrical mains by removing the plug from the power
supply socket.
• Never wash the appliance using water jets or place it in water!
• This appliance is suitable for use at ambient temperature not exceeding 43°C (climatic class “T”).

ENGLISH
3
4K
Congratulations, you bought the most innovative and technologi-
cally advanced professional table top Gelato machine in the world!
Gelato 4K TOUCH is entirely manufactured in Italy, by people who have specialized in and love producing quality gelato machi-
nes for over 30 years.
Read these instructions and you will quickly and easily learn the best way to use your Gelato 4K TOUCH and, more importantly,
make great gelato, ice cream and sorbet!
We thank you for your condence in our company and people. We will do everything we can to make you fully satised with your
choice.
A). Machine’s body with xed bowl
B). Stainless steel mixing blade
B.1) Plastic paddle inserts for use with xed bowl (marked
with letter “L”)
B.2) Plastic paddle inserts for use with removable bowl
(marked letter “A”)
C). Fixing knob for blade
D). Transparent lid
D.1) Opening with cap to add ingredients
E). Spatula for Gelato
F). Ventilation grids
G). Stainless steel removable bowl
H). Measuring cup
I). Power cable
L). Control panel
L.1) Start key and its LED (ON)
L.2). Production cycle feed LED (TIME LINE)
L.3). Storage key (SEL)
L.4). Storage LED (STORAGE)
IMPORTANT WARNINGS TO FOLLOW BEFORE USING THE MACHINE.
• Hygiene is the extremely important when processing food. Make sure that all the parts, in particular those coming in direct
contact with the ingredients, are scrupulously clean.
• Variations in speed and noise during the preparation are normal and do not affect the proper functioning.
• Pour your mixture at a temperature ranging between + 5°C and + 20°C. Outside of these parameters the success of your
preparation could be compromised.
• The machine has a recommended capacity of 1,0 kg. of mixture. If a larger quantity of mixture is poured in it could overow,
due to the volume increasing during processing. Also, the machine could be less efcient.
• The machine is equipped with a Pause function (see section PANEL AND FUNCTIONS OF Gelato 4K TOUCH and section LID
OF THE Gelato 4K TOUCH).
A warning tone (2 beeps) sounds every time the mixing blade starts moving.
A
B.1
H
C
E
B
L1
L
L2
L3
L4
B.2
G
D.1
F
D
I

ENGLISH
4
IMPORTANT:
This ice cream machine contains its own refrigerant which must be allowed to settle after transport. Leave the ice cream
machine on a horizontal surface for at least 12 hours after purchase or after any move which might have stored the ma-
chine the wrong way up.
Leave at least 20 cm on each side of the machine to allow free air circulation. Make sure the ventilation grids are free and
unobstructed. It is normal for warm or hot air to ow from the air vents. The refrigeration process requires this.
OPTIONS OF USE
1. Place the plastic inserts for use with xed bowl (let-
ter “L” moulded) on the stainless steel mixing blade
2. Insert the mixing blade (B)
3. Screw the appropriate xing knob for blade (C)
1. Pour in the xed bowl about 1 measuring cup (H) of a salt
and water solution (per 100 cc. 20 g. of salt and 80 g. water)
or a spirituous beverage with a proof higher than 40 ° or food
alcohol.
2. Insert the removable bowl (G) into the xed bowl, by
pressing down on the end. Lift it and CHECK THE EXTER-
NAL WALL OF THE REMOVABLE BOWL IS COMPLETELY
WET. Without this operation, the machine will not work
optimally.
3. Place the plastic inserts for use with removable bowl (let-
ter “A” moulded) on the stainless steel mixing blade
4. Insert the mixing blade (B)
5. Screw the appropriate xing knob for blade (C)
ATTENTION!: when using a saline solution, once you have nished using the machine, thoroughly
wash and dry both the xed and removable bowls to prevent corrosion. Do not leave the saline
solution inside the bowl!
A) Use with xed bowl
B) Use with removable bowl
The machine is ready for use
1
1
2
5
1
2
43
2 3

ENGLISH
5
4K
MAKING ICE CREAM WITH THE Gelato 4K TOUCH
Preparation times and storage phases are set automatically by the machine software, according to the con-
stant reading (detection) of the room temperature and density of the mixture.
• Ensure that the voltage indicated on the data
plate matches the mains voltage. Plug the
power plug into the wall socket. The electro-
nic board will perform an initialization check,
lighting all LEDs on the control panel, after whi-
ch only the faint lighting of the start key (L.1)
will remain. The machine is ready for use
• Pour the mixture (1)
• Close the transparent lid (D) (2)
• Press and hold the start key (L.1) on the con-
trol panel (L) for two seconds (3)
• The machine starts an automatic ice cream
production (4). The progress of the preparation
is indicated by the gradual lighting of the LED
on the TIME LINE bar (L.2) (5)
• At the end of the cycle, or when the ice cre-
am has reached the consistency established
by the software, the machine changes to the
storage phase (6)
• The storage phase is indicated by the li-
ghting; all LEDs of the TIME LINE bar, storage
key SEL (L.3), central LED of the STORAGE
bar (L.4) (7)
• The machine automatically manages the
mixing and cooling equipment, operating it as
needed, the paddle and the cold supply
• The ice cream can be stored for a maximum
period of 8 hours, after which the machine swi-
tches off automatically (8)
How to proceed:
1
3
5
7
2
4
6
8

ENGLISH
6
Gelato 4K TOUCH is designed to operate fully automatically. Below are the details of all functions:
ATTENTION: during the storage phase the machine automatically manages the mixing system, activating and
stopping the blade rotation. During this phase if the lid is kept open for more than 4 seconds, the Pause function
starts automatically, but only if the mixing blade was rotating.
The lid of the machine (D) is designed to ensure:
1) Hygiene: the lid prevents contamination of
the product being processed by external ele-
ments.
2) Cleaning: the lid is completely removable as
to allow thorough cleaning.
3) Visibility: the transparent lid allows the user
to visually check the preparation’s process.
4) Addition of ingredients: the lid is equipped
with an opening closed by a cap (D.1). The
opening is useful to add ingredients during the
preparation, it avoids opening the lid.
5) Safety: a safety device stops automatically
the blade when the lid is opened. If the lid is
stays open for more than 4 seconds, the Pause
function starts automatically (see section PA-
NEL AND FUNCTION OF Gelato 4K TOUCH).
Gelato 4K TOUCH, the LID
PANEL AND FUNCTIONS OF THE Gelato 4K TOUCH
SCREEN Function Operation Description Led and sound
Machine
starts.
Automatic
operation.
TAP L.1
1 x 2” Press and hold the START
L.1 key for two seconds.
Start the automatic cycle (see
section MAKE ICE CREAM
WITH Gelato 4K TOUCH).
Start of cycle and production
phase
- Led L.1 turned on
- Led L.2 on the TIME LINE bar
light up gradually
- Blade start: audible signal (2
beeps)
When the ice cream is ready,
the machine automatical-
ly switches to the storage
phase.
Beginning the storage
- Led L.1 turned on
- Led L.2 TIME LINE all turned
on
- Led L.3 SEL turned on
- Led L.4 STORAGE turned on
- Storage start audible signal (3
beeps)
WARNING: Storage lasts up
to 8 hours. After this time,
the machine will turn off au-
tomatically. 5 beeps signal
the turning off.
Reaching the time limit
- Machine turned off audible
signal (5 beeps)

ENGLISH
7
4K
SCREEN Function Operation Description Led and sound
Pause function
activation
1 TAP L.1 Press the START L.1 key
Pause function can be activated during the
production or storage phase. When the
Pause function is active, this is signaled by
a beep every 10 seconds.
NOTE: Pause function starts automati-
cally if the lid is kept open for more than 4
seconds. (see section Gelato 4K TOUCH,
the LID).
Switching from the production to the
pause phase
- Led L.1 turned on
- TIME LINE Led L.2 ashing
- Pause start audible signal (1 beep)
- Audible signal every 10 seconds (1 beep)
Switching from the storage to the
pause phase
- Led L.1 turned on
- Led ashing on the STORAGE bar
- Pause start audible signal (1 beep)
- Audible signal every 10 seconds (1 beep)
WARNING: the Pause lasts up
to 10 minutes after which the
machine turns off automatically.
5 beeps signal the turning off.
Reaching the time limit:
- Led L.1 subtle lighting.
- Machine turned off audible signal (5 beeps)
Pause function
deactivation
1 TAP L.1 Press the START L.1 key to exit the pause
function and return to the production or
storage phase.
Exit pause phase
- Led L.1 turned on
- Led goes from ashing to steady.
- Blade re-start audible signal (2 beeps)
Manual
activation of
the storage
function
TAP L.3
1 x 3”
Press the L.3 key for 3 seconds.
Activation of the storage phase. Se-
lectable at any time during the ice cream
production phase or during the pause.
WARNING: Storage lasts up
to 8 hours. After this time, the
machine will turn off auto-
matically. 5 beeps signal the
turning off.
Manual activation of the storage
- Led L.1 turned on
- Led L.2 TIME LINE all turned on
- Led L.3 SEL turned on
- Led L.4 STORAGE turned on
- Storage start audible signal (3 beeps)
Reaching the time limit:
- Machine turned off audible signal (5 beeps)
Selection of the
storage cycle
TAP L.3 Press the L.3. key
If you want to manually select the
density during the storage phase,
repeatedly press the L.3 key to select a
different density to the default.
The larger LEDs indicate a higher
density. Smaller LEDs indicate a lower
density.
Selecting the storage density
- Led L.1 turned on
- Led L.4 STORAGE lights up corresponding to
the selection made.
- Led. TIME LINE L.2 all turned on
Return to the
production
cycle from the
storage phase
TAP L.3
1 x 3”
Press the L.3 key for 3 seconds.
Activation of the production cycle. Se-
lectable at any time during the ice cream
storage phase.
Return to production stage
- Led L.1 turned on
- TIME LINE Led L.2 light up gradually.
- Led L.3 SEL turned off.
- Led L.4 STORAGE turned off
- Blade movement audible signal (2 beeps)
Turning off the
machine
TAP L.1
1 x 2”
Press the L.1 key for 2 seconds.
Stop all functions.
Turning off the machine
- Led L.1 subtle lighting.
- Machine turned off audible signal (5 beeps)
PANEL AND FUNCTIONS OF THE Gelato 4K TOUCH

ENGLISH
8
• Make sure that the plug is disconnected from the mains socket before starting any cleaning operation.
• Wash the blade (B), the insert (B.1 and B.2), the transparent lid (D), the xing knob (C) of the blade and the removable
bowl (G) with soapy water, they can also be washed in a dishwasher.
• Clean the body of the machine (A) using a soft cloth. NEVER PLACE THE BODY OF THE MACHINE IN WATER!
• When using the removable bowl, it is extremely important to clean and dry all parts that come into contact with the
saline solution to avoid corrosion.
PROBLEM: the machine switches to the storage phase but the ice cream is not fully formed.
POSSIBLE CAUSES:
• Between the fixed and removable bowls the solution of salt and water or alcohol was not included (see section USE WITH REMO-
VABLE BOWL).
• The ingredients of the recipe are not balanced correctly.
• The initial temperature of the ingredients is not between +5°C and +20°C.
• The ambient temperature is above 38°C.
• The amount of ingredients is excessive. Do not fill the bowl by more than half.
• Excessive use of the Pause function or repeated lid openings.
PROBLEM: The machine does not cool down:
POSSIBLE CAUSES:
• The cooling system is controlled automatically by the software. During storage and/or pause phases, the system works as needed.
Make sure that it is not in one of those phases. Wait the time needed before intervening.
• Check that the power plug is properly plugged in and that the electricity reaches the equipment. Check that the L1 key is lit up.
• If there is a power failure or the plug is accidentally disconnected. The operation stops. Wait 5 minutes before restarting the machine.
If this pause is not respected, the refrigeration system may be damaged or need a very long time before restarting.
• Check that the machine is correctly positioned with the ventilation grids free from any obstruction.
• Check the operation of the ventilation, making sure that the air comes out of the ventilation grids.
PROBLEM: The paddle does not rotate
POSSIBLE CAUSES:
• The mixing paddle is controlled automatically by the software. During storage and/or pause phases, it works as needed. Make sure
that it is not in one of those phases. Wait the time needed before intervening.
• Check that the paddle is securely attached to the shaft and locked with a suitable fixing knob (C).
• Check that there are no obstructions that prevent rotation (including any deformation of the bowl).
PROBLEM: During the storage phase, the ice cream has become very hard.
Tip: Use a different storage cycle. Press the L3 key until a cycle is activated that includes a lower density (corresponding to a smaller
LED turned on the STORAGE bar).
PROBLEM: During the storage phase, the ice cream tends to melt.
Tip: Use a different storage cycle. Press the L3 key until a cycle is activated that includes a higher density (corresponding to a greater
LED turned on the STORAGE bar).
The machine is noisy.
A certain level of noise is expected in the normal operating specifications. However, if it becomes excessive, contact an authorized
service centre.
CLEANING THE MACHINE
TROUBLESHOOTING

ENGLISH
9
4K
ATTENTION:
Pls keep the packaging boxes. They will be necessary in case you should return the machine for repair or you should return it for any other
reason. If the machine will be sent back with a packaging box not suitable for transportation all repairing charges will be at charge of the
sender, even if the machine is under warranty . If the machines doesn’t need to be repaired and the package will not be suitable the
machine will be returned to the sender too.
ATTENTION:
Veuillez conserver les emballages. Ils seront necessaires au cas où la machine sera retournée pour réparation ou pour n’import quelle
raison. Si les machines seront retournées dans un emballage pas conforme au transport toutes les frais de réparation seront à charge de
l’expéditeur même si la machine sera sous garantie. Aussi s’il ne s’agit pas de réparation et si l’emballage ne sera pas conforme la
machine ne sera pas acceptée et elle sera retournée à l’expéditeur.
ATTENZIONE:
Conservare gli imballi in caso la macchina debba essere restituita per riparazioni o resa. In caso di macchine spedite in imballo non adatto
alle modalità di trasporto gli interventi di riparazione saranno interamente a carico del mittente a prescindere dalla garanzia, mentre i resi
non saranno accettati.
ACHTUNG:
Bewahren Sie bitte immer die Originalverpackung. Falls das Gerät nicht in seiner Originalverpackung zum Kundendienst zugeschickt
wird, gehen die Kosten für die Reparatur auch während der Garantiezeit zu Lasten des Kunden. Retouren ohne Originalverpackung
werden verweigert.
LET OP:
Bewaar de verpakkingen voor het geval het apparaat teruggestuurd moet worden voor reparaties of in geval van retourzending. Bij
verzending van het apparaat in een ongeschikte verpakking zullen de reparatiekosten volledig voor rekening van de zender zijn, ongeacht
de garantie, en een retourzending zal niet worden geaccepteerd.
CUIDADO:
Guardar los emballajes en el caso el aparato sea devuelto para reparacion o devoluciòn. En el caso los aparatos seran entrgados en
cajas no bien protegidas los gastos de la reparaciòn seran cargados al cliente a pesar de la garancia, mientras las devoluciones no seran
aceptadas.
ВНИМАНИЕ:
пожалуйсто сохраните упаковачные коробки. Они нужны если понодобиться отдать прибор в сервис ули его вернуть
продавателью. В случае если прибор отправлен по почте не в оригинальной упаковачной коробке, сервисные расходы будут
полностью за счет отправителя, не зависимо от гарантийных условий. Продаватель умеет право не принимать приборы не в
оригинальной упаковачной коробке.
ADVARSEL:
Hold plasticposer i tilfælde skal maskinen returneres til reparation eller udbytte. I tilfælde af maskiner, der leveres i emballage uegnet
til transportformer reparationer afholdes udelukkende af afsenderen, uanset garantien, mens afkastet ikke vil blive accepteret.
VAROITUS:
Pidä muovipussit, mikäli koneella on palautettava korjattavana tai tuoton. Kun kyseessä koneiden toimitetaan pakkauksissa sovellu
kuljetusmuotojen korjaukset kantaa kokonaisuudessaan lähettäjän riippumatta takuun, kun palaa ei hyväksytä.
VARNING:
Förvara plastpåsar i fall maskinen måste returneras för reparation eller utbyte. När det gäller datorer som levereras i förpackningar
oläm pliga för transportsätt reparationer kommer att bäras av avsändaren, oavsett garantin, medan avkastningen inte kommer att

ITALIANO
10
I: AVVERTENZE PER IL CORRETTO SMALTIMENTO DEL PRODOTTO AI SENSI DELLA DIRETTIVA EUROPEA 2012/19/EU.
Informazioni ambientali
Questo prodotto può contenere sostanze che possono essere dannose per l’ambiente e per la salute umana se non viene smaltito in modo opportuno. Vi
forniamo pertanto le seguenti informazioni per evitare il rilascio di queste sostanze e per migliorare l’uso delle risorse naturali. Le apparecchiature elettriche ed
elettroniche non devono essere smaltite tra i normali riuti urbani ma devono essere inviate alla raccolta differenziata per il loro corretto trattamento. Il simbolo
del bidone barrato, apposto sul prodotto ed in questa pagina, ricorda la necessità di smaltire adeguatamente il prodotto al termine della sua vita. In tal modo è
possibile evitare che un trattamento non specico delle sostanze contenute in questi prodotti, od un uso improprio di parti di essi possano portare a conseguen-
ze dannose per l’ambiente e per la salute umana. Inoltre si contribuisce al recupero, riciclo e riutilizzo di molti dei materiali contenuti in questi prodotti. A tale sco-
po i produttori e distributori delle apparecchiature elettriche ed elettroniche organizzano opportuni sistemi di raccolta e smaltimento delle apparecchiature stesse.
Alla ne della vita del prodotto rivolgetevi al vostro distributore per avere informazioni sulle modalità di raccolta. Al momento dell’acquisto di questo prodotto il
vostro distributore vi informerà inoltre della possibilità di rendere gratuitamente un altro apparecchio a ne vita a condizione che sia di tipo equivalente ed abbia
svolto le stesse funzioni del prodotto acquistato. Uno smaltimento del prodotto in modo diverso da quanto sopra descritto sarà passibile delle sanzioni previste
dalla normativa nazionale vigente nel paese dove il prodotto viene smaltito. Vi raccomandiamo inoltre di adottare altri provvedimenti favorevoli all’ambiente:
riciclare l’imballo interno ed esterno con cui il prodotto è fornito e smaltire in modo adeguato le batterie usate (solo se contenute nel prodotto). Con il vostro aiuto
si può ridurre la quantità di risorse naturali impiegate per la realizzazione di apparecchiature elettriche ed elettroniche, minimizzare l’uso delle discariche per lo
smaltimento dei prodotti e migliorare la qualità della vita evitando che sostanze potenzialmente pericolose vengano rilasciate nell’ambiente.
Nemox International s.r.l. si riserva il diritto di apportare tutte le modiche ritenute necessarie.
AVVERTENZE GENERALI DI SICUREZZA
Durante l’utilizzo di apparecchi elettrici è necessario prestare molta attenzione ad alcune norme di sicurezza, in particolare:
· Leggere attentamente le istruzioni d’uso prima di installare e utilizzare l’apparecchio.
· Non immergere la macchina in acqua o in altri liquidi per evitare il pericolo di scosse elettriche.
· Non consentire l’uso dell’apparecchio a persone (anche bambini) con ridotte capacità psico-sico-sensoriali, o con esperienza e conoscenze insufcienti, a
meno che non siano attentamente sorvegliate e istruite da un responsabile della loro incolumità.
· Sorvegliare i bambini, assicurandosi che non giochino con l’apparecchio.
· Scollegare l’apparecchio dalla presa di corrente quando non è in funzione, prima di smontarlo e prima di pulirlo.
· Non venire a contatto con alcuna parte in movimento. Per evitare il rischio di infortuni o di danni all’apparecchio, non toccarlo con mani, capelli, abiti, spatole o
altri utensili mentre è in funzione.
· Non utilizzare l’apparecchio se il cavo di alimentazione o la spina sono danneggiati, o dopo un funzionamento anomalo, o ancora dopo che l’apparecchio sia
caduto o sia stato danneggiato in qualsiasi modo. In questi casi è consigliabile portare l’apparecchio al più vicino centro di Assistenza Autorizzato per le ripara-
zioni.
· L’uso di accessori o parti non originali o non raccomandate dal costruttore appositamente per quest’apparecchio potrebbe essere causa di incendio, di scosse
elettriche o di infortuni.
· Non utilizzare all’aperto.
· Non lasciare che il cavo di alimentazione sporga dal bordo del tavolo o dal piano di lavoro ed evitare che il cavo stesso entri in contatto con superci calde.
CONSERVARE QUESTE ISTRUZIONI
ATTENZIONE!
· Qualsiasi operazione che esuli dalla normale pulizia o manutenzione deve essere effettuata da un Centro Specializzato con personale autorizzato.
· Dopo aver tolto l’apparecchio dall’imballo vericarne l’integrità. In caso di dubbio non utilizzare l’apparecchio e rivolgersi ad un centro di servizio autorizza-
to.
· Sacchetti, polistiroli, chiodi etc. sono potenzialmente pericolosi e non vanno tenuti a portata dei bambini.
· Il costruttore ed il venditore riutano qualsiasi responsabilità per danni causati dal mancato rispetto delle istruzioni nel presente libretto. Controllare che il
voltaggio riportato sulla targa dati dell’apparecchio corrisponda alla tensione erogata nella vostra zona.
· Non utilizzare oggetti o utensili taglienti all’interno del cestello, potrebbe risultarne danneggiato. Ad apparecchio spento è consigliabile utilizzare una
spatola di gomma o un cucchiaio di legno.
· Non pulire l’apparecchio con sostanze od oggetti abrasivi.
· Non posizionare l’apparecchio su superci calde o vicino a amme.
· Non staccare la spina di alimentazione tirandola per il cavo.
· L’apparecchio deve essere alimentato tramite un impianto efciente equipaggiato con una efciente messa a terra e con presa di corrente capace di alme-
no 10A. Il costruttore non è responsabile per danni a cose o persone nel caso in cui le prescritte norme di sicurezza non siano rispettate.
· Prima di qualsiasi operazione di pulizia o manutenzione, assicurarsi che l’apparecchio sia disconnesso dalla rete elettrica.
· Non lavare mai l’apparecchio con getti d’acqua o immergendolo.
· Questo apparecchio è in classe climatica “T”, adatto per l’utilizzo no a temperatura ambiente di 43°C.
by

ITALIANO
11
4K
Complimenti, avete acquistato la macchina da gelato più innovati-
va e tecnologicamente avanzata esistente nel mercato mondiale!
Gelato 4K TOUCH è interamente costruita in Italia, da gente che da oltre 30 anni è specializzata e ama produrre macchine da
gelato di qualità. Leggendo queste istruzioni imparerete velocemente e facilmente a utilizzare al meglio la vostra Gelato 4K
TOUCH e soprattutto a ottenere ottimi gelati!
Vi ringraziamo per la ducia accordata alla nostra azienda e alla nostra gente. Faremo tutto il possibile per rendervi pienamente
soddisfatti della vostra scelta.
A) Corpo gelatiera con cestello sso
B) Pala miscelatrice in acciaio
B.1) Inserti pala per cestello sso (lettera “L” stampata)
B.2) Inserti pala per cestello estraibile (lettera “A” stampata)
C) Pomolo di ssaggio per pala
D) Coperchio trasparente
D.1) Foro aggiunta ingredienti con tappo
E) Spatola per gelato
F) Griglie di ventilazione
G) Cestello estraibile
H) Misurino
I) Cavo di alimentazione
L) Pannello comandi
L.1) Tasto Start e relativo led (ON)
L.2) Led avanzamento ciclo di produzione (TIME LINE)
L.3) Tasto conservazione (SEL)
L.4) Led conservazione (STORAGE)
AVVERTENZE PRELIMINARI DA SEGUIRE PRIMA DELL’UTILIZZO DELLA MACCHINA
• L’igiene è la cosa più importante da osservare quando si prepara il gelato. Assicuratevi che tutti i componenti siano assoluta-
mente puliti, in modo particolare quelli che possono venire a contatto con il gelato.
• Variazioni di velocità e di livello sonoro durante la preparazione del gelato sono normali e non pregiudicano il buon funziona-
mento della macchina.
• La miscela va versata nella gelatiera ad una temperatura compresa tra +5°C e +20°C, al di fuori di questi parametri la macchi-
na potrebbe non funzionare in maniera ottimale
• La macchina ha una capacità consigliata di 1,0 kg. di miscela. Se si inseriscono quantità maggiori c’è il rischio che il gelato,
aumentando di volume durante la lavorazione, sbordi dal cestello. Inoltre la macchina potrebbe non funzionare in maniera otti-
male.
• La macchina è dotata di una funzione di Pausa (vedere paragrafo IL PANNELLO E LE FUNZIONI DI Gelato 4K TOUCH ed il
paragrafo IL COPERCHIO DI Gelato 4K TOUCH).
Ogni avviamento della pala di mescolamento è segnalato da un avviso acustico (2 bip).
A
B.1
H C
E B
L1
L
L2
L3
L4
B.2
G
D.1
F
D
I

ITALIANO
12
IMPORTANTE: Lasciare la macchina su una supercie piana in posizione orizzontale almeno 12 ore prima di utilizzarla
per la prima volta. Nel caso in cui la macchina fosse stata capovolta durante il trasporto, gli agenti refrigeranti dovranno
riuire nella corretta posizione.
Lasciare almeno 20 cm. di spazio tutt’intorno alla macchina per una libera circolazione dell’aria. Assicurarsi che le griglie
di ventilazione (F) non siano ostruite. La fuoriuscita di aria tiepida o calda dalle prese d’aria laterali fa parte integrante del
funzionamento dell’apparecchio che scambia calore con l’esterno per la refrigerazione.
OPZIONI D’USO
1. Posizionare gli inserti di plastica per cestello sso
(B.1 lettera “L” stampata) sulla pala in acciaio
2. Inserire la pala miscelatrice (B)
3. Avvitare l’apposito pomolo di ssaggio (C)
1. Versare nel cestello sso circa 1 misurino (H) di una
soluzione di sale e acqua (per 100 cc. 20 g. di sale e 80 g. di
acqua) oppure di un superalcoolico di gradazione superiore
ai 40° o alcool alimentare.
2. Inserire la pentola estraibile (G) all’interno del cestello s-
so premendo bene sino in fondo. Sollevarlo e VERIFICARE
CHE LA PARETE ESTERNA DEL CESTELLO ESTRAIBILE
SIA COMPLETAMENTE BAGNATA.
Senza questa operazione la macchina non funzionerà in
maniera ottimale.
3. Posizionare gli inserti di plastica per cestello estraibile (B.2
lettera “A” stampata) sulla pala in acciaio
4. Inserire la pala miscelatrice (B)
5.Avvitare l’apposito pomolo di ssaggio (C)
ATTENZIONE!:
in caso di utilizzo della soluzione salina, una volta terminato l’utilizzo della macchina, lavare ed
asciugare molto bene sia cestello sso che estraibile per prevenire fenomeni di corrosione. Non
lasciare la soluzione salina all’interno del cestello!
A) Uso con cestello sso
B) Uso con cestello estraibile
La macchina è pronta per l’utilizzo
1
1
2
5
1
2
43
2 3

ITALIANO
13
4K
FARE IL GELATO CON Gelato 4K TOUCH
I tempi di preparazione e le fasi di conservazione sono stabiliti automaticamente dal software della macchina
in funzione della lettura costante di temperatura ambiente e densità della miscela.
• Vericare che il voltaggio indicato sulla tar-
ghetta dati corrisponda a quello di rete. Inserire
la spina di alimentazione nella presa di corren-
te
• La scheda elettronica effettuerà un controllo
di inizializzazione, accendendo tutti i led del
pannello comandi, dopodiché rimarrà solo una
illuminazione tenue del tasto start (L.1). La
macchina è pronta per l’uso
• Versare la miscela (g.1)
• Chiudere il coperchio trasparente (D) (g.2)
• Premere per due secondi il tasto start (L.1)
sul pannello comandi (L) (g.3)
• La macchina inizia un ciclo automatico di
produzione del gelato (g.4). L’avanzamento
della preparazione è segnalato dall’illuminazio-
ne progressiva dei LED sulla barra TIME LINE
(L.2) (g.5)
• Al termine del ciclo oppure nel caso il gelato
abbia raggiunto la consistenza stabilita dal
software, la macchina passa in fase di conser-
vazione (g.6)
• La fase di conservazione è segnalata dall’illu-
minazione di tutti i LED della barra TIME LINE,
tasto conservazione SEL (L.3) , LED centrale
della barra STORAGE (L.4) (g.7)
• La macchina gestisce automaticamente la
mantecazione e l’impianto frigorifero, facendo
funzionare al bisogno, la pala e l’erogazione
del freddo
• Il gelato può essere conservato per un pe-
riodo massimo di 8 ore, al termine del quale la
macchina si spegne automaticamente (g.8)
Come procedere:
3
5
78
12
4
6

ITALIANO
14
Gelato 4K TOUCH è progettata per funzionare in maniera completamente automatica. Di seguito il dettaglio di
tutte le funzioni:
ATTENZIONE: durante la fase di conservazione la macchina gestisce automaticamente la mantecazione, con
periodi di attivazione e spegnimento della funzione di mescolamento. Se durante la fase di conservazione il co-
perchio viene tenuto aperto per più di 4 secondi, la macchina entra automaticamente in funzione Pausa solo nel
caso in cui il mescolamento sia attivo.
Il coperchio della macchina (D) è studiato per garantire:
1) Igiene: il coperchio evita la contaminazione del
prodotto in lavorazione da parte di agenti esterni
2) Pulizia: il coperchio è totalmente smontabile in
modo da poter essere pulito accuratamente.
3) Controllo del prodotto: l’ampio coperchio traspa-
rente consente di controllare visivamente il gelato
in ogni fase della lavorazione
4) Aggiunte ingredienti: il coperchio è dotato di un
foro con tappo (D.1) per l’aggiunta di ingredienti
durante la lavorazione
5) Sicurezza: Un dispositivo di sicurezza arresta
il movimento della pala quando il coperchio viene
alzato. Se il coperchio viene tenuto aperto per più
di 4 secondi la macchina entra automaticamente in
funzione Pausa (vedere paragrafo IL PANNELLO
E LE FUNZIONI DI Gelato 4K TOUCH).
IL COPERCHIO DI Gelato 4K TOUCH
IL PANNELLO E LE FUNZIONI DI Gelato 4K TOUCH
SCREEN Funzione Operazione Descrizione Led e suono
Avvio mac-
china. Fun-
zionamento
automatico.
TAP L.1
1 x 2” Premere per due secondi il
tasto START
L.1. Avvio del ciclo automati-
co (vedere il paragrafo FARE
IL GELATO CON Gelato 4K
TOUCH)
Inizio ciclo e fase di produ-
zione
- Led L.1 acceso
- Led L.2 sull barra TIME LINE
si accendono progressivamente
- Segnale acustico avviamento
pala (2 bip)
A gelato pronto la macchina
passa automaticamente in
fase di conservazione.
Inizio fase di conservazione
- Led L.1 acceso
- Led L.2 TIME LINE tutti accesi
- Led L.3 SEL acceso
- Led L.4 STORAGE acceso
- Segnale acustico avvio con-
servazione (3 bip)
ATTENZIONE: la Conserva-
zione ha durata massima
di 8 ore. Trascorso questo
tempo la macchina si spe-
gne automaticamente. 5 bip
segnalano lo spegnimento.
Raggiungimento tempo limite
- Segnale acustico spegnimen-
to macchina (5 bip)

SCREEN Funzione Operazione Descrizione Led e suono
Attivazione
funzione Pausa
1 TAP L.1 Premere il tasto START L.1
Si può attivare durante la fase di forma-
zione o di conservazione del gelato. La
funzione viene segnalata da un avviso
acustico ogni 10 secondi.
Nota: la funzione Pausa viene attivata au-
tomaticamente nel caso il coperchio venga
tenuto aperto per più di 4 secondi (vedere
paragrafo IL COPERCHIO DI Gelato 4K
TOUCH)
Passaggio da fase di produzione a
pausa
- Led L.1 acceso
- Led L.2 TIME LINE lampeggianti
- Segnale acustico avvio pausa (1 bip)
- Segnale acustico ogni 10 secondi (1 bip)
Passaggio da fase conservazione a
pausa
- Led L.1 acceso
- Led lampeggiante sulla barra STORAGE
- Segnale acustico avvio pausa (1 bip)
- Segnale acustico ogni 10 secondi (1 bip)
ATTENZIONE: la Pausa ha
durata massima di 10 minuti al
termine dei quali la macchina si
spegne automaticamente. 5 bip
segnalano lo spegnimento.
Raggiungimento tempo limite:
- Led L.1 illumunazione tenue.
- Segnale acustico spegnimento macchina (5 bip)
Disattivazione
funzione pausa
1 TAP L.1 Premere il tasto START L.1 per uscire
dalla funzione pausa e ritornare alla fase di
produzione o di conservazione.
Uscita da fase di pausa
- Led L.1 acceso
- Led da lampeggiante a sso.
- Segnale acustico a riavvio pala (2 bip)
Attivazione
manuale della
funzione di
conservazione
TAP L.3
1 x 3”
Premere il tasto L.3 per 3 secondi.
Attivazione della fase di conservazione.
Selezionabile in qualsiasi momento
durante la fase di produzione del gelato
o durante la pausa.
ATTENZIONE: la Conserva-
zione ha durata massima di 8
ore. Trascorso questo tempo
la macchina si spegne automa-
ticamente. 5 bip segnalano lo
spegnimento.
Attivazione manuale conservazione
- Led L.1 acceso
- Led L.2 TIME LINE tutti accesi
- Led L.3 SEL acceso
- Led L.4 STORAGE acceso
- Segnale acustico avvio conservazione (3 bip)
Raggiungimento tempo limite:
- Segnale acustico spegnimento macchina (5
bip)
Selezione del
ciclo di conser-
vazione
TAP L.3 Premere il tasto L.3.
Se si desidera selezionare manualmente
la densità durante la fase di
conservazione, premere ripetuta-
mente il tasto L.3 per selezionare una
densità diversa da quella impostata di
default.
I led di dimensioni maggiori indicano una
densità maggiore. Quelli di dimensioni
inferiori una densità inferiore.
Selezione densità di conservazione
- Led L.1 acceso
- Led L.4 STORAGE si accende il led corri-
spondente alla selezione effettuata.
- Led. L.2 TIME LINE tutti accesi
Ritorno al ciclo
di produzione
dalla fase di
conservazione
TAP L.3
1 x 3”
Premere il tasto L.3 per 3 secondi.
Attivazione del ciclo di produzione. Sele-
zionabile in qualsiasi momento durante
la fase di conservazione del gelato.
Ritorno a fase di produzione
- Led L.1 acceso
- Led L.2 TIME LINE accesi progressivamete.
- Led L.3 SEL spento.
- Led L.4 STORAGE spento
- Segnale acustico movimento pala (2 bip)
Spegnimento
della macchina
TAP L.1
1 x 2”
Premere il tasto L.1 per 2 secondi.
Arresto di tutte le funzioni.
Spegnimento macchina
- Led L.1 illumunazione tenue.
- Segnale acustico spegnimento macchina (5
bip)
ITALIANO
15
4K
IL PANNELLO E LE FUNZIONI DI Gelato 4K TOUCH

ITALIANO
16
• Assicurarsi che la spina sia disinserita dalla presa di corrente prima di iniziare qualsiasi operazione di pulizia.
• Lavare la pala (B) e gli inserti (B.1 e B.2), il coperchio trasparente (D), il tappo (D.1), il pomolo di ssaggio (C) della pala
ed il cestello estraibile (G) con acqua saponata, si possono lavare anche in lavastoviglie.
• Pulire il corpo della macchina (A) servendosi di un panno morbido. NON IMMERGERE MAI IL CORPO DELLA MAC-
CHINA IN ACQUA!
• Quando si utilizza il cestello estraibile, è di estrema importanza pulire ed asciugare accuratamente tutte le parti che
vengono a contatto con la soluzione salina per evitare fenomeni di corrosione.
PROBLEMA: la macchina passa in fase di conservazione ma il gelato non è completamente formato.
POSSIBILI CAUSE:
• Tra il cestello sso e l’estraibile non è stata inserita la soluzione di acqua e sale o alcool (vedi paragrafo USO CON CE-
STELLO ESTRAIBILE).
• Gli ingredienti della ricetta non sono correttamente bilanciati.
• La temperatura iniziale degli ingredienti non è compresa tra +5°C e +20°C.
• La temperatura ambiente è superiore a 38°C.
• La quantità degli ingredienti è eccessiva. Non riempire il cestello oltre la sua metà.
• Eccessivo utilizzo della funzione di Pausa o eccessive aperture del coperchio.
PROBLEMA: La macchina non raffredda.
POSSIBILI CAUSE:
• L’impianto frigorifero è gestito automaticamente dal software. Durante le fasi di conservazione e / o pausa, l’impianto
funziona al bisogno. Assicurarsi di non essere in una di tali fasi. Attendere il tempo necessario prima di intervenire.
• Controllare che la spina di alimentazione sia correttamente inserita e l’energia elettrica arrivi all’apparecchio. Vericare
che il tasto L1 sia illuminato (tenue).
• Se si è vericata un’interruzione di corrente o si è stacca accidentalmente la spina, il funzionamento si interrompe. Atten-
dere 5 minuti prima di riavviare la macchina. Qualora non si rispetti questa pausa, l’impianto frigorifero potrebbe danneg-
giarsi o richiedere un tempo molto lungo prima di riavviarsi.
• Controllare che la macchina sia posizionata correttamente con le griglie di ventilazione libere da qualsiasi ostruzione.
• Vericare il funzionamento della ventilazione, controllando che l’aria fuoriesca dalle griglie di areazione.
PROBLEMA: La pala non gira.
POSSIBILI CAUSE:
• La pala di mantecazione è gestita automaticamente dal software. Durante le fasi di conservazione e / o pausa,
funziona al bisogno. Assicurarsi di non essere in una di tali fasi. Attendere il tempo necessario prima di intervenire.
• Controllare che la pala sia correttamente agganciata all’albero e bloccata con l’apposito pomolo di ssaggio (C).
• Controllare che non ci siano ostacoli che impediscano la rotazione della (incluse eventuali deformazioni del cestel-
lo).
PROBLEMA: Durante la fase di conservazione il gelato è divenuto molto duro.
Suggerimento: utilizzare un ciclo di conservazione diverso. Premere il tasto L3 no ad attivare un ciclo che preveda
una densità meno elevata (corrisponde a un LED acceso di dimensione minore sulla barra STORAGE).
PROBLEMA: Durante la fase di conservazione il gelato tende a sciogliersi.
Suggerimento: utilizzare un ciclo di conservazione diverso. Premere il tasto L3 no ad attivare un ciclo che preveda
una densità più elevata (corrisponde a un LED di dimensione maggiore sulla barra STORAGE).
La macchina è rumorosa.
Una certa rumorosità rientra nelle normali speciche di funzionamento; tuttavia, se diventasse eccessiva, contattate
un Centro di Assistenza autorizzato.
PULIZIA DELLA MACCHINA
CHE COSA POTREBBE NON FUNZIONARE?

ITALIANO
17
4K
ATTENTION:
Pls keep the packaging boxes. They will be necessary in case you should return the machine for repair or you should return it for any other
reason. If the machine will be sent back with a packaging box not suitable for transportation all repairing charges will be at charge of the
sender, even if the machine is under warranty . If the machines doesn’t need to be repaired and the package will not be suitable the
machine will be returned to the sender too.
ATTENTION:
Veuillez conserver les emballages. Ils seront necessaires au cas où la machine sera retournée pour réparation ou pour n’import quelle
raison. Si les machines seront retournées dans un emballage pas conforme au transport toutes les frais de réparation seront à charge de
l’expéditeur même si la machine sera sous garantie. Aussi s’il ne s’agit pas de réparation et si l’emballage ne sera pas conforme la
machine ne sera pas acceptée et elle sera retournée à l’expéditeur.
ATTENZIONE:
Conservare gli imballi in caso la macchina debba essere restituita per riparazioni o resa. In caso di macchine spedite in imballo non adatto
alle modalità di trasporto gli interventi di riparazione saranno interamente a carico del mittente a prescindere dalla garanzia, mentre i resi
non saranno accettati.
ACHTUNG:
Bewahren Sie bitte immer die Originalverpackung. Falls das Gerät nicht in seiner Originalverpackung zum Kundendienst zugeschickt
wird, gehen die Kosten für die Reparatur auch während der Garantiezeit zu Lasten des Kunden. Retouren ohne Originalverpackung
werden verweigert.
LET OP:
Bewaar de verpakkingen voor het geval het apparaat teruggestuurd moet worden voor reparaties of in geval van retourzending. Bij
verzending van het apparaat in een ongeschikte verpakking zullen de reparatiekosten volledig voor rekening van de zender zijn, ongeacht
de garantie, en een retourzending zal niet worden geaccepteerd.
CUIDADO:
Guardar los emballajes en el caso el aparato sea devuelto para reparacion o devoluciòn. En el caso los aparatos seran entrgados en
cajas no bien protegidas los gastos de la reparaciòn seran cargados al cliente a pesar de la garancia, mientras las devoluciones no seran
aceptadas.
ВНИМАНИЕ:
пожалуйсто сохраните упаковачные коробки. Они нужны если понодобиться отдать прибор в сервис ули его вернуть
продавателью. В случае если прибор отправлен по почте не в оригинальной упаковачной коробке, сервисные расходы будут
полностью за счет отправителя, не зависимо от гарантийных условий. Продаватель умеет право не принимать приборы не в
оригинальной упаковачной коробке.
ADVARSEL:
Hold plasticposer i tilfælde skal maskinen returneres til reparation eller udbytte. I tilfælde af maskiner, der leveres i emballage uegnet
til transportformer reparationer afholdes udelukkende af afsenderen, uanset garantien, mens afkastet ikke vil blive accepteret.
VAROITUS:
Pidä muovipussit, mikäli koneella on palautettava korjattavana tai tuoton. Kun kyseessä koneiden toimitetaan pakkauksissa sovellu
kuljetusmuotojen korjaukset kantaa kokonaisuudessaan lähettäjän riippumatta takuun, kun palaa ei hyväksytä.
VARNING:
Förvara plastpåsar i fall maskinen måste returneras för reparation eller utbyte. När det gäller datorer som levereras i förpackningar
oläm pliga för transportsätt reparationer kommer att bäras av avsändaren, oavsett garantin, medan avkastningen inte kommer att

18
NOTE

19
4K
NOTE

20
Cod. 519720
NEMOX International S.r.l.
Via Enrico Mattei, n.14
25026, Pontevico
Brescia) ITALY
www.nemox.com
Table of contents
Languages:
Other Nemox Ice Cream Maker manuals

Nemox
Nemox gelato 5Ksc User manual

Nemox
Nemox Gelato 6K crea User manual

Nemox
Nemox GELATO NXT1 L'AUTOMATIC User manual

Nemox
Nemox Crea Series User manual

Nemox
Nemox gelatissimo exclusive i-green User manual

Nemox
Nemox gelato CHEF 2200 User manual

Nemox
Nemox Ice Cream Maker User manual

Nemox
Nemox Gelato 6 K Crea Series User manual

Nemox
Nemox i-GREEN GELATO 5+5K TWIN CREA User manual

Nemox
Nemox gelato 12k User manual