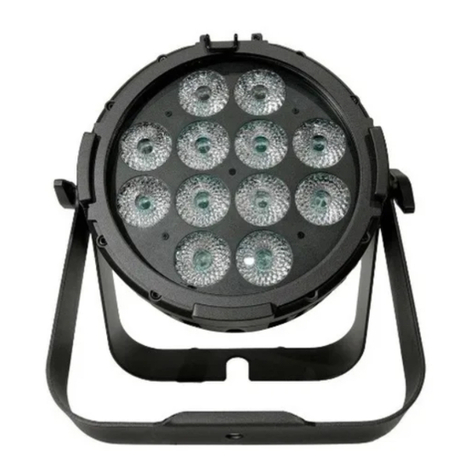
NEO Proton 12 HEX USB User manual

PLEASE READ THE INSTRUCTIONS CAREFULLY BEFORE USE /
POR FAVOR LEA LAS INSTRUCCIÓNES ANTES DE USAR
USER MANUAL / MANUAL DE USUARIO
PROTON 12
HEX USB

PROTON 12 HEX USB
P.
2
1. OVERVIEW
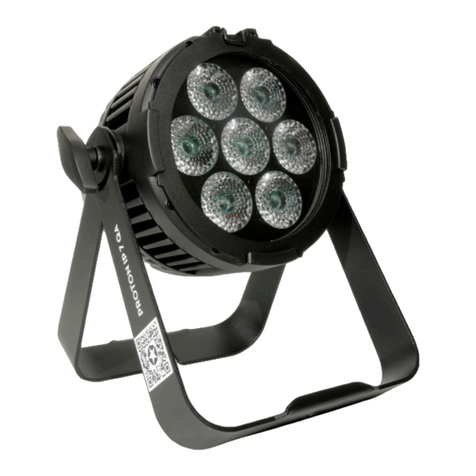
Proton 12 HEX USB is a professional, light & compact fix-
ture powered by 12 RGBAW+UV 10W LEDs with a 25º
beam angle. The unit is equipped with Hex-color LED tech-
nology, enabling deeply saturated colors & UV effect with
no multi-colored shadows. Proton 12 HEX USB sports 16-
bit dimmer with 4 dimming curves, strobe effect & a 1200Hz
refresh rate for flicker free video playback. Amongst its
most relevant features the user will find the built-in USB
port that - in combination with NEO Stick USB - allows the
user to control the unit in wireless mode or via NEO Wi app
– iOS® & Android®.
SPECIFICATIONS
Source & Optic
• Light Source: 12 RGBAW+UV 10W LEDs
• LEDs life: 50,000 hours
• Beam angle: 25º
• Field angle: 40º
Photometric Data
• Flux: 350 lux @ 16 ft.
Effects & Functions
• Controllable via NEO Wi app - iOS® & Android® -
Combined with the NEO Stick USB
• Hex-color LED technology: Smooth RGBWA+UV
mix with no multi-colored shadows
• Color macros and rainbow effect
• Dimmer: 0-100% general & for all colors
• 4 dimming curves
• Strobe effect: 0-30 Hz
• Flicker free (ideal for broadcasting)
• 4 built-in programs
• Controllable via IR-6 control (optional)
• Built-in microphone
• Very silent operation
Control
• DMX Channels: 6/11
• Operational modes: DMX, Master/Slave, Au-
to-run and Sound-active
• USBportforWi-ficontrol(Through NEOUSBStick)
• Electrical
• Input voltage range: AC100–240V, 50-60Hz
• Power consumption: 83W
• Power linking:
• 110V: Up to 9 units
• 220V: Up to 16 units
• Physical
• IP Rating: IP20
• 4-digit LED display
• DMX connectors: 2 XLR connectors (XLR-3 in-
put and output)
• IEC In/Out power supply connectors
• USB Port
• Dimensions: 253x290x98 mm. / 10x11.4x3.8 in.
• Weight: 3.2 Kg. / 7 Lbs.
ENGLISH VERSION

PROTON 12 HEX USB
P.
3
2. SAFETY INSTRUCTIONS
1. Before delivery, this device has passed strict in-
spection, Please follow the user manual strictly
for operation, if this fixture is damaged by im-
proper operation and mistake, the fixture will be
outofwarranty,andmanufactureordealerwon’t
be responsible for it. In case of any technology
change in this manual,we won’t advise in further
.
2. Aer you have received this product, please pay
special attention and check cautiously whether
the product was damaged or not during the
transportation, if it is, please do not use this fix-
ture and contact local dealers or manufacturers
as soon as possible.
3. The applicable temperature for the lighting is be-
low 40°C. Do not use the lighting above the temp
erature.
4. It must be kept clean; please do not use it around
overheat or dusty environment. Do not touch the
Chemical liquid.
5. Read the instructions before installing anything.
Pay attention to the manual and warning signs
on the equipment, if you have any other ques-
tions, please contact the dealer or manufacturer
as soon as possible.
6. Any break, please contact professionals: repairs
must be done by technical personnel.
7. Do not power in and open before installation. Let
have a rest when continuous work for eight hours.
It will longer the device using li.
8. Fixed installation, to prevent the strong vibration
or impact of the device.
9. The distance between the device and the projec-
tile must be at least 0.5 meter.
ENGLISH VERSION
10. Never look directly into the light source, as sen-
sitivepersons maysueranepileptic shock(espe-
cially meant for epileptics)! When light output
position of the device of dustproof glass break-
age, cracks or other visible damage, user should
replace the new glass to continue to use.
• WHAT’S INSIDE
• PROTON 12 HEX USB - Power cord
• User Manual
PROTON 12 HEX USB
P.
4
ENGLISH VERSION
3. OVERVIEW
Rear View

PROTON 12 HEX USB
P.
5
ENGLISH VERSION
DIMENSIONS
253
200
290
94
98
84
13

PROTON 12 HEX USB
P.
6
ENGLISH VERSION
Control Panel
BUTTON FUNCTION
Menu Selects operating mode or exits submenus
Up Scrolls up through option lists or selects higher value
Down Scrolls down through option lists or selects lower value
Enter Activates displayed menu option or selected value

PROTON 12 HEX USB
P.
7
ENGLISH VERSION
4. FUNCTION MENU
MODE OPTIONS/VALUES DESCRIPTION
6ch d 001-512 6-channel DMX mode
11ch d 001-512 11-channel DMX mode
C-- C 1-63 Static color selection
P-- (auto) P 1 Auto Program 1
P 2 Auto Program 2
P 3 Auto Program 3
P 4 Auto Program 4
Snd (audio) S-- 1-100 Program speed for P1–P4
SenS Snd1 Sound-active Program 1
Snd2 Sound-active Program 2
u--0-100 Sound sensitivity
U-- R000-255 (rojo) Custom static colors
Mix red, green, blue, amber, white
and UV
G000-255 (verde)
B000-255 (azul)
A000-255 (ámbar)
W000-255 (blanco)
P000-255 (UV)
diM OFF Dimmer speed
dIM 1
dIM 2
dIM 3
SEr On Turns infrared on or o
OFF

PROTON 12 HEX USB
P.
8
ENGLISH VERSION
UFI OPERATION
To enable wirelessDMXoperationviatheoptionalUFIwi- transceiver:
1) Set the Proton 12 HEX USB starting DMX address
2) Set the UFI sending/receiving channel
3) Attach the UFI to the PROTON 12 HEX USB port
4) Use Dipswitch 5 to select UFI send or receive mode.

PROTON 12 HEX USB
P.
9
ENGLISH VERSION
CHANNEL FUNCTION VALUE PERCENT/SETTINGS
1Red 000 - 255 0 - 100%
2 Green 000 - 255 0 - 100%
3 Blue 000 - 255 0 - 100%
4 Amber 000 - 255 0 - 100%
5 White 000 - 255 0 - 100%
6 UV 000 - 255 0 - 100%
7 Color Macros (overrides ch. 1-6) 000-015 No function
Color Macros
016-255
8 Strobe (when ch 9 is 000-031) 000-015 No function
016-255 Slow to fast
Speed (when ch 9 is 032-223) 000-255 Slow to fast
Sound sensitivity (when ch 9 is
224-255)
000-010 Off
011-255 Controls the sound sensitivity level
9 Mode 000 - 031 No function
032 - 063 Pulse effect 0-100%
064 - 095 Pulse effect 100-0%
096 - 127 Pulse effect 100-0-100%
128 - 159 Auto fade transition
160 - 191 Auto snap transition (6 colors)
192 - 223 Auto snap transition (63 colors)
224 - 255 Sound active mode
10 Dimmer 000-255 0-100%
11 Dimmer Speed 000 - 051 Default Dimmer Speed set from
menu
052 - 101 Dimmer speed mode off
102 - 152 Dimmer speed mode 1 (Fast speed)
Dimmer speed mode 2 (medium)
153 - 203
204 - 255 Dimmer speed mode 3 (slow)

PROTON 12 HEX USB
P.
10
ENGLISH VERSION
CHANNEL FUNCTION VALUE PERCENT/SETTINGS
1Red 000 - 255 0 - 100%
2 Green 000 - 255 0 - 100%
3 Blue 000 - 255 0 - 100%
4 Amber 000 - 255 0 - 100%
5 White 000 - 255 0 - 100%
6 UV 000 - 255 0 - 100%
STAND ALONE OPERATION
Preset color mode
1. Press MENU button until C-- is displayed Press ENTER
2. PressUPorDOWNto select C1 - C63 Press ENTER.
Auto program mode
1. Press MENU button until P-- is displayed
2. Press ENTER
3. Press UP or DOWN to select P1 - P4
4. Press ENTER
Selecting program speed
1. Press MENU button until S-- is displayed Press ENTER
2. Press UP or DOWN to select speed
3. Press ENTER.
Sound-active mode
1. Press MENU button until Snd is displayed Press ENTER
2. PressUP orDOWN to selectSnd1 or Snd2 PressENTER
Adjusting sound sensivity
1. Press MENU button until Sens is displayed
2. Press ENTER
3. Press UP or DOWN to adjust mic sensitivity
4. Press ENTER
Color mixing mode
1. Press MENU button until U-- is displayed
2. Press ENTER to scroll to each color setting for
amber, cool white, and warm white.Press UP or
DOWN to adjust output (r---, g---, b---, a---)
Selecting dimmer curves
1. Press MENU button until dIM is displayed
2. Press ENTER
3. Press UP or DOWN to select dimmer curve (OFF,
dIM1, dIM2, dIM3) Press ENTER
Activating infrared remote mode
1. Press MENU button until SEr is displayed
2. Press ENTER.
3. Press UP or DOWN to select On or OFF
4. Press ENTER.

PROTON 12 HEX USB
P.
11
ENGLISH VERSION
The IR6 infrared controller enables remote control of the
QUAD-PAR 12. To pair the IR6 to the Q PROTON 12 HEX
USB , follow these steps:
1. Press MENU button until SEr is displayed
2. Press ENTER
3. Press UP or DOWN to turn infrared operation
ON or OFF
4. Press ENTER
Ir6 button functions
• AUTO: Run auto programs
• FADE : Fade auto programs
• SPEED: Enable speed adjustment of auto programs
• +/ -: Increase / decrease speed of auto programs
• SOUND : Activate sound-active mode
• SENSITIVITY: Enable sound sensitivity adjustment
• +/ -: Increase / decrease sound sensitivity
• MANUAL : Enable static color selection
• 0-9: Select static colors
• R: Select red
• G: Select green
• B: Select blue
• A : Select ambar
• +/ -: Increase / decrease output of each color
• % : Enable adjustment of total light output level
• +/ -: Increase / decrease total light output
• STROBE: Enable adjustment of strobe rate
• +/ - : Increase / decrease strobe rate
• STROBE: Press again to turn o strobe
• BLACKOUT: Turn o all light output
• BLACKOUT: Press again to exit blackout mode
6. INFRARED (IR6) REMOTE CONTROL OPERATION

PROTON 12 HEX USB
P.
12
ENGLISH VERSION
7. MASTER/SLAVE
OPERATION
When multiple PROTON 12 HEX USB units are used to-
gether, Master/Slave mode enables the assignment of
one master unit and multiple slave units. The master unit
can be operated in stand-alone mode (i.e., auto program
or sound-active mode -- not DMX mode). The slave units
should all be set to slave mode as described below.
- Note: Slave units should be configured and connected
before linking to master unit.
SETUP AS BELOW:
Slave units:
1. Press MENU button until 6-CH or 11-CH is displayed
2. Press ENTER
3. Set DMX address to d 1
4. Connect DMX cable from master unit to DMX In con-
nectorLinkfollowingslaveunitsinsimilar cable configuration.
Master unit:
1. Set to Auto or Sound-Active mode
2. Link to slave units, beginning from the master DMX
Out connector.
MASTER/SLAVE OPERATION (via UFI- WIFI)
PROTON 12 HEX USB units can operate in Master/Slave
mode wirelessly using the optional UFI wi- transceiver. The
master UFI-enabled unit can be operated in stand-alone
mode, with the UFI set to transmit. The slave units should all

PROTON 12 HEX USB
P.
13
ENGLISH VERSION
be set to slave mode, with the UFI set to receive.
- Note: Slave units should be con gured before con guring
master unit Note: All units should be set to same DMX
address, mode and UFI channel.
SETUP AS BELOW:
Slave units:
1. Press MENU button until 6-CH or 11-CH is dis-
played.
2. Press ENTER.
3. Set DMX address to d 1
4. Set UFI to preferred receiving channel (1-16) Attach
UFI to the PROTON 12’s HEX USB port.
Master unit:
1. PressMENUbuttonuntilDMXmodeisdisplayedthat
matches slave configuration.
2. Press ENTER
3. Set DMX address to d 1
4. Set to Auto or Sound-Active mode
5. Set UFI to chosen transmitting channel (1-16) Attach
UFI to the PROTON 12’s HEX USB port.
OPERATING MODE PRIORITY RANK
Higher priority control modes override lower priority
modes
1. UFI
2. DMX (wired)
3. Infrared (IR6 remote)
4. Manual (onboard menu)

PROTON 12 HEX USB
P.
14
8. MAINTENANCE AND CLEAN-
ING THE UNIT
• Make sure the area below the installation place is
free from unwanted persons during setup.
• Switch off the unit, unplug the main cable and wait
until the unit had cooled down.
• All screws used for installing the device and any
of its parts should be tightly fastened and should
not be corroded.
• Housings, fixations and installation spots (ceilling,
trusses, suspensions) should be totally free from
any deformation.
• The main cables must be in impeccable condition
and should be replaced immediately even when a
small problem is detected.
• It is recommended to clean the front at regular
intervals, from impurities caused by dust, smoke
or other particles to ensure that the light is radi-
ated at maximum brightness. For cleaning, discon-
nect the main plug from the socket. Use a soft,
clean cloth moistened with a mild detergent. Then
carefully wipe the part dry. For cleaning other
housing parts use only a soft, clean cloth. Never
use a liquid, it might penetrate the unit and cause
damage to it.
FUSE REPLACEMENT
1. Remove the safety cap by a screwdriver.
2. Replace the blown fuse with a fuse of the exact
same type and rating (T2A-250V).
3. Install the safety cap, and reconnect power.
ENGLISH VERSION

PROTON 12 HEX USB
P.
15
TROUBLESHOOTING
ENGLISH VERSION

PROTON 12 HEX USB
P.
16
VERSION ESPAÑOL
1. DESCRIPCIÓN
Proton 12 HEX USB es un bañador profesional que cuenta
con 12 LEDs RGBAW+UV de 10W, con un ángulo de haz
de 25º. Su tecnología LED de seis colores permite una
mezcla suave sin sombras multicolor, logrando innumerable
cantidad de colores profundamente saturados. Proton 12
HEX USB tiene dimmer lineal de 16-bit, 4 curvas de dim-
meo, efecto UV y función estrobo. Ideal para aplicaciones
de broadcasting, gracias a su frecuencia de refresco de
1200Hz, cuenta además con un puerto USB que permite,
mediante la utilización del NEO Stick USB, controlar la un-
idad wireless o mediante la app NEO Wi de AMPRO®, dis-
ponible para iOS® & Android®.
ESPECIFICACIONES
Fuente & Óptica
• Fuente de luz: 12 LEDs RGBWA+UV de 10W
• Vida útil promedio: 50.000 horas
• Ángulo de haz: 25º
• Ángulo de campo: 40º
Datos fotométricos
• Flujo luminoso: 350 lux @ 5m (16 ft.)
Efectos & Funciones
• Controlable mediante la app NEO Wi - iOS® & An-
droid® incorporando el NEO USB Stick
• Tecnología LED de seis colores: Mezcla RGB
WA+UV suave sin sombras multicolor
• Macros de color y efecto arcoiris
• Dimmer: 0-100% general & para todos los colores
• 4 curvas de dimmeo
• Efecto estrobo: 0-30 Hz
• Sin parpadeo (Ideal para broadcasting)
• 4 programas integrados
• Controlable vía IR-6 (no incluído)
• Micrófono incorporado
• Funcionamiento ultra-silencioso
Control
• Canales DMX: 6/11
• Modos de operación: DMX, Master/Slave, Au-
tomático, colores estáticos & activado por sonido
• Puerto USB para su control Wi-Fi (Mediante
NEO USB Stick)
Eléctrico
• Rango de voltaje de entrada:AC100–240V, 50-60Hz
• Consumo de potencia: 89W
• 110V: Hasta 9 unidades
• 220V: Hasta 16 unidades
Físico
• Certificación IP20
• Display LED de 4 dígitos
• Conectores DMX: 2 conectores XLR-3
• Conectores de alimentación IEC de Entrada/Salida
• 1 Puerto USB
• Dimensiones: 253x290x98 mm. / 10x11,4x3,8 pulg.
• Peso: 3,2 Kg. / 7 Lbs.

PROTON 12 HEX USB
P.
17
VERSION ESPAÑOL
2. INSTRUCCIONES
1. Este equipo cumple con las Directivas de la Comu-
nidad Europeay,porlotanto,cuentaconcertificaciónCE.
2. El equipo funciona con un voltaje de entrada de
230V~. Para su instalación, póngase en contacto
con un profesional calificado. Para evitar el riesgo
de shock eléctrico, no introduzca modificaciones no
autorizadas en el equipo.
3. El equipo requiere de un sistema de suministro eléc-
trico con puesta a tierra (equipo clase I, norma IEC
60598-1). A su vez, se recomienda proteger los ca-
bles de alimentación de los contactos indirectos y
cortocircuitos mediante el uso de interruptores dif-
erenciales del tamaño adecuado.
4. La instalación eléctrica debe realizarla un electri-
cista certificado. Procure que el voltaje y la fre-
cuencia coincidan con los requeridos por la unidad.
5. La unidad está diseñada para uso profesional. No
es de uso residencial.
6. Procurenoutilizarelequipobajolassiguientescondiciones:
- En lugares proclives a vibraciones y sacudidas.
- En lugares con temperatura superior a 40°C.
7. Evite que líquidos inflamables, objetos de metal o
agua entren en contacto con el equipo.
8. No desarme o modifique el equipo.
9. El mantenimiento o reparación del equipo deben
ser realizados por personal calificado. Pónganse
en contacto con el servicio técnico autorizado
más cercano o directamente con su proveedor.
10. Con el fin de respetar el medio ambiente, procure
desecharlaunidaden la planta derecicladomáscercana.
11. La garantía no cubre daños provocados por el
uso inapropiado del equipo. El uso inadecuado
del equipo puede ocasionar quemaduras, corto-
circuitos, shock eléctrico, etc.
12. Desconecte el equipo del suministro eléctrico an-
tesderealizarcualquiertareadelimpiezaomantenimiento.
13. Procure utilizar un cable de seguridad para afirmar
la instalación. Al utilizar la unidad, cumpla en todo
momento con las regulaciones (especialmente de
seguridad) actualmente vigentes en su país.
14. Instale el equipo en una zona con ventilación.
15. Mantenga cualquier tipo de material inflamable
lejos de la unidad.
16. Reemplace la cubierta, los lentes o la luz ultravio-
leta si se dañan y comprometen el óptimo funcion-
amiento del equipo.
17. Reemplace la lámpara de LED si se daña o sufre
deformación por el calor.
18. No mire de forma directa hacia la fuente de luz
cuando el equipo esté encendido. La luz puede
generar convulsiones en las personas fotosensiti-
vas o con epilepsia.
19. No toque el equipo durante su funcionamiento ya
que su temperatura puede ser muy elevada.
QUE VIENE DENTRO
• PROTON 12 HEX USB - Cable de Alimentación
• Manual del USUARIO

PROTON 12 HEX USB
P.
18
VERSION ESPAÑOL
3. DESCRIPCIÓN DEL EQUIPO
Vista Dorsal
TECLAS
DEL MENÚ MICRÓFONO
PANTALLA
SALIDA DE POTENCIA
CONECTOR
DMX DE
ENTRADA Y
SALIDA ORIFICIO
CABLE DE
SEGURIDAD PUERTO USB
ENTRADA DE
POTENCIA
PERILLA DE
AJUSTE

PROTON 12 HEX USB
P.
19
VERSION ESPAÑOL
DIMENSIONES
253
200
290
94
98
84
13

PROTON 12 HEX USB
P.
20
VERSION ESPAÑOL
Panel de Control
BUTTON FUNCTION
Menu Selects operating mode or exits submenus
Up Scrolls up through option lists or selects higher value
Down Scrolls down through option lists or selects lower value
Enter Activates displayed menu option or selected value
Table of contents
Languages:
Other NEO Dj Equipment manuals
Popular Dj Equipment manuals by other brands

Briteq
Briteq Pro Beamer RGBW outdoor Operation manuals

Konig
Konig DL-DANCER250 manual

Chauvet DJ
Chauvet DJ SlimPAR PRO W USB user manual

Chauvet DJ
Chauvet DJ SlimPAR PRO TRI Quick reference guide

thomann
thomann Stairville CLB5 6P RGB WW Compact LED Bar user manual

PR Lighting
PR Lighting PR-8102 product manual