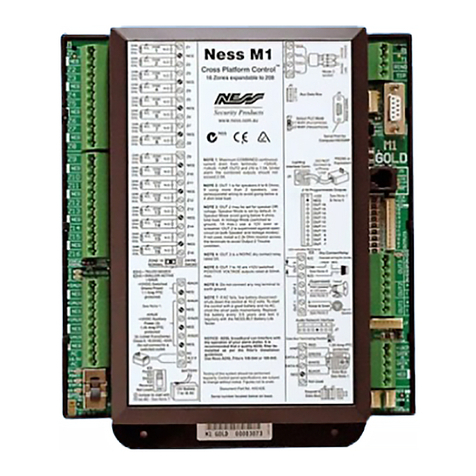
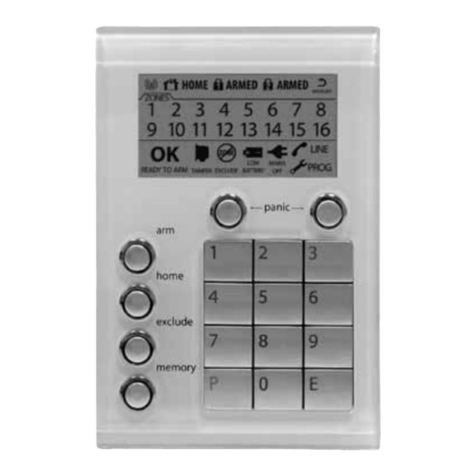
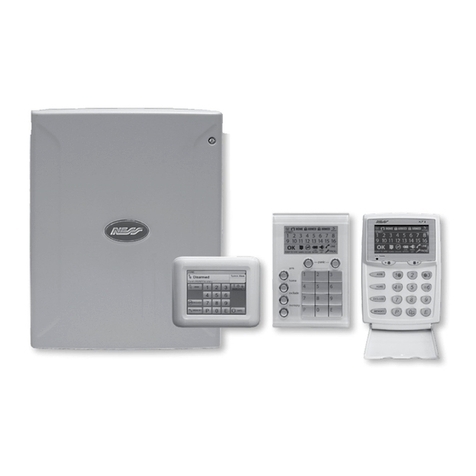
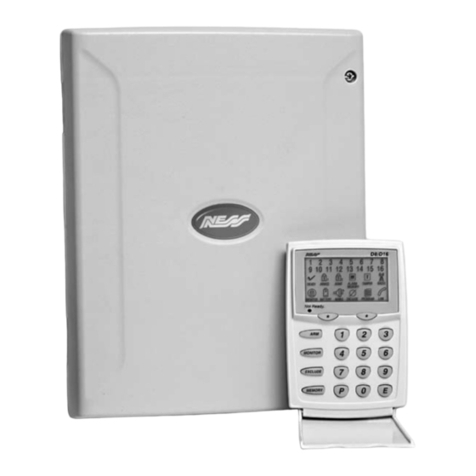
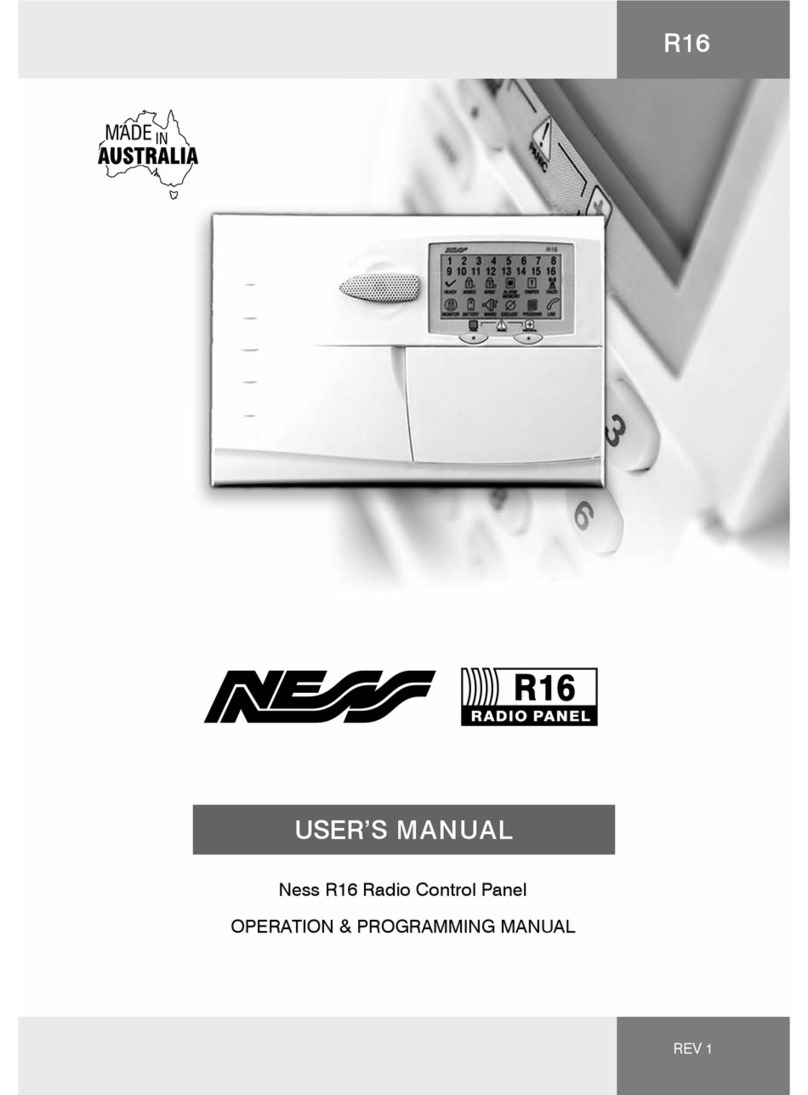
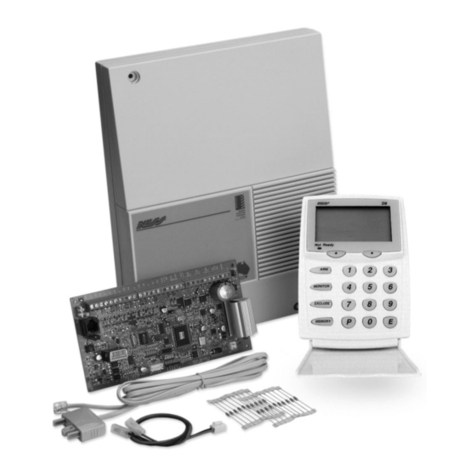
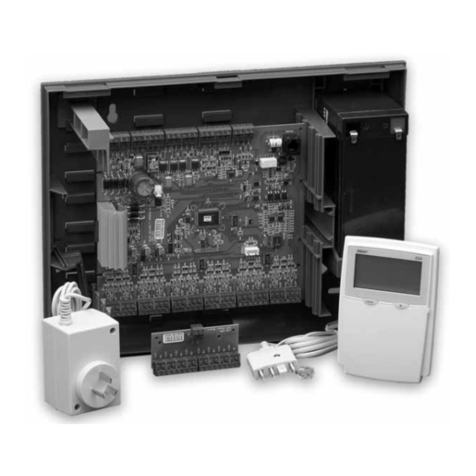
Ness D16 Assembly instructions

Rev 1.11
Installation & Programming Manual
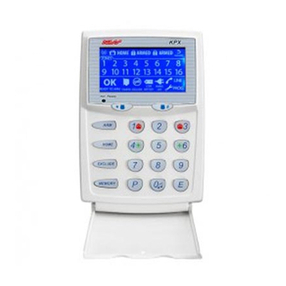
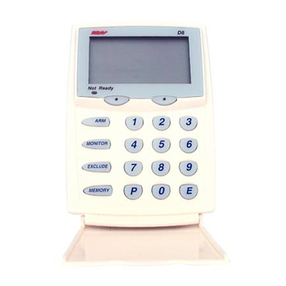
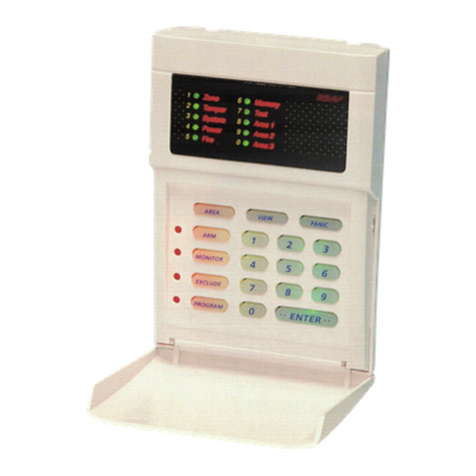
Navigator, Saturn+ or KPX+
keypad options
D8/D16 XCEL 4G Document 890-490
SIM
Ness SIM supplied for your convenience.
Activate the SIM on a competitive Ness SIM
Plan or BYO SIM
activate.ness.com.au
8/16 Zone Control Panels with 4G Communicator
D8/D16 XCEL
Auto-Time
Automation
Up to 8 AUX
Outputs
Various
Keypad
Options
4G Cellular Access
Control
onboard
Powerful
Wireless
Options
C-BUS
Compatible
using Ness
MiniCentral
Multiple
Arming
Modes
Area
Partitioning
Dual Voltage
17VAC & 20VDC
8 or 16
Hardwired or
Wireless zones
Easy
Programming
via Keypad
Fast
Programming
via PC
Free
NessComms
Installer Software
Convenient
Programming
via SMS
Adjustable
Vibration Inputs
on all Zones
8
16
Operation by
Smartphone /
Internet
Operation and
Monitoring by
SMS or Central
Station

All rights reserved. No part of this publication may be reproduced, transmitted or stored in a retrieval system in any form or by any
means, electronic, mechanical, photocopying, recording, or otherwise, without the prior written permission of Ness.
Ness reserves the right to make changes to features and specifications at any time without prior notification in the interest of ongoing
product development and improvement.
© 2021 Ness Corporation Pty Ltd ABN 28 069 984 372
D8/D16 XCEL
INSTALLATION & PROGRAMMING MANUAL
Document Part No: 890-490
Rev 1.11 May 2021
For use with Ness D8XCEL/D16XCEL control panels with 4G Communicator V11.3 and later.
Related manuals:
890-497 D8/D16 XCEL 4G LCD Keypad User Manual
890-498 D8/D16 XCEL 4G Navigator Keypad User Manual
WARNINGS & NOTICES
Ness Corporation manufacturing processes are accredited to ISO9001 quality standards and all possible care and diligence has been
applied during manufacture to ensure the reliable operation of this product. However there are various external factors that may impede
or restrict the operation of this product in accordance with the product’s specification.
These factors include, but are not limited to:
1. Erratic or reduced radio range (if radio accessories are installed). Ness radio products are sophisticated low power devices, however
the presence of in-band radio signals, high power transmissions or interference caused by electrical appliances such as Mains
Inverters, Wireless Routers, Cordless Phones, Computers, TVs and other electronic devices may reduce radio range performance.
While such occurrences are unusual, they are possible. In this case it may be necessary to either increase the physical separation
between the Ness receiver and other devices or if possible change the radio frequency or channel of the other devices.
2. Unauthorised tampering, physical damage, electrical interruptions such as mains failure, electrical spikes or lightning.
3. Solar power inverters are a known source of electrical interference. Please ensure that this product and all associated cabling is
installed at least 3 metres away from a solar power inverter and its cabling.
4. While SMS reporting is a powerful and useful feature it is dependent on the integrity and availability of the cellular network.
As with any SMS message it is possible that SMS monitoring reports may be delayed or fail to be delivered. Such failures are a
function of the cellular network/s and beyond the control of Ness Corporation. Ness recommends central station monitoring using an
IP protocol as your primary monitoring path.
5. Ness recommends IP Protocol for most reliable back-to-base reporting. Contact ID (CID) is available as an option and should only be
used if your central station does not offer IP protocols.
WARNING: Installation and maintenance to be performed only by qualified service personnel.
CAUTION: Risk of explosion if battery is replaced by an incorrect type. Dispose of used batteries in accordance with local regulations.
Innovative Electronic Solutions
www.ness.com.au
National Customer Service Centre
Ph: 1300 551 991

CONTENTS
Product Features...................................................................... 4
SIM activation, SIM information ............................................... 4
Optional products and software .............................................. 5
Installation procedures ............................................................ 6
Inputs and outputs................................................................... 7
Connection Diagrams ...........................................................8–9
Keypad Operation - Saturn & KPX+.................................10–11
Keypad Operation - Navigator ............................................... 12
Operation
Operation Summary - Keypads, SMS, Radio Keys ............... 13
Operation by SMS, Detail ...................................................... 14
PROGRAMMING
How to enter Program Mode ................................................. 15
Special Functions in Program Mode ..................................... 15
Quick start Programming....................................................... 16
Programming by SMS ........................................................... 17
Central Station Monitoring, operation ................................... 18
Contact ID Reports Table....................................................... 18
SMS Messaging
SMS Monitoring, operation.................................................... 19
SMS Request Status .............................................................. 20
SMS Text Output ...............................................................21–22
PROGRAMMING OPTIONS
User Codes .......................................................................23–24
Timers..................................................................................... 25
Vibration Sensitivity................................................................ 26
Zone Assignment..............................................................27–28
Definitions. Day Zones, Temp Day Zones, Home ................. 29
Zone To Output Mapping..................................................30–32
Various Options.................................................................33–34
Tamper/Keypad Panic Output Mapping ................................ 35
System Operation Shortcuts.................................................. 36
Home Mode, Day Mode output mapping.............................. 37
Miscellaneous Options .......................................................... 38
Zone Supervision options.................................................39–41
Misc. options ....................................................................42–45
COMMUNICATOR OPTIONS
Central Station Monitoring Account Numbers ...................... 46
Central Station Reporting Numbers ...................................... 47
SMS Monitoring Phone Numbers.......................................... 48
Report zone alarms................................................................ 49
Report zone restorals............................................................. 49
Report multiple zone alarms.................................................. 49
Account No.2 zones............................................................... 49
Report Miscellaneous alarms ................................................ 50
Report Miscellaneous Restorals ............................................ 50
Test Call options..................................................................... 51
Reporting format options..................................................52–53
Enable SMS Reporting .......................................................... 53
Area1, Area2 open/close reports........................................... 54
Siren Chirp, Flash options ..................................................... 54
Other reports.......................................................................... 55
Enable Test Calls.................................................................... 56
Mains Report Delay/ Swinger Shutdown............................... 56
No Memory Warning zones ................................................... 57
FACTORY DEFAULTS
Clear Radio Devices............................................................... 58
Clear Memory......................................................................... 58
Clear Panel Options............................................................... 58
Clear User Codes................................................................... 58
Program the Installer Code.................................................... 58
Output Expander options..................................................59–60
AUX OUTPUTS
Aux1~4 output options.....................................................63–70
Aux5–8 output options........................................................... 71
Alarm/Fire/Chirp Siren Volume .............................................. 72
Enable/Disable hardwire zones ............................................. 72
End Of Line Resistor options ................................................. 73
AUTOTIME OPTIONS
AutoTime description and examples..................................... 74
RealTime Clock programming............................................... 75
AutoTime programming....................................................75–76
RADIO OPTIONS
Signal Strength Test............................................................... 77
Ness Radio Interface, connection.......................................... 77
Radio Device / RADIO KEY Programming .......................78–79
Serial Output options ............................................................. 80
ACCESS CONTROL OPTIONS
Programming access cards................................................... 81
Access Control options.....................................................82–85
Weigand Reader wiring diagram ........................................... 86
Programming Options Summary......................................87–92
Specifications......................................................................... 93
Release Notes........................................................................ 94
Installation Record ................................................................. 95
XCEL 4G QUICK START
Installers, you will be pleased to know that XCEL 4G differs from XCEL 3G in only three program options,
mostly to cater for the new IP reporting feature.
New option P86E 3E: Enable Reporting by ARMOR IP, see Page 52
New option P85E Polling Interval, see page 51
Changed options P170E, P171E, Central Station Reporting Numbers (see page 47) can be programmed as:
• Base Station Phone Number for Contact ID reporting > programmed via Keypad or SMS
• IP Address for ARMOR IP reporting > programmed via Keypad or SMS
• Domain Name for ARMOR IP reporting > programmed via SMS
3
Ness D8xCeL / D16xCeL 4G CoNtroL PaNeL – INstaLLatIoN MaNuaL rev 1.11

Features
What's New in D8XCEL / D16XCEL 4G
• 8 or 16 alarm zones.
• Supports up to 3 mixed keypads (Navigator/Saturn/LCD) or 4 Navigator keypads
• 56 user codes can be programmed to operate by keypad PIN, radio key or access
card.
• Optional NESS RADIO INTERFACE for fully integrated wireless security.
• Programmable TWO AREA PARTITIONING can split the panel into two independent
areas plus a common area.
• REAL TIME CLOCK with AUTOTIME features - auto arm/disarm, auto aux outputs,
time based user control.
• 3 Door ACCESS CONTROLLER onboard with support for Weigand prox or fingerprint
readers.
• Supports control via INTERNET using Ness iComms/aComms iPhone/iPad and
Android apps and optional ethernet adapter.
• Home Mode allows partial arming, (eg, perimeter security overnight).
• Day Mode feature allows daytime monitoring of fire doors, coolrooms etc.
• Temporary Day Zone feature allows easy enabling/disabling of Day Mode.
• Keypad Panic and Duress feature.
• Two button arming feature.
• Fire Alarm feature with different siren tones.
• Highly flexible zone to output mapping.
• ONBOARD VIBRATION SENSOR ANALYSER with programmable sensitivity. Use with
Nessensor™ vibration sensors.
• MULTIPLE PROGRAMMABLE EOL resistor values from 0k to 22k (2k2 resistors
supplied).
• Siren chirp and strobe flash on arming with radio key.
• Quiet chirps option on arm/disarm by radio key.
• True DYNAMIC BATTERY TEST actively tests the battery under load every hour and
every time a keypad code is entered.
• 4 PROGRAMMABLE AUXILIARY outputs (Up to 8 Aux outputs optional).
• Optional output expander.
• ENHANCED SERIAL DATA input/output via RS232.
• AUTOMATIC RESET FUSES.
• Programmable Reset Output lockout.
• 30 event memory from KPX and Saturn keypads. 80 event memory can be accessed
using Navigator keypad or NessComms™.
• Standard defaults to suit most applications.
• Easy programming by keypad or NessComms™ software by direct connect.
• All programming data is permanently stored in a non-volatile memory.
• All inputs and outputs are heavily protected against lightning and high voltage supply
transients.
• High efficiency DC power supply with dual 17VAC/20VDC power input
Communicator
• 4G Communicator onboard
• Direct-connect upload/download using NessComms™ software.
• View system status and arm/disarm using NessComms™.
• Remote control of outputs via telephone with voice prompts.
• Operation via SMS messaging
• Programming via SMS
• Alarm reports via SMS self-monitoring or Central Station
• Central Station monitoring in Contact and ARMOR IP formats
• Remote operation and programming via the free NessXCEL app
• 4G Cellular Communicator onboard
• Operation via SMS messaging
• Programming via SMS
• Alarm reports via SMS self-monitoring or Central Station
• Central Station monitoring in Contact ID and ARMOR IP formats
• Remote operation and programming via the free NessXCEL app
• The panel is not network locked. Activate the supplied Ness SIM or BYO SIM
• New PCB layout, AUX5~8 header added
SIM
To activate the SIM
activate.ness.com.au
NESS SIM
Registration
& Activation
THIS CELLULAR PRODUCT IS NOT
LOCKED AND CAN BE USED WITH ANY
ACTIVE SIM.1
A Ness SIM card is supplied for your
convenience. You can choose to
activate the Ness SIM or BYO SIM on a
network of your choice.
Please activate the Ness SIM to enjoy
the advantages of remote access and
monitoring via the cellular network.2
Ness SIM benefits:
• A Ness SIM card is supplied
• Easy online activation & simple billing
• Competitive Retail & Trade SIM plans
• No lock-in contracts - opt out anytime
1. Standard sized SIM required.
2. Monthly network access charges apply once activated.
Access charges do not include central station monitor-
ing which is a separate service.
4Ness D8xCeL / D16xCeL 4G CoNtroL PaNeL – INstaLLatIoN MaNuaL rev 1.11

NESSCOMMS
Powerful PC-based programming & operation software
• Fast and easy installation programming
• Live zone status mode
• Download system logs, including extended logs not
accessible by keypad - up to 80 events
• Database stores hundreds of clients
• Free For Trade users
NessComms makes on-site control panel programming as
simple as ticking the boxes.
Direct connect via serial port for fast and easy programming
by laptop/PC. The Ness 450-246 Serial Cable and 101-231
Serial-to-USB adpater cables are required.
MINICENTRAL
Ness MiniCENTRAL C-Bus interface combined with a Ness
D8x/D16x control panel gives you full two-way C-Bus control
and all the features and benefits of a powerful alarm panel.
• Fully Clipsal approved C-Bus Enabled Product.
• Controls up to 255 individual C-Bus lights or outputs.
Includes full dimming, On/Off and toggle commands.
• True 2 way communications on the C-Bus network.
• Connects directly onto C-Bus without the need for ad-
ditional hardware such as a PCI Interface.
• Many D16X events or status changes can control mod-
ules on the C-Bus.
• C-Bus Trigger Control and Enable Control.
• C-Bus events can control the D8x/D16x.
• Multiple onboard SERIAL repeater ports means the D8x/
D16x panel can also connect to other serial devices while
connected to MiniCENTRAL.
D8x/D16x
V7.3 or later
MiniCENTRAL
To Clipsal C-Bus
FREE SOFTWARE OPTIONAL PRODUCT
DIRECT CONNECT On-Site
D8X / D16X DELUXE
SERIAL
450-246
Serial cable
101-231 Serial to USB
Adapter cable
Note:
D8x/D16x and XCEL models (v8 and later) use 450-246 serial cable (4 pin)
Previous versions of D8x/D16x use 450-185 RS232 cable (3 pin)
NESS XCEL APP
iOS and Android SMS app
Ness XCEL free app for iPhone or Android devices
provides operation and control of your D8/D16 XCEL
panel by SMS messaging.
Arm, Disarm, activate Emergency alarms, control AUX
outputs by SMS.
Search Google Play or Apple App Store for “Ness Xcel”
NOTE. XCEL app is an "SMS utility app" not an IP app and is subject to
the limitations of operation by SMS.
The app does not require the optional ethernet kit but does require an
active SIM card in the D8XCEL or D16XCEL panel.
iPhone/iPad/Smartphone not included.
NESS iCOMMS/ aCOMMS
iOS and Android apps
iComms and aComms apps for mobile control of D8/
D16 control panels using your iPhone/iPad or Android
device.
Arm, Disarm, View zone status, Emergency alarms,
Control the panel outputs.
Requirements:
D8XCEL or D16XCEL panel fitted with the optional 101-244 Ethernet
adapter and serial cable).
iPhone/iPad/Smartphone not included.
iComms and aComms are third party paid apps which are endorsed
by Ness without tech support. Emergency alarms must be enabled
in the control panel to be available in iComms and aComms.
OPTIONAL APP OPTIONAL APP
Ness iComms
Ness aComms
Ness XCEL
5
Ness D8xCeL / D16xCeL 4G CoNtroL PaNeL – INstaLLatIoN MaNuaL rev 1.11

ESD WARNING
(Electrostatic Discharge).
Once properly installed, Ness control
panels are well protected from ESD.
However, take note of the following
precautions during installation.
The human body can generate static
electricity when it is insulated from earth
- for instance by walking over carpet.
ESD occurs (and a small shock is
sometimes felt) if an earthed metal
object is then touched.
The installer should be aware that if
he generates static electricity while
installing the panel and then discharges
this static electricity into the internal
components on the main D8/D16 circuit
board or the keypad board, then ESD
damage may occur.
The circuit board should not be
unwrapped until it is actually ready to be
installed.
Methods to avoid electrostatic build-up.
1. Use a foot strap, a wrist strap,
or a grounding mat. The aim is
to connect the body to earth to
discharge static before it builds up.
The connection is a high resistance
for personnel safety.
2. If the above is not available, then it
is advisable to wear clothing that will
minimise the build-up of static.
3. Handle circuit boards by the edges.
Avoid touching any components on
the board as the integrated circuits,
in particular, are not guaranteed by
their manufacturers to be safe from
ESD.
4. To minimise the build-up of static,
avoid walking around as much
as possible while working on the
installation.
5. Touch an earthed object to
discharge any static before working
on the installation.
INSTALLATION PROCEDURES
The main panel housing and keypad/s should be installed within areas that are protected by
motion sensors or reed switches. A linen closet or cupboard are good examples as these
are generally located in the centre of the premises. Installing in ceiling spaces or other areas
where extremes of temperature may be encountered is not advised.
Positioning of the movement detectors should be considered as the incorrect position may
cause unwanted alarms. Refer to the motion sensors' installation instructions.
1. Remove the lid and the battery from the base.
2. Securely mount the rear panel housing in a secure location.
3. Run all cabling needed for the installation.
4. Insert the red PCB stand-offs in the housing and then plug the circuit board onto the
stand-offs. See the ESD Warning on this page.
5. Wire the sensors, sirens and accessories to the main board terminal blocks as per the
wiring instructions in this installation manual.
6. Connect the 4G antenna connector on the PCB and install the antenna outside the
panel housing in a location providing the best signal strength as indicated by the
keypad signal strength display.
7. Fit the battery into the housing but DO NOT CONNECT the battery yet.
8. Insert the panel tamper bracket leads as shown below.
9. The NESS SIM is factory-fitted or insert your own SIM card as shown.
10. Power up as described below.
11. Close the lid and program the panel as required.
POWER-UP PROCEDURE
To enter INSTALLER PROGRAM MODE the first time, power-up with the PROG/TAMP link
OFF. If the PROG/TAMP link is ON and any other 24hr zones are unsealed on power-up the
panel will immediately go into alarm - reset the alarm via keypad or remove power to stop
the alarm.
1. CONNECT THE BATTERY FIRST. Observe correct polarity.
a) The RED heartbeat LED will flash continuously to indicate correct operation.
b) The Current Limiting Globes should be OFF. If the Globes are glowing, the battery
connection is reversed. Immediately disconnect the battery and check the polarity of
the battery leads.
If the heartbeat LED does not flash steadily or cycles off intermittently there may be a
problem with the initialisation of the onboard memory. To remedy, in Installer Program
Mode press P95E, P97E & P98E to erase all programming and reload factory defaults.
Then remove power by briefly removing one of the battery leads then re-connect. The
heartbeat LED should now be flashing continuously, proceed to power-up step 2.
2. TURN ON THE EXTERNAL POWER SUPPLY. The Current Limiting Globes may
glow slightly to indicate that the battery is charging correctly.
6Ness D8xCeL / D16xCeL 4G CoNtroL PaNeL – INstaLLatIoN MaNuaL rev 1.11
8. Insert the
white N/C tamper
switch. Connect to
INTERNAL TAMPER
pins.
4. Insert the four red
PCB posts in the
positions shown
9. Insert your SIM
card before powering
up the panel. (Panels
supplied with a Ness
SIM are factory
fitted).
BLUE SIGNAL LED
LED on steady =
Connecting to network
Fast Flash = 4G
Slow Flash = 3G
Heartbeat LED
Backup battery position.
Suits up to 12V 7Ah battery.

OUTPUTS
MONITORED ZONES
The Ness D8x and D16x have 8 or 16 fully programmable zone
inputs. (Monitored by end of line resistor).
Also, 1 x 24 hour External TAMP input. (Monitored by end of line
resistor). 1 x 24 hour Box Tamper input. (Normally Closed input.
Resistor is not required).
END OF LINE RESISTOR
Each zone input must be terminated with an end of line (EOL) resistor
unless the zone is disabled by option P125E.
The default EOL resistor value is 2.2k (2200 Ohms). The EOL value
is fully programmable. Available options are 0k (closed circuit), 1k,
1.5k, 2.2k, 3.3k, 3.9k, 4.7k, 5.6k, 6.8k, 8.2k, 10k, 12k and 22k. See
programming option P129E.
TAMP – TAMPER INPUT
The TAMP input must also be sealed with an end of line resistor. This
input is always a 24hr input. The EOL value programed by option
p129E also applies to the TAMP input.
POWER INPUT TERMINALS
These terminals are for the connection of the external power supply.
Your panel has a dual 17VAC/20VDC power input. Please use the
correct power supply as shown on page 8.
EARTH (Functional Earth, not a safety Earth)
Connect a good earth to this terminal to help protect against damage
from lightning strikes and static.
BATTERY
These terminals are for the connection of a sealed lead-acid
rechargeable 12Volt battery. Charge current is limited to 350mA.
The charge voltage is factory preset at 13.8V. Note: A 12 Volt sealed
lead acid rechargeable battery must be connected for correct panel
operation and to ensure the Siren, Strobe and Reset outputs operate
correctly.
The panel will shut down if battery voltage is below 11V and mains
power is off.
Observe correct polarity when connecting the battery.
(Ness Part Number BAT210 12V 7Ah battery)
CURRENT LIMITING
The current limiting globes serve to regulate battery charging current.
When the battery is fully charged the globes will not glow. The
globes will glow slightly when recharging the battery after a short
power outage. If the globes glow very brightly the battery is drawing
excessive current and may be faulty, or the battery is connected in
reverse. Check the connections or connect a charged battery.
INPUTS
12 VOLT OUTPUT
A regulated 13.8 VDC output is available to power detectors
and other equipment. This output is available from two sets of
terminals marked +12V and 0V. This output is protected by an
Automatic Reset fuse.
A maximum load of 500mA may be connected to these terminals.
SIREN
The on-board siren driver will drive a maximum of 3 x 8 ohm horn
speakers (Ness Part No. NOI110 or 100-171 Internal Siren). The
output will reset at the end of siren time (P29E) or whenever the
panel is reset, whichever comes first.
This output is protected by an Automatic Reset fuse.
STR
A latched 12VDC output for connecting strobe lights.
This output will reset after 72 hours (3 days) or when the panel is
disarmed. (D8/D16 versions prior to V4.5 allow indefinite strobe
operation, until the panel is reset).
A maximum of 2 x 1 Watt Strobes (Ness Part No. NOI300) can be
connected to this output.
This output is protected by an Automatic Reset fuse.
RESET
A 12V DC output for connecting Ness sirens, piezo sirens or
relays, etc. This output will reset at the end of siren time (P29E) or
whenever the panel is reset, whichever comes first.
A maximum of 3 x 12V piezo screamers (Ness Part No. 100-238,
100-004) or 2 X Ness Piezo (Part No 100-172) can be connected to
this output.
This output is protected by an Automatic Reset fuse.
AUX HEADERS (AUX1~4, AUX5~8)
The Aux1 to Aux8 outputs are open collector outputs (switch
negative) which can supply a maximum of 100mA. Each Aux
output can be programmed to perform several different functions.
The headers also provides a 12V DC output, max. draw 100mA.
RS232 SERIAL PORT (4 PIN)
Two way RS232 serial port for interfacing to a PC or external
automation products. The serial data is 9600 baud, 8 data bits, no
parity, 1 stop bit. Developer's kit available on request.
PROG/TAMP – PROGRAM LINK & INTERNAL TAMPER INPUT
The PROG/TAMP link appears on the two pin J1 header.
The PROG/TAMP link has two purposes:
1. To enter Installer Program Mode on initial power up. Power-
up with the PROG link OFF. The PROG link (or Box Tamper lead)
must be ON in operating mode.
2. Box Tamper. When used with the Internal Tamper Lead
(supplied), PROG/TAMP serves as the 24hr tamper input for the
panel’s internal tamper switch.
Replace the PROG Link with the Box Tamper Lead. Connect the
Internal Tamper Lead spade terminals directly to the terminals of
the internal tamper switch (supplied). An end-of-line resistor is
NOT required on this input.
When PROG/TAMP is used for Internal Tamper, powering up with
the panel’s cover open will enter Installer Program Mode.
OUTPUT FUSING. The 12V outputs, Siren, Reset and
Strobe outputs are protected by Automatic Reset elec-
tronic fuses. These outputs will automatically reset once
the overload is removed.
SIREN LOAD. A maximum output of 2.0A continuous is
available from the SIREN and RESET outputs and 200mA
from the STR output.
Recommended maximum power load:
3 x Horn speakers (SIREN output)
2 x Strobe lights (STR output)
2 x Ness Internal Sirens (100-172) (RESET output)
Note: (This assumes no more than 500mA is being drawn
from the 12V device outputs).
BATTERY
RED+
BLACK
12V 7AhSealed
Lead Acid Battery
Current limiting
globes
OBSERVE
CORRECT POLARITY
7
Ness D8xCeL / D16xCeL 4G CoNtroL PaNeL – INstaLLatIoN MaNuaL rev 1.11

8Ness D8xCeL / D16xCeL 4G CoNtroL PaNeL – INstaLLatIoN MaNuaL rev 1.11
20V DC
POWER SUPPLY
If required, this control panel can alternatively be
powered by a 17VAC (1.4A) plug pack.
Install the cellular
antenna in a location
providing the best
signal strength as
indicated by the keypad
signal strength display.
The antenna should not
be installed inside the
control panel housing.
Part No.
840-054
20VDC Non-polarity 17VAC Non-polarity
17VAC or
20VDC
POWER INPUT
NON-POLARITY
17V AC
POWER SUPPLY
4G
ANTENNA
Yellow/Green
To panel earth (optional)
Part No.
840-029
A 20VDC power supply is included with most
D8XCEL/D16XCEL models (Australia only).
This power supply has positive and negative 20VDC
output however the polarity is not important in this
case.
Brown
Blue
17VAC or
20VDC
POWER INPUT
NON-POLARITY
DUAL VOLTAGE POWER INPUT
20VDC or 17VAC
J1
4G Antenna
socket
3m cable
Antenna has a
magnetic base and
self-adhesive disc
for afxing to non-
metallic surfaces
KEYPAD
17VAC or
20VDC
POWER INPUT
NON-POLARITY
12V
BATTERY
BATTERY LEADS
RECEIVER
Optional Ness Radio
Interface
BLUE Signal LED
SERIAL
RS232 serial port
SEALED/NORMAL STATE
Link on or tamper connected
OPEN/ALARM STATE
Power up with link off to enter
installer program mode
J1 LINK
BOX TAMPER & PROGRAM LINK
READER
Connection for up to 3 Ness
Weigand readers.
Also used for Ness PD
Portable Download tool.
RED +
RED +
READERSERIAL
0V
F6
AUX1
AUX2
AUX3
AUX4
+12V
0V
5
6
7
8
AUX
+12V
NESS RADIO
RECEIVER
USB
FUTURE USE
SIM
4G
SIREN
F1
F1
F7
F2
F2
F3
RESET
+12V
+12V 0V Z9 Z10 Z12 Z14Z11 Z13 Z15 Z16C C C C
0V
Z1
Z2
Z3
Z4
Z5
Z6
Z7
Z8
TAMP
N.O TAMPER SWITCH
(761-002) Colour: BLACK
Supplied with Ness siren covers
12VDC OUTPUT
END OF LINE RESISTORS
The default end of line resistor value is 2k2 (2200 Ohms). The EOL
value is fully programmable with a choice of 13 resistor values,
see program option P129E. Ness panels are supplied with 2k2 1%
tolerance Metal Film resistors.
Colour code: Red, Red, Black, Brown, Brown.
Normally Closed
(N.C.) Devices
ZONE WIRING
Normally Open
(N.O.) Devices
ZONE 8
ZONE 7
ZONE 6
ZONE 5
ZONE
SENSOR
SENSOR
ZONE
C
C
ZONE 4
ZONE 3
ZONE 2
ZONE 1
12V DC output for detectors.
500mA max. from all 12V outputs.
Auto Reset fuse protected.
Up to 3 x 12V Screamer (100-238, 100-004)
Up to 2 x Strobe Light (NOI-300)
Up to 3 x Horn Speaker, 8 Ohm (NOI-110)
Non-polarity
Keypad connection (Alternative)
BOX TAMPER SWITCH (White) N.C.
contacts. Connect to J1.
Jumper remains tted if not using internal
tamper switch.
RED Heartbeat LED - Flashing OK
Maximum 3 mixed
keypads or 4 Navigator
keypads per system.
Maximum cable length
100m (all keypads
combined).
NAVIGATOR SATURN KPX+
DAT (Blue)
CLK (White)
COM (Black)
+12V (Red)
ZONES 1~8 D8XCEL & D16XCEL
ZONES 9~16 D16XCEL only
D8XCEL
D16XCEL
Main Board
ALTERNATIVE TAMPER SWITCH
WIRING for N.C TAMPER SWITCH
(SWI920) Colour: WHITE
4G FAST
3G SLOW
FLASH
4G
ANTENNA
+12V
0V
C
C
C
C
+12V
COM
KEYPAD
CLK
DAT
STR
If the signal LED is not
ashing the SIM card may
not be inserted or inactive

NESS D8/D16
CONTROL PANEL
EXTERNAL
INTERNAL
TAMP
C
STR
RESET
SIREN
RED
RED
BLACK
BLACK
N.O. TAMPER SWITCH
(761-002) Colour: BLACK
STROBE LIGHT
(NOI300)
The terminal block should
be mounted inside the
siren cover.
HORN
SPEAKER
(NOI110)
2K2
CONNECTION DIAGRAMS
Optional Accessories for D8 & D16
+12V
Red
DATA
White
RSSI
Blue
OV
Black
100-200
Ness Radio Interface.
Blu
Brn
Grn
Wht
Red
Blk
1
2
3
106-012 Weigand Interface.
Provides connection for up to 3
addressable Weigand Readers
(Ness 101-014).
See Access Control options,
pages 81-86.
READER#
header
RECEIVER
header
Both expander boards can co-exist.
Example, connect Output Expander to AUX1~4 and Relay
Board to AUX5~8
0V
+12V
AUX4
AUX3
AUX2
AUX1
NO C
AUX1
NC NO C
AUX2
NC NO C
AUX3
NC NO C
AUX4
NC
106-013 Relay Board.
Provides 4 relay
outputs suitable for
switching low voltage
accessories.
Connect to
AUX 1~4
or
AUX5~8
101-244
Internet interface.
Provides internet
connectivity for use with
Ness G1 Z-Wave gateway
and third party apps such
as iComms & aComms.
XCEL Serial
header (4 pin)
450-246
Serial cable
LAN
101-244
IP232
Ethernet
Module
Connect up to one
additional expander
OUT
12V In
12345678910111213141516
+
IN
106-011 Output Expander.
Provides 16 programmable
open collector outputs.
See page 59.
Connect to
AUX 1~4
Header only
9
Ness D8xCeL / D16xCeL 4G CoNtroL PaNeL – INstaLLatIoN MaNuaL rev 1.11
Generic Detector Wiring Examples LUX HW Detector Wiring
Siren Wiring Examples
External trigger to turn on the LUX
nightlight.
Pull to 0v to turn on.1
Nightlight status output. Pulls low
(0v) when light is on.
Fast reacting output is low (0v)
when movement is detected.
Additional +12V terminal.
D8/D16 PANEL D8/D16 PANEL
4 wire example
6 wire example
with 24hr Tamper
See P30E~P36E Zone Vibration Sensitivity, page 26
Vibration Sensor
D8/D16 PANEL
D8/D16 PANEL
ANY NESS OR GENERIC
HARDWIRED DETECTOR
NESS LUX HW
DETECTOR
DETECTOR
NESSENSOR
0V
ALARM
TAMPER
N.C.
N.C.
+12V
N.C.
N.C.
ZoneZone
TAMP
0V
CC
C
+12V
2K2
ZoneZone
0V
CC
+12V
2K2
0V
ALARM
TAMPER
N.C.
N.C.
+12V
N.C.
N.C.
ZoneZone
TAMP
0V
CC
C
+12V
2K2
2K2
ZoneZone
CC
2K2
+12V TAMPER ALARM 0V +12V
OUT
FAST SENS LIGHT
OUT IN
AUX1
AUX2
AUX3
AUX4
+12V
0V
EXAMPLE
Using Aux1 on your D8/D16 to turn on
the the LUX HW nightlight from the
keypad or even remotely.
INSTALLER PROGRAMMING
P141E 4E should be ON.
OPERATION
• LCD keypad, press 11* or 11# to turn
on/off
• Navigator keypad, Aux Control menu.
• SMS, send [usercode]E11ON to turn on
or [usercode]E11OFF to turn off
1HINT. Use a 450-159 loom (cut and use one end
only into the panel's Aux header).
Or a 106-011 output expander or 106-013 relay
board can be used and wired accordingly.

KEYPAD BEEPS
BEEPS MEANING
1 BEEP Any key press.
3 BEEPS Valid Command.
–– 1 LONG BEEP Error.
..10.. 10 BEEPS Mains Power is off
or Panel Battery is low
or A Radio Device
has sent a low battery
signal
or Telephone Line Fail
has been detected.
... ... ...
Constant SLOW beeps
An AutoTime action is
due to begin.
. . .
Constant FAST beeps
An AutoTime action
will begin in one
minute.
KEYPAD DISPLAY INDICATORS IN MEMORY MODE
KEYPAD ICON MEMORY EVENT
Zone numbers 1–8 or 1–16 Zone alarm
(no icons displayed) Panel Disarmed
ARMED Panel Armed (or Area 1 Armed)
ARM2 Area 2 Armed
MAINS Mains power failure
BATTERY Low Battery
TAMPER + 1 Internal Tamper alarm
TAMPER + 2 External Tamper alarm
EXCLUDE + 1 Panic alarm
EXCLUDE + 2 Medical alarm
EXCLUDE + 3 Fire alarm
RADIO, EXCLUDE Radio Key Panic alarm
RADIO, BATTERY, ZONE Radio Device battery low, (Device number is indicated by zone lights)
RADIO, BATTERY, ARM Radio Key battery low, (Radio Key number is NOT indicated)
RADIO, TAMPER, ZONE Radio Device tamper alarm (Device number is indicated by zone lights)
RADIO, HOME, ZONE Radio Supervision alarm (Device number is indicated by zone lights)
HOME, ZONE Wired Zone Supervision alarm (Zone number is indicated by zone lights)
KEYPAD DISPLAY INDICATORS IN OPERATING MODE
DISPLAY OFF ON FLASHING
ZONES
1-8 (or 1-16) Zone is sealed. Zone is unsealed. Zone is in alarm.
Zone/s are unsealed OR Power fault
OR Panel is armed
Ready to Arm
Panel is disarmed,
or Area 1 is disarmed, if using Areas.
Panel is armed,
or Area 1 is armed, if using Areas.
Area 2 is disarmed. Area 2 is armed if using Areas.
Home Mode is disarmed. Panel is armed in Home Mode. Day Mode enabled, (see page 29).
Normal. Memory mode selected. New alarm/s in memory.
Normal. Receiving a radio signal. (If radio
fitted.)
A Radio Key or other radio device has
low battery.
Normal. Internal Tamper: Double Flash with
long pause.External Tamper: Steady
flash.
Normal. Zone/s are Excluded.
Normal. The backup battery is low.
Normal. Mains power is off.
Cellular signal strength status - alternates with real time clock display.
Signal strength range is 00 (no signal) to 30 (Best signal).
Signal strength below 5 means the antenna should be checked or moved to a better reception area.
The CELL icon indicates various cellular conditions.
1. CELL with flashing signal strength indicates the communicator is in use.
2. with flashing CELL indicates a cellular communicator fault.
3. CELL with flashing indicates 'no SIM' Card is fitted.
Real time clock display - alternates with cellular signal strength status.*
Normal. User Program Mode. Installer Program Mode.
* The onboard clock is automatically updated from your cellular network.
You should only need to adjust clock settings if the panel is being used 'offline'
without a SIM card.
10 Ness D8xCeL / D16xCeL 4G CoNtroL PaNeL – INstaLLatIoN MaNuaL rev 1.11

The CELL icon indicates various cellular
conditions.
1. CELL with flashing signal strength
indicates the communicator is in use.
2. with flashing CELL indicates a cellular
comms fault.
3. CELL with flashing indicates 'no SIM'
Card is fitted.
11
Ness D8xCeL / D16xCeL 4G CoNtroL PaNeL – INstaLLatIoN MaNuaL rev 1.11
KPX+ LCD KEYPAD
SATURN+ LCD KEYPAD
Fire Alarm
Press and hold the two FIRE (1 & 3) keys
together for FIRE alarm.
See P126E 2E to enable keys. See P75E 4E,
P191E 4E to enable fire alarm reporting.
Medical Alarm
Press the two Medical (4 & 6) keys together
for Medical alarm.
See P126E 3E to enable keys. See P75E 2E,
P191E 2E to enable medical alarm reporting.
Keypad Tamper Alarm
Applies to all keypads and is designed to
prevent multiple attempts to guess a user
code either at the keypad or by SMS.
A Keypad Tamper alarm is generated by 5
failed attempts to arm, disarm or any other
command that requires entry of a user code.
Keypad Tamper Alarm sounds the Siren,
Strobe and Reset outputs. A Keypad Tamper
report is sent by CID or SMS if programmed
by P75E, P191E.
Clear the alarm by entering a valid user code
+ E
All the key functions described above
also apply to Saturn keypads.
Panic Alarm
Press and hold the two emergency keys
together for PANIC alarm.
See P126E 1E to enable. See P75E 3E,
P191E 3E to enable panic alarm reporting
Press and hold the Pkey. Release
when the desired volume is
reached.
The volume level is displayed on
the LCD during adjustment.
Adjust Key Beep Volume
Press and hold the 0key.
Release when the desired
volume is reached.
The volume level is displayed
on the LCD during adjustment.
To display all available
LCD icons press and hold
the Ekey.
Display Test can be used
in any mode.
Adjust Chime Volume Display Test
Press and hold the 9key to adjust
the brightness of the LCD and keys
backlighting. Release when the desired
brightness is reached.
Adjust LCD Backlight
10 Levels
Note. Beep/Chime Volume and LCD Brightness
settings are stored in the keypad. Adjust each
keypad individually. Defaults to loudest/highest
settings on power down.
Note that some Saturn keypad models do not
have CELLULAR signal and real time clock
display. Operational functions are unaffected,
however it's recommended that at least one
KPX+ keypad be installed to provide cellular
signal indication.

NAVIGATOR TOUCH SCREEN KEYPAD
1Touch to arm the system.
2Touch to arm Home Mode.
3Touch to Exclude zones.
4Touch to view the event memory.
5Numeric keypad.
6Touch to view the full zone list.
7Touch here to view the calendar.
This area also displays System Alarms.
8Touch to activate the Emergency Alarms.
9This area displays current Emergency Alarms.
10 Touch to control the Auxiliary Outputs.
11 Touch to display the information screens.
12 Cellular signal strength display
The Zone List display will show 8
zones for D8XCEL and 16 zones for
D16XCEL.
Zone numbers
and descriptions.
Unsealed zones
show a red indicator.
Touch to close the window.
The Zone Status Bar displays the zone numbers of
unsealed zones.
If only one zone is unsealed its description will also
be displayed.
Zones which are currently in the alarmed state are
displayed in flashing red text.
1
2
3
4
6
7
8
9
10
11
5
12
6
12 Ness D8xCeL / D16xCeL 4G CoNtroL PaNeL – INstaLLatIoN MaNuaL rev 1.11
Note: Text Names displayed by the Navigator Keypad can only be programmed by SMS
messaging as described on pages 21, 22.
This includes Zone Names, User Names and Installer Details for display on the Navigator keypad
and for reporting by SMS messaging.

OPERATION SUMMARY
OPERATION by KEYPADS & SMS by RADIO KEY by ACCESS CARD or
FOB
to ARM
The panel must initially be
disarmed.
ALL KEYPADS ARM +E
If the Arming Shortcut is enabled, P62E 5E
or ARM + [UserCode] + E
or [UserCode] + E
If Code Only Arming has been enabled for that
user code. Extra Option 4E
SMS A[UserCode]E
Press the ON button once.
Present a Card or
Fob twice. (if P301E
2E is on).
Or, present a Card
or Fob once +
press button. (if
P301E 3E is on).
to DISARM
To disarm and/or reset alarms.
ALL KEYPADS [UserCode] + E
SMS [UserCode]E
Press the OFF button once.*
Present a Card or
Fob once. (if P301E
4E is on).
to arm HOME MODE
Area1 must initially be
disarmed.
Home Mode can be used if
the panel is fully disarmed or if
only Area2 is armed, see page
29 for more information.
ALL KEYPADS HOME +E
(If the Home Shortcut is enabled, P62E 3E)
or HOME + [UserCode] + E
SMS H[UserCode]E
Press either the OFF button or the ON button
twice within 4 seconds. (P69E 5E must be on).
Or press the AUX button once. (If P120E 3E is
on). RK4 radio key only.
Radio Key Home Arm chirps can be enabled
by P120E 2E. Radio Key Home Arm strobe
flash can be enabled by P64E 6E, (off by
default).
PANIC alarm KPX/SATURN together
or + [UserCode] + E
or + E
(If Keypad Panic Shortcut is enabled, P62E 4E)
NAVIGATOR press EMERGENCY then
press PANIC
SMS S[UserCode]E
Press and hold the PANIC button for at least
4 seconds.
If P68E 1E Double Press Radio Panic is
enabled, press and hold twice for 4 sec.
FIRE alarm
MEDICAL alarm
FIRE Alarm KPX/SATURN 1 & 3 together NAVIGATOR press EMERGENCY then press FIRE
MEDICAL Alarm KPX/SATURN 4 & 6 together NAVIGATOR press EMERGENCY then press MEDICAL
NOTES
The FIRE alarm sounds the siren using the FIRE siren sound and sends a fire report if programmed.
The MEDICAL alarm triggers the strobe light if programmed and sends a medical report if programmed.
Related options for Fire and Medical P75E, P77E, P191E, P193E, P161E, P126E 2E 3E, P69E 1E
KEYPAD DURESS
Keypad Duress allows the user
to send a silent duress report
while disarming, (if the system
is being monitored by a central
station).
ALL KEYPADS [5, 6, 8 or 9]+[UserCode] + E
Add one these digits in front of a user code when disarming.
This sequence will disarm the panel and sends a Duress report to the central station. This is a silent alarm with no
indication at the keypad/s.
(Report Keypad Duress must be enabled, P75E1E)
EXCLUDE ZONES
EXCLUDE + E can only
be used when the panel is
disarmed.
EXCLUDE + CODE + E can be
used anytime.
ALL KEYPADS EXCLUDE +E (If the Exclude Shortcut is enabled, P62E 2E)
then KPX/SATURN [ZoneNumber] +E [ZoneNumber] +E (Enter the zone number/s to be excluded.)
NAVIGATOR [SelectZones]
then KPX/SATURN press E to exit Exclude mode or NAVIGATOR press to exit.
The Exclude icon flashes constantly while zones are excluded. Excluded zones are automatically included on
disarming.
OPERATE AUX
OUTPUTS
The AUX outputs must be
enabled for operation by
keypad. See P141E 4E, P142E
4E, P143E 4E, P144E 4E.
KPX/SATURN [AuxNumber] +to turn ON or PULSE an output. [AuxNumber] +to turn off.
NAVIGATOR press AUXILIARY CONTROL press AUX outputs on/off.
SMS [UserCode]E[AuxNumber]E
Note, via SMS enter the Aux output numbers as double digits. For example to turn on Aux1 send [UserCode]
E11E (therefore Aux2 is 22, Aux3 is 33 etc.) More information next page.
* If a user code is assigned to a radio key and has Extra Option 4E enabled, (Code Only arming), then pressing OFF toggles the arm/disarm state.
13
Ness D8xCeL / D16xCeL 4G CoNtroL PaNeL – INstaLLatIoN MaNuaL rev 1.11

OPERATION BY SMS
SUMMARY OF SMS COMMANDS
The following examples use the default Master Code of 123 as an example.
Substitute your own valid user code/s in operation.
OPERATION SMS TO THE PANEL SMS REPLY
ARM A123E A123E ACK
arming status: AREA 1 ARMED
IN EXIT DELAY
zones unsealed: NONE
zones in alarm: NONE
zones excluded: NONE
outputs status: ALL OFF
Any unsealed zones, zones in alarm and
excluded zones will listed as ZONE [x] or by
name if named.
DISARM 123E 123E ACK arming status:
DISARMED [plus zones and
outputs status as per arming
response above]
HOME mode H123E H123E ACK arming status:
AREA 1 ARMED IN EXIT DELAY
[plus zones and outputs status as
per arming response above]
EXCLUDE zones
(Example zones 4 & 5)
X123E4E5E X123E ACK 4E ACK 5E ACK
E ACK
zones excluded: ZONE 4
ZONE 5
FIRE alarm1
(Triggers the Fire
Alarm, if enabled)
F123E F123E ACK
MEDICAL alarm2
(Triggers the Medical
Alarm, if enabled)
D123E D123E ACK
PANIC alarm3
(Triggers the Panic
Alarm, if enabled)
S123E S123E ACK
Operate AUX
outputs, eg Aux1
(Aux2 is 22, Aux3 is 33 etc)
To enable AUX1 for remote
operation see P141E 4E,
page 64
C123E11ON
C123E11OFF
11* ACK
auxiliary outputs on: AUX1
11# ACK auxiliary outputs
on: ALL OFF [or the Aux
number/s if any are on]
1The FIRE alarm sounds the siren using the FIRE siren sound and sends a fire report if
programmed.
2The MEDICAL alarm triggers the strobe light if programmed and sends a medical report if
programmed.
3The PANIC alarm sounds the sirens and strobe if programmed.
Related options for Fire and Medical P75E, P77E, P191E, P193E, P161E, P126E 2E 3E, P69E 1E
Related options for Panic P61E 5E~8E
SMS COMMANDS
COMMAND OPERATION
A ARM
H HOME
X EXCLUDE
P PROGRAM1
E ENTER
F FIRE
D MEDICAL
S PANIC
C OPERATE AUX OUTPUTS
T TEXT2
1See page 17 for detail
2See page 21-22 for detail
SMS RESPONSES
SMS IS RECEIVED FROM A KNOWN
PHONE NUMBER (one of the phone
numbers programmed at P180E~P189E)
a) The panel will respond to any
SMS command from a known phone
number.
b) A correctly formatted command
will be actioned and replied with ACK
(Acknowledged).
c) If you send an incorrectly formatted
SMS or the wrong user code the panel
responds with NAK (Not ACK).
SMS IS RECEIVED FROM AN
UNKNOWN PHONE NUMBER
a) If the user code is valid the panel will
action the command and reply.
b) If the user code is not valid the panel
will ignore the command and reply with
the message "The SMS just received
is wrong. No further responses until
correct SMS received"
c) The panel ignores further attempts to
operate it with an invalid user code.
d) Once a correct command with a
valid user code is received the panel
will action and reply.
e) If the valid user code is not the
master user code, but the command
requires the master code then the reply
is “wrong message”
14 Ness D8xCeL / D16xCeL 4G CoNtroL PaNeL – INstaLLatIoN MaNuaL rev 1.11

INSTALLER PROGRAM MODE
Installer Program Mode allows access to ALL
program options.
NOTE 1. NessComms Direct Connect via the
serial port requires the panel to be in Installer
Program Mode.
NOTE 2. The panel will remain in Installer
Program Mode until P + E is entered by
keypad.
INSTALLER'S HANDY HINT
All inputs are disabled while the panel is in
Installer Program Mode. This handy feature
allows you to work on the system without
triggering 24 hour zones such as tamper
inputs.
USER PROGRAM MODE
User Program Mode allows the owner to program:
• All User Codes
• Entry Exit Times
• SMS Telephone numbers
• Real Time Clock settings
Note: The panel will automatically drop out of
User Program Mode to Operating Mode if no
keypad buttons are pressed for 4 minutes.
HOW TO ENTER PROGRAM MODE
METHOD 1.
FIRST TIME PROGRAMMING – FROM POWER UP
1. Power-up with the J1 PROG/TAMP link OFF.
2. The panel is now in Installer Program Mode. Program the panel as
required.
3. Replace the PROG/TAMP link (or Box Tamper lead) before you exit
program mode. The link must be on in normal operating mode.
METHOD 2.
USING ANY KEYPAD TO ENTER PROGRAM MODE
The panel must be Disarmed.
1. Press
P+ [MasterCode]+E
This is User Program Mode (PROG icon is ON).
Various user options can be programmed in this mode.
2. Press P + [InstallerCode]+E
This is Installer Program Mode (PROG icon is FLASHING).
All program options can be programmed in this mode.
HOW TO EXIT PROGRAM MODE
Press P+ E
Exits directly to Operating Mode (PROG icon is OFF).
FACTORY DEFAULTS
Master Code: 123
Installer Code: 000000
15
Ness D8xCeL / D16xCeL 4G CoNtroL PaNeL – INstaLLatIoN MaNuaL rev 1.11
programming
SPECIAL FUNCTION
PROGRAM
MODE KEYPRESS
SEND COMMUNICATOR TEST REPORT
Send a Test Report to the reporting number programmed at P170E.
USER P 66666666 E (eight 6's)
SIREN TEST
Turn the Siren, Reset and Strobe Outputs On. Pressing P E will stop the Siren Test (and also exits
Program Mode).
USER or
INSTALLER
P 77777777 E (eight 7's)
PANEL RESET
This function resets the microprocessor. The effect is the same as powering down and powering up
again. INSTALLER'S TIP: Use P88888888E prior to powering down for a short time. This will save the
current Time Before Next Test Call and the Real Time Clock into permanent memory. On power up
these times will be restored.
USER or
INSTALLER
P 88888888 E (eight 8's)
DISPLAY FIRMWARE VERSION
This function displays the panel firmware version when in program mode. Displayed in decimal
format by the zone LEDs. Example, version V6.1 is displayed by flashing 6 followed by 1.
USER or
INSTALLER
P 99999999 E (eight 9's)
SPECIAL FUNCTIONS IN PROGRAM MODE

Use one of these Quick Start programming summaries for fast setup of your control panel with typical Local, SMS Monitored or
Central Station Monitored options.
QUICK START 1 - LOCAL SYSTEM
Just program a User Code and it's ready to go.
STEP KPX+ or SATURN KP DESCRIPTION COMMENT
1 P 1 2 3 E Enters User Program Mode. PROG icon will turn on. (The default Master Code is 123)
2 P 2 0 1 E Selects the option for User Code 1. The existing code will be displayed.
3 _ _ _ _ E Enter your new PIN code followed
by E.
Keypad codes can be 3 to 6 digits in length. The PIN must not
start with 0 (zero).
4 _ _ _ _ E Enter your new PIN code again. The new code will be displayed.
5 P E To exit program mode. PROG icon will turn off.
QUICK START 2 - FOR SMS SELF-MONITORING
Program at least one User Code and one mobile phone number.
STEP KPX+ or SATURN KP DESCRIPTION COMMENT
1 P 1 2 3 E Enters User Program Mode. PROG icon will turn on. (The default Master Code is 123)
2 P 0 0 0 0 0 0 E Enters Installer Program Mode. PROG icon will flash. (The default Installer Code is 000000)
3 P 2 0 1 E Selects the option for User Code 1. The existing code will be displayed.
4 _ _ _ _ E Enter your new PIN code followed
by E.
Keypad codes can be 3 to 6 digits in length. The PIN must not
start with 0 (zero).
5 _ _ _ _ E Enter your new PIN code again. The new code will be displayed.
6 P 1 8 0 E Enter a mobile phone number
followed by E
This mobile phone number will receive alarm reports, if enabled.
3 mobile numbers can be programmed to receive alarm reports.
1 mobile number can receive open/close reports, see P180E to
P189E. See P190E to P194E to enable/disable various SMS alarm
reports.
7 P E To exit program mode. PROG icon will turn off.
QUICK START 3 - FOR CENTRAL STATION MONITORING
Program a User Code, the Central Station reporting number and the Account Number.
STEP KPX+ or SATURN KP DESCRIPTION COMMENT
1 P 1 2 3 E Enters User Program Mode. PROG icon will turn on. (The default Master Code is 123)
2 P 0 0 0 0 0 0 E Enters Installer Program Mode. PROG icon will flash. (The default Installer Code is 000000)
3 P 2 0 1 E Selects the option for User Code 1. The existing code will be displayed.
4 _ _ _ _ E Enter your new PIN code followed
by E.
Keypad codes can be 3 to 6 digits in length. The PIN must not
start with 0 (zero).
5 _ _ _ _ E Enter your new PIN code again. The new code will be displayed.
6 P 1 7 0 E Selects the option for Reporting No 1. IP protocol is recommended
7 _ _ _ _ _ _ _ _ E Enter the central station IP
Address:Port followed by E
30 digits maximum.
8 P 7 2 E Selects the option for Account No 1.
9 _ _ _ _ E Enter the Account number followed
by E
4 digits maximum. The account number is supplied by your
central monitoring station.
10 P E To exit program mode. PROG icon will turn off.
Quick Start Programming Guide
16 Ness D8xCeL / D16xCeL 4G CoNtroL PaNeL – INstaLLatIoN MaNuaL rev 1.11
programming

D8XCEL and D16XCEL 4G control panels can be operated and programmed by SMS
(TXT) messaging from any mobile phone.
This section covers programming by direct SMS messaging from a mobile phone.
PROGRAMMING BY SMS FROM ANY SMARTPHONE
SMS programming commands are sent to the XCEL panel in essentially the same format
as programming using a KPX+ or Saturn keypad.
Examples using the factory default master code: 123
EXAMPLE 1
Program the Entry Delay time to be 15 seconds
SMS SENT TO THE PANEL SMS REPLY
P123E P26E 15E
Entry Delay can be programmed in User Program
Mode so the installer code is not required.
This command is ok to send without spaces, ie.
P123EP26E15E will also work.
M123E ACK
M26E ACK
15E ACK
ME ACK
The command comprises of three parts, where...
P123E P26E 15E
Enters user program
mode. 123 in this case
is the Master code.
The option number for
Entry Delay
Programs Entry Delay to
be 15 seconds
EXAMPLE 2
Program User Code 2 to be 5678.
SMS SENT TO THE PANEL SMS REPLY
P123E P202E 5678E 5678E
User Codes can be programmed in User
Program Mode so the installer code is not
required.
M123E ACK
M202E ACK
5678E ACK
5678E ACK ME ACK
EXAMPLE 3 Sending multiple commands.
For example, to program all these changes in one message.
User code 6 change to 3456
Entry Delay change to 20 seconds
Exit Delay change to 50 seconds
Siren Time change to 3 minutes
Zone 2 change to an entry delay zone
SMS SENT TO THE PANEL SMS REPLY
P123E P000000E P206E 3456E 3456E
P26E 20E P28E 50E P29E 3E P41E 2E
This command requires both the master Code
and Installer Code to be included.
M123E ACK M000000E ACK M206E
ACK 3456E ACK 3456E ACK M26E
ACK 20E ACK M28E ACK 50E ACK
M29E ACK 3E ACK M41E ACK 2E
ACK ME ACK
SMS PROGRAMMING COMMANDS
PROGRAMMING BY SMS
SMS commands are extremely flexible in
their format.
THE PANEL CANNOT BE
PROGRAMMED WHILE ARMED. SMS
OR KEYPAD PROGRAMMING IS
PERFORMED IN THE DISARMED STATE.
MULTIPLE COMMANDS
You can send multiple programming
commands in one text message - in fact
the message can be as long as the SMS
limit of 160 characters per single message.
See the Installer Manual for detailed
instructions.
USE OF SPACES
The panel automatically ignores spaces in
most SMS commands. However, spaces
are important in Text Output commands,
see page 21.
UPPER or LOWER CASE is ok
You can use either UPPER CASE or lower
case characters in your messages, or even
mixed case without a problem.
But BEWARE OF COMMAS
Commas are used to separate words
when reprogramming text output, so use
commas only when the command allows it.
SMS REPLIES: The panel replies to
each programming command with
a confirmation message. Incorrectly
fomatted messages will be ignored.
ACK (Acknowledged): ACK is the panel
saying ‘Command received and applied’.
NAK (Not Acknowledged): The ‘NAK’
response indicates that the command
was not accepted by the panel. Check
the format of your SMS or perhaps the
command should have been sent in
Installer program mode.
TOGGLE OVER-RIDE
With some options U and Z can replace E
to ensure an option is ON or OFF instead
of toggled.
Example:
P39E1E toggles option 1
P39E1U sets ON option 1
P39E1Z sets OFF option 1
For experienced installers only, works only
with 'AND' program options.
To DELETE a user code or phone number,
enter V in place of the number.
Example.
P123EP000000EP180EVE deletes SMS
phone number 1.
17
Ness D8xCeL / D16xCeL 4G CoNtroL PaNeL – INstaLLatIoN MaNuaL rev 1.11
programming

CENTRAL STATION MONITORING
Ness D8XCEL and D16XCEL series control panels have an on-board 4G
communicator for reporting alarm messages to a central monitoring station.
Ness recommends IP Protocol for most reliable back-to-base reporting.
Contact ID (CID) is available as an option and should only be used if your
central station does not offer IP protocols.
REPORT NAME SSSS Q XYZ GG CCC SUFFIX
Zone 1– Zone 16 Alarm ssss 18 q 130 aa 001–016 k
Duress ssss 18 1 121 01 030 k
Keyswitch Panic ssss 18 1 120 01 031 k
Keypad Panic ssss 18 1 120 01 032 k
Radio Key Panic ssss 18 1 120 01 1dd k
Medical Alarm ssss 18 1 100 01 033 k
Fire ssss 18 1 110 01 034 k
Exit Install mode ssss 18 1 306 01 035 k
External Tamper ssss 18 q 137 01 040 k
Internal Tamper ssss 18 q 137 01 041 k
Keypad Tamper ssss 18 q 137 01 042 k
Radio Sensor Supervision ssss 18 q 381 01 4zz k
Radio Sensor Tamper ssss 18 q 383 01 2zz k
Radio Sensor Low Battery ssss 18 q 384 01 3zz k
Mains Fail ssss 18 q 301 01 050 k
Panel Battery Fail ssss 18 q 309 01 051 k
Open (Disarm) ssss 18 1 402 aa 0dd k
Force Open (Cancel) ssss 18 1 406 aa 0dd k
Close (Arm) ssss 18 3 402 aa 0dd k
Closing Extended ssss 18 3 464 aa 0dd k
Test Report ssss 18 1 602 01 063 k
Zone 1-16 Manual Exclude ssss 18 q 573 aa 001-016 k
Zone 1-16 Auto Exclude ssss 18 q 380 aa 001-016 k
CONTACT ID REPORTS TABLE
Contact ID Message format:
SSSS Account Number
QEvent qualifier
1=New Event or Open
3=Restore or Close
XYZ Alarm type
GG Group or Area designation
CCC Alarm number
dd=User ID (1 to 56)
zz = Zone ID (1 to 16)
aa = 01 Area 1
aa = 02 Area 2
aa = 01 Monitor area
aa = 00 24 Hr Area
K = Checksum
(0 to 0f hex)
REPORT NAME User ID
Arm/Disarm by Keyswitch 57
Shortcut Arm 58
Arm/Disarm by AutoTimer 1 91
Arm/Disarm by AutoTimer 2 92
Arm/Disarm by AutoTimer 3 93
REPORT NAME User ID
Arm/Disarm by AutoTimer 4 94
Arm/Disarm by AutoTimer 5 95
Arm/Disarm by AutoTimer 6 96
Arm/Disarm by AutoTimer 7 97
Arm/Disarm by AutoTimer 8 98
ARMOR IP ALARM MESSAGE FIELDS
ITEM PREFIX FULL FIELD COMMENT
1 AC AC0000xxxx 8 digit eld with 4 digit account number xxxx in hex format (as set by P72E, P73E). The 1st 4 digits are always 0.
2 DF DFCID CID (for Contact ID message). Fixed for all messages.
3 SQ SQ00000000 8 digit eld. A hexadecimal number from 0 to 13 (19 decimal). The 1st 7 digits are always 0.
4 DD DDACCT18 QXYZGG
CCCF
ACCT = 4 Digit Account number (0-9, B-F) MT = 18
Q, 1 = New Event or Opening, 3 = New Restore or Closing, 6 = Status report
XYZ = Event code (3 Hex digits 0-9,B-F)
GG = Group or Partition number (2 Hex digits 0-9, B-F. CCC = Zone number (Event reports) or User # (Open /
Close reports ) (3 Hex digits 0-9,B-F )
F last digit xed
5 TT "TTTIMEZONE HH:MM:SS DD/MM/YYYY" The transmitted time. See below for time zone details.
6 PN PN LOCATION The panel name or location as renamed by the LOCATION in the text output table. Up to 32
characters. See SMS TEXT OUTPUT TABLE in the Installation manual.
7 PT PTD8X4G D8X4G or D16X4G depending on the product.
8 XP XP000wwwww Poll Window Time in minutes. A hexadecimal number set to 3 times the actual poll time + 30secs.
The time zones sent are derived from the time zone reported by the network, ie it is location dependant. The product presently has provision for the following
time zones.
AUS standard time zones: WST: UTC+08:00 Western Standard Time, ACST: UTC+09:30 Central Standard Time, AEST: UTC+10:00 Eastern Standard Time
AUS daylight saving zones: CDST or ACDT: UTC+10:30, in South Australia and Broken Hill, New South Wales, EDST or AEDT: UTC+11:00, in New South
Wales, the ACT, Victoria, and Tasmania
NZ time zones: NZST: New Zealand Standard Time, CHAST: Chatham Island Standard Time
ARMOR IP POLLING MESSAGE FIELDS
1 AC AC0000xxxx 8 digit eld with 4 digit account number xxxx in hex format (as set by P72E, P73E). The 1st 4 digits are always 0.
2 SQ SQ00000003 8 digit eld The 1st 7 digits are always 0, LAST DIGIT IS 3.
3 DF DFNULL Fixed for all poll messages.
4 PN PN LOCATION The panel name or location as renamed by the LOCATION in the text output table. Up to 32
characters. See SMS TEXT OUTPUT TABLE in the Installation manual.
5 PT PTD8X4G D8X4G or D16X4G depending on the product.
6 XP XP00000ppp "Poll Time in minutes. A hexadecimal number equivalent to P85E setting. It is not the same as XP in normal mes-
sage as it is the poll interval, not the poll window."
18 Ness D8xCeL / D16xCeL 4G CoNtroL PaNeL – INstaLLatIoN MaNuaL rev 1.11

Powerful SMS accessibility includes the ability to arm and disarm, program
the control panel, check system status, read alarm memory, receive alarm
messages and operate AUX outputs all by SMS/TXT messaging.
SMS 'Self-monitoring' reports include Arm/disarm reports by Area and User,
Zone alarms and Restorals, System Alarms such as AC Fail and Low Battery,
Panic and Duress alarms.
SMS Reporting Message Format
Example 1 - Alarm from Zone 2
NESS security report
from MYPANEL
ALARM Z2 RUMPUS AREA 1
Tue 7 Aug 2018 4:07:22pm 1/1
SMS MESSAGE EXPLAINER
NESS security report Identifies the message as a Ness alarm panel report.
MYPANEL identifies the premises. This ID can be programmed by SMS
using the LOCATION command. See page 21.
ALARM Tells us there has been an alarm
Z2 RUMPUS What caused the alarm. In this case Zone 2 which has been
renamed Z2 RUMPUS. (The zone name can be programmed by SMS, otherwise
the panel just reports the zone number). See page 21
AREA 1 Identifies the zone as belonging to Area 1
Tue 7 Aug 2018 4:07:22pm Time and date of the event
1/1. Means message 1 of 1. Long SMS messages are split into multiple
messages of 160 characters each
SMS MONITORING
Example 2 - Area 1 was Armed by User 1
NESS security report
from MYPANEL
ARMED USER 1 AREA 1
Tue 7 Aug 2018 4:57:54pm 1/1
Arm/disarm reports by SMS require these two options set:
P194E 1E, 2E, Enable SMS Open/Close Reports - page 54.
P183E program a phone number to receive SMS Open/Close reports - p48.
Example 3 - Mains Fail report
NESS security report
from MYPANEL
POWER FAILURE POWER
MAIN 12V
Tue 7 Aug 2018 5:30:00pm 1/1
Mains Fail reports by SMS can be enabled/disabled by option P191E 14E, page
50.
While SMS reporting is a
powerful and useful feature it
is dependent on the integrity
and availability of the cellular
network.
As with any SMS message it is
possible that SMS monitoring
reports may be delayed or fail
to be delivered. Such failures
are a function of the cellular
network/s and beyond the
control of Ness Corporation.
Ness recommends central
station monitoring as your
primary monitoring path.
19
Ness D8xCeL / D16xCeL 4G CoNtroL PaNeL – INstaLLatIoN MaNuaL rev 1.11

SMS - REQUEST STATUS
REQUEST PANEL STATUS BY SMS
D8XCEL and D16XCEL panel status can be interrogated by SMS. Check the sealed/
unsealed status of zones, check miscellaneous alarm status and check if the system is
armed, all by SMS messaging and reply.
Request Status Commands Example.
SMS SENT TO THE PANEL SMS REPLY
i123E ZU
To request zones unsealed.
status report
zones unsealed
ZONE 3
ZONE 4
Tues 18 Sep 2018 10:11 1/1
In this example, zones 3 and 4 are unsealed,
followed by the date stamp and message number
(1 of 1)
Message Format.
i [Master Code] E [Command]
NOTES
Status requests can be made at any
time including when the panel is armed,
disarmed or in program mode.
Description SMS
COMMAND
Status update
Zone Input Unsealed ZU LIST Zones 1-16
Zone in Alarm ZA LIST Zones 1-16
Zone Excluded ZX LIST Zones 1-16
Zone Supervision Fail ZS LIST Zones 1-16
Zone Doors Open (Wire-
less Reeds)
ZD LIST Zones 1-16 wireless reed switch unsealed
Zone Detector Low
Battery (Wireless PIRs)
ZB LIST Zones 1-16 wireless PIR low battery
Zone Detector Tamper
(Wireless PIRs)
ZT LIST Zones 1-16 wireless device tamper alarm
Miscellaneous Alarms MISC List one or more miscellaneous alarm:
Duress Panel Tamper
Panic Keypad Tamper
Medical Pendant Panic
Fire Panel Battery Low
Instal End Mains Fail
Ext Tamper
Status of armed conditions ARM List one or more armed status:
Area 1 Armed Entry Delay 1 ON
Area 2 Armed Entry Delay 2 ON
Area 1 Fully Armed Manual Exclude Mode
Area 2 Fully Armed Memory Mode
Home Armed Day Zone Select
Day Mode Armed
Status of outputs OUTPUT List the status of various outputs:
Siren Loud Aux1
Siren Soft Aux2
Siren Soft Home Aux3
Siren Fire Aux4
Strobe Home Out
Reset Power Fail
Sonalert Panel Batt Fail
Keypad Display Enable Tamper Xpand
Panel firmware version MOD Lists the panel’s model and firmware version
Status of auxiliary outputs AUX Lists the status of Auxiliary outputs 1 to 8.
If the Aux outputs have been renamed they will
be listed accordingly.
20 Ness D8xCeL / D16xCeL 4G CoNtroL PaNeL – INstaLLatIoN MaNuaL rev 1.11
Other manuals for D16
4
This manual suits for next models
2
Table of contents
Other Ness Control Panel manuals
Popular Control Panel manuals by other brands

Cofem
Cofem CCO122 manual

Blueprint
Blueprint PNGCP18003 Programming manual

BFT
BFT SHYRA AC SL installation manual

EL.MO. Spa
EL.MO. Spa TA4000 user manual

SHENZHEN FANHAI SANJIANG ELECTRONICS
SHENZHEN FANHAI SANJIANG ELECTRONICS JB-QBL-9116E user manual

Zanussi
Zanussi ZES 2226 Installation and operating instructions