4400 Airless Sprayer
ALWAYS wear safety goggles or protective eye-wear when operating the unit!
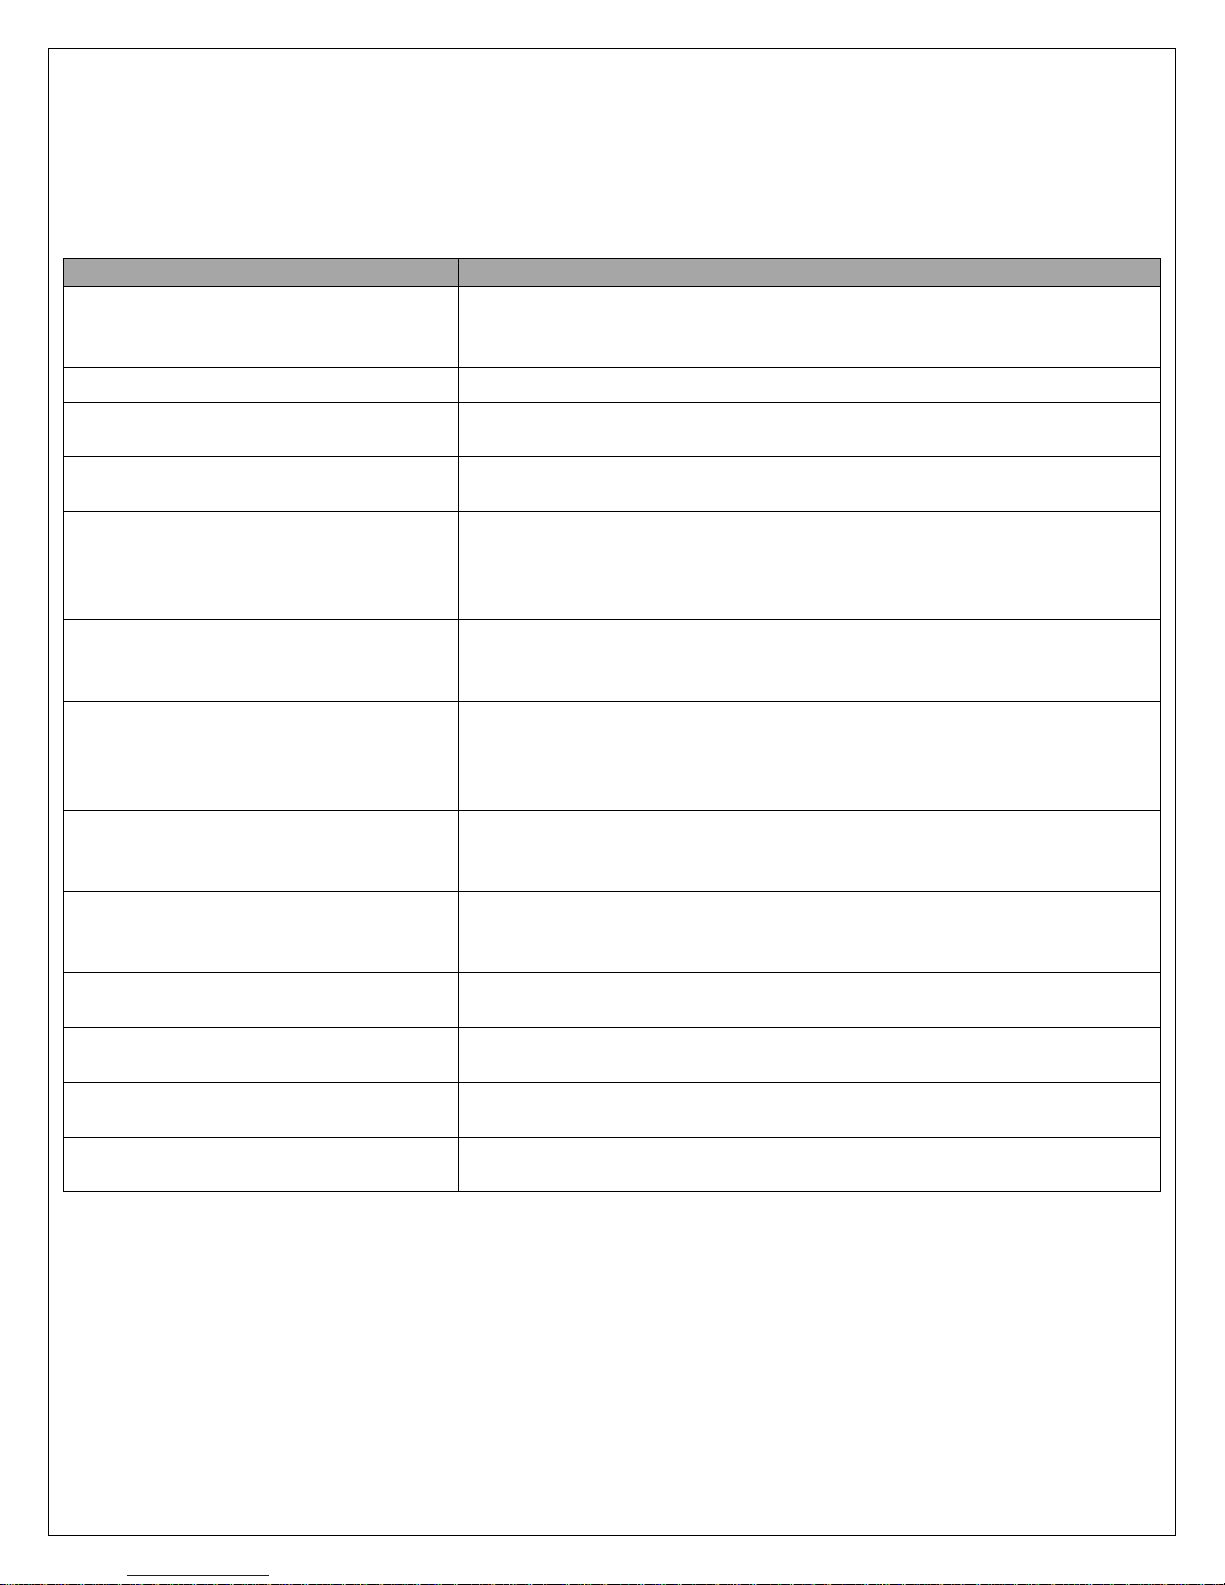
TROUBLESHOOTING GUIDE
PROBLEM REMEDY
Engine will not start Check that the fuel shutoff and ignition switch are in the on position, choke
lever is in Choke position and throttle lever is in run position. Fuel tank has
adequate new fuel. Call factory for assistance.
Engine starts, but runs rough Check that the choke is turned off.
Choke off but still runs rough Check for proper fuel. Check spark plug for fouling. Clean or replace. Check
air filter. Call factory if operation is still unsatisfactory.
Pump will not prime
(No fluid returning to pail)
Check that spray control knob is in Prime position (Circular arrows aligned
with arrow on housing). Push brass outlet valve button 3 times.
Outlet Valve Button pushed, but will still
not prime
Turn off pump, turn pressure control knob out (counter-clockwise) several
turns until loosens. Turn on pump and run for 60 seconds. Turn pressure
control knob all the way in. Pump should now prime. Call factory for
assistance.
Fluid is returning to pail in bypass hose,
but air bubbles are still present in hose
after 60 seconds
Check inlet hose fitting for tightness and worn or missing rubber washer.
Check suction hose for nicks or cuts. Call factory for assistance.
Pump primes, but gun does not spray Check spray control knob is in spray position. Check pressure control knob
is turned to high pressure (clockwise), until it stops. Do Not Force. Check
suction filter is below liquid level. Press brass outlet valve button three
times. Make sure spray tip is not obstructed.
Knobs are set correctly, still does not
spray
Check that trigger lock on spray gun is turned to operating position (wings
parallel to gun body). Check spray tip arrow is pointing towards ground
Check that handle trigger is operating spray gun.
All of above correct, gun will still not
spray
Turn spray control knob to prime position, turn off engine, pull trigger to
release pressure. Check spray gun filter, replace if plugged. Call factory for
assistance.
Over spray or too much paint Lower spray pressure. Turn spray pressure control knob counter- clockwise
several turns, then increase pressure until desired spray pattern is even.
Too little paint Increase spray pressure. Paint may need to be thinned in cooler
temperatures and if paint viscosity is very thick.
Uneven spray pattern or stringing Increase spray pressure. Spray tip may be chipped or clogged. Reverse tip
to clear obstruction and clean if necessary.
Pressure increased, tip is clean, spray still
not correct
Worn tip. Replace tip. Call factory for assistance.