NI REM-11190 User manual

-~
ARTISAN
®
~I
TECHNOLOGY
GROUP
Your definitive source
for
quality
pre-owned
equipment.
Artisan Technology
Group
Full-service,
independent
repair
center
with
experienced
engineers
and
technicians
on staff.
We
buy
your
excess,
underutilized,
and
idle
equipment
along
with
credit
for
buybacks
and
trade-ins
.
Custom
engineering
so
your
equipment
works
exactly as
you
specify.
•
Critical
and
expedited
services
•
Leasing
/
Rentals/
Demos
• In
stock/
Ready-to-ship
•
!TAR-certified
secure
asset
solutions
Expert
team
ITrust
guarantee
I
100%
satisfaction
All
tr
ademarks,
br
a
nd
names, a
nd
br
a
nd
s a
pp
earing here
in
are
th
e property of
th
e
ir
r
es
pecti
ve
ow
ner
s.
Visit our website - Click HERE

GETTING STARTED GUIDE
NI REM-11190
Bus Power Module for Remote I/O
This document explains how to connect to the REM-11190.
Note The guidelines in this document are specific to the REM-11190. The other
components in the system might not meet the same safety ratings. Refer to the
documentation for each component in the system to determine the safety and EMC
ratings for the entire system.
Caution Do not operate the REM-11190 in a manner not specified in this
document. Product misuse can result in a hazard. You can compromise the safety
protection built into the product if the product is damaged in any way. If the product
is damaged, return it to NI for repair.

Isolation Withstand Voltages
Test section Test voltage
5 V communications power (logic), 24 V supply (I/O) 500 VAC, 50 Hz, 1 min.
5 V supply (logic)/functional earth ground 500 VAC, 50 Hz, 1 min.
24 V supply (I/O)/functional earth ground 500 VAC, 50 Hz, 1 min.
Electromagnetic Compatibility Guidelines
This product was tested and complies with the regulatory requirements and limits for
electromagnetic compatibility (EMC) stated in the product specifications. These requirements
and limits provide reasonable protection against harmful interference when the product is
operated in the intended operational electromagnetic environment.
This product is intended for use in industrial locations. However, harmful interference may
occur in some installations, when the product is connected to a peripheral device or test object,
or if the product is used in residential or commercial areas. To minimize interference with
radio and television reception and prevent unacceptable performance degradation, install and
use this product in strict accordance with the instructions in the product documentation.
Furthermore, any changes or modifications to the product not expressly approved by National
Instruments could void your authority to operate it under your local regulatory rules.
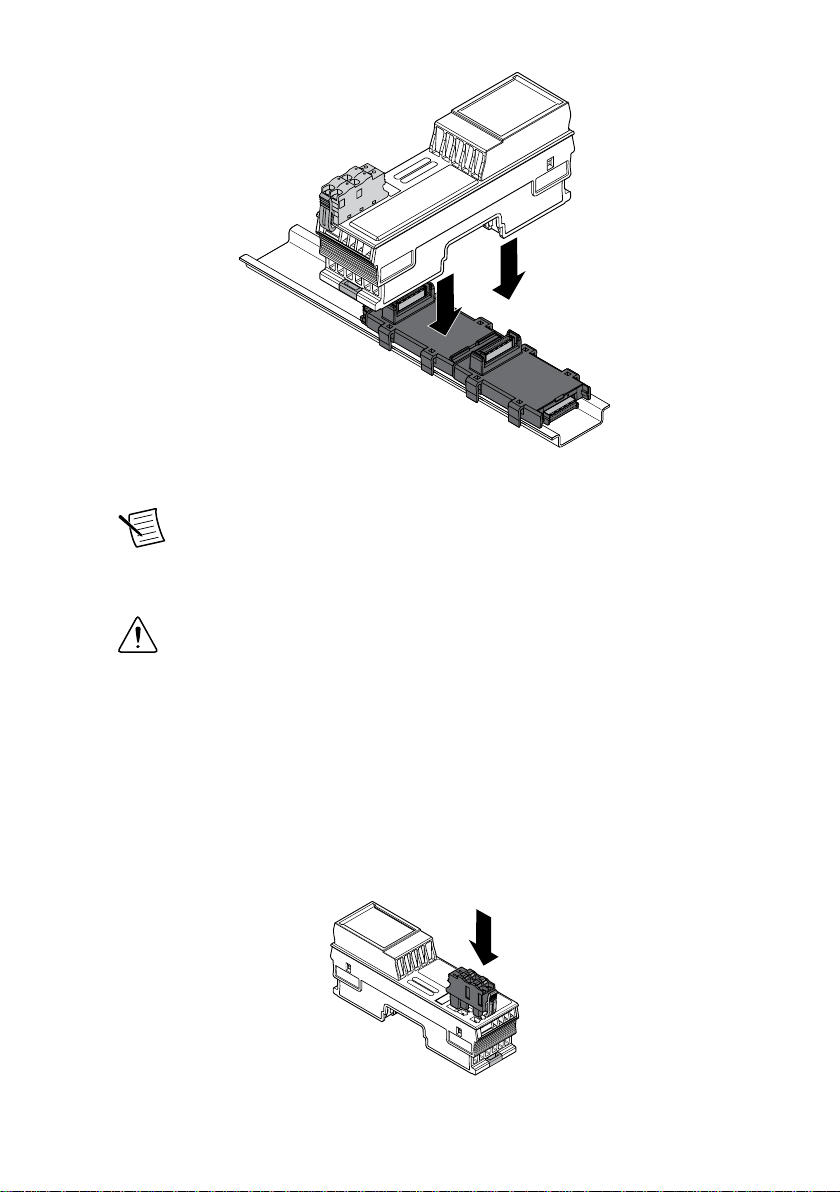
Preparing the Environment
Ensure that the environment in which you are using the REM-11190 meets the following
specifications.
Operating temperature -25 °C to 60 °C
Operating humidity 5% RH to 95% RH, noncondensing
Pollution Degree 2
Maximum altitude 3,000 m
Indoor use only.
Note Refer to the device datasheet on ni.com/manuals for complete specifications.
2| ni.com | REM-11190 Getting Started Guide

Verifying the Kit Contents
Verify that the following items are included in the REM-11190 kit.
Figure 1. REM-11190 Kit Contents
12 3
1. NI REM-11190
2. Red Bus connector
3. Supply voltage connector
Unpacking the Kit
Caution To prevent electrostatic discharge (ESD) from damaging the device,
ground yourself using a grounding strap or by holding a grounded object, such as
your computer chassis.
1. Touch the antistatic package to a metal part of the computer chassis.
2. Remove the device from the package and inspect the device for loose components or any
other sign of damage.
Caution Never touch the exposed pins of connectors.
Note Do not install a device if it appears damaged in any way.
3. Unpack any other items and documentation from the kit.
Store the device in the antistatic package when the device is not in use.
REM-11190 Getting Started Guide | © National Instruments | 3

Installing the REM-11190
Figure 2. Structure of the REM-11190
1
34
5
2
1. Bus connector
2. REM-11190
3. Module function label
4. Supply voltage connector
5. LED indicators
Table 1. Module Function Labels
Label Color Module Function
Blue Digital input
Red Digital output
Green Analog input, thermocouple
Yellow Analog output
White Bus coupler, power module
Installing Bus Connectors
What to Use
• Bus connector
• DIN rail
What to Do
Complete the following steps to install bus connectors on the DIN rail.
4| ni.com | REM-11190 Getting Started Guide

1
2
1. Insert the bus connector for the REM-11190 into the DIN rail.
Note Verify that you are using the red bus connector. The REM-11190 will
not function if you mount it on any other bus connector.
2. Slide the bus connector along the DIN rail until it connects to the preceding bus
connector.
Note A bus connector will not attach to a preceding bus connector with a
mounted module. Remove the preceding module before installing additional
bus connectors.
3. Repeat Steps 2 and 3 for additional bus connectors.
Installing the Module
What to Use
• REM-11190
• Mounted bus connector
What to Do
Complete the following steps to install the REM-11190 on the DIN rail.
REM-11190 Getting Started Guide | © National Instruments | 5

1. Align the REM-11190 over the appropriate bus connector.
Note Verify that the bus connector socket aligns with the socket on the
underside of the module.
2. Press the REM-11190 directly onto the bus connector and DIN rail until it clicks into
place.
Caution Tilting the module when mounting it on the DIN rail will damage the
contacts.
Installing Spring-Terminal Blocks
What to Use
• REM-11190
• Spring-terminal block
What to Do
Align the spring-terminal block over the REM-11190 and press until it clicks into place.
6| ni.com | REM-11190 Getting Started Guide

REM-11190 Pinout
a1
a2
b1
b2
24 VDC GND
GND24 VDC
Table 2. REM-11190 Signal Descriptions
Signal Color Description
a1, a2 Red 24 VDC (UL) Supply of logic voltage (internally jumpered)
b1, b2 Blue GND Reference potential of the supply voltage (internally
jumpered)
Figure 3. REM-11190 LEDs
UL
E1
Table 3. LED Indicators
LED LED Color LED Pattern Indication
UL
Green Solid Communications power UBus is present.
Red Solid
• Communications power UBus is not present.
• Communications power UBus downstream of the
power module is not present.
— Off Communications power supply not present.
E1
Red Solid Module mounted on incorrect bus connector
— Off No error
REM-11190 Getting Started Guide | © National Instruments | 7

Connecting the REM-11190
24 VDC
F1
+
–
24 VDC
F2
+
–
a1
a2
b1
b2
a1
a2
b1
b2
REM-11190
a1 b1
a2 b2
REM-111xx
REM-111xx
The supply terminals blocks contain internal jumpers. You can use the first connection for
supply and the second connection to forward a potential to the next module.
Caution Connect an 8 A external fuse to the 24 V UL supply to protect against
polarity reversal. The power supply must provide four times the nominal current of
the external fuse. This rating ensures that the fuse trips in the event of an error.
Connection Guidelines
• Make sure that devices you connect to the REM-11190 are compatible with the module
specifications.
• Push the wire into the terminal when using a solid wire or a stranded wire with a ferrule.
• Open the terminal by pressing a screwdriver into the spring lever when using a stranded
wire without a ferrule.
8| ni.com | REM-11190 Getting Started Guide

Removing Components
Removing Spring Terminal Blocks
Complete the following steps to remove a spring-terminal block from the REM-11190.
1
3
2
1
1. Press the locking latch to release the spring-terminal block.
2. Tilt the block toward the center of the module.
3. Remove the connector from the module.
Removing the REM-11190
Remove all connections before removing the REM-11190, either by disconnecting the cables
or removing the spring-terminal block.
What to Use
• Flathead Screwdriver
What to Do
Complete the following steps to remove the REM-11190 from the DIN rail.
1
1
2
1. Insert the screwdriver and loosen the base latches on either end of the module.
2. Remove REM-11190 perpendicular to the DIN rail.
REM-11190 Getting Started Guide | © National Instruments | 9

Caution Tilting the module when removing it from the DIN rail will damage
the contacts.
Removing Bus Connectors
Complete the following steps to remove bus connectors from the DIN rail.
What to Use
• Flathead Screwdriver
What to Do
Note You must remove the preceding module before removing the bus connector.
1
3
2
1. Slide the bus connector away from the preceding bus connector at least 5.0 mm (0.20 in.).
2. Insert the screwdriver and loosen both latches on one side of the DIN rail.
3. Rotate the bus connector to remove it from the DIN rail.
Note If you want to remove a bus connector in the middle of the system, you
must remove any modules or bus connectors following the desired connector or
slide them along the DIN rail at least 15.0 mm (0.60 in.).
10 | ni.com | REM-11190 Getting Started Guide

Where to Go Next
APPLICATION
SUPPORT
Services
ni.com/services
NI Community
ni.com/community
Support
ni.com/support
SOFTWAREHARDWARE
Software Support
ni.com/info swsupport
Remote I/O Examples
NI Example Finder
Learn LabVIEW Basics
ni.com/gettingstarted
NI-Industrial Communication
for EtherCAT Help
ni.com/info ecat16help
Remote I/O Vendor
Configuration Guide
ni.com/manuals
Remote I/O Sample
Projects
LabVIEW Create Project
EtherCAT Driver Support
ni.com/info ecatdriver
Setting Up EtherCAT
on NI Programmable
Automation Controllers
ni.com/info ecatsetup
Worldwide Support and Services
The NI website is your complete resource for technical support. At ni.com/support, you have
access to everything from troubleshooting and application development self-help resources to
email and phone assistance from NI Application Engineers.
Visit ni.com/services for NI Factory Installation Services, repairs, extended warranty, and
other services.
Visit ni.com/register to register your NI product. Product registration facilitates technical
support and ensures that you receive important information updates from NI.
A Declaration of Conformity (DoC) is our claim of compliance with the Council of the
European Communities using the manufacturer’s declaration of conformity. This system
affords the user protection for electromagnetic compatibility (EMC) and product safety. You
can obtain the DoC for your product by visiting ni.com/certification. If your product supports
calibration, you can obtain the calibration certificate for your product at ni.com/calibration.
NI corporate headquarters is located at 11500 North Mopac Expressway, Austin, Texas,
78759-3504. NI also has offices located around the world. For telephone support in the United
States, create your service request at ni.com/support or dial 1 866 ASK MYNI (275 6964). For
REM-11190 Getting Started Guide | © National Instruments | 11

telephone support outside the United States, visit the Worldwide Offices section of ni.com/
niglobal to access the branch office websites, which provide up-to-date contact information,
support phone numbers, email addresses, and current events.
Refer to the NI Trademarks and Logo Guidelines at ni.com/trademarks for information on NI trademarks. Other product and
company names mentioned herein are trademarks or trade names of their respective companies. For patents covering NI
products/technology, refer to the appropriate location: Help»Patents in your software, the patents.txt file on your media, or the
National Instruments Patent Notice at ni.com/patents. You can find information about end-user license agreements (EULAs)
and third-party legal notices in the readme file for your NI product. Refer to the Export Compliance Information at ni.com/
legal/export-compliance for the NI global trade compliance policy and how to obtain relevant HTS codes, ECCNs, and other
import/export data. NI MAKES NO EXPRESS OR IMPLIED WARRANTIES AS TO THE ACCURACY OF THE INFORMATION
CONTAINED HEREIN AND SHALL NOT BE LIABLE FOR ANY ERRORS. U.S. Government Customers: The data contained in
this manual was developed at private expense and is subject to the applicable limited rights and restricted data rights as set forth
in FAR 52.227-14, DFAR 252.227-7014, and DFAR 252.227-7015.
© 2016 National Instruments. All rights reserved.
376552A-01 Oct16

Artisan
Technology
Group
is
an independent supplier
of
quality pre-owned equipment
Gold-standard
solutions
Extend the life
of
your
critical industrial,
commercial, and military systems
with
our
superior service and support.
We
buy
equipment
Planning to
upgrade
your current
equipment? Have surplus equipment taking
up shelf space? We'll give it a
new
home.
Learn
more!
Visit us at artisantg.com for more info
on price quotes, drivers, technical
specifications, manuals, and documentation.
Artisan Scientific
Corporation
dba
Artisan
Technology
Group
is
not
an affiliate,
representative,
or
authorized
distributor
for
any
manufacturer
listed herein.
We're here to make your life easier.
How
can
we
help you today?
(217)
352-9330
Isales@artisantg.com I artisantg.com
Table of contents
Other NI Control Unit manuals
Popular Control Unit manuals by other brands

Nevco
Nevco MPCX2 Football Operator instructions

Aaeon
Aaeon PFM-C20N manual

Villeroy & Boch
Villeroy & Boch Emotion Control Start-up and operation

STERIFLOW
STERIFLOW I&M MK901 Series Installation & maintenance instructions

Marine Air Systems
Marine Air Systems AH-Passport Operation manual

DHV
DHV RISING STEM Installation, operation and maintenance manual